目录
转载Bolg:恋恋风辰 视频:BiliBili学习视频
day01-项目结构概述
简介
本项目为C++全栈聊天项目实战,包括PC端QT界面编程,asio异步服务器设计,beast网络库搭建http网关,nodejs搭建验证服务,各服务间用grpc通信,server和client用asio通信等,也包括用户信息的录入等。实现跨平台设计,先设计windows的server,之后再考虑移植到windows中。较为全面的展示C++ 在实际项目中的应用,可作为项目实践学习案例,也可写在简历中。
架构设计
一个概要的结构设计如下图
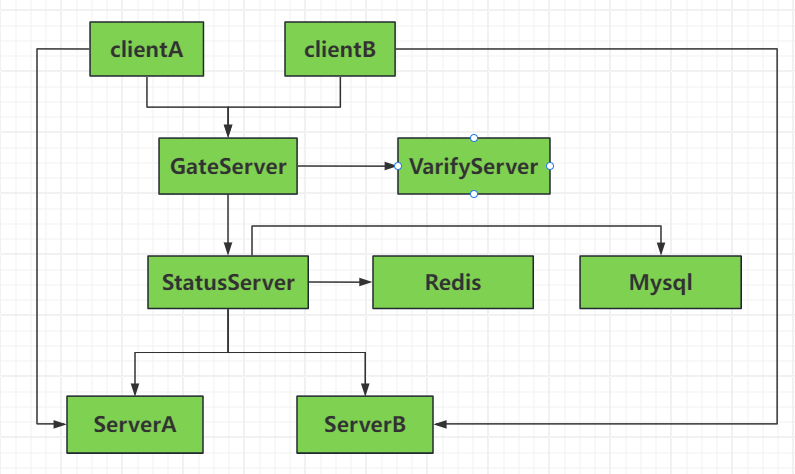
- GateServer为网关服务,主要应对客户端的连接和注册请求,因为服务器是是分布式,所以GateServer收到用户连接请求后会查询状态服务选择一个负载较小的Server地址给客户端,客户端拿着这个地址直接和Server通信建立长连接。
- 当用户注册时会发送给GateServer, GateServer调用VarifyServer验证注册的合理性并发送验证码给客户端,客户端拿着这个验证码去GateServer注册即可。
- StatusServer, ServerA, ServerB都可以直接访问Redis和Mysql服务。
创建应用
我们先创建客户端的登录界面,先用qt创建qt application widgets
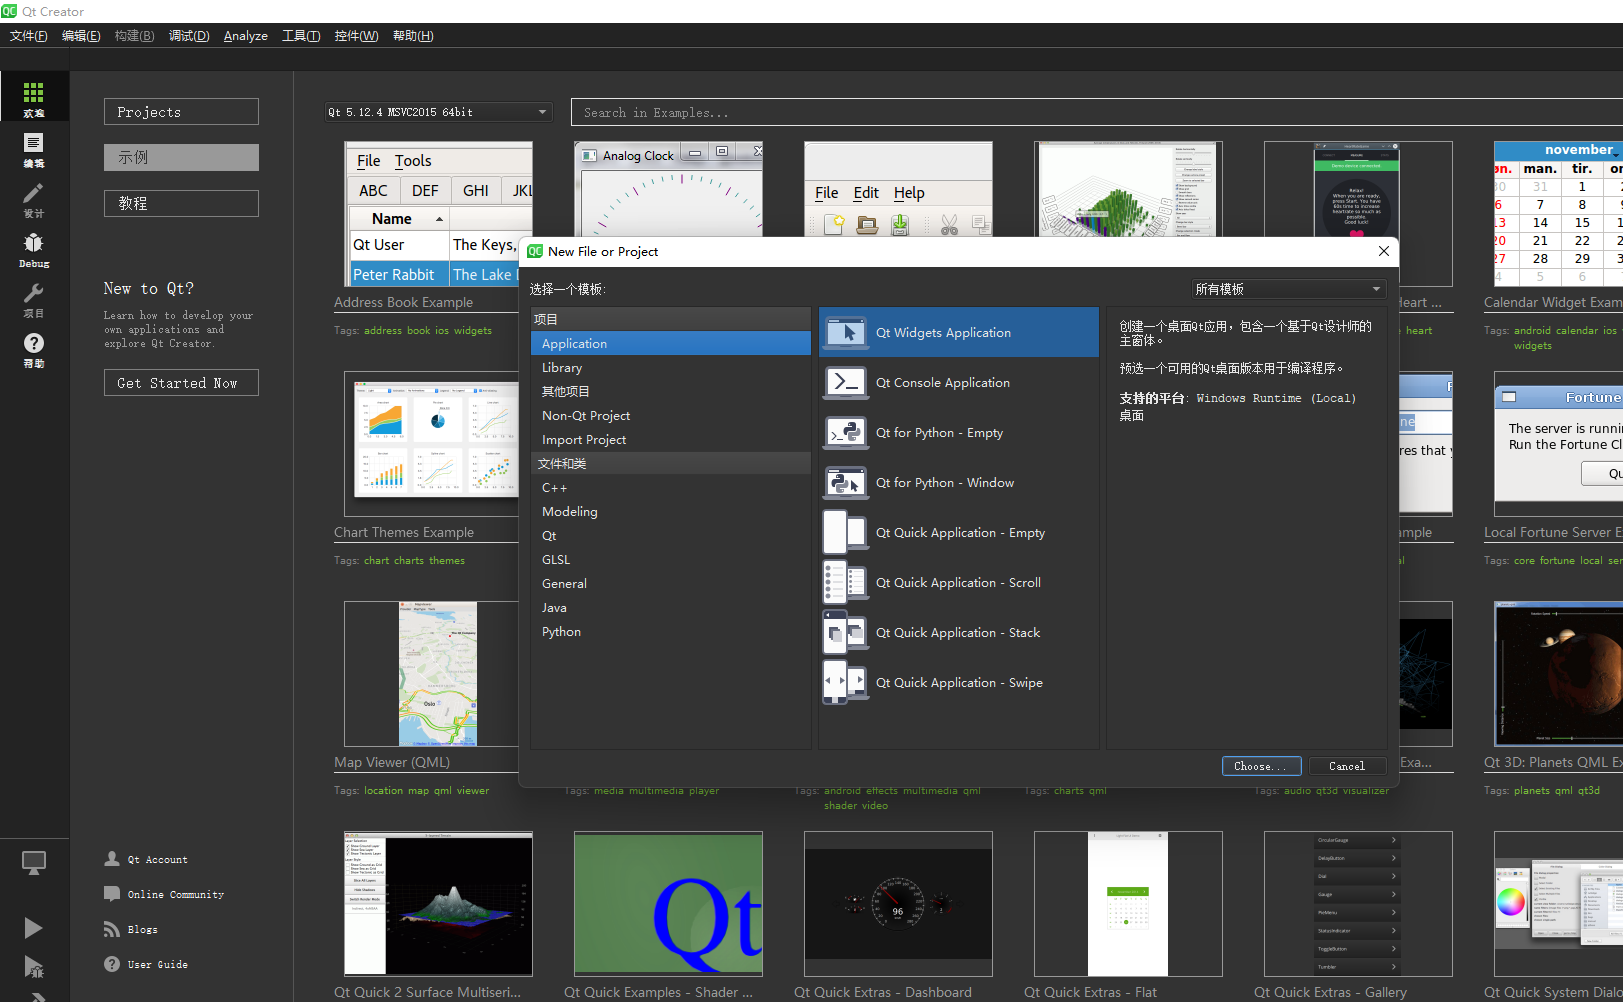
项目名称叫做llfcchat,位置大家自己选择。
接下来一路同意,最后生成项目。
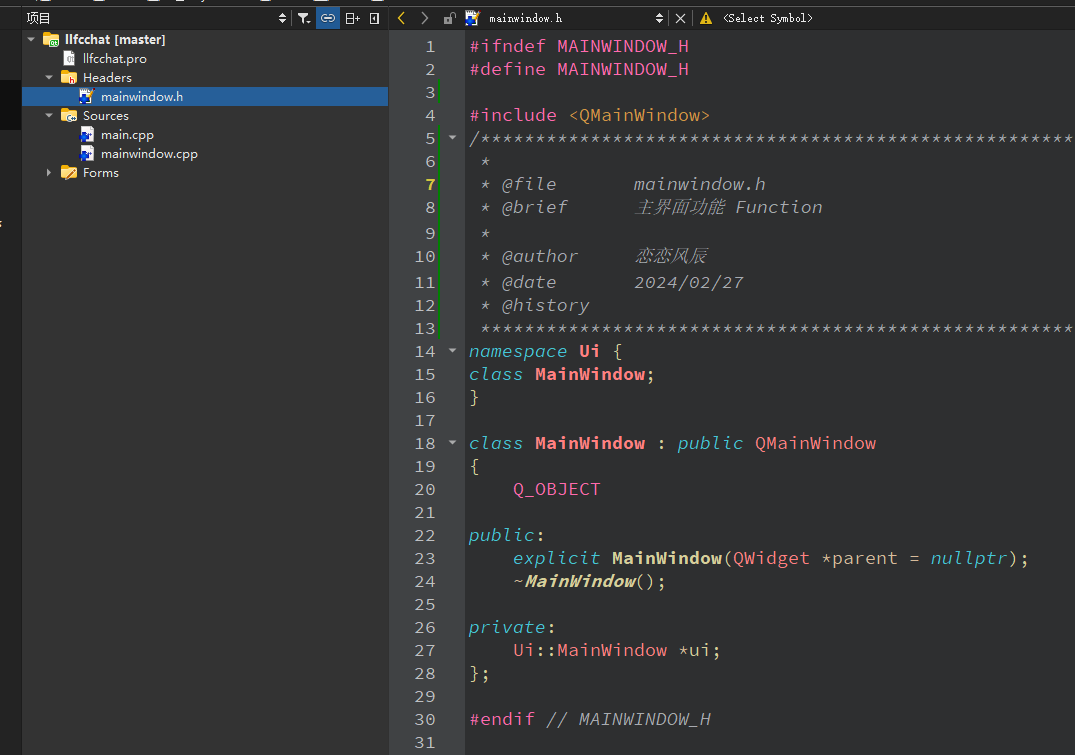
为了增加项目可读性,我们增加注释模板
选择“工具”->“选项”,再次选择“文本编辑器”->“片段”->“添加”,按照下面的模板编排
bash展开代码/******************************************************************************
 *
 * @file       %{CurrentDocument:FileName}
 * @brief      XXXX Function
 *
 * @author     恋恋风辰
 * @date       %{CurrentDate:yyyy\/MM\/dd}
 * @history
 *****************************************************************************/
如下图
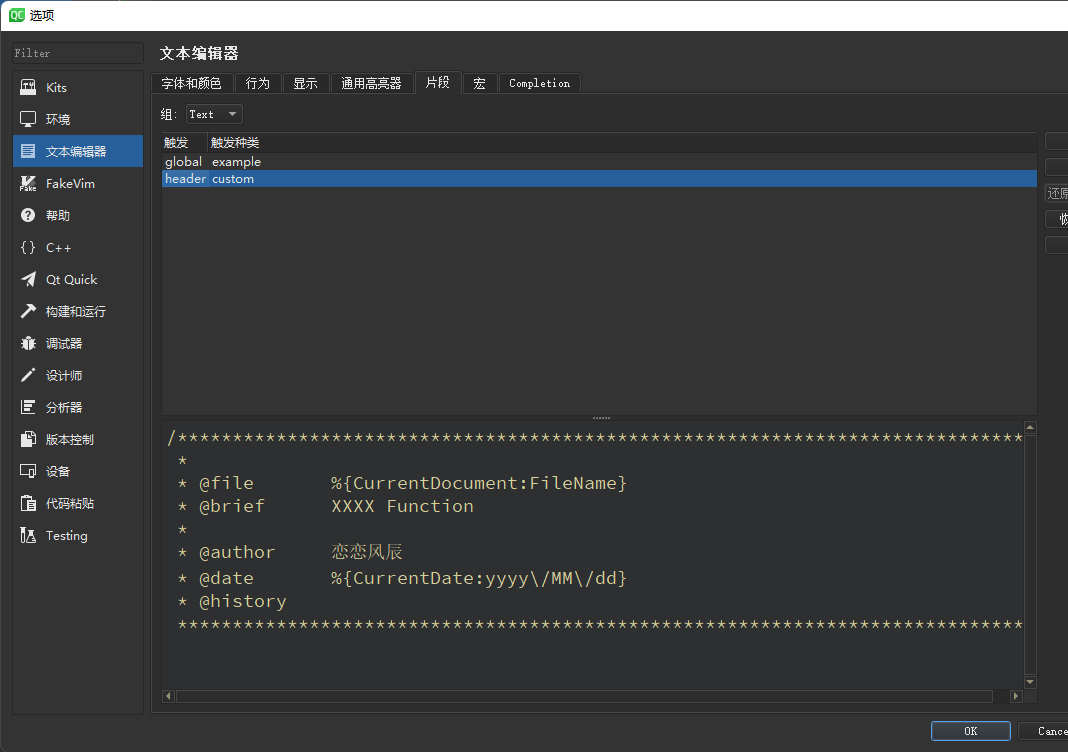
以后输入header custom就可以弹出注释模板了.
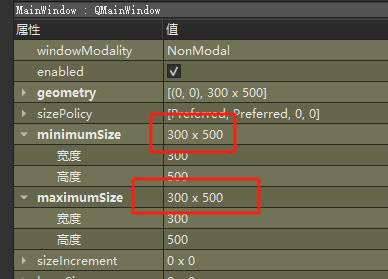
修改mainwindow.ui属性,长宽改为300*500
将window title 改为llfcchat
大家自己找个icon.ico文件放到项目根目录,或者用我的也行,然后在项目pro里添加输出目录文件和icon图标
cpp展开代码RC_ICONS = icon.ico
DESTDIR = ./bin
将图片资源添加ice.png添加到文件夹res里,然后右键项目选择添加新文件,选择qt resource files, 添加qt的资源文件,名字设置为rc。
添加成功后邮件rc.qrc选择添加现有资源文件,
选择res文件夹下的ice.png,这样ice.png就导入项目工程了。
创建登录界面
右键项目,选择创建,点击设计师界面类
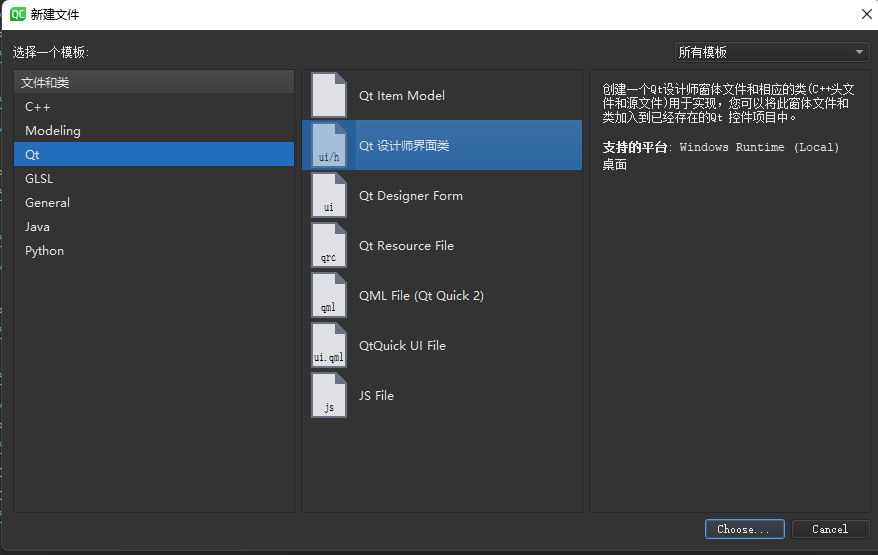
选择 dialog without buttons

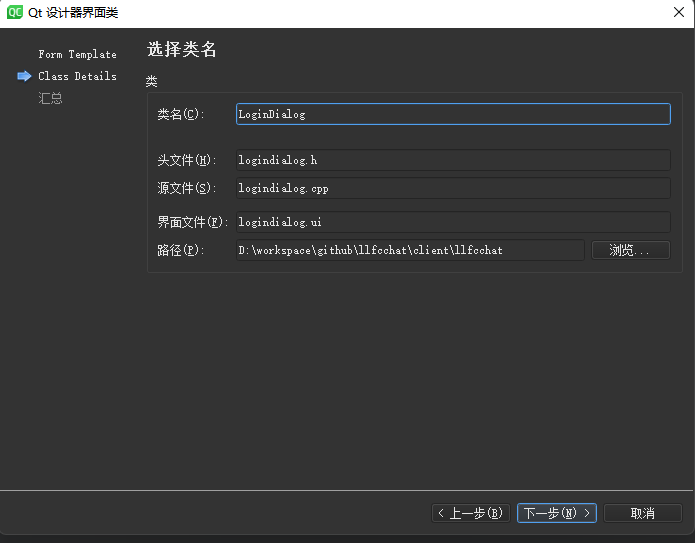
创建的名字就叫做LoginDialog
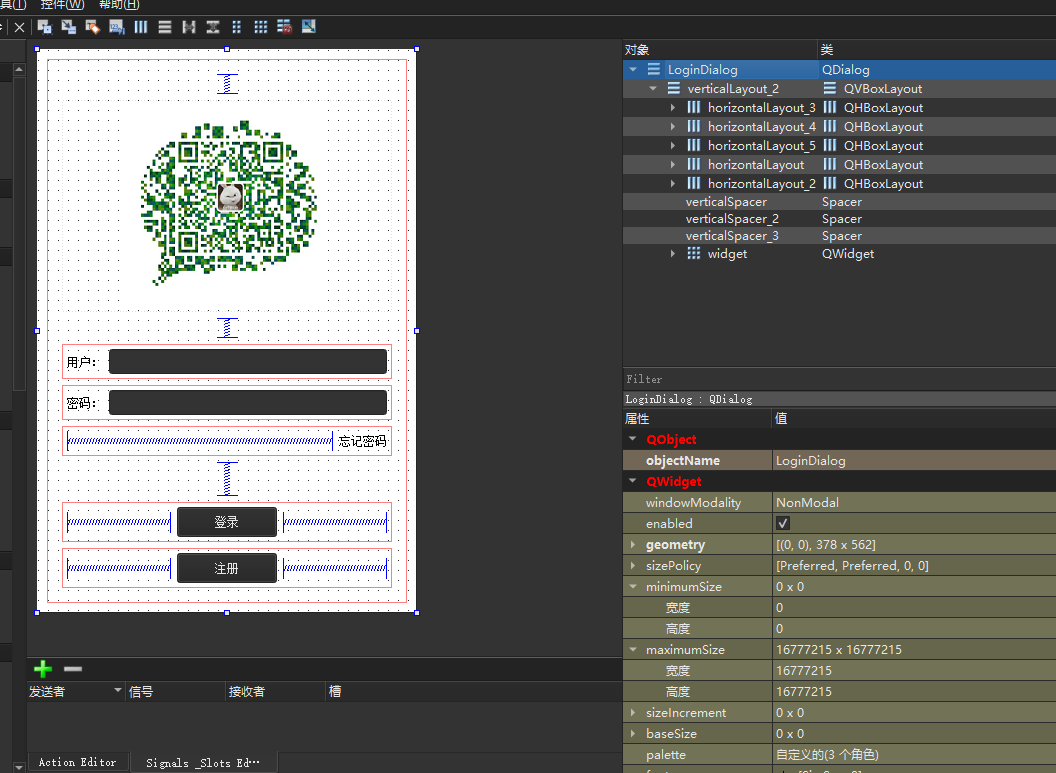
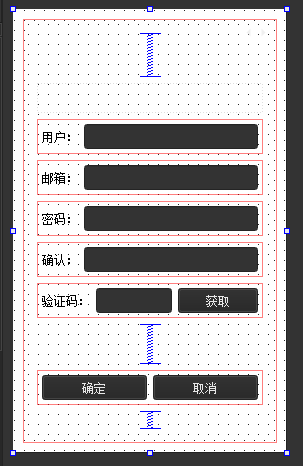
将LoginDialog.ui修改为如下布局
在mainwindow.h中添加LoginDialog指针成员,然后在构造函数将LoginDialog设置为中心部件
cpp展开代码MainWindow::MainWindow(QWidget *parent) :
    QMainWindow(parent),
    ui(new Ui::MainWindow)
{
    ui->setupUi(this);
    //创建一个CentralWidget, 并将其设置为MainWindow的中心部件
    _login_dlg = new LoginDialog();
    setCentralWidget(_login_dlg);
    _login_dlg->show();
}
创建注册界面
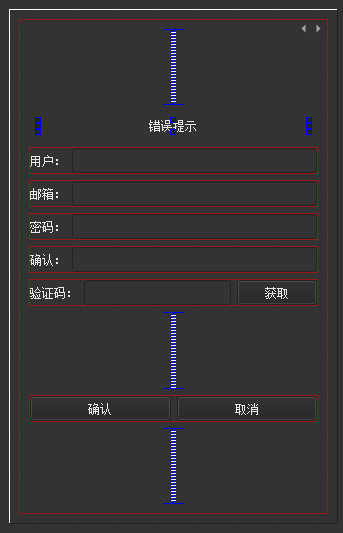
注册界面创建方式和登录界面类似,我们创建的界面如下:
创建好界面后接下来在LoginDialog类声明里添加信号切换注册界面
cpp展开代码signals:
    void switchRegister();
在LoginDialog的构造函数里连接按钮点击事件
cpp展开代码connect(ui->reg_btn, &QPushButton::clicked, this, &LoginDialog::switchRegister);
按钮点击后LoginDialog发出switchRegister信号,该信号发送给MainWindow用来切换界面。
我们在MainWindow里声明注册类变量
cpp展开代码private:
    RegisterDialog* _reg_dlg;
在其构造函数中添加注册类对象的初始化以及连接switchRegister信号
cpp展开代码    //创建和注册消息的链接
    connect(_login_dlg, &LoginDialog::switchRegister,
            this, &MainWindow::SlotSwitchReg);

    _reg_dlg = new RegisterDialog();
接下来实现槽函数SlotSwitchReg
cpp展开代码void MainWindow::SlotSwitchReg(){
    setCentralWidget(_reg_dlg);
    _login_dlg->hide();
    _reg_dlg->show();
}
这样启动程序主界面优先显示登录界面,点击注册后跳转到注册界面
优化样式
我们在项目根目录下创建style文件夹,在文件夹里创建stylesheet.qss文件,然后在qt项目中的rc.qrc右键添加现有文件,选择stylesheet.qss,这样qss就被导入到项目中了。
在主程序启动后加载qss
cpp展开代码int main(int argc, char *argv[])
{
    QApplication a(argc, argv);

    QFile qss(":/style/stylesheet.qss");

    if( qss.open(QFile::ReadOnly))
    {
        qDebug("open success");
        QString style = QLatin1String(qss.readAll());
        a.setStyleSheet(style);
        qss.close();
    }else{
         qDebug("Open failed");
     }

    MainWindow w;
    w.show();

    return a.exec();
}
然后我们写qss样式美化界面
qss展开代码QDialog#LoginDialog{
background-color:rgb(255,255,255)
}
主界面有一道灰色的是toolbar造成的,去mainwindow.ui里把那个toolbar删了就行了。
day02-客户端Http管理类设计
完善注册类界面
先在注册类构造函数里添加lineEdit的模式为密码模式
cpp展开代码ui->lineEdit_Passwd->setEchoMode(QLineEdit::Password);
ui->lineEdit_Confirm->setEchoMode(QLineEdit::Password);
我们在注册界面的ui里添加一个widget,widget内部包含一个tip居中显示,用来提示错误。设置label的显示为文字居中。
我们在qss里添加err_tip样式,根据不同的状态做字体显示
qss展开代码#err_tip[state='normal']{
   color: green;
}

#err_tip[state='err']{
   color: red;
}
接下来项目中添加global.h和global.cpp文件,global.h声明repolish函数,global.cpp用来定义这个函数。
.h中的声明
cpp展开代码#ifndef GLOBAL_H
#define GLOBAL_H
#include <QWidget>
#include <functional>
#include "QStyle"
extern std::function<void(QWidget*)> repolish;

#endif // GLOBAL_H
.cpp中的定义
cpp展开代码#include "global.h"

std::function<void(QWidget*)> repolish =[](QWidget *w){
    w->style()->unpolish(w);
    w->style()->polish(w);
};
在Register的构造函数中添加样式设置。
cpp展开代码ui->err_tip->setProperty("state","normal");
repolish(ui->err_tip);
接下来实现获取验证码的逻辑,ui里关联get_code按钮的槽事件,并实现槽函数
cpp展开代码void RegisterDialog::on_get_code_clicked()
{
    //验证邮箱的地址正则表达式
    auto email = ui->email_edit->text();
    // 邮箱地址的正则表达式
    QRegularExpression regex(R"((\w+)(\.|_)?(\w*)@(\w+)(\.(\w+))+)");
    bool match = regex.match(email).hasMatch(); // 执行正则表达式匹配
    if(match){
        //发送http请求获取验证码
    }else{
        //提示邮箱不正确
        showTip(tr("邮箱地址不正确"));
    }
}
在RegisterDialog中添加showTip函数
cpp展开代码void RegisterDialog::showTip(QString str)
{
    ui->err_tip->setText(str);
    ui->err_tip->setProperty("state","err");
    repolish(ui->err_tip);
}
好了,这样就完成了。测试提示功能正确,下面要实现判断邮箱正确后发送http请求。
单例类封装
网络请求类要做成一个单例类,这样方便在任何需要发送http请求的时候调用,我们先实现单例类,添加singleton.h实现如下
cpp展开代码#include <memory>
#include <mutex>
#include <iostream>
using namespace std;
template <typename T>
class Singleton {
protected:
    Singleton() = default;
    Singleton(const Singleton<T>&) = delete;
    Singleton& operator=(const Singleton<T>& st) = delete;

    static std::shared_ptr<T> _instance;
public:
    static std::shared_ptr<T> GetInstance() {
        static std::once_flag s_flag;
        std::call_once(s_flag, [&]() {
            _instance = shared_ptr<T>(new T);
            });

        return _instance;
    }
    void PrintAddress() {
        std::cout << _instance.get() << endl;
    }
    ~Singleton() {
        std::cout << "this is singleton destruct" << std::endl;
    }
};

template <typename T>
std::shared_ptr<T> Singleton<T>::_instance = nullptr;
http管理类
http管理类主要用来管理http发送接收等请求得,我们需要在pro中添加网络库
cpp展开代码QT += core gui network
在pro中添加C++类,命名为HttpMgr,然后头文件如下
cpp展开代码#include "singleton.h"
#include <QString>
#include <QUrl>
#include <QObject>
#include <QNetworkAccessManager>
#include "global.h"
#include <memory>
#include <QJsonObject>
#include <QJsonDocument>
class HttpMgr:public QObject, public Singleton<HttpMgr>,
        public std::enable_shared_from_this<HttpMgr>
{
    Q_OBJECT

public:
    ~HttpMgr();
private:
    friend class Singleton<HttpMgr>;
    HttpMgr();
    QNetworkAccessManager _manager;
signals:
    void sig_http_finish();
};
我们先实现PostHttpReq请求的函数,也就是发送http的post请求, 发送请求要用到请求的url,请求的数据(json或者protobuf序列化),以及请求的id,以及哪个模块发出的请求mod,那么一个请求接口应该是这样的
cpp展开代码void PostHttpReq(QUrl url, QJsonObject json, ReqId req_id, Modules mod);
我们去global.h定义ReqId枚举类型
cpp展开代码enum ReqId{
    ID_GET_VARIFY_CODE = 1001, //获取验证码
    ID_REG_USER = 1002, //注册用户
};
在global.h定义ErrorCodes
cpp展开代码enum ErrorCodes{
    SUCCESS = 0,
    ERR_JSON = 1, //Json解析失败
    ERR_NETWORK = 2,
};
在global.h中定义模块
cpp展开代码enum Modules{
    REGISTERMOD = 0,
};
还需要修改下要发送的信号,在HttpMgr的头文件里,让他携带参数
cpp展开代码void sig_http_finish(ReqId id, QString res, ErrorCodes err, Modules mod);
我们实现PostHttpReq
cpp展开代码void HttpMgr::PostHttpReq(QUrl url, QJsonObject json, ReqId req_id, Modules mod)
{
    //创建一个HTTP POST请求,并设置请求头和请求体
    QByteArray data = QJsonDocument(json).toJson();
    //通过url构造请求
    QNetworkRequest request(url);
    request.setHeader(QNetworkRequest::ContentTypeHeader, "application/json");
    request.setHeader(QNetworkRequest::ContentLengthHeader, QByteArray::number(data.length()));
    //发送请求,并处理响应, 获取自己的智能指针,构造伪闭包并增加智能指针引用计数
    auto self = shared_from_this();
    QNetworkReply * reply = _manager.post(request, data);
    //设置信号和槽等待发送完成
    QObject::connect(reply, &QNetworkReply::finished, [reply, self, req_id, mod](){
        //处理错误的情况
        if(reply->error() != QNetworkReply::NoError){
            qDebug() << reply->errorString();
            //发送信号通知完成
            emit self->sig_http_finish(req_id, "", ErrorCodes::ERR_NETWORK, mod);
            reply->deleteLater();
            return;
        }

        //无错误则读回请求
        QString res = reply->readAll();

        //发送信号通知完成
        emit self->sig_http_finish(req_id, res, ErrorCodes::SUCCESS,mod);
        reply->deleteLater();
        return;
    });
}
加下来HttpMgr内实现一个slot_http_finish的槽函数用来接收sig_http_finish信号。
cpp展开代码void HttpMgr::slot_http_finish(ReqId id, QString res, ErrorCodes err, Modules mod)
{
    if(mod == Modules::REGISTERMOD){
        //发送信号通知指定模块http响应结束
        emit sig_reg_mod_finish(id, res, err);
    }
}
我们在HttpMgr.h中添加信号sig_reg_mod_finish,
cpp展开代码class HttpMgr:public QObject, public Singleton<HttpMgr>,
        public std::enable_shared_from_this<HttpMgr>
{
    Q_OBJECT

public:
   //...省略
signals:
    void sig_http_finish(ReqId id, QString res, ErrorCodes err, Modules mod);
    void sig_reg_mod_finish(ReqId id, QString res, ErrorCodes err);
};
并且在cpp文件中连接slot_http_finish和sig_http_finish.
cpp展开代码HttpMgr::HttpMgr()
{
    //连接http请求和完成信号,信号槽机制保证队列消费
    connect(this, &HttpMgr::sig_http_finish, this, &HttpMgr::slot_http_finish);
}
我们在注册界面连接sig_reg_mod_finish信号
cpp展开代码RegisterDialog::RegisterDialog(QWidget *parent) :
    QDialog(parent),
    ui(new Ui::RegisterDialog)
{
    //省略...
    connect(HttpMgr::GetInstance().get(), &HttpMgr::sig_reg_mod_finish, this, &RegisterDialog::slot_reg_mod_finish);
}
接下俩实现slot_reg_mod_finish函数
cpp展开代码void RegisterDialog::slot_reg_mod_finish(ReqId id, QString res, ErrorCodes err)
{
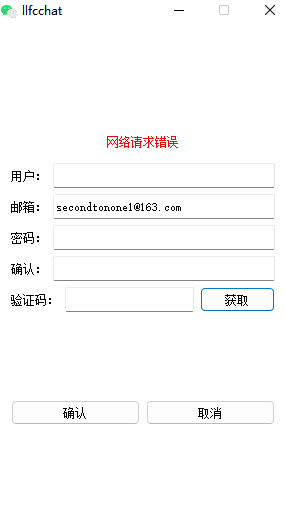
if(err != ErrorCodes::SUCCESS){
showTip(tr("网络请求错误"),false);
return;
}
// 解析 JSON 字符串,res需转化为QByteArray
QJsonDocument jsonDoc = QJsonDocument::fromJson(res.toUtf8());
//json解析错误
if(jsonDoc.isNull()){
showTip(tr("json解析错误"),false);
return;
}
//json解析错误
if(!jsonDoc.isObject()){
showTip(tr("json解析错误"),false);
return;
}
QJsonObject jsonObj = jsonDoc.object();
//调用对应的逻辑
return;
}
showTip逻辑稍作修改,增加bool类型参数
cpp展开代码void RegisterDialog::showTip(QString str, bool b_ok)
{
    if(b_ok){
         ui->err_tip->setProperty("state","err");
    }else{
        ui->err_tip->setProperty("state","normal");
    }

    ui->err_tip->setText(str);

    repolish(ui->err_tip);
}
注册消息处理
我们需要对RegisterDialog注册消息处理,头文件声明
cpp展开代码QMap<ReqId, std::function<void(const QJsonObject&)>> _handlers;
在RegisterDialog中添加注册消息处理的声明和定义
cpp展开代码void RegisterDialog::initHttpHandlers()
{
//注册获取验证码回包逻辑
_handlers.insert(ReqId::ID_GET_VARIFY_CODE, [this](QJsonObject jsonObj){
int error = jsonObj["error"].toInt();
if(error != ErrorCodes::SUCCESS){
showTip(tr("参数错误"),false);
return;
}
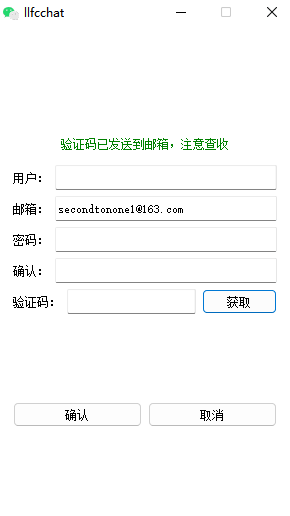
auto email = jsonObj["email"].toString();
showTip(tr("验证码已发送到邮箱,注意查收"), true);
qDebug()<< "email is " << email ;
});
}
回到slot_reg_mod_finish函数添加根据id调用函数处理对应逻辑
cpp展开代码void RegisterDialog::slot_reg_mod_finish(ReqId id, QString res, ErrorCodes err)
{
   //前面逻辑省略...
    //调用对应的逻辑,根据id回调。
    _handlers[id](jsonDoc.object());

    return;
}
day03-visualstudio配置boost和jsoncpp
GateServer
网关服务器主要应答客户端基本的连接请求,包括根据服务器负载情况选择合适服务器给客户端登录,注册,获取验证服务等,接收http请求并应答。
boost库安装
boost库的安装分为Windows和Linux两部分,Linux部分放在后面再讲解。因为Windows比较直观,便于我们编写代码,所以优先在windows平台搭建环境并编写代码,测试无误后再移植到linux。
boost官网地址:
Boost库官网https://www.boost.org/,首先进入官网下载对应的Boost库文件。点击下图所示红框中Download进入下载页面。更多版本点击链接下载。

点击进入页面后,接下来选择7z或者zip文件都可以。

如果下载缓慢,大家可以去我的网盘下载 链接:https://pan.baidu.com/s/1Uf-7gZxWpCOl7dnYzlYRHg?pwd=xt01
提取码:xt01
我的是boost_1_81_0版本,大家可以和我的版本匹配,也可以自己用最新版。
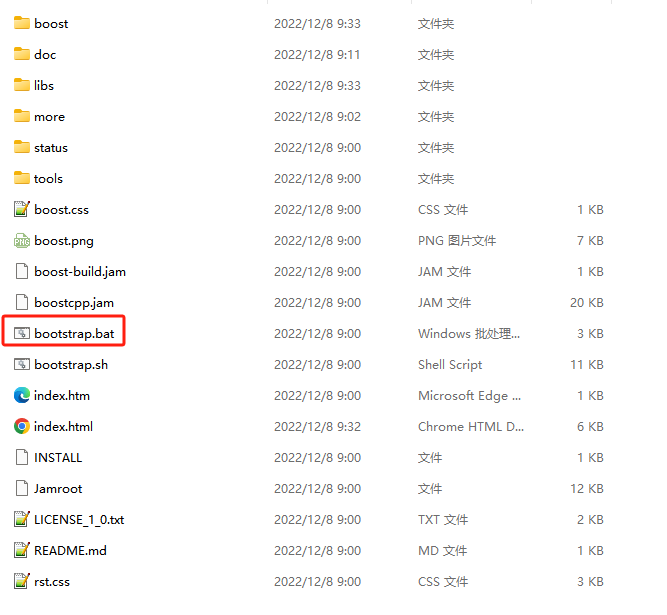
下载好后解压, 其中booststrap.bat点击后生成编译程序
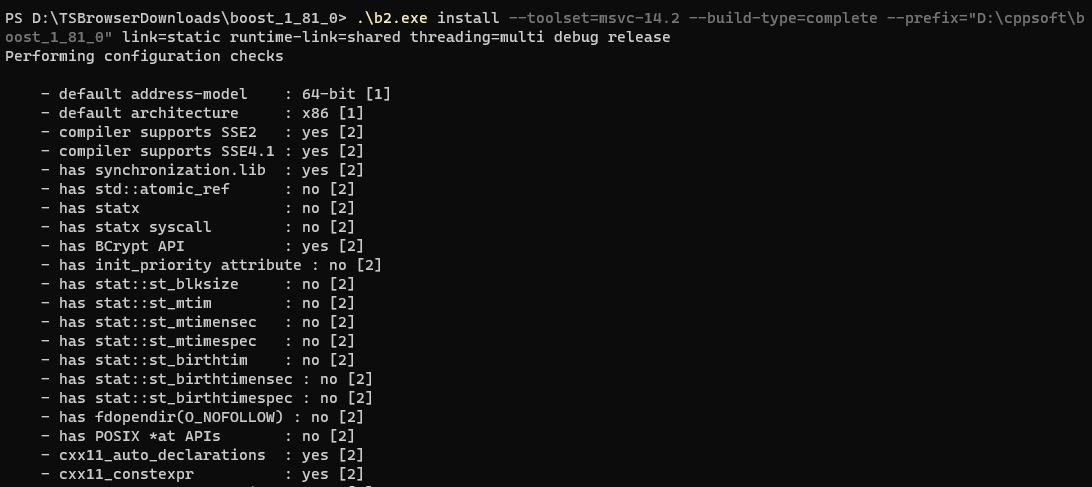
点击后,生成b2.exe,我们执行如下命令
bash展开代码.\b2.exe install --toolset=msvc-14.2 --build-type=complete --prefix="D:\cppsoft\boost_1_81_0" link=static runtime-link=shared threading=multi debug release
先逐一解释各参数含义
-
install可以更改为stage, stage表示只生成库(dll和lib), install还会生成包含头文件的include目录。一般来说用stage就可以了,我们将生成的lib和下载的源码包的include头文件夹放到项目要用的地方即可。
-
toolset 指定编译器,
gcc用来编译生成linux用的库,msvc-14.2(VS2019)用来编译windows使用的库,版本号看你的编译器比如msvc-10.0(VS2010),我的是VS2019所以是msvc-14.2。 -
如果选择的是install 命令,指定生成的库文件夹要用
--prefix,如果使用的是stage命令,需要用--stagedir指定。 -
link表示生成动态库还是静态库,static表示生成lib库,shared表示生成dll库。 -
runtime-link表示用于指定运行时链接方式为静态库还是动态库,指定为static就是MT模式,指定shared就是MD模式。MD和MT是微软 Visual C++ 编译器的选项,用于指定运行时库的链接方式。这两个选项有以下区别:/MD:表示使用多线程 DLL(Dynamic Link Library)版本的运行时库。这意味着你的应用程序将使用动态链接的运行时库(MSVCRT.dll)。这样的设置可以减小最终可执行文件的大小,并且允许应用程序与其他使用相同运行时库版本的程序共享代码和数据。/MT:表示使用多线程静态库(Static Library)版本的运行时库。这意味着所有的运行时函数将被静态链接到应用程序中,使得应用程序不再依赖于动态链接的运行时库。这样可以确保应用程序在没有额外依赖的情况下独立运行,但可能会导致最终可执行文件的体积增大。
执行上述命令后就会在指定目录生成lib库了,我们将lib库拷贝到要使用的地方即可。
一句话简化上面的含义,就是我们生成的是lib库,运行时采用的md加载模式。
下面是编译界面
编译后生成如下目录和文件, 我的是D盘 cppsoft目录下的boost文件夹,大家可以根据自己的设置去指定文件夹查看。
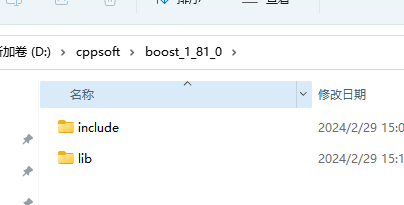
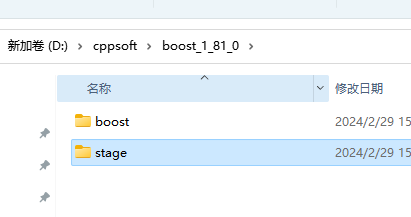
为了兼容我之前做的旧项目,我创建了一个stage文件夹,将lib文件夹和内容移动到stage中了。然后将include文件夹下的boost文件夹移出到boost_1_81_0目录下,整体看就就是如下
接下来我们创建项目并配置boost
配置boost
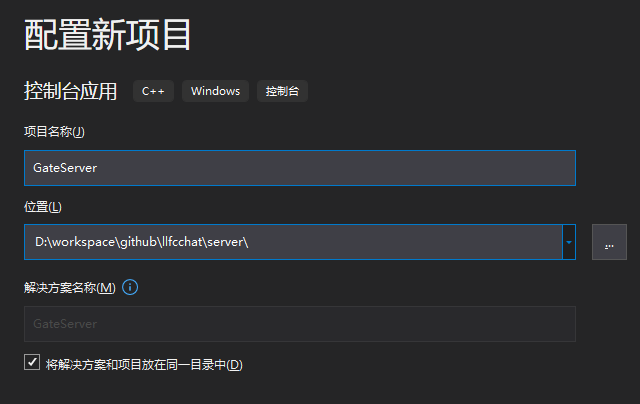
打开visual studio 创建项目
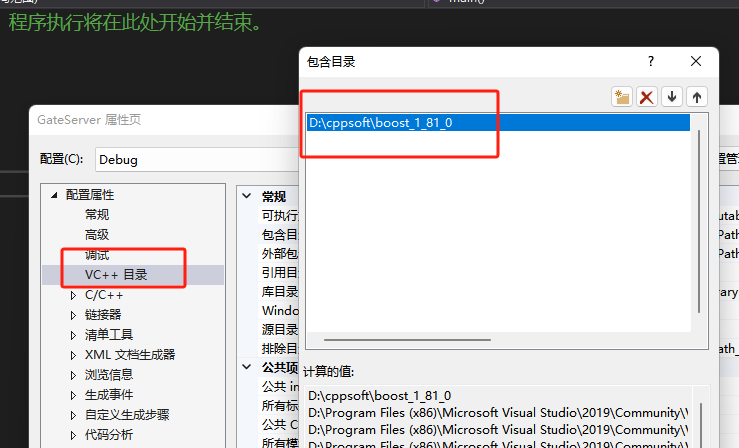
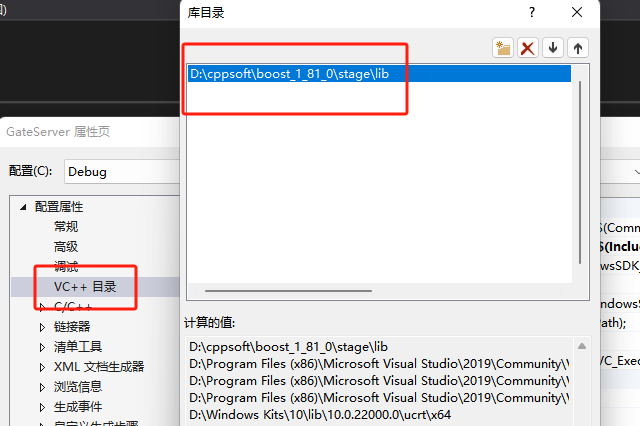
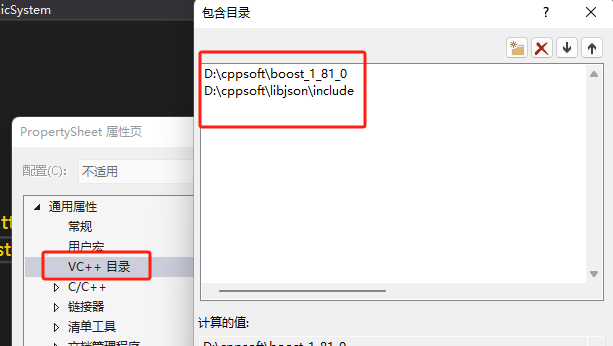
接下来配置boost到项目中,右键项目选择属性,配置VC++包含目录,添加D:\cppsoft\boost_1_81_0(根据你自己的boost目录配置)
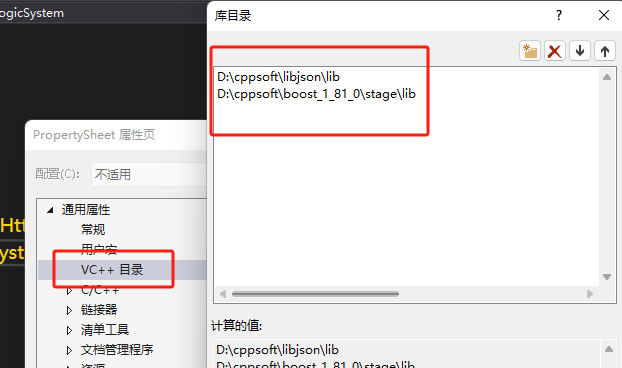
再配置VC++库目录, 添加D:\cppsoft\boost_1_81_0\stage\lib
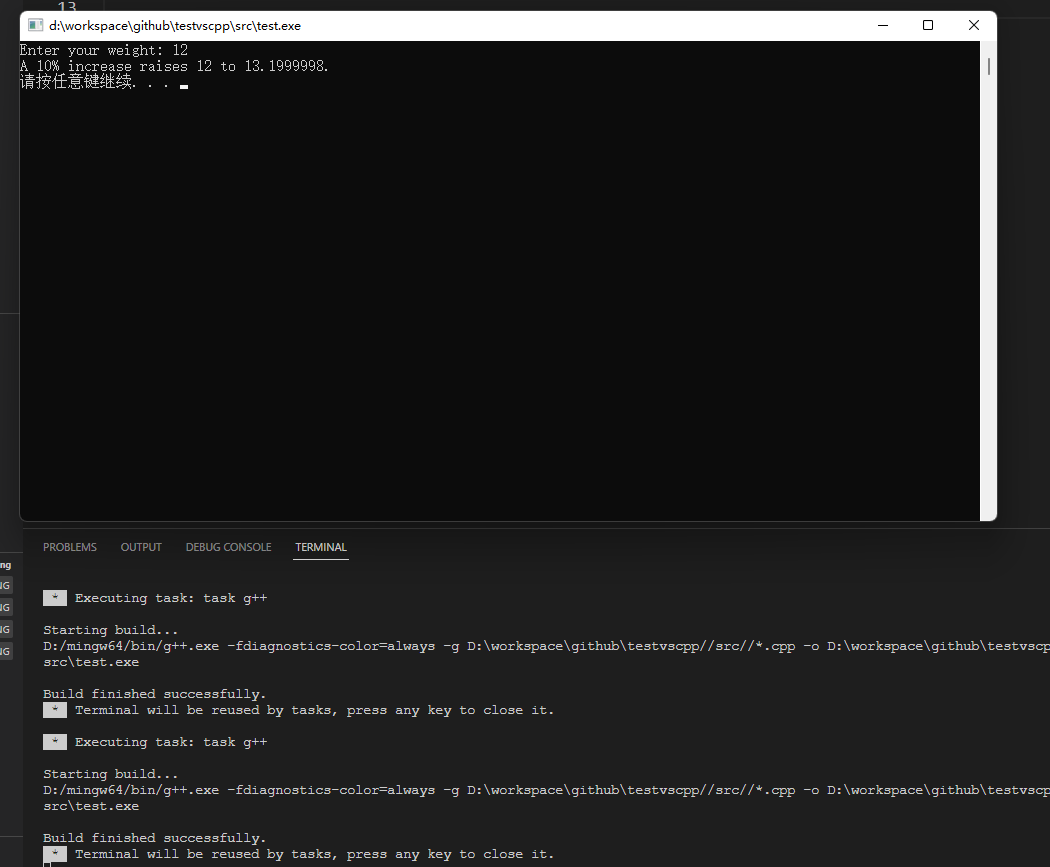
写个代码测试一下
cpp展开代码#include <iostream>
#include <string>
#include "boost/lexical_cast.hpp"
int main()
{
    using namespace std;
    cout << "Enter your weight: ";
    float weight;
    cin >> weight;
    string gain = "A 10% increase raises ";
    string wt = boost::lexical_cast<string> (weight);
    gain = gain + wt + " to ";      // string operator()
    weight = 1.1 * weight;
    gain = gain + boost::lexical_cast<string>(weight) + ".";
    cout << gain << endl;
    system("pause");
    return 0;
}
运行成功,可以看到弹出了窗口
配置jsoncpp
因为要用到json解析,所以我们选择jsoncpp来做后端json解析工作
jsoncpp下载地址: https://github.com/open-source-parsers/jsoncpp 官方文档: http://jsoncpp.sourceforge.net/old.html
选择windows版本的下载。
如果下载速度很慢,可以去我的网盘地址下载 https://pan.baidu.com/s/1Yg9Usdc3T-CYhyr9GiePCw?pwd=ng6x
验证码ng6x
下载后我们解压文件夹,解压后文件夹如下图
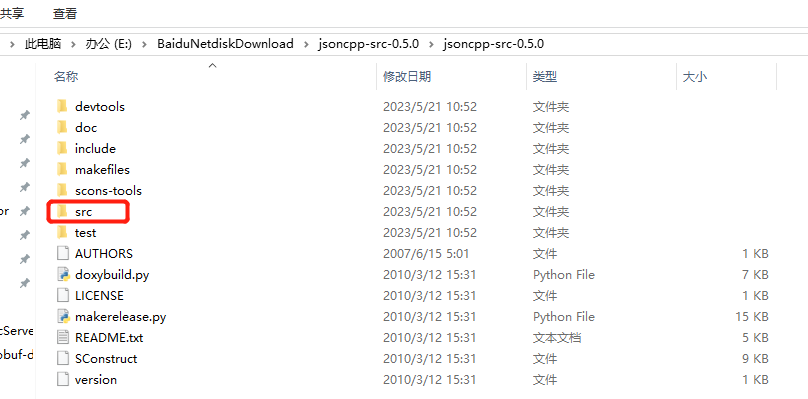
然后进行编译,编译需要进入makefile文件夹下
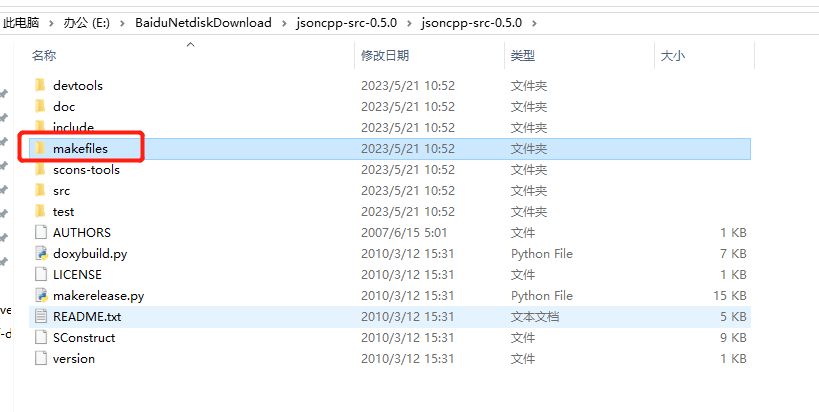
找到jsoncpp.sln文件,用visual studio打开,因为我的是visual studio2019版本,所以会提示我升级。
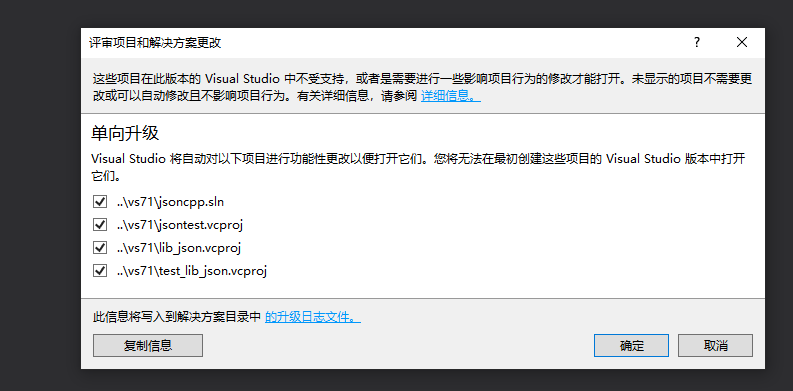
点击确定升级,之后我们选择编译lib_json即可,当然偷懒可以选择编译整个解决方案。
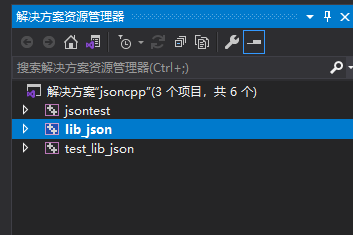
然后我们配置编译属性,我想要用x64位的,所以配置编译平台为X64位,编译模式为debug模式,大家最好把release版和debug版都编译一遍。
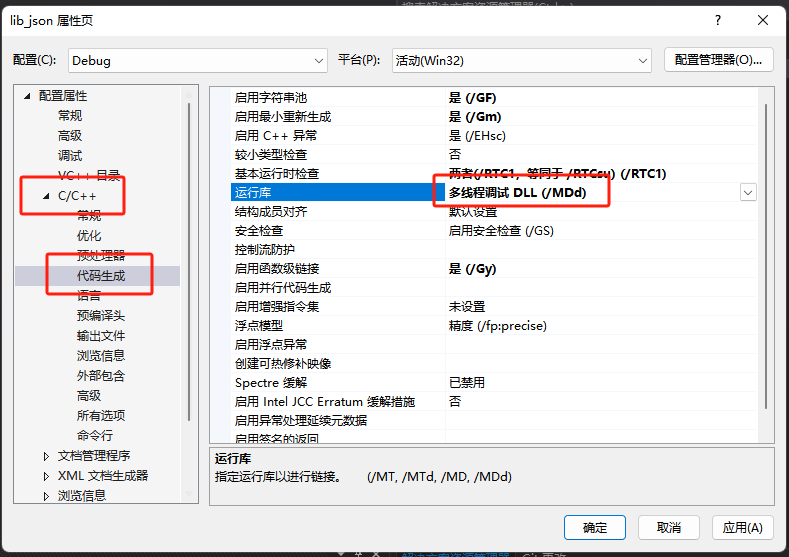
右键lib_json属性里选择C++,再选择代码生成,之后在右侧选择运行库,选择md(release版), mdd(debug版).
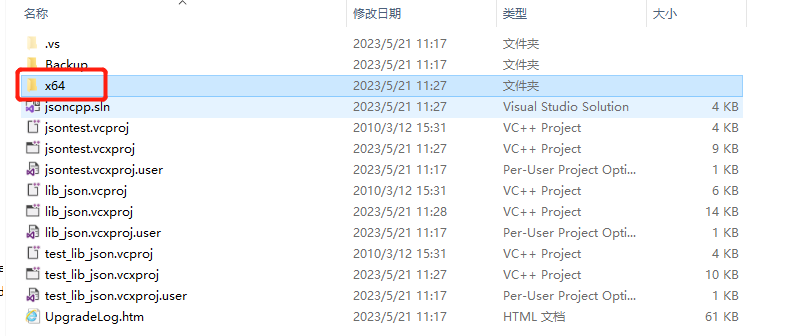
编译生成后,我们的json库生成在项目同级目录的x64文件夹下的debug目录下
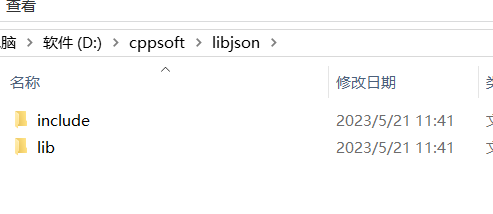
接下来我们在D盘cppsoft新建一个文件夹libjson,然后在其内部分别建立include和lib文件夹
将jsoncpp-src-0.5.0源码文件夹下include文件夹里的内容copy到libjson下的include文件夹内。
将jsoncpp-src-0.5.0源码文件夹下x64位debug文件夹和Release文件夹下生成的库copy到libjson下的lib文件夹内。
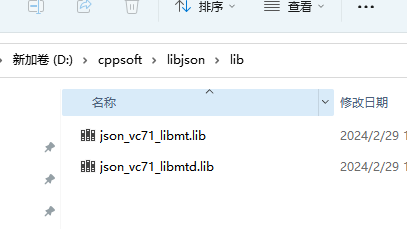
我们生成的是mdd和md版本的库,但是名字却是mt,这个是visual studio生成的小bug先不管了。
接下来我们新建一个项目,在项目属性中配置jsoncpp
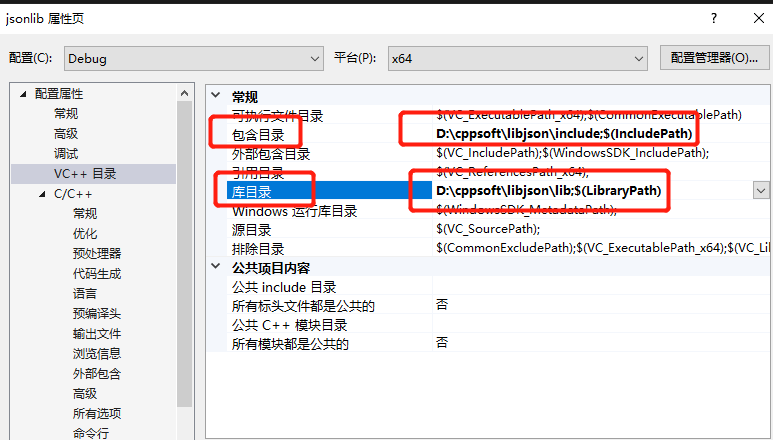
项目属性中,VC++包含目录设置为 D:\cppsoft\libjson\include
库目录选择为 VC++库目录设置为 D:\cppsoft\libjson\lib
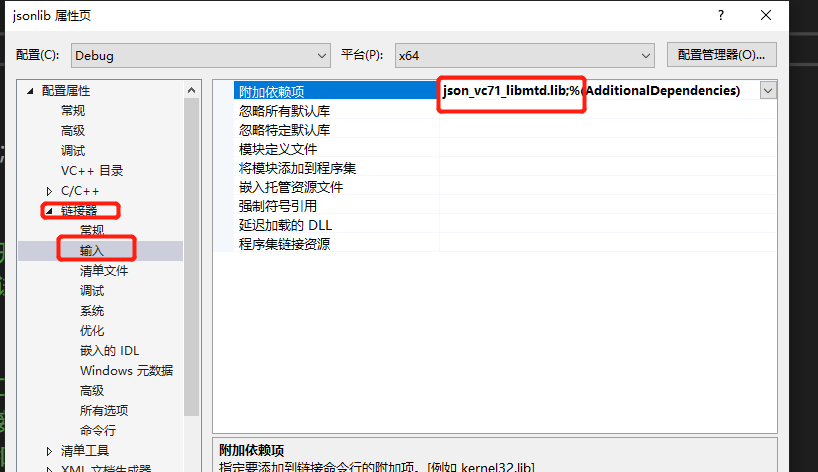
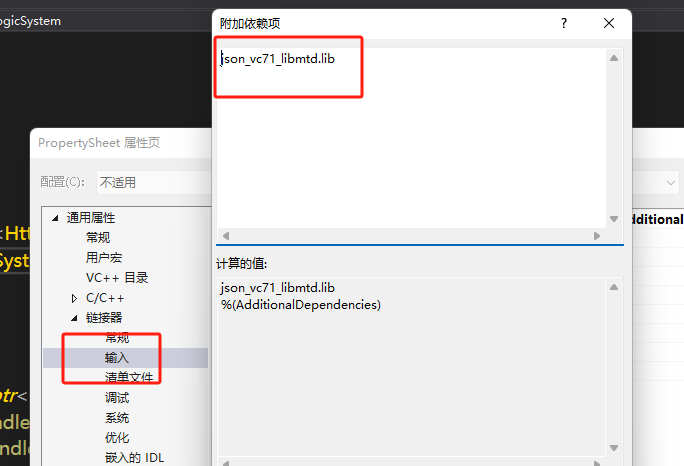
另外我们还要设置链接器->输入->附加依赖项里设置json_vc71_libmtd.lib
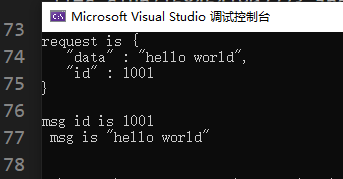
我们写个程序测试一下json库安装的情况
cpp展开代码#include <iostream>
#include <json/json.h>
#include <json/value.h>
#include <json/reader.h>

int main()
{
    Json::Value root;
    root["id"] = 1001;
    root["data"] = "hello world";
    std::string request = root.toStyledString();
    std::cout << "request is " << request << std::endl;

    Json::Value root2;
    Json::Reader reader;
    reader.parse(request, root2);
    std::cout << "msg id is " << root2["id"] << " msg is " << root2["data"] << std::endl;
}
从这段代码中,我们先将root序列化为字符串,再将字符串反序列化为root2.
输出如下
day04-beast搭建http服务器
绑定和监听连接
我们利用visual studio创建一个空项目,项目名字为GateServer,然后按照day03的方法配置boost库和jsoncpp配置好后,我们添加一个新的类,名字叫CServer。添加成功后生成的CServer.h和CServer.cpp也会自动加入到项目中。
CServer类构造函数接受一个端口号,创建acceptor接受新到来的链接。
CServer.h包含必要的头文件,以及简化作用域声明
cpp展开代码#include <boost/beast/http.hpp>
#include <boost/beast.hpp>
#include <boost/asio.hpp>

namespace beast = boost::beast;         // from <boost/beast.hpp>
namespace http = beast::http;           // from <boost/beast/http.hpp>
namespace net = boost::asio;            // from <boost/asio.hpp>
using tcp = boost::asio::ip::tcp;       // from <boost/asio/ip/tcp.hpp>
CServer.h中声明acceptor, 以及用于事件循环的上下文iocontext,和构造函数
cpp展开代码class CServer:public std::enable_shared_from_this<CServer>
{
public:
	CServer(boost::asio::io_context& ioc, unsigned short& port);
	void Start();
private:
	tcp::acceptor  _acceptor;
	net::io_context& _ioc;
	boost::asio::ip::tcp::socket   _socket;
};
cpp中实现构造函数如下
cpp展开代码CServer::CServer(boost::asio::io_context& ioc, unsigned short& port) :_ioc(ioc),
_acceptor(ioc, tcp::endpoint(tcp::v4(), port)),_socket(ioc) {

}
接下来我们实现Start函数,用来监听新链接
cpp展开代码void CServer::Start()
{
	auto self = shared_from_this();
	_acceptor.async_accept(_socket, [self](beast::error_code ec) {
		try {
			//出错则放弃这个连接,继续监听新链接
			if (ec) {
				self->Start();
				return;
			}

			//处理新链接,创建HpptConnection类管理新连接
			std::make_shared<HttpConnection>(std::move(self->_socket))->Start();
			//继续监听
			self->Start();
		}
		catch (std::exception& exp) {
			std::cout << "exception is " << exp.what() << std::endl;
			self->Start();
		}
	});
}
Start函数内创建HttpConnection类型智能指针,将_socket内部数据转移给HttpConnection管理,_socket继续用来接受写的链接。
我们创建const.h将文件件和一些作用于声明放在const.h里,这样以后创建的文件包含这个const.h即可,不用写那么多头文件了。
cpp展开代码#include <boost/beast/http.hpp>
#include <boost/beast.hpp>
#include <boost/asio.hpp>

namespace beast = boost::beast;         // from <boost/beast.hpp>
namespace http = beast::http;           // from <boost/beast/http.hpp>
namespace net = boost::asio;            // from <boost/asio.hpp>
using tcp = boost::asio::ip::tcp;       // from <boost/asio/ip/tcp.hpp>
新建HttpConnection类文件,在头文件添加声明
cpp展开代码#include "const.h"

class HttpConnection: public std::enable_shared_from_this<HttpConnection>
{
	friend class LogicSystem;
public:
	HttpConnection(tcp::socket socket);
	void Start();

private:
	void CheckDeadline();
	void WriteResponse();
	void HandleReq();
	tcp::socket  _socket;
	// The buffer for performing reads.
	beast::flat_buffer  _buffer{ 8192 };

	// The request message.
	http::request<http::dynamic_body> _request;

	// The response message.
	http::response<http::dynamic_body> _response;

	// The timer for putting a deadline on connection processing.
	net::steady_timer deadline_{
		_socket.get_executor(), std::chrono::seconds(60) };
};
_buffer 用来接受数据
_request 用来解析请求
_response 用来回应客户端
_deadline 用来做定时器判断请求是否超时
实现HttpConnection构造函数
cpp展开代码HttpConnection::HttpConnection(tcp::socket socket)
	: _socket(std::move(socket)) {
}
我们考虑在HttpConnection::Start内部调用http::async_read函数,其源码为
cpp展开代码async_read(
    AsyncReadStream& stream,
    DynamicBuffer& buffer,
    basic_parser<isRequest>& parser,
    ReadHandler&& handler)
第一个参数为异步可读的数据流,大家可以理解为socket.
第二个参数为一个buffer,用来存储接受的数据,因为http可接受文本,图像,音频等多种资源文件,所以是Dynamic动态类型的buffer。
第三个参数是请求参数,我们一般也要传递能接受多种资源类型的请求参数。
第四个参数为回调函数,接受成功或者失败,都会触发回调函数,我们用lambda表达式就可以了。
我们已经将1,2,3这几个参数写到HttpConnection类的成员声明里了
实现HttpConnection的Start函数
cpp展开代码void HttpConnection::Start()
{
	auto self = shared_from_this();
	http::async_read(_socket, _buffer, _request, [self](beast::error_code ec,
		std::size_t bytes_transferred) {
			try {
				if (ec) {
					std::cout << "http read err is " << ec.what() << std::endl;
					return;
				}

				//处理读到的数据
				boost::ignore_unused(bytes_transferred);
				self->HandleReq();
				self->CheckDeadline();
			}
			catch (std::exception& exp) {
				std::cout << "exception is " << exp.what() << std::endl;
			}
		}
	);
}
我们实现HandleReq
cpp展开代码void HttpConnection::HandleReq() {
	//设置版本
	_response.version(_request.version());
	//设置为短链接
	_response.keep_alive(false);

	if (_request.method() == http::verb::get) {
		bool success = LogicSystem::GetInstance()->HandleGet(_request.target(), shared_from_this());
		if (!success) {
			_response.result(http::status::not_found);
			_response.set(http::field::content_type, "text/plain");
			beast::ostream(_response.body()) << "url not found\r\n";
			WriteResponse();
			return;
		}

		_response.result(http::status::ok);
		_response.set(http::field::server, "GateServer");
		WriteResponse();
		return;
	}
}
为了方便我们先实现Get请求的处理,根据请求类型为get调用LogicSystem的HandleGet接口处理get请求,根据处理成功还是失败回应数据包给对方。
我们先实现LogicSystem,采用单例模式,单例基类之前讲解过了
cpp展开代码#include <memory>
#include <mutex>
#include <iostream>
template <typename T>
class Singleton {
protected:
	Singleton() = default;
	Singleton(const Singleton<T>&) = delete;
	Singleton& operator=(const Singleton<T>& st) = delete;

	static std::shared_ptr<T> _instance;
public:
	static std::shared_ptr<T> GetInstance() {
		static std::once_flag s_flag;
		std::call_once(s_flag, [&]() {
			_instance = shared_ptr<T>(new T);
			});

		return _instance;
	}
	void PrintAddress() {
		std::cout << _instance.get() << endl;
	}
	~Singleton() {
		std::cout << "this is singleton destruct" << std::endl;
	}
};

template <typename T>
std::shared_ptr<T> Singleton<T>::_instance = nullptr;
实现LogicSystem单例类
cpp展开代码#include "Singleton.h"
#include <functional>
#include <map>
#include "const.h"

class HttpConnection;
typedef std::function<void(std::shared_ptr<HttpConnection>)> HttpHandler;
class LogicSystem :public Singleton<LogicSystem>
{
	friend class Singleton<LogicSystem>;
public:
	~LogicSystem();
	bool HandleGet(std::string, std::shared_ptr<HttpConnection>);
	void RegGet(std::string, HttpHandler handler);
private:
	LogicSystem();
	std::map<std::string, HttpHandler> _post_handlers;
	std::map<std::string, HttpHandler> _get_handlers;
};
_post_handlers和_get_handlers分别是post请求和get请求的回调函数map,key为路由,value为回调函数。
我们实现RegGet函数,接受路由和回调函数作为参数
cpp展开代码void LogicSystem::RegGet(std::string url, HttpHandler handler) {
	_get_handlers.insert(make_pair(url, handler));
}
在构造函数中实现具体的消息注册
cpp展开代码LogicSystem::LogicSystem() {
	RegGet("/get_test", [](std::shared_ptr<HttpConnection> connection) {
		beast::ostream(connection->_response.body()) << "receive get_test req";
	});
}
为防止互相引用,以及LogicSystem能够成功访问HttpConnection,在LogicSystem.cpp中包含HttpConnection头文件
并且在HttpConnection中添加友元类LogicSystem, 且在HttpConnection.cpp中包含LogicSystem.h文件
cpp展开代码bool LogicSystem::HandleGet(std::string path, std::shared_ptr<HttpConnection> con) {
	if (_get_handlers.find(path) == _get_handlers.end()) {
		return false;
	}

	_get_handlers[path](con);
	return true;
}
这样我们在HttpConnection里实现WriteResponse函数
cpp展开代码void HttpConnection::WriteResponse() {
	auto self = shared_from_this();
	_response.content_length(_response.body().size());
	http::async_write(
		_socket,
		_response,
		[self](beast::error_code ec, std::size_t)
		{
			self->_socket.shutdown(tcp::socket::shutdown_send, ec);
			self->deadline_.cancel();
		});
}
因为http是短链接,所以发送完数据后不需要再监听对方链接,直接断开发送端即可。
另外,http处理请求需要有一个时间约束,发送的数据包不能超时。所以在发送时我们启动一个定时器,收到发送的回调后取消定时器。
我们实现检测超时的函数
cpp展开代码void HttpConnection::CheckDeadline() {
	auto self = shared_from_this();

	deadline_.async_wait(
		[self](beast::error_code ec)
		{
			if (!ec)
			{
				// Close socket to cancel any outstanding operation.
				self->_socket.close(ec);
			}
		});
}
我们在主函数中初始化上下文iocontext以及启动信号监听ctr-c退出事件, 并且启动iocontext服务
cpp展开代码int main()
{
	try
	{
		unsigned short port = static_cast<unsigned short>(8080);
		net::io_context ioc{ 1 };
		boost::asio::signal_set signals(ioc, SIGINT, SIGTERM);
		signals.async_wait([&ioc](const boost::system::error_code& error, int signal_number) {

			if (error) {
				return;
			}
			ioc.stop();
			});
		std::make_shared<CServer>(ioc, port)->Start();
		ioc.run();
	}
	catch (std::exception const& e)
	{
		std::cerr << "Error: " << e.what() << std::endl;
		return EXIT_FAILURE;
	}
}
``
启动服务器,在浏览器输入`http://localhost:8080/get_test`

会看到服务器回包`receive get_test req`

如果我们输入带参数的url请求`http://localhost:8080/get_test?key1=value1&key2=value2`

会收到服务器反馈`url not found`

所以对于get请求带参数的情况我们要实现参数解析,我们可以自己实现简单的url解析函数

``` cpp
//char 转为16进制
unsigned char ToHex(unsigned char x)
{
	return  x > 9 ? x + 55 : x + 48;
}
将十进制的char转为16进制,如果是数字不超过9则加48转为对应的ASCII码的值
如果字符是大于9的,比如AZ, az等则加55,获取到对应字符的ASCII码值
详细的ASCII码表大家可以看这个https://c.biancheng.net/c/ascii/
接下来实现从16进制转为十进制的char的方法
cpp展开代码unsigned char FromHex(unsigned char x)
{
	unsigned char y;
	if (x >= 'A' && x <= 'Z') y = x - 'A' + 10;
	else if (x >= 'a' && x <= 'z') y = x - 'a' + 10;
	else if (x >= '0' && x <= '9') y = x - '0';
	else assert(0);
	return y;
}
接下来我们实现url编码工作
cpp展开代码std::string UrlEncode(const std::string& str)
{
	std::string strTemp = "";
	size_t length = str.length();
	for (size_t i = 0; i < length; i++)
	{
		//判断是否仅有数字和字母构成
		if (isalnum((unsigned char)str[i]) ||
			(str[i] == '-') ||
			(str[i] == '_') ||
			(str[i] == '.') ||
			(str[i] == '~'))
			strTemp += str[i];
		else if (str[i] == ' ') //为空字符
			strTemp += "+";
		else
		{
			//其他字符需要提前加%并且高四位和低四位分别转为16进制
			strTemp += '%';
			strTemp += ToHex((unsigned char)str[i] >> 4);
			strTemp += ToHex((unsigned char)str[i] & 0x0F);
		}
	}
	return strTemp;
}
我们先判断str[i]是否为字母或者数字,或者一些简单的下划线,如果是泽直接拼接,否则判断是否为空字符,如果为空则换成'+'拼接。否则就是特殊字符,我们需要将特殊字符转化为'%'和两个十六进制字符拼接。现拼接'%',再将字符的高四位拼接到strTemp上,最后将低四位拼接到strTemp上。
url解码的工作正好相反
cpp展开代码std::string UrlDecode(const std::string& str)
{
	std::string strTemp = "";
	size_t length = str.length();
	for (size_t i = 0; i < length; i++)
	{
		//还原+为空
		if (str[i] == '+') strTemp += ' ';
		//遇到%将后面的两个字符从16进制转为char再拼接
		else if (str[i] == '%')
		{
			assert(i + 2 < length);
			unsigned char high = FromHex((unsigned char)str[++i]);
			unsigned char low = FromHex((unsigned char)str[++i]);
			strTemp += high * 16 + low;
		}
		else strTemp += str[i];
	}
	return strTemp;
}
接下来实现get请求的参数解析, 在HttpConnection里添加两个成员
cpp展开代码std::string _get_url;
std::unordered_map<std::string, std::string> _get_params;
参数解析如下
cpp展开代码void HttpConnection::PreParseGetParam() {
	// 提取 URI
	auto uri = _request.target();
	// 查找查询字符串的开始位置(即 '?' 的位置)
	auto query_pos = uri.find('?');
	if (query_pos == std::string::npos) {
		_get_url = uri;
		return;
	}

	_get_url = uri.substr(0, query_pos);
	std::string query_string = uri.substr(query_pos + 1);
	std::string key;
	std::string value;
	size_t pos = 0;
	while ((pos = query_string.find('&')) != std::string::npos) {
		auto pair = query_string.substr(0, pos);
		size_t eq_pos = pair.find('=');
		if (eq_pos != std::string::npos) {
			key = UrlDecode(pair.substr(0, eq_pos)); // 假设有 url_decode 函数来处理URL解码
			value = UrlDecode(pair.substr(eq_pos + 1));
			_get_params[key] = value;
		}
		query_string.erase(0, pos + 1);
	}
	// 处理最后一个参数对(如果没有 & 分隔符)
	if (!query_string.empty()) {
		size_t eq_pos = query_string.find('=');
		if (eq_pos != std::string::npos) {
			key = UrlDecode(query_string.substr(0, eq_pos));
			value = UrlDecode(query_string.substr(eq_pos + 1));
			_get_params[key] = value;
		}
	}
}
HttpConnection::HandleReq函数略作修改
cpp展开代码void HttpConnection::HandleReq() {
	//...省略
	if (_request.method() == http::verb::get) {
		PreParseGetParam();
		bool success = LogicSystem::GetInstance()->HandleGet(_get_url, shared_from_this());
	}
	//...省略
}
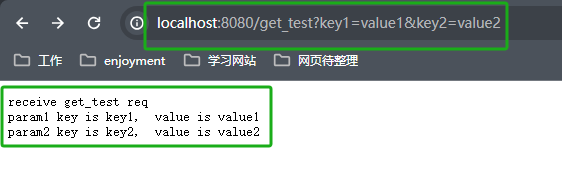
我们修改LogicSytem构造函数,在get_test的回调里返回参数给对端
cpp展开代码LogicSystem::LogicSystem() {
	RegGet("/get_test", [](std::shared_ptr<HttpConnection> connection) {
		beast::ostream(connection->_response.body()) << "receive get_test req " << std::endl;
		int i = 0;
		for (auto& elem : connection->_get_params) {
			i++;
			beast::ostream(connection->_response.body()) << "param" << i << " key is " << elem.first;
			beast::ostream(connection->_response.body()) << ", " <<  " value is " << elem.second << std::endl;
		}
	});
}
在浏览器输入http://localhost:8080/get_test?key1=value1&key2=value2
看到浏览器收到如下图信息,说明我们的get请求逻辑处理完了
day05-处理post请求并解析json数据
注册Post请求
我们实现RegPost函数
cpp展开代码void LogicSystem::RegPost(std::string url, HttpHandler handler) {
	_post_handlers.insert(make_pair(url, handler));
}
在const.h中添加ErrorCodes定义并且包含JsonCpp相关的头文件
cpp展开代码#include <json/json.h>
#include <json/value.h>
#include <json/reader.h>

enum ErrorCodes {
	Success = 0,
	Error_Json = 1001,  //Json解析错误
	RPCFailed = 1002,  //RPC请求错误
};
然后在LogicSystem的构造函数里添加获取验证码的处理逻辑,
cpp展开代码RegPost("/get_varifycode", [](std::shared_ptr<HttpConnection> connection) {
	auto body_str = boost::beast::buffers_to_string(connection->_request.body().data());
	std::cout << "receive body is " << body_str << std::endl;
	connection->_response.set(http::field::content_type, "text/json");
	Json::Value root;
	Json::Reader reader;
	Json::Value src_root;
	bool parse_success = reader.parse(body_str, src_root);
	if (!parse_success) {
		std::cout << "Failed to parse JSON data!" << std::endl;
		root["error"] = ErrorCodes::Error_Json;
		std::string jsonstr = root.toStyledString();
		beast::ostream(connection->_response.body()) << jsonstr;
		return true;
	}

	auto email = src_root["email"].asString();
	cout << "email is " << email << endl;
	root["error"] = 0;
	root["email"] = src_root["email"];
	std::string jsonstr = root.toStyledString();
	beast::ostream(connection->_response.body()) << jsonstr;
	return true;
});
然后我们在LogicSystem中添加Post请求的处理
cpp展开代码bool LogicSystem::HandlePost(std::string path, std::shared_ptr<HttpConnection> con) {
	if (_post_handlers.find(path) == _post_handlers.end()) {
		return false;
	}

	_post_handlers[path](con);
	return true;
}
在HttpConnection的HandleReq中添加post请求处理
cpp展开代码void HttpConnection::HandleReq() {
    //省略...
	if (_request.method() == http::verb::post) {
		bool success = LogicSystem::GetInstance()->HandlePost(_request.target(), shared_from_this());
		if (!success) {
			_response.result(http::status::not_found);
			_response.set(http::field::content_type, "text/plain");
			beast::ostream(_response.body()) << "url not found\r\n";
			WriteResponse();
			return;
		}

		_response.result(http::status::ok);
		_response.set(http::field::server, "GateServer");
		WriteResponse();
		return;
	}

}
然后我们启动服务器,然后下载postman,大家可以去官网下载,如果速度慢可以去我的网盘下载 https://pan.baidu.com/s/1DBIf7Y6G3v0XYfW5LyDKMg?pwd=kjxz
提取码:kjxz
打开postman,将请求修改为post
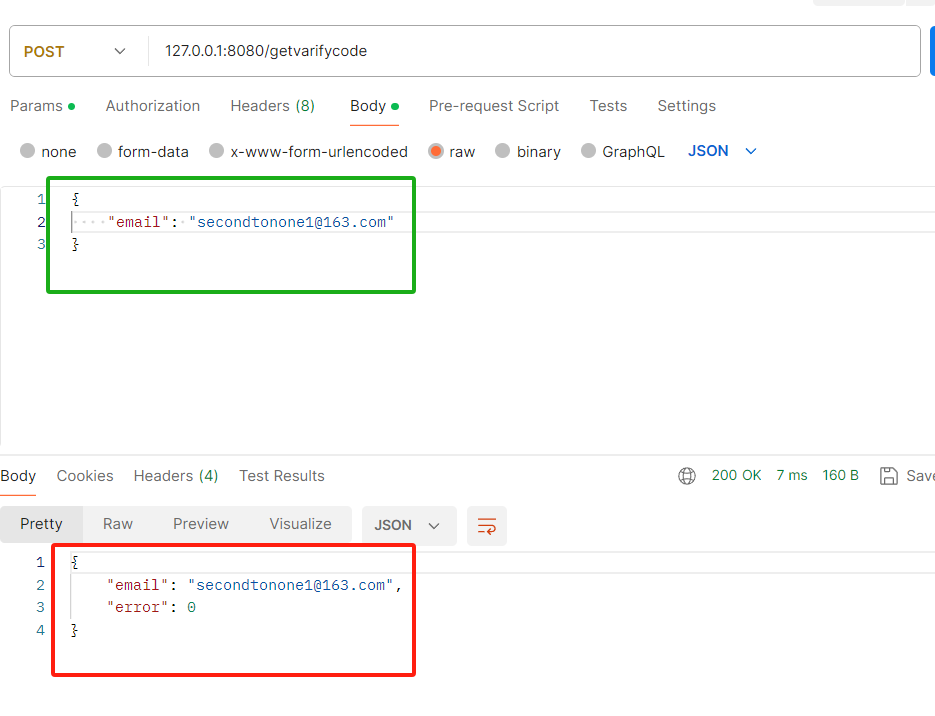
绿色的为post请求的json参数,红色的为服务器返回的json数据包。
我们看服务器打印的日志
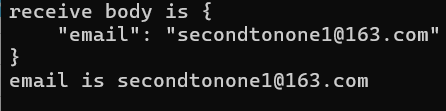
客户端增加post逻辑
我们之前在客户端实现了httpmgr的post请求,在点击获取验证码的槽函数里添加发送http的post请求即可
cpp展开代码void RegisterDialog::on_get_code_clicked()
{
    //验证邮箱的地址正则表达式
    auto email = ui->email_edit->text();
    // 邮箱地址的正则表达式
    QRegularExpression regex(R"((\w+)(\.|_)?(\w*)@(\w+)(\.(\w+))+)");
    bool match = regex.match(email).hasMatch(); // 执行正则表达式匹配
    if(match){
        //发送http请求获取验证码
        QJsonObject json_obj;
        json_obj["email"] = email;
        HttpMgr::GetInstance()->PostHttpReq(QUrl("http://localhost:8080/get_varifycode"),
                     json_obj, ReqId::ID_GET_VARIFY_CODE,Modules::REGISTERMOD);

    }else{
        //提示邮箱不正确
        showTip(tr("邮箱地址不正确"),false);
    }
}
当服务器不启动,客户端输入邮箱,点击获取验证码,客户端会收到网络连接失败的提示
启动服务器后,再次获取验证码,就显示正确提示了,而且客户端输出了服务器回传的邮箱地址email is "secondtonone1@163.com",界面也刷新为正确显示
客户端配置管理
我们发现客户端代码中很多参数都是写死的,最好通过配置文件管理,我们在代码所在目录中新建一个config.ini文件, 内部添加配置
cpp展开代码[GateServer]
host=localhost
port=8080
接着右键项目添加现有文件config.ini即可加入项目中。
因为我们的程序最终会输出的bin目录,所以在pro中添加拷贝脚本将配置也拷贝到bin目录
bash展开代码win32:CONFIG(release, debug | release)
{
    #指定要拷贝的文件目录为工程目录下release目录下的所有dll、lib文件,例如工程目录在D:\QT\Test
    #PWD就为D:/QT/Test,DllFile = D:/QT/Test/release/*.dll
    TargetConfig = $${PWD}/config.ini
    #将输入目录中的"/"替换为"\"
    TargetConfig = $$replace(TargetConfig, /, \\)
    #将输出目录中的"/"替换为"\"
    OutputDir =  $${OUT_PWD}/$${DESTDIR}
    OutputDir = $$replace(OutputDir, /, \\)
    //执行copy命令
    QMAKE_POST_LINK += copy /Y \"$$TargetConfig\" \"$$OutputDir\"
}
global.h中添加声明
cpp展开代码extern QString gate_url_prefix;
在cpp中添加定义
cpp展开代码QString gate_url_prefix = "";
在main函数中添加解析配置的逻辑
cpp展开代码// 获取当前应用程序的路径
QString app_path = QCoreApplication::applicationDirPath();
// 拼接文件名
QString fileName = "config.ini";
QString config_path = QDir::toNativeSeparators(app_path +
                        QDir::separator() + fileName);

QSettings settings(config_path, QSettings::IniFormat);
QString gate_host = settings.value("GateServer/host").toString();
QString gate_port = settings.value("GateServer/port").toString();
gate_url_prefix = "http://"+gate_host+":"+gate_port;
将RegisterDialog发送post请求修改为
cpp展开代码 HttpMgr::GetInstance()->PostHttpReq(QUrl(gate_url_prefix+"/get_varifycode"),
                     json_obj, ReqId::ID_GET_VARIFY_CODE,Modules::REGISTERMOD);
再次测试仍旧可以收到服务器回馈的http包。
这么做的好处就是客户端增加了配置,而且以后修改参数也方便。
day06-windows配置grpc
title: windows配置和编译grpc date: 2023-05-28 13:56:35 categories: [C++] tags: [C++]
grpc简介
gRPC是Google开发的一种高性能、开源的远程过程调用(RPC)框架。它可以让客户端应用程序像调用本地服务一样轻松地调用远程服务,并提供了多种语言的支持,如C++、Java、Python、Go等。
gRPC使用Protocol Buffers作为数据格式,可以在不同的平台上进行应用程序之间的通信,支持多种编程语言和多种操作系统。它采用基于HTTP/2的协议,提供了高效、快速且可扩展的远程调用功能,并带有负载均衡、认证、监控等功能,方便用户管理和维护分布式系统。
gRPC可用于构建各种类型的分布式应用程序,如微服务、云原生应用程序、大规模Web应用程序、移动应用程序等场景。由于其高性能和可扩展性,越来越多的企业和组织开始采用gRPC来构建他们的应用程序和服务。
grpc下载
由于国内环境,grpc下载极其困难,grpc项目在github上,源码地址为https://github.com/grpc/grpc,我们可以通过如下命令克隆grpc源码进行编译
bash展开代码git clone https://github.com/grpc/grpc.git
git submodule update  --init
但是国内网络环境执行submodule update时会失败,所以可以用国内的代码管理工具gitee进行克隆。
注意,目前在Gitee上只能找到gRPC依赖的部分"官方"镜像仓库,网友提供的镜像仓库较旧,因而只能构造v1.34.0版本.通过上述指令可以将v1.34.0版本的gRPC代码下载到grpc目录.
我们选择一个稳定的分支进行克隆
bash展开代码git clone -b v1.34.0 https://gitee.com/mirrors/grpc-framework.git grpc
克隆之后,我们进入grpc文件夹,修改.gitmodules内仓库地址,修改前.gitmodules内容是这样的
cpp展开代码[submodule "third_party/zlib"]
	path = third_party/zlib
	#url = https://github.com/madler/zlib
	url = https://gitee.com/mirrors/zlib.git
	# When using CMake to build, the zlib submodule ends up with a
	# generated file that makes Git consider the submodule dirty. This
	# state can be ignored for day-to-day development on gRPC.
	ignore = dirty
[submodule "third_party/protobuf"]
	path = third_party/protobuf
	#url = https://github.com/google/protobuf.git
	url = https://gitee.com/local-grpc/protobuf.git
[submodule "third_party/googletest"]
	path = third_party/googletest
	#url = https://github.com/google/googletest.git
	url = https://gitee.com/local-grpc/googletest.git
[submodule "third_party/benchmark"]
	path = third_party/benchmark
	#url = https://github.com/google/benchmark
	url = https://gitee.com/mirrors/google-benchmark.git
[submodule "third_party/boringssl-with-bazel"]
	path = third_party/boringssl-with-bazel
	#url = https://github.com/google/boringssl.git
	url = https://gitee.com/mirrors/boringssl.git
[submodule "third_party/re2"]
	path = third_party/re2
	#url = https://github.com/google/re2.git
	url = https://gitee.com/local-grpc/re2.git
[submodule "third_party/cares/cares"]
	path = third_party/cares/cares
	#url = https://github.com/c-ares/c-ares.git
	url = https://gitee.com/mirrors/c-ares.git
	branch = cares-1_12_0
[submodule "third_party/bloaty"]
	path = third_party/bloaty
	#url = https://github.com/google/bloaty.git
	url = https://gitee.com/local-grpc/bloaty.git
[submodule "third_party/abseil-cpp"]
	path = third_party/abseil-cpp
	#url = https://github.com/abseil/abseil-cpp.git
	url = https://gitee.com/mirrors/abseil-cpp.git
	branch = lts_2020_02_25
[submodule "third_party/envoy-api"]
	path = third_party/envoy-api
	#url = https://github.com/envoyproxy/data-plane-api.git
	url = https://gitee.com/local-grpc/data-plane-api.git
[submodule "third_party/googleapis"]
	path = third_party/googleapis
	#url = https://github.com/googleapis/googleapis.git
	url = https://gitee.com/mirrors/googleapis.git
[submodule "third_party/protoc-gen-validate"]
	path = third_party/protoc-gen-validate
	#url = https://github.com/envoyproxy/protoc-gen-validate.git
	url = https://gitee.com/local-grpc/protoc-gen-validate.git
[submodule "third_party/udpa"]
	path = third_party/udpa
	#url = https://github.com/cncf/udpa.git
	url = https://gitee.com/local-grpc/udpa.git
[submodule "third_party/libuv"]
	path = third_party/libuv
	#url = https://github.com/libuv/libuv.git
	url = https://gitee.com/mirrors/libuv.git
gRPC的依赖是通过git的submodules来关联的,代码下载下来之后可以看到.gitmodules文件,内部的git仓库地址都需要替换成Gitee的,例如:
bash展开代码[submodule "third_party/zlib"]
	path = third_party/zlib
	url = https://github.com/madler/zlib
	# When using CMake to build, the zlib submodule ends up with a
	# generated file that makes Git consider the submodule dirty. This
	# state can be ignored for day-to-day development on gRPC.
	ignore = dirty
使用了zlib,在Gitee上搜索其代码仓库为https://gitee.com/mirrors/zlib,可以使用如下指令clone:
bash展开代码git clone https://gitee.com/mirrors/zlib.git
因而替换成:
bash展开代码[submodule "third_party/zlib"]
	path = third_party/zlib
	#url = https://github.com/madler/zlib
	url = https://gitee.com/mirrors/zlib.git
	# When using CMake to build, the zlib submodule ends up with a
	# generated file that makes Git consider the submodule dirty. This
	# state can be ignored for day-to-day development on gRPC.
	ignore = dirty
通过这种方法可以找到部分依赖库的最新镜像仓库,但是有一些找不到最新的,例如protobuf等库,用户local-grpc提供了gRPC依赖的全部代码仓库,可以使用这些仓库(注意代码不是同步镜像,导致gRPC只能构造相应版本),其中protobuf链接为:
bash展开代码https://gitee.com/local-grpc/protobuf.git
这里将.gitmodules修改为如下内容即可:
bash展开代码[submodule "third_party/zlib"]
	path = third_party/zlib
	#url = https://github.com/madler/zlib
	url = https://gitee.com/mirrors/zlib.git
	# When using CMake to build, the zlib submodule ends up with a
	# generated file that makes Git consider the submodule dirty. This
	# state can be ignored for day-to-day development on gRPC.
	ignore = dirty
[submodule "third_party/protobuf"]
	path = third_party/protobuf
	#url = https://github.com/google/protobuf.git
	url = https://gitee.com/local-grpc/protobuf.git
[submodule "third_party/googletest"]
	path = third_party/googletest
	#url = https://github.com/google/googletest.git
	url = https://gitee.com/local-grpc/googletest.git
[submodule "third_party/benchmark"]
	path = third_party/benchmark
	#url = https://github.com/google/benchmark
	url = https://gitee.com/mirrors/google-benchmark.git
[submodule "third_party/boringssl-with-bazel"]
	path = third_party/boringssl-with-bazel
	#url = https://github.com/google/boringssl.git
	url = https://gitee.com/mirrors/boringssl.git
[submodule "third_party/re2"]
	path = third_party/re2
	#url = https://github.com/google/re2.git
	url = https://gitee.com/local-grpc/re2.git
[submodule "third_party/cares/cares"]
	path = third_party/cares/cares
	#url = https://github.com/c-ares/c-ares.git
	url = https://gitee.com/mirrors/c-ares.git
	branch = cares-1_12_0
[submodule "third_party/bloaty"]
	path = third_party/bloaty
	#url = https://github.com/google/bloaty.git
	url = https://gitee.com/local-grpc/bloaty.git
[submodule "third_party/abseil-cpp"]
	path = third_party/abseil-cpp
	#url = https://github.com/abseil/abseil-cpp.git
	url = https://gitee.com/mirrors/abseil-cpp.git
	branch = lts_2020_02_25
[submodule "third_party/envoy-api"]
	path = third_party/envoy-api
	#url = https://github.com/envoyproxy/data-plane-api.git
	url = https://gitee.com/local-grpc/data-plane-api.git
[submodule "third_party/googleapis"]
	path = third_party/googleapis
	#url = https://github.com/googleapis/googleapis.git
	url = https://gitee.com/mirrors/googleapis.git
[submodule "third_party/protoc-gen-validate"]
	path = third_party/protoc-gen-validate
	#url = https://github.com/envoyproxy/protoc-gen-validate.git
	url = https://gitee.com/local-grpc/protoc-gen-validate.git
[submodule "third_party/udpa"]
	path = third_party/udpa
	#url = https://github.com/cncf/udpa.git
	url = https://gitee.com/local-grpc/udpa.git
[submodule "third_party/libuv"]
	path = third_party/libuv
	#url = https://github.com/libuv/libuv.git
	url = https://gitee.com/mirrors/libuv.git
使用如下指令拉取gRPC所有依赖:
bash展开代码cd grpc
git submodule update --init
编译grpc
CMake安装
为了编译grpc,我们需要下载cmake,cmake是一个跨平台编译工具,在之前我们编译protobuf时已经下载过了,这里再次介绍一下 CMake是一个跨平台的开源构建工具,可以用于自动化构建、测试和打包C++代码。与其他构建工具相比,CMake的优点之一是它的配置文件具有可读性和可维护性,而且支持多种编译器、操作系统和构建工具。
我们要在windows上生成protobuf对应的库,就需要用到cmake。 官方下载地址https://cmake.org/download/, 选择Windows Source下载。 由于官方下载较慢,可以去我的网盘下载 https://pan.baidu.com/s/1Yg9Usdc3T-CYhyr9GiePCw?pwd=ng6x
验证码ng6x
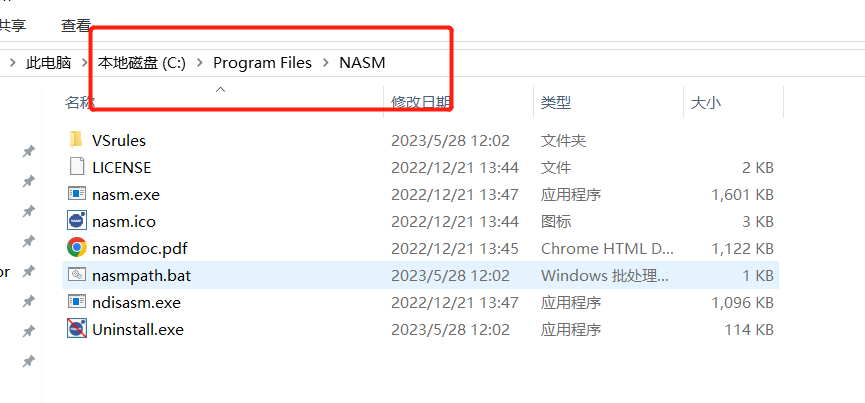
NASM
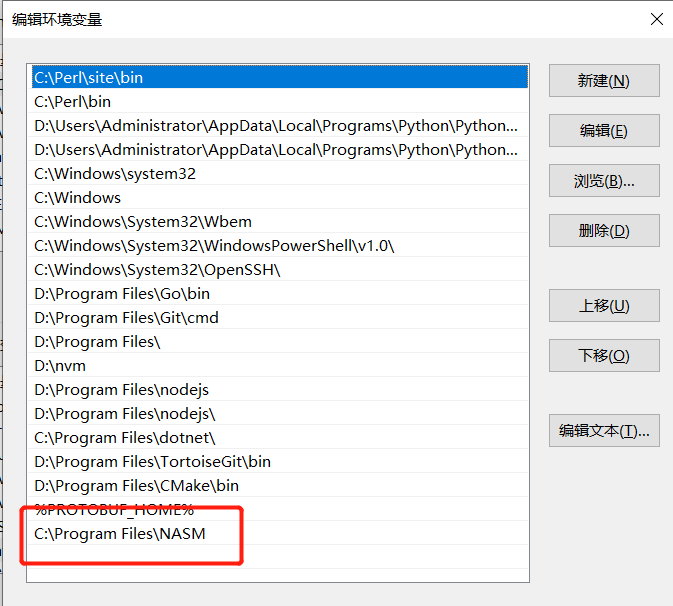
编译grpc需要准备nasm,所以也要下载nasm, 下载地址为https://www.nasm.us/,点击下载指定版本,安装即可,记得安装后把安装的路径配置在环境变量里,我的装载了C盘
 环境变量配置如下
有部分博主说要安装go和perl,我感觉不需要,但是我的电脑里确实有开发环境,这里还是告诉大家如何安装go和Perl
Go安装
windows环境下下载go,地址https://studygolang.com/dl。 选择我们对应系统的安装包下载即可。一路下载安装,最后go会自动写入我们的环境变量。 Linux可以选择手动安装二进制包再配置环境变量。 安装好后,因为go的库包默认在外网,下载很慢,所以要切换代理
bash展开代码go env -w GOPROXY=https://goproxy.cn,direct # 设置代理,国内网络开启
Perl安装
Perl安装可以去官网下载https://www.activestate.com/products/perl/,并按照提示一步步安装,也可以去网盘下载,直接安装,网盘地址https://pan.baidu.com/s/1i3GLKAp
编译grpc
接下来我们需要用CMake编译grpc来生成我们需要的visual studio 项目
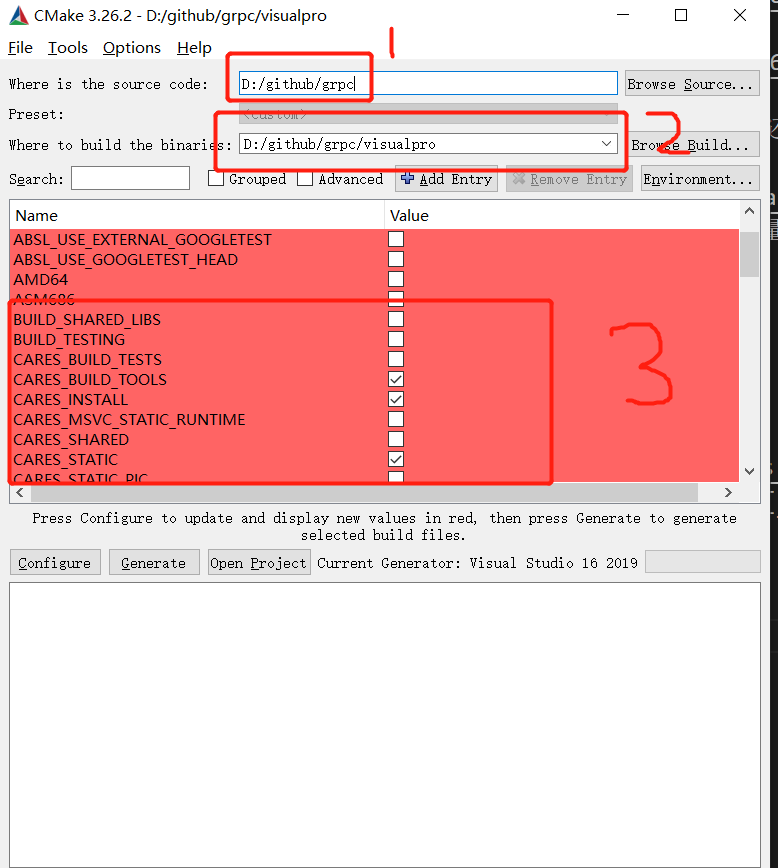
1是grpc源码目录 2是grpc生成的visual studio项目目录 3 是我们要生成哪些项目。
我们先点击啊config进行配置,此时弹出对话框,我的visual studio版本是2019的, 所以我选择编译生成visual studio2019的工程。 接下来点击generate生成项目,大约几分钟可以生成,生成成功后我们点击open project打开工程,此时就是用visual sutido 2019打开grpc工程了。 接下来我们设置编译平台为64位,选择Debug模式,这里大家尽量编译Release版,Release版压缩的更好一点。 选择All项目进行全量编译,编译后就可以在Debug或Release文件夹找到对应生成的库文件和exe了。
总结
本文介绍了windows环境下如何配置grpc项目和编译生成我们需要的库。 如果大家还是不能顺利生成编译所需的库,可以用我的,这个源码在linux和windows都能用,源码包括第三方库都下载好了,网盘地址: https://pan.baidu.com/s/1BBaAZ8-R-GSxxcy2s7TRWA?pwd=ybno 提取码:ybno
day07-visualstudio配置grpc
##属性管理器
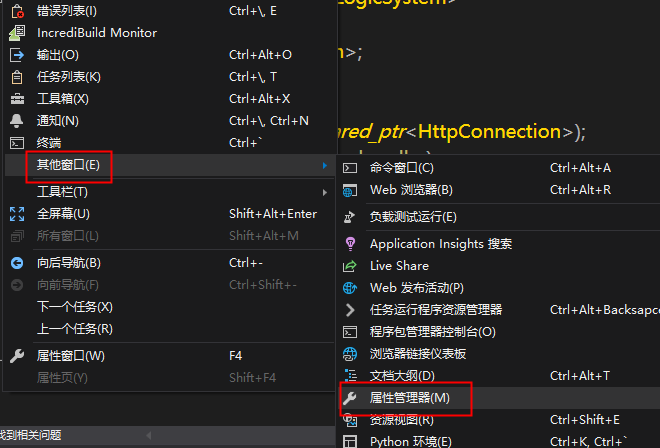
推荐一种可复制配置的方式,视图里选择其他窗口,再选择属性管理器
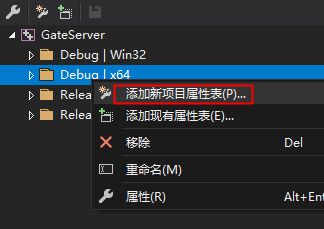
我们选择要配置的类型,我选择Debug 64位的配置,添加新项目属性表
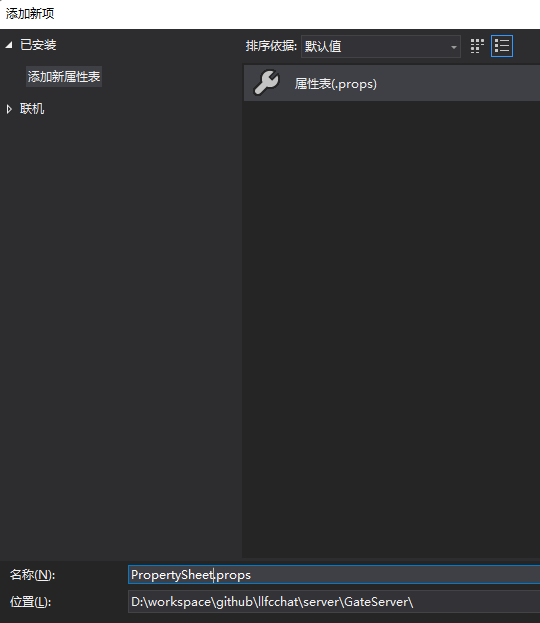
选择创建属性的名字
接下来双击我们创建好的属性文件,将之前配置的boost和jsoncpp库属性移动到这里,把之前在项目中配置的删除。
包含目录
库目录
链接库
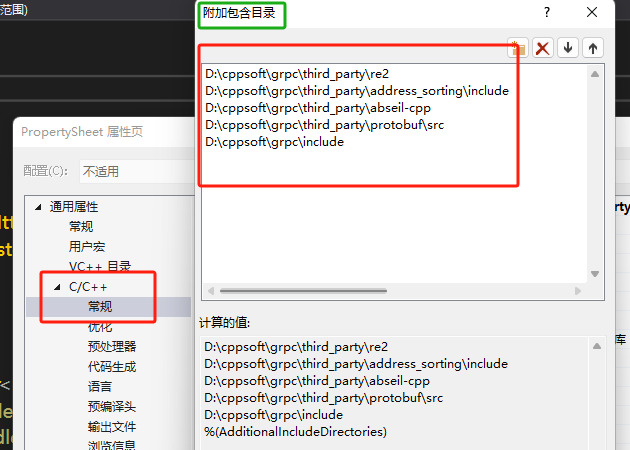
接下来配置grpc头文件包含目录,C++ 常规-> 附加包含目录添加如下
bash展开代码D:\cppsoft\grpc\third_party\re2
D:\cppsoft\grpc\third_party\address_sorting\include
D:\cppsoft\grpc\third_party\abseil-cpp
D:\cppsoft\grpc\third_party\protobuf\src
D:\cppsoft\grpc\include
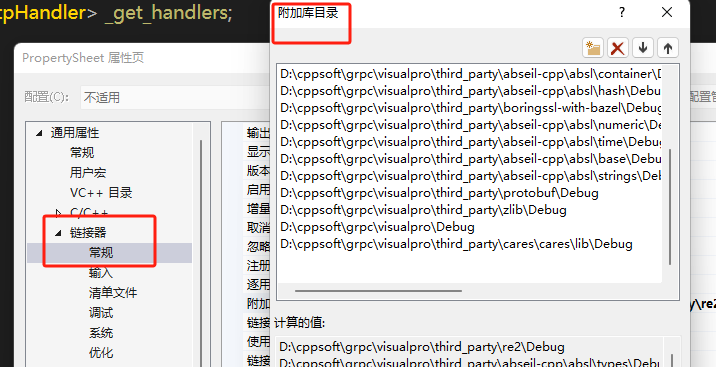
接下来配置库路径, 在链接器常规选项下,点击附加库目录,添加我们需要的库目录
bash展开代码D:\cppsoft\grpc\visualpro\third_party\re2\Debug
D:\cppsoft\grpc\visualpro\third_party\abseil-cpp\absl\types\Debug
D:\cppsoft\grpc\visualpro\third_party\abseil-cpp\absl\synchronization\Debug
D:\cppsoft\grpc\visualpro\third_party\abseil-cpp\absl\status\Debug
D:\cppsoft\grpc\visualpro\third_party\abseil-cpp\absl\random\Debug
D:\cppsoft\grpc\visualpro\third_party\abseil-cpp\absl\flags\Debug
D:\cppsoft\grpc\visualpro\third_party\abseil-cpp\absl\debugging\Debug
D:\cppsoft\grpc\visualpro\third_party\abseil-cpp\absl\container\Debug
D:\cppsoft\grpc\visualpro\third_party\abseil-cpp\absl\hash\Debug
D:\cppsoft\grpc\visualpro\third_party\boringssl-with-bazel\Debug
D:\cppsoft\grpc\visualpro\third_party\abseil-cpp\absl\numeric\Debug
D:\cppsoft\grpc\visualpro\third_party\abseil-cpp\absl\time\Debug
D:\cppsoft\grpc\visualpro\third_party\abseil-cpp\absl\base\Debug
D:\cppsoft\grpc\visualpro\third_party\abseil-cpp\absl\strings\Debug
D:\cppsoft\grpc\visualpro\third_party\protobuf\Debug
D:\cppsoft\grpc\visualpro\third_party\zlib\Debug
D:\cppsoft\grpc\visualpro\Debug
D:\cppsoft\grpc\visualpro\third_party\cares\cares\lib\Debug
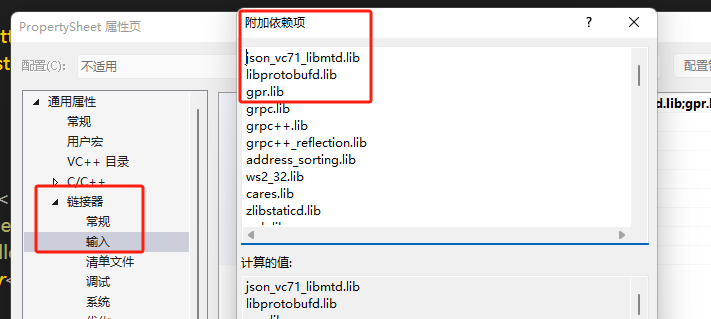
在链接器->输入->附加依赖项中添加
bash展开代码libprotobufd.lib
gpr.lib
grpc.lib
grpc++.lib
grpc++_reflection.lib
address_sorting.lib
ws2_32.lib
cares.lib
zlibstaticd.lib
upb.lib
ssl.lib
crypto.lib
absl_bad_any_cast_impl.lib
absl_bad_optional_access.lib
absl_bad_variant_access.lib
absl_base.lib
absl_city.lib
absl_civil_time.lib
absl_cord.lib
absl_debugging_internal.lib
absl_demangle_internal.lib
absl_examine_stack.lib
absl_exponential_biased.lib
absl_failure_signal_handler.lib
absl_flags.lib
absl_flags_config.lib
absl_flags_internal.lib
absl_flags_marshalling.lib
absl_flags_parse.lib
absl_flags_program_name.lib
absl_flags_usage.lib
absl_flags_usage_internal.lib
absl_graphcycles_internal.lib
absl_hash.lib
absl_hashtablez_sampler.lib
absl_int128.lib
absl_leak_check.lib
absl_leak_check_disable.lib
absl_log_severity.lib
absl_malloc_internal.lib
absl_periodic_sampler.lib
absl_random_distributions.lib
absl_random_internal_distribution_test_util.lib
absl_random_internal_pool_urbg.lib
absl_random_internal_randen.lib
absl_random_internal_randen_hwaes.lib
absl_random_internal_randen_hwaes_impl.lib
absl_random_internal_randen_slow.lib
absl_random_internal_seed_material.lib
absl_random_seed_gen_exception.lib
absl_random_seed_sequences.lib
absl_raw_hash_set.lib
absl_raw_logging_internal.lib
absl_scoped_set_env.lib
absl_spinlock_wait.lib
absl_stacktrace.lib
absl_status.lib
absl_strings.lib
absl_strings_internal.lib
absl_str_format_internal.lib
absl_symbolize.lib
absl_synchronization.lib
absl_throw_delegate.lib
absl_time.lib
absl_time_zone.lib
absl_statusor.lib
re2.lib
之后点击保存会看到项目目录下生成了PropertySheet.props文件
proto文件编写
在项目的根目录下创建一个proto名字为message.proto
bash展开代码syntax = "proto3";

package message;

service VarifyService {
  rpc GetVarifyCode (GetVarifyReq) returns (GetVarifyRsp) {}
}

message GetVarifyReq {
  string email = 1;
}

message GetVarifyRsp {
  int32 error = 1;
  string email = 2;
  string code = 3;
}
接下来我们利用grpc编译后生成的proc.exe生成proto的grpc的头文件和源文件
bash展开代码D:\cppsoft\grpc\visualpro\third_party\protobuf\Debug\protoc.exe -I="." --grpc_out="." --plugin=protoc-gen-grpc="D:\cppsoft\grpc\visualpro\Debug\grpc_cpp_plugin.exe" "message.proto"
上述命令会生成message.grpc.pb.h和message.grpc.pb.cc文件。
接下来我们生成用于序列化和反序列化的pb文件
bash展开代码D:\cppsoft\grpc\visualpro\third_party\protobuf\Debug\protoc.exe --cpp_out=. "message.proto"
上述命令会生成message.pb.h和message.pb.cc文件
接下来我们将这些pb.h和pb.cc放入项目中
我们新建一个VarifyGrpcClient类,vs帮我们自动生成头文件和源文件,我们在头文件添加Grpc客户端类
cpp展开代码#include <grpcpp/grpcpp.h>
#include "message.grpc.pb.h"
#include "const.h"
#include "Singleton.h"
using grpc::Channel;
using grpc::Status;
using grpc::ClientContext;

using message::GetVarifyReq;
using message::GetVarifyRsp;
using message::VarifyService;

class VerifyGrpcClient:public Singleton<VerifyGrpcClient>
{
	friend class Singleton<VerifyGrpcClient>;
public:

	GetVarifyRsp GetVarifyCode(std::string email) {
		ClientContext context;
		GetVarifyRsp reply;
		GetVarifyReq request;
		request.set_email(email);

		Status status = stub_->GetVarifyCode(&context, request, &reply);

		if (status.ok()) {

			return reply;
		}
		else {
			reply.set_error(ErrorCodes::RPCFailed);
			return reply;
		}
	}

private:
	VerifyGrpcClient() {
		std::shared_ptr<Channel> channel = grpc::CreateChannel("127.0.0.1:50051", grpc::InsecureChannelCredentials());
		stub_ = VarifyService::NewStub(channel);
	}

	std::unique_ptr<VarifyService::Stub> stub_;
};
我们在之前收到post请求获取验证码的逻辑里添加处理
cpp展开代码RegPost("/get_varifycode", [](std::shared_ptr<HttpConnection> connection) {
	auto body_str = boost::beast::buffers_to_string(connection->_request.body().data());
	std::cout << "receive body is " << body_str << std::endl;
	connection->_response.set(http::field::content_type, "text/json");
	Json::Value root;
	Json::Reader reader;
	Json::Value src_root;
	bool parse_success = reader.parse(body_str, src_root);
	if (!parse_success) {
		std::cout << "Failed to parse JSON data!" << std::endl;
		root["error"] = ErrorCodes::Error_Json;
		std::string jsonstr = root.toStyledString();
		beast::ostream(connection->_response.body()) << jsonstr;
		return true;
	}

	auto email = src_root["email"].asString();
	GetVarifyRsp rsp = VerifyGrpcClient::GetInstance()->GetVarifyCode(email);
	cout << "email is " << email << endl;
	root["error"] = rsp.error();
	root["email"] = src_root["email"];
	std::string jsonstr = root.toStyledString();
	beast::ostream(connection->_response.body()) << jsonstr;
	return true;
});
服务器读取配置
我们很多参数都是写死的,现通过配置文件读取以方便以后修改 在项目中添加config.ini文件
bash展开代码[GateServer]
Port = 8080
[VarifyServer]
Port = 50051
添加ConfigMgr类用来读取和管理配置, 定义一个SectionInfo类管理key和value
cpp展开代码struct SectionInfo {
	SectionInfo(){}
	~SectionInfo(){
		_section_datas.clear();
	}

	SectionInfo(const SectionInfo& src) {
		_section_datas = src._section_datas;
	}

	SectionInfo& operator = (const SectionInfo& src) {
		if (&src == this) {
			return *this;
		}

		this->_section_datas = src._section_datas;
	}

	std::map<std::string, std::string> _section_datas;
	std::string  operator[](const std::string  &key) {
		if (_section_datas.find(key) == _section_datas.end()) {
			return "";
		}
		// 这里可以添加一些边界检查
		return _section_datas[key];
	}
};
定义ComigMgr管理section和其包含的key与value
cpp展开代码class ConfigMgr
{
public:
	~ConfigMgr() {
		_config_map.clear();
	}
	SectionInfo operator[](const std::string& section) {
		if (_config_map.find(section) == _config_map.end()) {
			return SectionInfo();
		}
		return _config_map[section];
	}


	ConfigMgr& operator=(const ConfigMgr& src) {
		if (&src == this) {
			return *this;
		}

		this->_config_map = src._config_map;
	};

	ConfigMgr(const ConfigMgr& src) {
		this->_config_map = src._config_map;
	}

	ConfigMgr();
private:

	// 存储section和key-value对的map
	std::map<std::string, SectionInfo> _config_map;
};
构造函数里实现config读取
cpp展开代码ConfigMgr::ConfigMgr(){
	// 获取当前工作目录
	boost::filesystem::path current_path = boost::filesystem::current_path();
	// 构建config.ini文件的完整路径
	boost::filesystem::path config_path = current_path / "config.ini";
	std::cout << "Config path: " << config_path << std::endl;

	// 使用Boost.PropertyTree来读取INI文件
	boost::property_tree::ptree pt;
	boost::property_tree::read_ini(config_path.string(), pt);


	// 遍历INI文件中的所有section
	for (const auto& section_pair : pt) {
		const std::string& section_name = section_pair.first;
		const boost::property_tree::ptree& section_tree = section_pair.second;

		// 对于每个section,遍历其所有的key-value对
		std::map<std::string, std::string> section_config;
		for (const auto& key_value_pair : section_tree) {
			const std::string& key = key_value_pair.first;
			const std::string& value = key_value_pair.second.get_value<std::string>();
			section_config[key] = value;
		}
		SectionInfo sectionInfo;
		sectionInfo._section_datas = section_config;
		// 将section的key-value对保存到config_map中
		_config_map[section_name] = sectionInfo;
	}

	// 输出所有的section和key-value对
	for (const auto& section_entry : _config_map) {
		const std::string& section_name = section_entry.first;
		SectionInfo section_config = section_entry.second;
		std::cout << "[" << section_name << "]" << std::endl;
		for (const auto& key_value_pair : section_config._section_datas) {
			std::cout << key_value_pair.first << "=" << key_value_pair.second << std::endl;
		}
	}

}
在const.h里声明一个全局变量
cpp展开代码class ConfigMgr;
extern ConfigMgr gCfgMgr;
接下来在main函数中将8080端口改为从配置读取
cpp展开代码ConfigMgr gCfgMgr;
std::string gate_port_str = gCfgMgr["GateServer"]["Port"];
unsigned short gate_port = atoi(gate_port_str.c_str());
其他地方想要获取配置信息就不需要定义了,直接包含const.h并且使用gCfgMgr即可。
总结
本节基于visual studio配置grpc,并实现了grpc客户端发送请求的逻辑。下一节实现 grpc server
day08-邮箱认证服务
认证服务
我们的认证服务要给邮箱发送验证码,所以用nodejs较为合适,nodejs是一门IO效率很高而且生态完善的语言,用到发送邮件的库也方便。
nodejs可以去官网下载https://nodejs.org/en,一路安装就可以了
我们新建VarifyServer文件夹,在文件夹内部初始化server要用到的nodejs库的配置文件
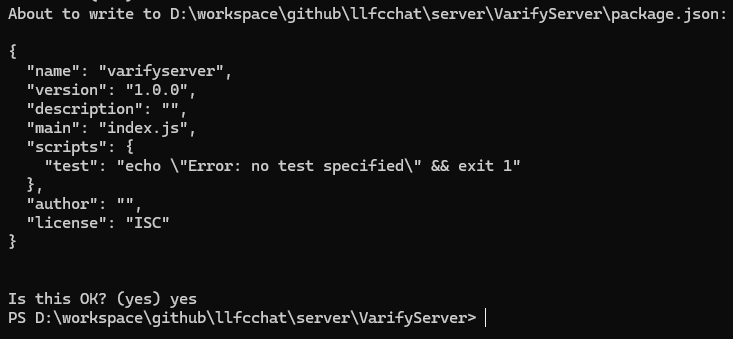
bash展开代码npm init
根据提示同意会创建一个package.json文件
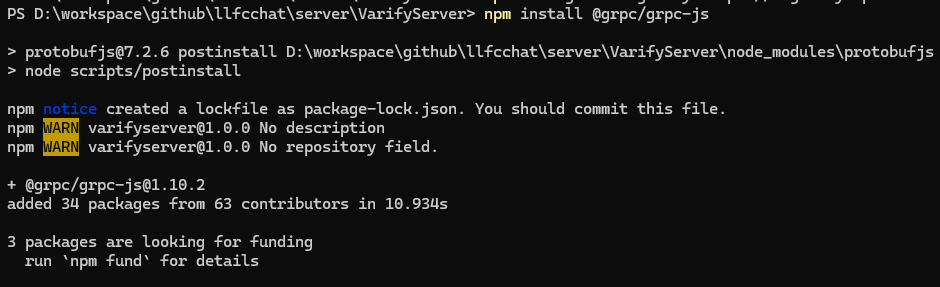
接下来安装grpc-js包,也可以安装grpc,grpc是C++版本,grpc-js是js版本,C++版本停止维护了。所以用grpc-js版本。
安装过程出现了错误,因为淘宝镜像地址过期了
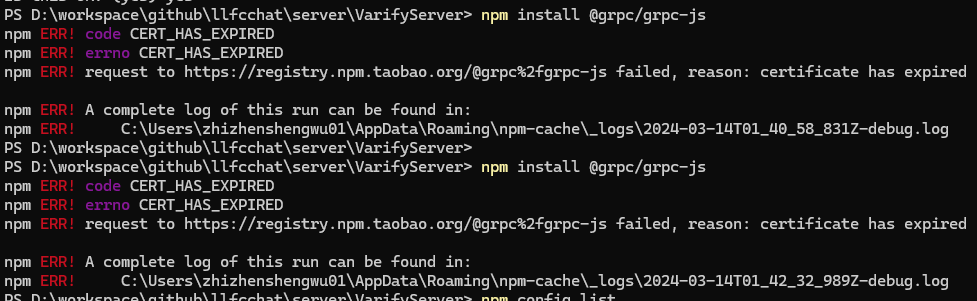
清除之前npm镜像地址
bash展开代码npm cache clean --force
重新设置新的淘宝镜像
bash展开代码npm config set registry https://registry.npmmirror.com
接着下载grpc-js就成功了
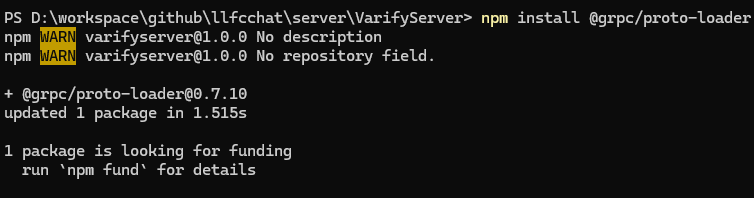
接着安装proto-loader用来动态解析proto文件
bash展开代码npm install @grpc/proto-loader
我们再安装email处理的库
js展开代码npm install nodemailer
我们将proto文件放入VarifyServer文件夹,并且新建一个proto.js用来解析proto文件
js展开代码const path = require('path')
const grpc = require('@grpc/grpc-js')
const protoLoader = require('@grpc/proto-loader')

const PROTO_PATH = path.join(__dirname, 'message.proto')
const packageDefinition = protoLoader.loadSync(PROTO_PATH, { keepCase: true, longs: String, enums: String, defaults: true, oneofs: true })
const protoDescriptor = grpc.loadPackageDefinition(packageDefinition)

const message_proto = protoDescriptor.message

module.exports = message_proto
keepCase: 如果为 true,则保留字段名的原始大小写。如果为 false,则将所有字段名转换为驼峰命名法。
longs: 控制如何表示 Protocol Buffers 中的 long 类型。如果设置为 String,则长整数会被转换为字符串,以避免 JavaScript 中的整数溢出问题。
enums: 控制如何表示 Protocol Buffers 中的枚举类型。如果设置为 String,则枚举值会被转换为字符串。
defaults: 如果为 true,则为未明确设置的字段提供默认值。
oneofs: 如果为 true,则支持 Protocol Buffers 中的 oneof 特性。
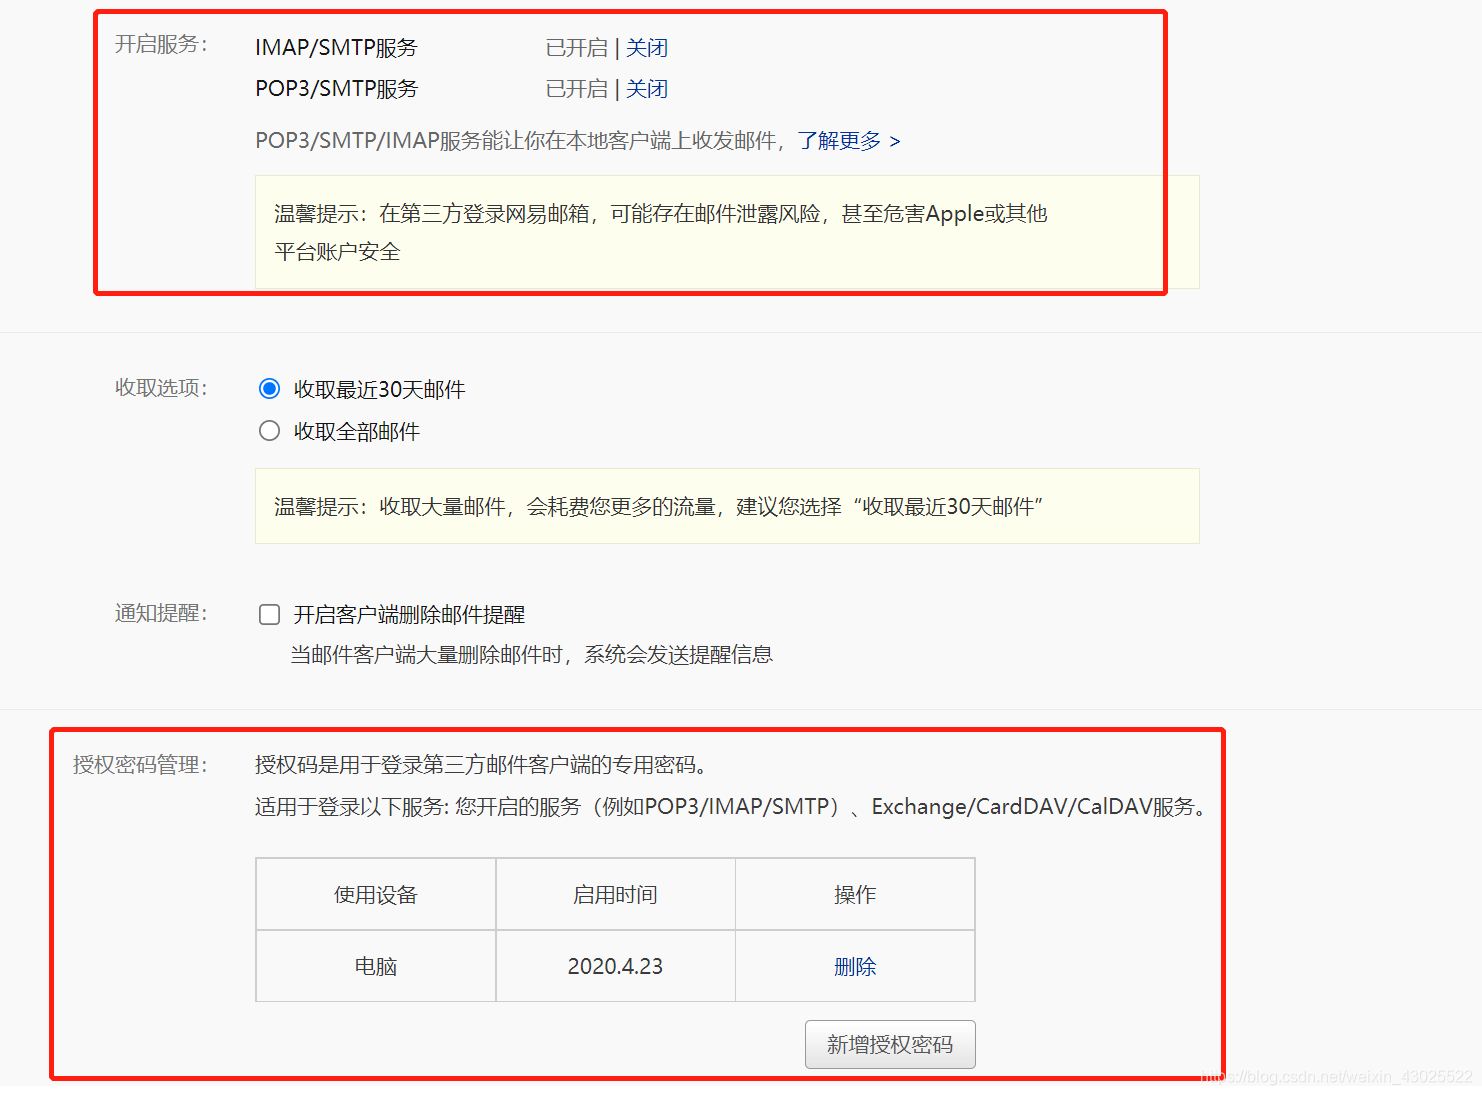
在写代码发送邮件之前,我们先去邮箱开启smtp服务。我用的163邮箱,在邮箱设置中查找smtp服务器地址,需要开启smtp服务。这个是固定的,不需要修改。
网易163邮箱的 SMTP 服务器地址为: smtp.163.com
发送邮件,建议使用授权码(有的邮箱叫 独立密码),确保邮箱密码的安全性。授权码在邮箱设置中进行设置。如果开启了授权码,发送邮件的时候,必须使用授权码。
这里设置开启smtp服务和授权码。我这里已经是设置好的。

新增一个授权码用于发邮件
读取配置
因为我们要实现参数可配置,所以要读取配置,先在文件夹内创建一个config.json文件
js展开代码{
    "email": {
      "user": "secondtonone1@163.com",
      "pass": "CRWTAZOSNCWDDQQTllfc"
    },
}
user是我们得邮箱地址,pass是邮箱得授权码,只有有了授权码才能用代码发邮件。大家记得把授权码改为你们自己的,否则用我的无法发送成功。
另外我们也要用到一些常量和全局得变量,所以我们定义一个const.js
js展开代码let code_prefix = "code_";

const Errors = {
    Success : 0,
    RedisErr : 1,
    Exception : 2,
};


module.exports = {code_prefix,Errors}
新建config.js用来读取配置
js展开代码const fs = require('fs');

let config = JSON.parse(fs.readFileSync('config.json', 'utf8'));
let email_user = config.email.user;
let email_pass = config.email.pass;
let mysql_host = config.mysql.host;
let mysql_port = config.mysql.port;
let redis_host = config.redis.host;
let redis_port = config.redis.port;
let redis_passwd = config.redis.passwd;
let code_prefix = "code_";


module.exports = {email_pass, email_user, mysql_host, mysql_port,redis_host, redis_port, redis_passwd, code_prefix}
接下来封装发邮件的模块,新建一个email.js文件
js展开代码const nodemailer = require('nodemailer');
const config_module = require("./config")

/**
 * 创建发送邮件的代理
 */
let transport = nodemailer.createTransport({
    host: 'smtp.163.com',
    port: 465,
    secure: true,
    auth: {
        user: config_module.email_user, // 发送方邮箱地址
        pass: config_module.email_pass // 邮箱授权码或者密码
    }
});
接下来实现发邮件函数
js展开代码/**
 * 发送邮件的函数
 * @param {*} mailOptions_ 发送邮件的参数
 * @returns
 */
function SendMail(mailOptions_){
    return new Promise(function(resolve, reject){
        transport.sendMail(mailOptions_, function(error, info){
            if (error) {
                console.log(error);
                reject(error);
            } else {
                console.log('邮件已成功发送:' + info.response);
                resolve(info.response)
            }
        });
    })

}

module.exports.SendMail = SendMail
因为transport.SendMail相当于一个异步函数,调用该函数后发送的结果是通过回调函数通知的,所以我们没办法同步使用,需要用Promise封装这个调用,抛出Promise给外部,那么外部就可以通过await或者then catch的方式处理了。
我们新建server.js,用来启动grpc server
cpp展开代码async function GetVarifyCode(call, callback) {
    console.log("email is ", call.request.email)
    try{
        uniqueId = uuidv4();
        console.log("uniqueId is ", uniqueId)
        let text_str =  '您的验证码为'+ uniqueId +'请三分钟内完成注册'
        //发送邮件
        let mailOptions = {
            from: 'secondtonone1@163.com',
            to: call.request.email,
            subject: '验证码',
            text: text_str,
        };

        let send_res = await emailModule.SendMail(mailOptions);
        console.log("send res is ", send_res)

        callback(null, { email:  call.request.email,
            error:const_module.Errors.Success
        });


    }catch(error){
        console.log("catch error is ", error)

        callback(null, { email:  call.request.email,
            error:const_module.Errors.Exception
        });
    }

}

function main() {
    var server = new grpc.Server()
    server.addService(message_proto.VarifyService.service, { GetVarifyCode: GetVarifyCode })
    server.bindAsync('0.0.0.0:50051', grpc.ServerCredentials.createInsecure(), () => {
        server.start()
        console.log('grpc server started')
    })
}

main()
GetVarifyCode声明为async是为了能在内部调用await。
提升GateServer并发
添加ASIO IOContext Pool 结构,让多个iocontext跑在不同的线程中
cpp展开代码#include <vector>
#include <boost/asio.hpp>
#include "Singleton.h"
class AsioIOServicePool:public Singleton<AsioIOServicePool>
{
	friend Singleton<AsioIOServicePool>;
public:
	using IOService = boost::asio::io_context;
	using Work = boost::asio::io_context::work;
	using WorkPtr = std::unique_ptr<Work>;
	~AsioIOServicePool();
	AsioIOServicePool(const AsioIOServicePool&) = delete;
	AsioIOServicePool& operator=(const AsioIOServicePool&) = delete;
	// 使用 round-robin 的方式返回一个 io_service
	boost::asio::io_context& GetIOService();
	void Stop();
private:
	AsioIOServicePool(std::size_t size = 2/*std::thread::hardware_concurrency()*/);
	std::vector<IOService> _ioServices;
	std::vector<WorkPtr> _works;
	std::vector<std::thread> _threads;
	std::size_t                        _nextIOService;
};
实现
cpp展开代码#include "AsioIOServicePool.h"
#include <iostream>
using namespace std;
AsioIOServicePool::AsioIOServicePool(std::size_t size):_ioServices(size),
_works(size), _nextIOService(0){
	for (std::size_t i = 0; i < size; ++i) {
		_works[i] = std::unique_ptr<Work>(new Work(_ioServices[i]));
	}

	//遍历多个ioservice,创建多个线程,每个线程内部启动ioservice
	for (std::size_t i = 0; i < _ioServices.size(); ++i) {
		_threads.emplace_back([this, i]() {
			_ioServices[i].run();
			});
	}
}

AsioIOServicePool::~AsioIOServicePool() {
	Stop();
	std::cout << "AsioIOServicePool destruct" << endl;
}

boost::asio::io_context& AsioIOServicePool::GetIOService() {
	auto& service = _ioServices[_nextIOService++];
	if (_nextIOService == _ioServices.size()) {
		_nextIOService = 0;
	}
	return service;
}

void AsioIOServicePool::Stop(){
	//因为仅仅执行work.reset并不能让iocontext从run的状态中退出
	//当iocontext已经绑定了读或写的监听事件后,还需要手动stop该服务。
	for (auto& work : _works) {
		//把服务先停止
		work->get_io_context().stop();
		work.reset();
	}

	for (auto& t : _threads) {
		t.join();
	}
}
修改CServer处Start逻辑, 改为每次从IOServicePool连接池中获取连接
cpp展开代码void CServer::Start()
{
	auto self = shared_from_this();
	auto& io_context = AsioIOServicePool::GetInstance()->GetIOService();
	std::shared_ptr<HttpConnection> new_con = std::make_shared<HttpConnection>(io_context);
	_acceptor.async_accept(new_con->GetSocket(), [self, new_con](beast::error_code ec) {
		try {
			//出错则放弃这个连接,继续监听新链接
			if (ec) {
				self->Start();
				return;
			}

			//处理新链接,创建HpptConnection类管理新连接
			new_con->Start();
			//继续监听
			self->Start();
		}
		catch (std::exception& exp) {
			std::cout << "exception is " << exp.what() << std::endl;
			self->Start();
		}
	});
}
为了方便读取配置文件,将ConfigMgr改为单例, 将构造函数变成私有,添加Inst函数
cpp展开代码static ConfigMgr& Inst() {
    static ConfigMgr cfg_mgr;
    return cfg_mgr;
}
VerifyGrpcClient.cpp中添加
cpp展开代码class RPConPool {
public:
	RPConPool(size_t poolSize, std::string host, std::string port)
		: poolSize_(poolSize), host_(host), port_(port), b_stop_(false) {
		for (size_t i = 0; i < poolSize_; ++i) {

			std::shared_ptr<Channel> channel = grpc::CreateChannel(host+":"+port,
				grpc::InsecureChannelCredentials());

			connections_.push(VarifyService::NewStub(channel));
		}
	}

	~RPConPool() {
		std::lock_guard<std::mutex> lock(mutex_);
		Close();
		while (!connections_.empty()) {
			connections_.pop();
		}
	}

	std::unique_ptr<VarifyService::Stub> getConnection() {
		std::unique_lock<std::mutex> lock(mutex_);
		cond_.wait(lock, [this] {
			if (b_stop_) {
				return true;
			}
			return !connections_.empty();
			});
		//如果停止则直接返回空指针
		if (b_stop_) {
			return  nullptr;
		}
		auto context = std::move(connections_.front());
		connections_.pop();
		return context;
	}

	void returnConnection(std::unique_ptr<VarifyService::Stub> context) {
		std::lock_guard<std::mutex> lock(mutex_);
		if (b_stop_) {
			return;
		}
		connections_.push(std::move(context));
		cond_.notify_one();
	}

	void Close() {
		b_stop_ = true;
		cond_.notify_all();
	}

private:
	atomic<bool> b_stop_;
	size_t poolSize_;
	std::string host_;
	std::string port_;
	std::queue<std::unique_ptr<VarifyService::Stub>> connections_;
	std::mutex mutex_;
	std::condition_variable cond_;
};
我们在VerifyGrpcClient类中添加成员
cpp展开代码std::unique_ptr<RPConPool> pool_;
修改构造函数
cpp展开代码VerifyGrpcClient::VerifyGrpcClient() {
	auto& gCfgMgr = ConfigMgr::Inst();
	std::string host = gCfgMgr["VarifyServer"]["Host"];
	std::string port = gCfgMgr["VarifyServer"]["Port"];
	pool_.reset(new RPConPool(5, host, port));
}
当我们想连接grpc server端时,可以通过池子获取连接,用完之后再返回连接给池子
cpp展开代码GetVarifyRsp GetVarifyCode(std::string email) {
    ClientContext context;
    GetVarifyRsp reply;
    GetVarifyReq request;
    request.set_email(email);
    auto stub = pool_->getConnection();
    Status status = stub->GetVarifyCode(&context, request, &reply);

    if (status.ok()) {
        pool_->returnConnection(std::move(stub));
        return reply;
    }
    else {
        pool_->returnConnection(std::move(stub));
        reply.set_error(ErrorCodes::RPCFailed);
        return reply;
    }
}
总结
到本节为止我们完成nodejs搭建的grpc server, 修改package.json中的脚本
cpp展开代码  "scripts": {
    "serve": "node server.js"
  },
接着命令行执行 npm run serve即可启动grpc 服务。
day09-redis服务搭建
邮箱验证服务联调
我们启动GateServer和VarifyServer
我们启动客户端,点击注册按钮进入注册界面,输入邮箱并且点击获取验证码
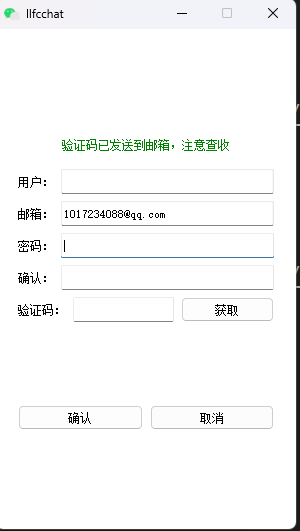
GateServer收到Client发送的请求后,会调用grpc 服务 访问VarifyServer,VarifyServer会随机生成验证码,并且调用邮箱模块发送邮件给指定邮箱。而且把发送的结果给GateServer,GateServer再将消息回传给客户端。
设置验证码过期
我们的验证码是要设置过期的,可以用redis管理过期的验证码自动删除,key为邮箱,value为验证码,过期时间为3min。
windows 安装redis服务
windows 版本下载地址:
https://github.com/tporadowski/redis/releases
下载速度慢可以去我的网盘
链接: https://pan.baidu.com/s/1v_foHZLvBeJQMePSGnp4Ow?pwd=yid3 提取码: yid3
下载完成后解压
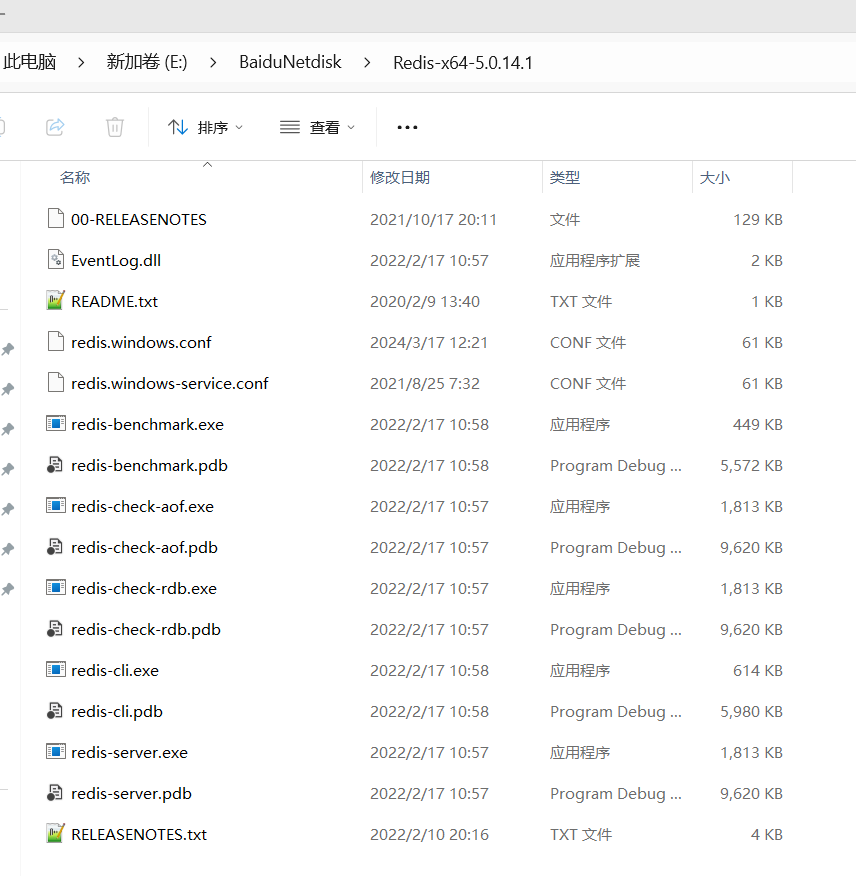
修改redis.windows.conf, 并且修改端口
cpp展开代码port 6380
找到requirepass foobared,下面添加requirepass
cpp展开代码# requirepass foobared
requirepass 123456
启动redis 服务器 .\redis-server.exe .\redis.windows.conf
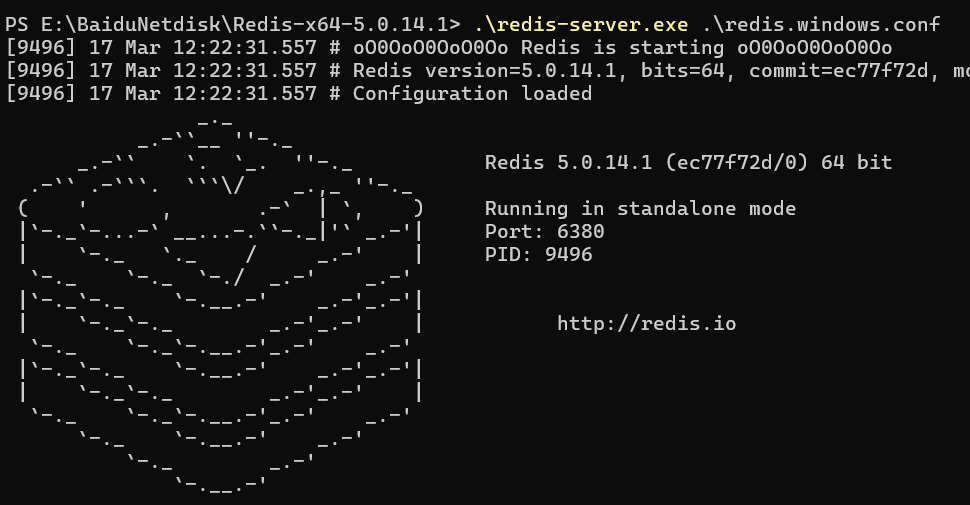
启动客户端 .\redis-cli.exe -p 6380, 输入密码登录成功

Linux 安装redis服务
Linux安装容器后,直接用容器启动redis
bash展开代码docker run -d --name llfc-redis -p 6380:6379 redis --requirepass "123456"
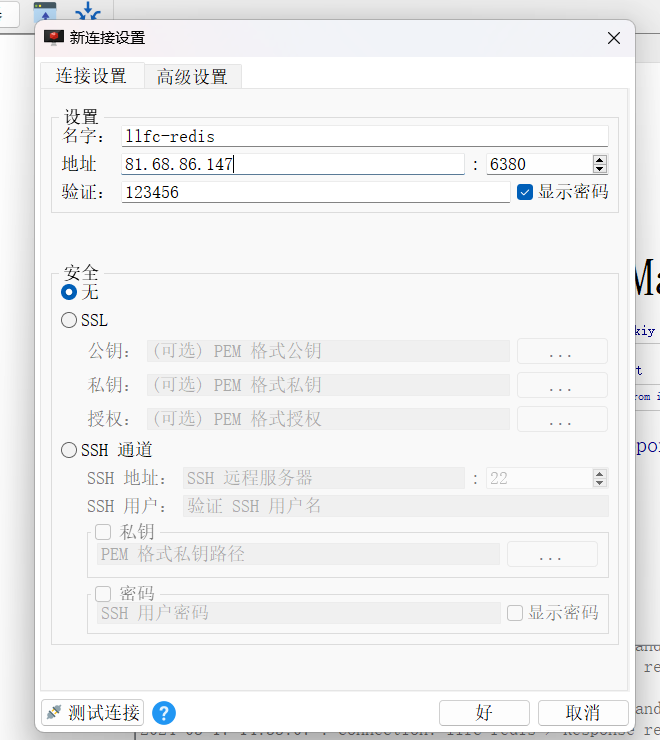
为了方便测试能否链接以及以后查看数据,大家可以下载redis desktop manager
官网链接 redisdesktop.com/
下载速度慢可以去我的网盘
链接: https://pan.baidu.com/s/1v_foHZLvBeJQMePSGnp4Ow?pwd=yid3 提取码: yid3
下载后安装
设置好ip和密码,点击测试连接连通就成功了
widows编译和配置redis
Linux的redis库直接编译安装即可,windows反而麻烦一些,我们先阐述windows环境如何配置redis库, C++ 的redis库有很多种,最常用的有hredis和redis-plus-plus. 我们用redis-plus-plus. 这里介绍一种简单的安装方式---vcpkg
先安装vcpkg, 源码地址
https://github.com/microsoft/vcpkg/releases
下载源码后
windows版本redis下载地址
https://github.com/microsoftarchive/redis
因为是源码,所以进入msvc目录
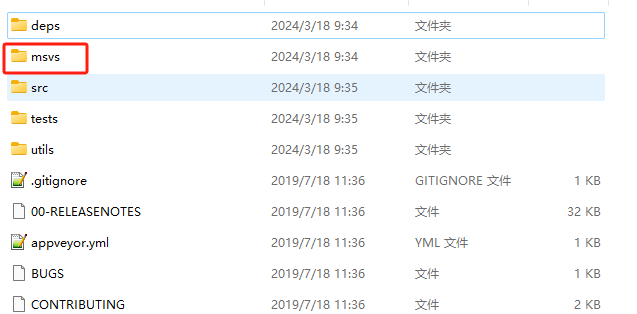
用visual studio打开sln文件,弹出升级窗口, 我的是vs2019所以升级到142
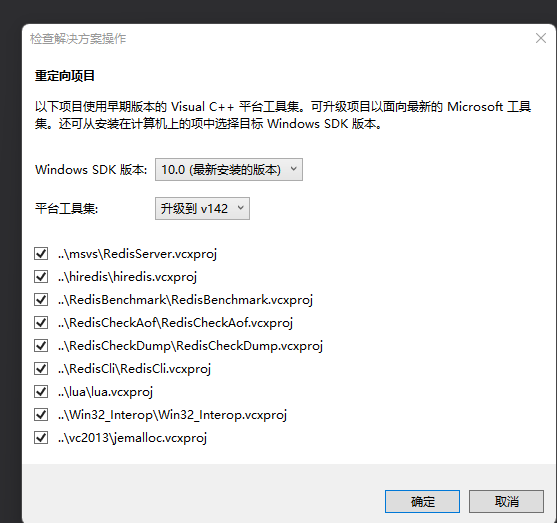
只需要生成hiredis工程和Win32_Interop工程即可,分别点击生成,生成hiredis.lib和Win32_Interop.lib即可
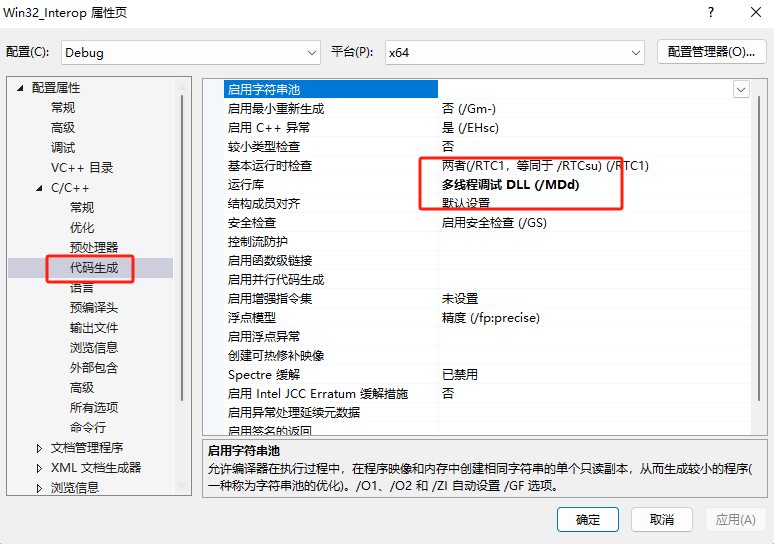
右键两个工程的属性,代码生成里选择运行时库加载模式为MDD(Debug模式动态运行加载),为了兼容我们其他的库,其他的库也是MDD模式
编译Win32_Interop.lib时报错, system_error不是std成员,
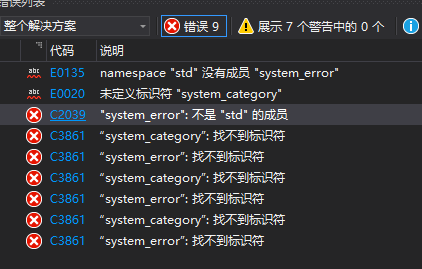
解决办法为在Win32_variadicFunctor.cpp和Win32_FDAPI.cpp添加
#include <system_error>,再右键生成成功
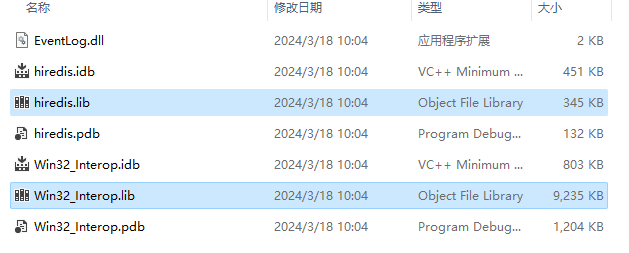
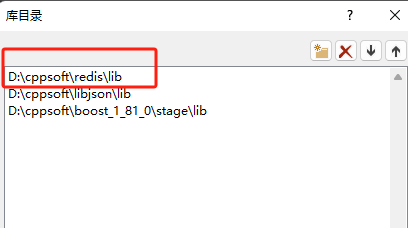
将hiredis.lib和Win32_Interop.lib拷贝到D:\cppsoft\reids\lib
将redis-3.0\deps和redis-3.0\src文件夹拷贝到D:\cppsoft\reids
然后我们在visual studio中配置VC++ 包含目录

配置VC++库目录
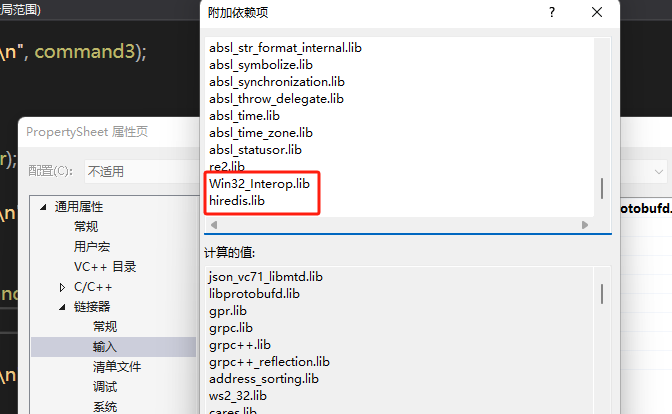
然后在链接器->输入->附加依赖项中添加
代码测试
我们需要写代码测试库配置的情况
cpp展开代码void TestRedis() {
	//连接redis 需要启动才可以进行连接
//redis默认监听端口为6387 可以再配置文件中修改
	redisContext* c = redisConnect("127.0.0.1", 6380);
	if (c->err)
	{
		printf("Connect to redisServer faile:%s\n", c->errstr);
		redisFree(c);        return;
	}
	printf("Connect to redisServer Success\n");

	std::string redis_password = "123456";
	redisReply* r = (redisReply*)redisCommand(c, "AUTH %s", redis_password);
	 if (r->type == REDIS_REPLY_ERROR) {
		 printf("Redis认证失败!\n");
	}else {
		printf("Redis认证成功!\n");
		 }

	//为redis设置key
	const char* command1 = "set stest1 value1";

	//执行redis命令行
    r = (redisReply*)redisCommand(c, command1);

	//如果返回NULL则说明执行失败
	if (NULL == r)
	{
		printf("Execut command1 failure\n");
		redisFree(c);        return;
	}

	//如果执行失败则释放连接
	if (!(r->type == REDIS_REPLY_STATUS && (strcmp(r->str, "OK") == 0 || strcmp(r->str, "ok") == 0)))
	{
		printf("Failed to execute command[%s]\n", command1);
		freeReplyObject(r);
		redisFree(c);        return;
	}

	//执行成功 释放redisCommand执行后返回的redisReply所占用的内存
	freeReplyObject(r);
	printf("Succeed to execute command[%s]\n", command1);

	const char* command2 = "strlen stest1";
	r = (redisReply*)redisCommand(c, command2);

	//如果返回类型不是整形 则释放连接
	if (r->type != REDIS_REPLY_INTEGER)
	{
		printf("Failed to execute command[%s]\n", command2);
		freeReplyObject(r);
		redisFree(c);        return;
	}

	//获取字符串长度
	int length = r->integer;
	freeReplyObject(r);
	printf("The length of 'stest1' is %d.\n", length);
	printf("Succeed to execute command[%s]\n", command2);

	//获取redis键值对信息
	const char* command3 = "get stest1";
	r = (redisReply*)redisCommand(c, command3);
	if (r->type != REDIS_REPLY_STRING)
	{
		printf("Failed to execute command[%s]\n", command3);
		freeReplyObject(r);
		redisFree(c);        return;
	}
	printf("The value of 'stest1' is %s\n", r->str);
	freeReplyObject(r);
	printf("Succeed to execute command[%s]\n", command3);

	const char* command4 = "get stest2";
	r = (redisReply*)redisCommand(c, command4);
	if (r->type != REDIS_REPLY_NIL)
	{
		printf("Failed to execute command[%s]\n", command4);
		freeReplyObject(r);
		redisFree(c);        return;
	}
	freeReplyObject(r);
	printf("Succeed to execute command[%s]\n", command4);

	//释放连接资源
	redisFree(c);

}
在主函数中调用TestRedis,编译项目时发现编译失败,提示
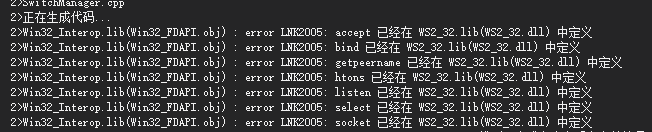
在同时使用Redis连接和socket连接时,遇到了Win32_Interop.lib和WS2_32.lib冲突的问题, 因为我们底层用了socket作为网络通信,也用redis,导致两个库冲突。
引起原因主要是Redis库Win32_FDAPI.cpp有重新定义了socket的一些方法引起来冲突
cpp展开代码extern "C" {
// Unix compatible FD based routines
fdapi_accept accept = NULL;
fdapi_access access = NULL;
fdapi_bind bind = NULL;
fdapi_connect connect = NULL;
fdapi_fcntl fcntl = NULL;
fdapi_fstat fdapi_fstat64 = NULL;
fdapi_fsync fsync = NULL;
fdapi_ftruncate ftruncate = NULL;
fdapi_freeaddrinfo freeaddrinfo = NULL;
fdapi_getaddrinfo getaddrinfo = NULL;
fdapi_getpeername getpeername = NULL;
fdapi_getsockname getsockname = NULL;
fdapi_getsockopt getsockopt = NULL;
fdapi_htonl htonl = NULL;
fdapi_htons htons = NULL;
fdapi_isatty isatty = NULL;
fdapi_inet_ntop inet_ntop = NULL;
fdapi_inet_pton inet_pton = NULL;
fdapi_listen listen = NULL;
fdapi_lseek64 lseek64 = NULL;
fdapi_ntohl ntohl = NULL;
fdapi_ntohs ntohs = NULL;
fdapi_open open = NULL;
fdapi_pipe pipe = NULL;
fdapi_poll poll = NULL;
fdapi_read read = NULL;
fdapi_select select = NULL;
fdapi_setsockopt setsockopt = NULL;
fdapi_socket socket = NULL;
fdapi_write write = NULL;
}
auto f_WSACleanup = dllfunctor_stdcall<int>("ws2_32.dll", "WSACleanup");
auto f_WSAFDIsSet = dllfunctor_stdcall<int, SOCKET, fd_set*>("ws2_32.dll", "__WSAFDIsSet");
auto f_WSAGetLastError = dllfunctor_stdcall<int>("ws2_32.dll", "WSAGetLastError");
auto f_WSAGetOverlappedResult = dllfunctor_stdcall<BOOL, SOCKET, LPWSAOVERLAPPED, LPDWORD, BOOL, LPDWORD>("ws2_32.dll", "WSAGetOverlappedResult");
auto f_WSADuplicateSocket = dllfunctor_stdcall<int, SOCKET, DWORD, LPWSAPROTOCOL_INFO>("ws2_32.dll", "WSADuplicateSocketW");
auto f_WSAIoctl = dllfunctor_stdcall<int, SOCKET, DWORD, LPVOID, DWORD, LPVOID, DWORD, LPVOID, LPWSAOVERLAPPED, LPWSAOVERLAPPED_COMPLETION_ROUTINE>("ws2_32.dll", "WSAIoctl");
auto f_WSARecv = dllfunctor_stdcall<int, SOCKET, LPWSABUF, DWORD, LPDWORD, LPDWORD, LPWSAOVERLAPPED, LPWSAOVERLAPPED_COMPLETION_ROUTINE>("ws2_32.dll", "WSARecv");
auto f_WSASocket = dllfunctor_stdcall<SOCKET, int, int, int, LPWSAPROTOCOL_INFO, GROUP, DWORD>("ws2_32.dll", "WSASocketW");
auto f_WSASend = dllfunctor_stdcall<int, SOCKET, LPWSABUF, DWORD, LPDWORD, DWORD, LPWSAOVERLAPPED, LPWSAOVERLAPPED_COMPLETION_ROUTINE>("ws2_32.dll", "WSASend");
auto f_WSAStartup = dllfunctor_stdcall<int, WORD, LPWSADATA>("ws2_32.dll", "WSAStartup");
auto f_ioctlsocket = dllfunctor_stdcall<int, SOCKET, long, u_long*>("ws2_32.dll", "ioctlsocket");

auto f_accept = dllfunctor_stdcall<SOCKET, SOCKET, struct sockaddr*, int*>("ws2_32.dll", "accept");
auto f_bind = dllfunctor_stdcall<int, SOCKET, const struct sockaddr*, int>("ws2_32.dll", "bind");
auto f_closesocket = dllfunctor_stdcall<int, SOCKET>("ws2_32.dll", "closesocket");
auto f_connect = dllfunctor_stdcall<int, SOCKET, const struct sockaddr*, int>("ws2_32.dll", "connect");
auto f_freeaddrinfo = dllfunctor_stdcall<void, addrinfo*>("ws2_32.dll", "freeaddrinfo");
auto f_getaddrinfo = dllfunctor_stdcall<int, PCSTR, PCSTR, const ADDRINFOA*, ADDRINFOA**>("ws2_32.dll", "getaddrinfo");
auto f_gethostbyname = dllfunctor_stdcall<struct hostent*, const char*>("ws2_32.dll", "gethostbyname");
auto f_getpeername = dllfunctor_stdcall<int, SOCKET, struct sockaddr*, int*>("ws2_32.dll", "getpeername");
auto f_getsockname = dllfunctor_stdcall<int, SOCKET, struct sockaddr*, int*>("ws2_32.dll", "getsockname");
auto f_getsockopt = dllfunctor_stdcall<int, SOCKET, int, int, char*, int*>("ws2_32.dll", "getsockopt");
auto f_htonl = dllfunctor_stdcall<u_long, u_long>("ws2_32.dll", "htonl");
auto f_htons = dllfunctor_stdcall<u_short, u_short>("ws2_32.dll", "htons");
auto f_listen = dllfunctor_stdcall<int, SOCKET, int>("ws2_32.dll", "listen");
auto f_ntohs = dllfunctor_stdcall<u_short, u_short>("ws2_32.dll", "ntohs");
auto f_ntohl = dllfunctor_stdcall<u_long, u_long>("ws2_32.dll", "ntohl");
auto f_recv = dllfunctor_stdcall<int, SOCKET, char*, int, int>("ws2_32.dll", "recv");
auto f_select = dllfunctor_stdcall<int, int, fd_set*, fd_set*, fd_set*, const struct timeval*>("ws2_32.dll", "select");
auto f_send = dllfunctor_stdcall<int, SOCKET, const char*, int, int>("ws2_32.dll", "send");
auto f_setsockopt = dllfunctor_stdcall<int, SOCKET, int, int, const char*, int>("ws2_32.dll", "setsockopt");
auto f_socket = dllfunctor_stdcall<SOCKET, int, int, int>("ws2_32.dll", "socket");
去掉Redis库里面的socket的函数的重定义,把所有使用这些方法的地方都改为下面对应的函数
cpp展开代码int FDAPI_accept(int rfd, struct sockaddr *addr, socklen_t *addrlen);
int FDAPI_access(const char *pathname, int mode);
int FDAPI_bind(int rfd, const struct sockaddr *addr, socklen_t addrlen);
int FDAPI_connect(int rfd, const struct sockaddr *addr, size_t addrlen);
int FDAPI_fcntl(int rfd, int cmd, int flags);
int FDAPI_fstat64(int rfd, struct __stat64 *buffer);
void FDAPI_freeaddrinfo(struct addrinfo *ai);
int FDAPI_fsync(int rfd);
int FDAPI_ftruncate(int rfd, PORT_LONGLONG length);
int FDAPI_getaddrinfo(const char *node, const char *service, const struct addrinfo *hints, struct addrinfo **res);
int FDAPI_getsockopt(int rfd, int level, int optname, void *optval, socklen_t *optlen);
int FDAPI_getpeername(int rfd, struct sockaddr *addr, socklen_t * addrlen);
int FDAPI_getsockname(int rfd, struct sockaddr* addrsock, int* addrlen);
u_long FDAPI_htonl(u_long hostlong);
u_short FDAPI_htons(u_short hostshort);
u_int FDAPI_ntohl(u_int netlong);
u_short FDAPI_ntohs(u_short netshort);
int FDAPI_open(const char * _Filename, int _OpenFlag, int flags);
int FDAPI_pipe(int *pfds);
int FDAPI_poll(struct pollfd *fds, nfds_t nfds, int timeout);
int FDAPI_listen(int rfd, int backlog);
int FDAPI_socket(int af, int type, int protocol);
int FDAPI_select(int nfds, fd_set *readfds, fd_set *writefds, fd_set *exceptfds, struct timeval *timeout);
int FDAPI_setsockopt(int rfd, int level, int optname, const void *optval, socklen_t optlen);
ssize_t FDAPI_read(int rfd, void *buf, size_t count);
ssize_t FDAPI_write(int rfd, const void *buf, size_t count);
考虑大家修改起来很麻烦,可以下载我的代码
https://gitee.com/secondtonone1/windows-redis
再次编译生成hredis和Win32_Interop的lib库,重新配置下,项目再次编译就通过了。
封装redis操作类
因为hredis提供的操作太别扭了,我们手动封装redis操作类,简化调用流程。
封装的类叫RedisMgr,它是个单例类并且可接受回调,按照我们之前的风格
cpp展开代码class RedisMgr: public Singleton<RedisMgr>,
	public std::enable_shared_from_this<RedisMgr>
{
	friend class Singleton<RedisMgr>;
public:
	~RedisMgr();
	bool Connect(const std::string& host, int port);
	bool Get(const std::string &key, std::string& value);
	bool Set(const std::string &key, const std::string &value);
	bool Auth(const std::string &password);
	bool LPush(const std::string &key, const std::string &value);
	bool LPop(const std::string &key, std::string& value);
	bool RPush(const std::string& key, const std::string& value);
	bool RPop(const std::string& key, std::string& value);
	bool HSet(const std::string &key, const std::string  &hkey, const std::string &value);
	bool HSet(const char* key, const char* hkey, const char* hvalue, size_t hvaluelen);
	std::string HGet(const std::string &key, const std::string &hkey);
	bool Del(const std::string &key);
	bool ExistsKey(const std::string &key);
	void Close();
private:
	RedisMgr();

	redisContext* _connect;
	redisReply* _reply;
};
连接操作
cpp展开代码bool RedisMgr::Connect(const std::string &host, int port)
{
	this->_connect = redisConnect(host.c_str(), port);
	if (this->_connect != NULL && this->_connect->err)
	{
		std::cout << "connect error " << this->_connect->errstr << std::endl;
		return false;
	}
	return true;
}
获取key对应的value
cpp展开代码bool RedisMgr::Get(const std::string &key, std::string& value)
{
	 this->_reply = (redisReply*)redisCommand(this->_connect, "GET %s", key.c_str());
	 if (this->_reply == NULL) {
		 std::cout << "[ GET  " << key << " ] failed" << std::endl;
		 freeReplyObject(this->_reply);
		  return false;
	}

	 if (this->_reply->type != REDIS_REPLY_STRING) {
		 std::cout << "[ GET  " << key << " ] failed" << std::endl;
		 freeReplyObject(this->_reply);
		 return false;
	}

	 value = this->_reply->str;
	 freeReplyObject(this->_reply);

	 std::cout << "Succeed to execute command [ GET " << key << "  ]" << std::endl;
	 return true;
}
设置key和value
cpp展开代码bool RedisMgr::Set(const std::string &key, const std::string &value){
	//执行redis命令行

	this->_reply = (redisReply*)redisCommand(this->_connect, "SET %s %s", key.c_str(), value.c_str());

	//如果返回NULL则说明执行失败
	if (NULL == this->_reply)
	{
		std::cout << "Execut command [ SET " << key << "  "<< value << " ] failure ! " << std::endl;
		freeReplyObject(this->_reply);
		return false;
	}

	//如果执行失败则释放连接
	if (!(this->_reply->type == REDIS_REPLY_STATUS && (strcmp(this->_reply->str, "OK") == 0 || strcmp(this->_reply->str, "ok") == 0)))
	{
		std::cout << "Execut command [ SET " << key << "  " << value << " ] failure ! " << std::endl;
		freeReplyObject(this->_reply);
		return false;
	}

	//执行成功 释放redisCommand执行后返回的redisReply所占用的内存
	freeReplyObject(this->_reply);
	std::cout << "Execut command [ SET " << key << "  " << value << " ] success ! " << std::endl;
	return true;
}
密码认证
cpp展开代码bool RedisMgr::Auth(const std::string &password)
{
	this->_reply = (redisReply*)redisCommand(this->_connect, "AUTH %s", password.c_str());
	if (this->_reply->type == REDIS_REPLY_ERROR) {
		std::cout << "认证失败" << std::endl;
		//执行成功 释放redisCommand执行后返回的redisReply所占用的内存
		freeReplyObject(this->_reply);
		return false;
	}
	else {
		//执行成功 释放redisCommand执行后返回的redisReply所占用的内存
		freeReplyObject(this->_reply);
		std::cout << "认证成功" << std::endl;
		return true;
	}
}
左侧push
cpp展开代码bool RedisMgr::LPush(const std::string &key, const std::string &value)
{
	this->_reply = (redisReply*)redisCommand(this->_connect, "LPUSH %s %s", key.c_str(), value.c_str());
	if (NULL == this->_reply)
	{
		std::cout << "Execut command [ LPUSH " << key << "  " << value << " ] failure ! " << std::endl;
		freeReplyObject(this->_reply);
		return false;
	}

	if (this->_reply->type != REDIS_REPLY_INTEGER || this->_reply->integer <= 0) {
		std::cout << "Execut command [ LPUSH " << key << "  " << value << " ] failure ! " << std::endl;
		freeReplyObject(this->_reply);
		return false;
	}

	std::cout << "Execut command [ LPUSH " << key << "  " << value << " ] success ! " << std::endl;
	freeReplyObject(this->_reply);
	return true;
}
左侧pop
cpp展开代码bool RedisMgr::LPop(const std::string &key, std::string& value){
	this->_reply = (redisReply*)redisCommand(this->_connect, "LPOP %s ", key.c_str());
	if (_reply == nullptr || _reply->type == REDIS_REPLY_NIL) {
		std::cout << "Execut command [ LPOP " << key<<  " ] failure ! " << std::endl;
		freeReplyObject(this->_reply);
		return false;
	}
	value = _reply->str;
	std::cout << "Execut command [ LPOP " << key <<  " ] success ! " << std::endl;
	freeReplyObject(this->_reply);
	return true;
}
右侧push
cpp展开代码bool RedisMgr::RPush(const std::string& key, const std::string& value) {
	this->_reply = (redisReply*)redisCommand(this->_connect, "RPUSH %s %s", key.c_str(), value.c_str());
	if (NULL == this->_reply)
	{
		std::cout << "Execut command [ RPUSH " << key << "  " << value << " ] failure ! " << std::endl;
		freeReplyObject(this->_reply);
		return false;
	}

	if (this->_reply->type != REDIS_REPLY_INTEGER || this->_reply->integer <= 0) {
		std::cout << "Execut command [ RPUSH " << key << "  " << value << " ] failure ! " << std::endl;
		freeReplyObject(this->_reply);
		return false;
	}

	std::cout << "Execut command [ RPUSH " << key << "  " << value << " ] success ! " << std::endl;
	freeReplyObject(this->_reply);
	return true;
}
右侧pop
cpp展开代码bool RedisMgr::RPop(const std::string& key, std::string& value) {
	this->_reply = (redisReply*)redisCommand(this->_connect, "RPOP %s ", key.c_str());
	if (_reply == nullptr || _reply->type == REDIS_REPLY_NIL) {
		std::cout << "Execut command [ RPOP " << key << " ] failure ! " << std::endl;
		freeReplyObject(this->_reply);
		return false;
	}
	value = _reply->str;
	std::cout << "Execut command [ RPOP " << key << " ] success ! " << std::endl;
	freeReplyObject(this->_reply);
	return true;
}
HSet操作
cpp展开代码bool RedisMgr::HSet(const std::string &key, const std::string &hkey, const std::string &value) {
	this->_reply = (redisReply*)redisCommand(this->_connect, "HSET %s %s %s", key.c_str(), hkey.c_str(), value.c_str());
	if (_reply == nullptr || _reply->type != REDIS_REPLY_INTEGER ) {
		std::cout << "Execut command [ HSet " << key << "  " << hkey <<"  " << value << " ] failure ! " << std::endl;
		freeReplyObject(this->_reply);
		return false;
	}
	std::cout << "Execut command [ HSet " << key << "  " << hkey << "  " << value << " ] success ! " << std::endl;
	freeReplyObject(this->_reply);
	return true;
}


bool RedisMgr::HSet(const char* key, const char* hkey, const char* hvalue, size_t hvaluelen)
{
	 const char* argv[4];
	 size_t argvlen[4];
	 argv[0] = "HSET";
	argvlen[0] = 4;
	argv[1] = key;
	argvlen[1] = strlen(key);
	argv[2] = hkey;
	argvlen[2] = strlen(hkey);
	argv[3] = hvalue;
	argvlen[3] = hvaluelen;
	this->_reply = (redisReply*)redisCommandArgv(this->_connect, 4, argv, argvlen);
	if (_reply == nullptr || _reply->type != REDIS_REPLY_INTEGER) {
		std::cout << "Execut command [ HSet " << key << "  " << hkey << "  " << hvalue << " ] failure ! " << std::endl;
		freeReplyObject(this->_reply);
		return false;
	}
	std::cout << "Execut command [ HSet " << key << "  " << hkey << "  " << hvalue << " ] success ! " << std::endl;
	freeReplyObject(this->_reply);
	return true;
}
HGet操作
cpp展开代码std::string RedisMgr::HGet(const std::string &key, const std::string &hkey)
{
	const char* argv[3];
	size_t argvlen[3];
	argv[0] = "HGET";
	argvlen[0] = 4;
	argv[1] = key.c_str();
	argvlen[1] = key.length();
	argv[2] = hkey.c_str();
	argvlen[2] = hkey.length();
	this->_reply = (redisReply*)redisCommandArgv(this->_connect, 3, argv, argvlen);
	if (this->_reply == nullptr || this->_reply->type == REDIS_REPLY_NIL) {
		freeReplyObject(this->_reply);
		std::cout << "Execut command [ HGet " << key << " "<< hkey <<"  ] failure ! " << std::endl;
		return "";
	}

	std::string value = this->_reply->str;
	freeReplyObject(this->_reply);
	std::cout << "Execut command [ HGet " << key << " " << hkey << " ] success ! " << std::endl;
	return value;
}
Del 操作
cpp展开代码bool RedisMgr::Del(const std::string &key)
{
	this->_reply = (redisReply*)redisCommand(this->_connect, "DEL %s", key.c_str());
	if (this->_reply == nullptr || this->_reply->type != REDIS_REPLY_INTEGER) {
		std::cout << "Execut command [ Del " << key <<  " ] failure ! " << std::endl;
		freeReplyObject(this->_reply);
		return false;
	}
	std::cout << "Execut command [ Del " << key << " ] success ! " << std::endl;
	 freeReplyObject(this->_reply);
	 return true;
}
判断键值是否存在
cpp展开代码bool RedisMgr::ExistsKey(const std::string &key)
{
	this->_reply = (redisReply*)redisCommand(this->_connect, "exists %s", key.c_str());
	if (this->_reply == nullptr || this->_reply->type != REDIS_REPLY_INTEGER || this->_reply->integer == 0) {
		std::cout << "Not Found [ Key " << key << " ]  ! " << std::endl;
		freeReplyObject(this->_reply);
		return false;
	}
	std::cout << " Found [ Key " << key << " ] exists ! " << std::endl;
	freeReplyObject(this->_reply);
	return true;
}
关闭
cpp展开代码void RedisMgr::Close()
{
	redisFree(_connect);
}
测试用例
cpp展开代码void TestRedisMgr() {
	assert(RedisMgr::GetInstance()->Connect("127.0.0.1", 6380));
	assert(RedisMgr::GetInstance()->Auth("123456"));
	assert(RedisMgr::GetInstance()->Set("blogwebsite","llfc.club"));
	std::string value="";
	assert(RedisMgr::GetInstance()->Get("blogwebsite", value) );
	assert(RedisMgr::GetInstance()->Get("nonekey", value) == false);
	assert(RedisMgr::GetInstance()->HSet("bloginfo","blogwebsite", "llfc.club"));
	assert(RedisMgr::GetInstance()->HGet("bloginfo","blogwebsite") != "");
	assert(RedisMgr::GetInstance()->ExistsKey("bloginfo"));
	assert(RedisMgr::GetInstance()->Del("bloginfo"));
	assert(RedisMgr::GetInstance()->Del("bloginfo"));
	assert(RedisMgr::GetInstance()->ExistsKey("bloginfo") == false);
	assert(RedisMgr::GetInstance()->LPush("lpushkey1", "lpushvalue1"));
	assert(RedisMgr::GetInstance()->LPush("lpushkey1", "lpushvalue2"));
	assert(RedisMgr::GetInstance()->LPush("lpushkey1", "lpushvalue3"));
	assert(RedisMgr::GetInstance()->RPop("lpushkey1", value));
	assert(RedisMgr::GetInstance()->RPop("lpushkey1", value));
	assert(RedisMgr::GetInstance()->LPop("lpushkey1", value));
	assert(RedisMgr::GetInstance()->LPop("lpushkey2", value)==false);
	RedisMgr::GetInstance()->Close();
}
封装redis连接池
cpp展开代码class RedisConPool {
public:
	RedisConPool(size_t poolSize, const char* host, int port, const char* pwd)
		: poolSize_(poolSize), host_(host), port_(port), b_stop_(false){
		for (size_t i = 0; i < poolSize_; ++i) {
			auto* context = redisConnect(host, port);
			if (context == nullptr || context->err != 0) {
				if (context != nullptr) {
					redisFree(context);
				}
				continue;
			}

			auto reply = (redisReply*)redisCommand(context, "AUTH %s", pwd);
			if (reply->type == REDIS_REPLY_ERROR) {
				std::cout << "认证失败" << std::endl;
				//执行成功 释放redisCommand执行后返回的redisReply所占用的内存
				freeReplyObject(reply);
				continue;
			}

			//执行成功 释放redisCommand执行后返回的redisReply所占用的内存
			freeReplyObject(reply);
			std::cout << "认证成功" << std::endl;
			connections_.push(context);
		}

	}

	~RedisConPool() {
		std::lock_guard<std::mutex> lock(mutex_);
		while (!connections_.empty()) {
			connections_.pop();
		}
	}

	redisContext* getConnection() {
		std::unique_lock<std::mutex> lock(mutex_);
		cond_.wait(lock, [this] {
			if (b_stop_) {
				return true;
			}
			return !connections_.empty();
			});
		//如果停止则直接返回空指针
		if (b_stop_) {
			return  nullptr;
		}
		auto* context = connections_.front();
		connections_.pop();
		return context;
	}

	void returnConnection(redisContext* context) {
		std::lock_guard<std::mutex> lock(mutex_);
		if (b_stop_) {
			return;
		}
		connections_.push(context);
		cond_.notify_one();
	}

	void Close() {
		b_stop_ = true;
		cond_.notify_all();
	}

private:
	atomic<bool> b_stop_;
	size_t poolSize_;
	const char* host_;
	int port_;
	std::queue<redisContext*> connections_;
	std::mutex mutex_;
	std::condition_variable cond_;
};
RedisMgr构造函数中初始化pool连接池
cpp展开代码RedisMgr::RedisMgr() {
	auto& gCfgMgr = ConfigMgr::Inst();
	auto host = gCfgMgr["Redis"]["Host"];
	auto port = gCfgMgr["Redis"]["Port"];
	auto pwd = gCfgMgr["Redis"]["Passwd"];
	_con_pool.reset(new RedisConPool(5, host.c_str(), atoi(port.c_str()), pwd.c_str()));
}
在析构函数中回收资源
cpp展开代码RedisMgr::~RedisMgr() {
	Close();
}

void RedisMgr::Close() {
	_con_pool->Close();
}
在使用的时候改为从Pool中获取链接
cpp展开代码bool RedisMgr::Get(const std::string& key, std::string& value)
{
	auto connect = _con_pool->getConnection();
	if (connect == nullptr) {
		return false;
	}
	 auto reply = (redisReply*)redisCommand(connect, "GET %s", key.c_str());
	 if (reply == NULL) {
		 std::cout << "[ GET  " << key << " ] failed" << std::endl;
		 freeReplyObject(reply);
		 _con_pool->returnConnection(connect);
		  return false;
	}

	 if (reply->type != REDIS_REPLY_STRING) {
		 std::cout << "[ GET  " << key << " ] failed" << std::endl;
		 freeReplyObject(reply);
		 _con_pool->returnConnection(connect);
		 return false;
	}

	 value = reply->str;
	 freeReplyObject(reply);

	 std::cout << "Succeed to execute command [ GET " << key << "  ]" << std::endl;
	 _con_pool->returnConnection(connect);
	 return true;
}
总结
本节告诉大家如何搭建redis服务,linux和windows环境的,并且编译了windows版本的hredis库,解决了链接错误,而且封装了RedisMgr管理类。 并实现了测试用例,大家感兴趣可以测试一下。下一节实现VarifyServer访问的redis功能。
day10-多服务验证码派发功能调试
VerifyServer增加redis
我们为了让验证码有一个过期时间,可以利用redis实现,在Verify文件夹用npm安装redis服务。
bash展开代码npm install ioredis
完善config.json
json展开代码{
    "email": {
      "user": "secondtonone1@163.com",
      "pass": "CRWTAZOSNCWDDQQTllfc"
    },

    "mysql": {
      "host": "81.68.86.146",
      "port": 3308,
      "passwd": "123456"
    },

    "redis":{
      "host": "81.68.86.146",
      "port": 6380,
      "passwd": "123456"
    }
}
服务里添加redis模块,封装redis操作在redis.js中
js展开代码const config_module = require('./config')
const Redis = require("ioredis");

// 创建Redis客户端实例
const RedisCli = new Redis({
  host: config_module.redis_host,       // Redis服务器主机名
  port: config_module.redis_port,        // Redis服务器端口号
  password: config_module.redis_passwd, // Redis密码
});


/**
 * 监听错误信息
 */
RedisCli.on("error", function (err) {
  console.log("RedisCli connect error");
  RedisCli.quit();
});

/**
 * 根据key获取value
 * @param {*} key
 * @returns
 */
async function GetRedis(key) {

    try{
        const result = await RedisCli.get(key)
        if(result === null){
          console.log('result:','<'+result+'>', 'This key cannot be find...')
          return null
        }
        console.log('Result:','<'+result+'>','Get key success!...');
        return result
    }catch(error){
        console.log('GetRedis error is', error);
        return null
    }

  }

/**
 * 根据key查询redis中是否存在key
 * @param {*} key
 * @returns
 */
async function QueryRedis(key) {
    try{
        const result = await RedisCli.exists(key)
        //  判断该值是否为空 如果为空返回null
        if (result === 0) {
          console.log('result:<','<'+result+'>','This key is null...');
          return null
        }
        console.log('Result:','<'+result+'>','With this value!...');
        return result
    }catch(error){
        console.log('QueryRedis error is', error);
        return null
    }

  }

/**
 * 设置key和value,并过期时间
 * @param {*} key
 * @param {*} value
 * @param {*} exptime
 * @returns
 */
async function SetRedisExpire(key,value, exptime){
    try{
        // 设置键和值
        await RedisCli.set(key,value)
        // 设置过期时间(以秒为单位)
        await RedisCli.expire(key, exptime);
        return true;
    }catch(error){
        console.log('SetRedisExpire error is', error);
        return false;
    }
}

/**
 * 退出函数
 */
function Quit(){
    RedisCli.quit();
}

module.exports = {GetRedis, QueryRedis, Quit, SetRedisExpire,}
server.js中包含redis.js
js展开代码const redis_module = require('./redis')
获取验证码之前可以先查询redis,如果没查到就生成uid并且写入redis
js展开代码async function GetVarifyCode(call, callback) {
    console.log("email is ", call.request.email)
    try{
        let query_res = await redis_module.GetRedis(const_module.code_prefix+call.request.email);
        console.log("query_res is ", query_res)
        if(query_res == null){

        }
        let uniqueId = query_res;
        if(query_res ==null){
            uniqueId = uuidv4();
            if (uniqueId.length > 4) {
                uniqueId = uniqueId.substring(0, 4);
            }
            let bres = await redis_module.SetRedisExpire(const_module.code_prefix+call.request.email, uniqueId,600)
            if(!bres){
                callback(null, { email:  call.request.email,
                    error:const_module.Errors.RedisErr
                });
                return;
            }
        }

        console.log("uniqueId is ", uniqueId)
        let text_str =  '您的验证码为'+ uniqueId +'请三分钟内完成注册'
        //发送邮件
        let mailOptions = {
            from: 'secondtonone1@163.com',
            to: call.request.email,
            subject: '验证码',
            text: text_str,
        };

        let send_res = await emailModule.SendMail(mailOptions);
        console.log("send res is ", send_res)

        callback(null, { email:  call.request.email,
            error:const_module.Errors.Success
        });


    }catch(error){
        console.log("catch error is ", error)

        callback(null, { email:  call.request.email,
            error:const_module.Errors.Exception
        });
    }

}
验证服务联调
开启VerifyServer和GateServer,再启动客户端,点击获取验证码,客户端就会发送请求给GateServer,GateServer再调用内部服务VerifyServer。最后将请求返回客户端,完成了验证码发送的流程。
如果10分钟之内多次请求,因为验证码被缓存在redis中,所以会被复用返回给客户端。
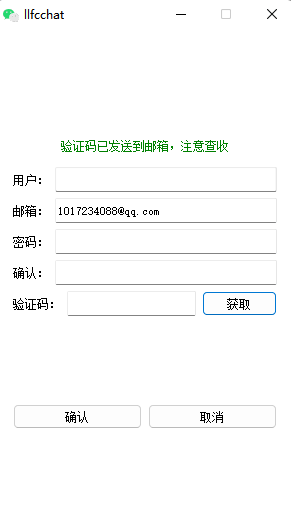
看起来客户端收到服务器的回复了,我们去邮箱看看是否收到验证码
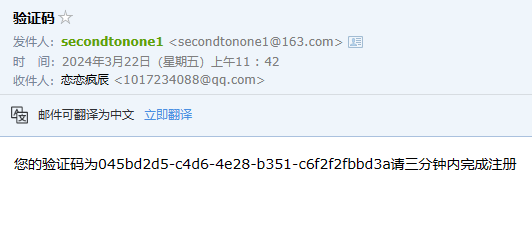
确实收到了验证码。好的多服务调用实现了,大家可以把这个功能理解下,接下来去实现注册逻辑。
day11-注册功能
注册功能
实现注册功能,先实现客户端发送post请求, 将注册ui中确定按钮改为sure_btn,并为其添加click槽函数
cpp展开代码//day11 添加确认槽函数
void RegisterDialog::on_sure_btn_clicked()
{
    if(ui->user_edit->text() == ""){
        showTip(tr("用户名不能为空"), false);
        return;
    }

    if(ui->email_edit->text() == ""){
        showTip(tr("邮箱不能为空"), false);
        return;
    }

    if(ui->pass_edit->text() == ""){
        showTip(tr("密码不能为空"), false);
        return;
    }

    if(ui->confirm_edit->text() == ""){
        showTip(tr("确认密码不能为空"), false);
        return;
    }

    if(ui->confirm_edit->text() != ui->pass_edit->text()){
        showTip(tr("密码和确认密码不匹配"), false);
        return;
    }

    if(ui->varify_edit->text() == ""){
        showTip(tr("验证码不能为空"), false);
        return;
    }

    //day11 发送http请求注册用户
    QJsonObject json_obj;
    json_obj["user"] = ui->user_edit->text();
    json_obj["email"] = ui->email_edit->text();
    json_obj["passwd"] = ui->pass_edit->text();
    json_obj["confirm"] = ui->confirm_edit->text();
    json_obj["varifycode"] = ui->varify_edit->text();
    HttpMgr::GetInstance()->PostHttpReq(QUrl(gate_url_prefix+"/user_register"),
                 json_obj, ReqId::ID_REG_USER,Modules::REGISTERMOD);
}
再添加http请求回复后收到处理流程
cpp展开代码void RegisterDialog::initHttpHandlers()
{
    //...省略
    //注册注册用户回包逻辑
    _handlers.insert(ReqId::ID_REG_USER, [this](QJsonObject jsonObj){
        int error = jsonObj["error"].toInt();
        if(error != ErrorCodes::SUCCESS){
            showTip(tr("参数错误"),false);
            return;
        }
        auto email = jsonObj["email"].toString();
        showTip(tr("用户注册成功"), true);
        qDebug()<< "email is " << email ;
    });
}
Server端接受注册请求
Server注册user_register逻辑
cpp展开代码RegPost("/user_register", [](std::shared_ptr<HttpConnection> connection) {
    auto body_str = boost::beast::buffers_to_string(connection->_request.body().data());
    std::cout << "receive body is " << body_str << std::endl;
    connection->_response.set(http::field::content_type, "text/json");
    Json::Value root;
    Json::Reader reader;
    Json::Value src_root;
    bool parse_success = reader.parse(body_str, src_root);
    if (!parse_success) {
        std::cout << "Failed to parse JSON data!" << std::endl;
        root["error"] = ErrorCodes::Error_Json;
        std::string jsonstr = root.toStyledString();
        beast::ostream(connection->_response.body()) << jsonstr;
        return true;
    }
    //先查找redis中email对应的验证码是否合理
    std::string  varify_code;
    bool b_get_varify = RedisMgr::GetInstance()->Get(src_root["email"].asString(), varify_code);
    if (!b_get_varify) {
        std::cout << " get varify code expired" << std::endl;
        root["error"] = ErrorCodes::VarifyExpired;
        std::string jsonstr = root.toStyledString();
        beast::ostream(connection->_response.body()) << jsonstr;
        return true;
    }

    if (varify_code != src_root["varifycode"].asString()) {
        std::cout << " varify code error" << std::endl;
        root["error"] = ErrorCodes::VarifyCodeErr;
        std::string jsonstr = root.toStyledString();
        beast::ostream(connection->_response.body()) << jsonstr;
        return true;
    }

    //访问redis查找
    bool b_usr_exist = RedisMgr::GetInstance()->ExistsKey(src_root["user"].asString());
    if (b_usr_exist) {
        std::cout << " user exist" << std::endl;
        root["error"] = ErrorCodes::UserExist;
        std::string jsonstr = root.toStyledString();
        beast::ostream(connection->_response.body()) << jsonstr;
        return true;
    }

    //查找数据库判断用户是否存在

    root["error"] = 0;
    root["email"] = src_root["email"];
    root ["user"]= src_root["user"].asString();
    root["passwd"] = src_root["passwd"].asString();
    root["confirm"] = src_root["confirm"].asString();
    root["varifycode"] = src_root["varifycode"].asString();
    std::string jsonstr = root.toStyledString();
    beast::ostream(connection->_response.body()) << jsonstr;
    return true;
    });
安装Mysql
先介绍Windows环境下安装mysql
点击mysql安装包下载链接:https://dev.mysql.com/downloads/mysql
选择window版本,点击下载按钮,如下所示
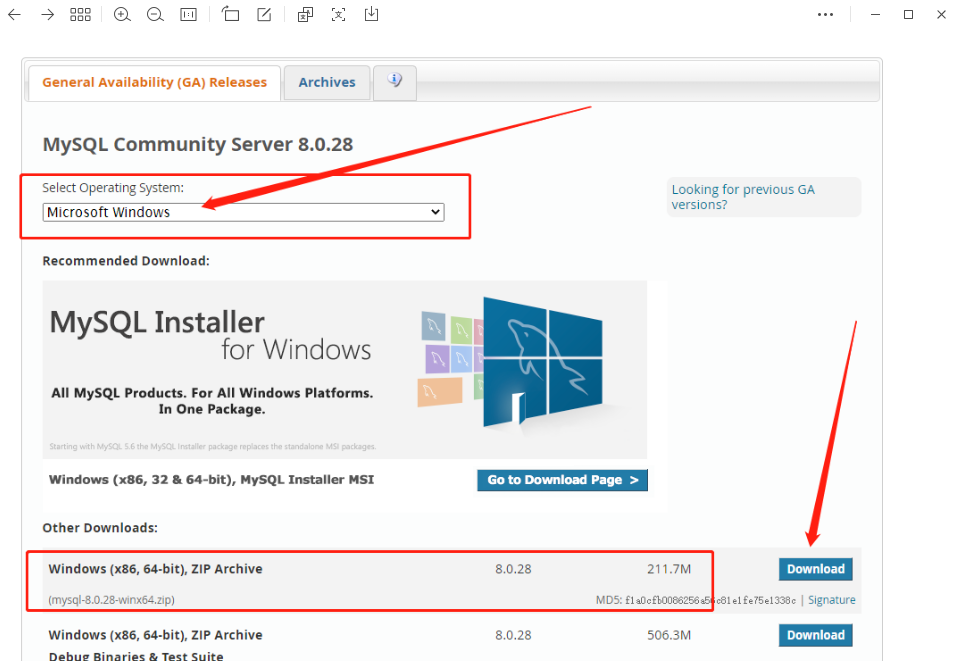
不用登录直接下载
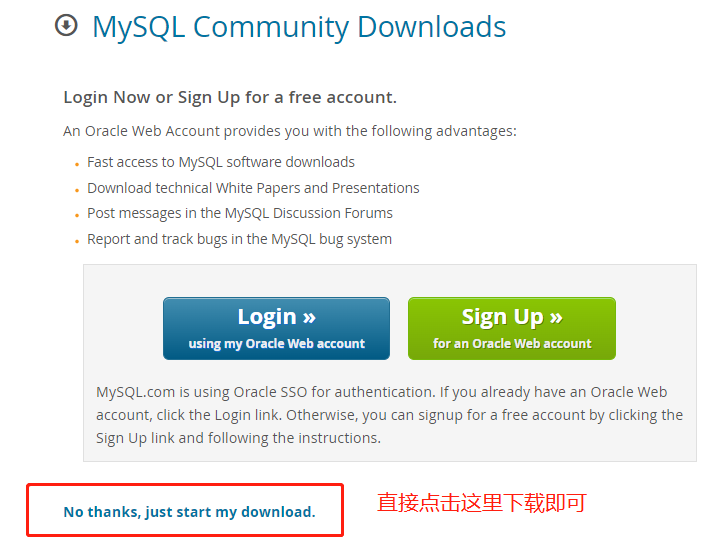
下载好mysql安装包后,将其解压到指定目录,并记下解压的目录,后续用于环境变量配置
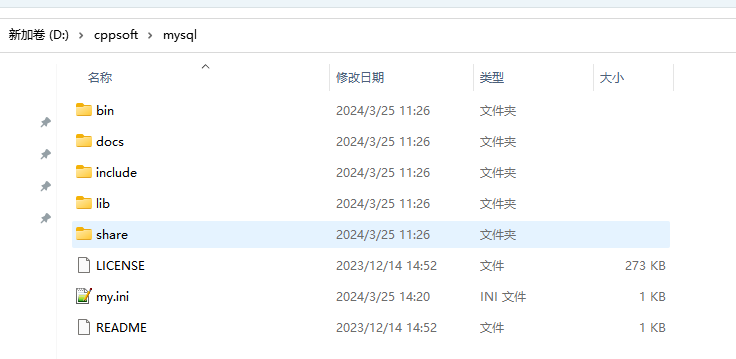
在bin目录同级下创建一个文件,命名为my.ini 编辑my.ini文件
ini展开代码[mysqld]
# 设置3308端口
port=3308
# 设置mysql的安装目录 ---这里输入你安装的文件路径----
basedir=D:\cppsoft\mysql
# 设置mysql数据库的数据的存放目录
datadir=D:\mysql\data
# 允许最大连接数
max_connections=200
# 允许连接失败的次数。
max_connect_errors=10
# 服务端使用的字符集默认为utf8
character-set-server=utf8
# 创建新表时将使用的默认存储引擎
default-storage-engine=INNODB
# 默认使用“mysql_native_password”插件认证
#mysql_native_password
default_authentication_plugin=mysql_native_password
[mysql]
# 设置mysql客户端默认字符集
default-character-set=utf8
[client]
# 设置mysql客户端连接服务端时默认使用的端口
port=3308
default-character-set=utf8
有两点需要注意修改的:
A、basedir这里输入的是mysql解压存放的文件路径
B、datadir这里设置mysql数据库的数据存放目录
打开cmd进入mysql的bin文件下
依次执行命令
第一个命令为:
cpp展开代码//安装mysql  安装完成后Mysql会有一个随机密码
.\mysqld.exe --initialize --console
如下图,随机密码要记住,以后我们改密码会用到
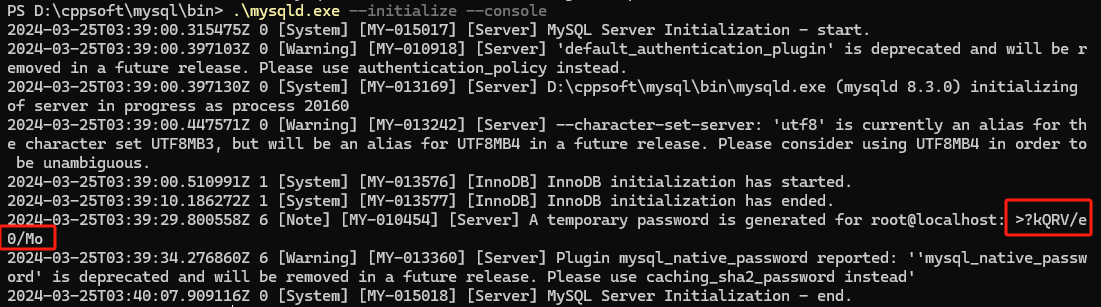
接下来在cmd执行第二条命令
cpp展开代码//安装mysql服务并启动
.\mysqld.exe --install mysql
如果出现以下情况,说明cmd不是以管理员形式执行的,改用为管理员权限执行即可。

成功如下

目前为止安装完毕,大家如果mysql官网下载缓慢,可以去我的网盘下载
https://pan.baidu.com/s/1BTMZB31FWFUq4mZZdzcA9g?pwd=6xlz
提取码:6xlz
修改mysql密码
1 在本机启动mysql服务:
点击桌面我的电脑,右键选择管理进去:
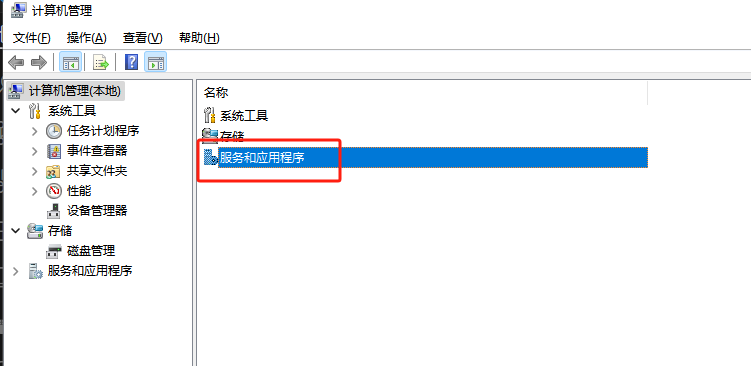
点击后选择服务
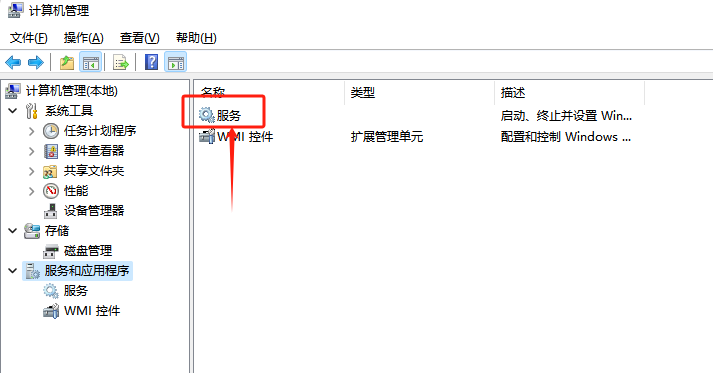
点击服务后可查看当前计算机启动的所有服务,找到mysql,然后右键点击设为启动,同时也可设置其为自动启动和手动启动
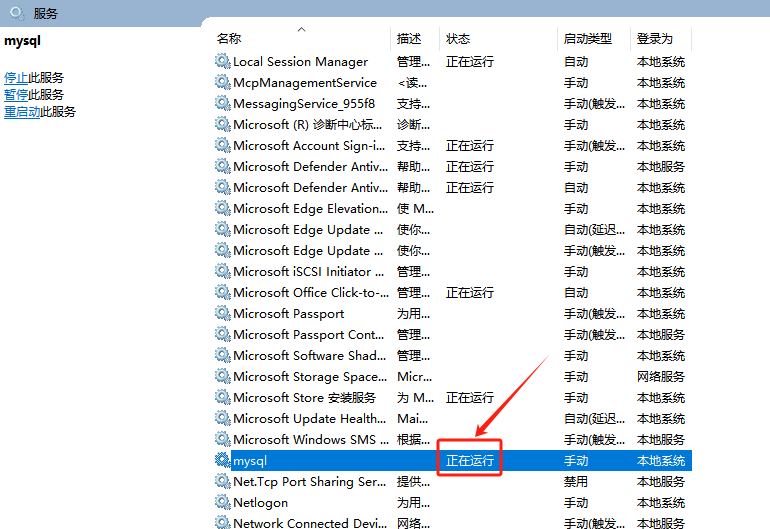
继续在cmd上执行以下命令
bash展开代码mysql -uroot -p
回车后输入上面安装时保存的初始密码,进入mysql里面:
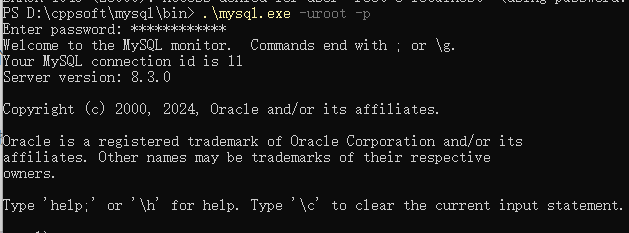
在mysql里面继续执行以下命令:
cpp展开代码//修改密码为123mysql
ALTER USER 'root'@'localhost' IDENTIFIED BY '123456';
回车按照指引执行完后,代表密码修改成功,再输入exit;退出即可
配置环境变量
为了方便使用mysql命令,可以将mysql目录配置在环境变量里
新建系统变量:
变量名:MYSQL_HOME
变量值:msql目录
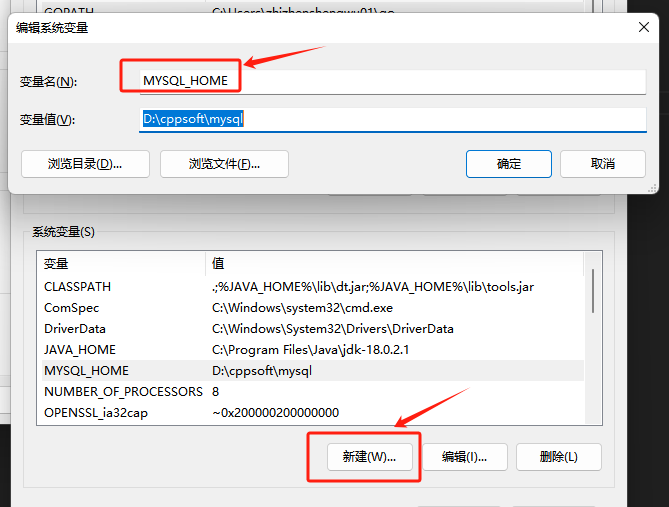
修改系统的path变量
编辑path,进去后添加 %MYSQL_HOME%\bin
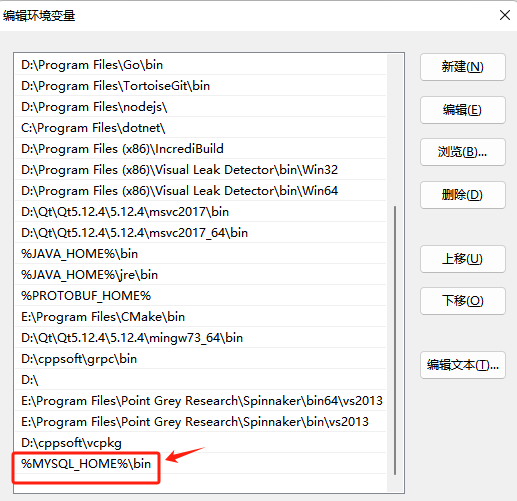
测试连接
为了方便测试,大家可以使用navicat等桌面工具测试连接。以后增删改查也方便。
可以去官网下载
或者我得网盘下载
https://pan.baidu.com/s/10jApYUrwaI19j345dpPGNA?pwd=77m2
验证码: 77m2
效果如下:
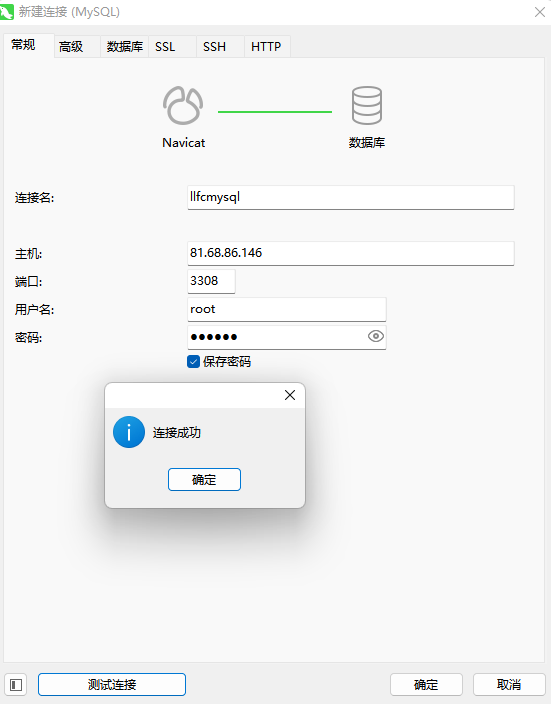
Docker环境配置mysql
拉取mysql镜像
bash展开代码docker pull mysql:8.0
先启动一个测试版本,然后把他的配置文件拷贝出来
bash展开代码docker run --name mysqltest \
-p 3307:3306 -e MYSQL_ROOT_PASSWORD=root \
-d mysql
创建三个目录,我得目录是
bash展开代码mkdir -p /home/zack/llfc/mysql/config
mkdir -p /home/zack/llfc/mysql/data
mkdir -p /home/zack/llfc/mysql/logs
进入docker中
bash展开代码docker exec -it mysqltest bash
之后可以通过搜寻找到配置在/etc/mysql/my.cnf
所以接下来退出容器,执行拷贝命令
bash展开代码docker cp mysqltest:/etc/mysql/my.cnf /home/zack/llfc/mysql/config
然后删除测试用的mysql docker
bash展开代码docker rm -f mysqltest
然后启动我们的容器
bash展开代码docker run --restart=on-failure:3 -d   \
-v /home/zack/llfc/mysql/config/my.cnf:/etc/mysql/my.cnf \
-v /home/zack/llfc/mysql/data/:/var/lib/mysql \
-v /home/zack/llfc/mysql/logs:/logs -p 3308:3306  \
--name llfcmysql -e MYSQL_ROOT_PASSWORD=123456 mysql:8.0
设置远程访问
进入docker
bash展开代码docker exec -it llfcmysql bash
登录mysql
bash展开代码mysql -u root -p
设置允许远程访问,我不设置也能访问的,这里介绍一下。
bash展开代码use mysql
ALTER USER 'root'@'%' IDENTIFIED WITH mysql_native_password BY '123456';
flush privileges;
再次用navicat连接,是可以连接上了。
完善GateServer配置
添加Redis和Mysql配置
ini展开代码[Mysql]
Host = 81.68.86.146
Port = 3308
Passwd = 123456
[Redis]
Host = 81.68.86.146
Port = 6380
Passwd = 123456
Mysql Connector C++
尽管Mysql提供了访问数据库的接口,但是都是基于C风格的,为了便于面向对象设计,我们使用Mysql Connector C++ 这个库来访问mysql。
我们先安装这个库,因为我们windows环境代码是debug版本,所以下载connector的debug版本,如果你的开发编译用的release版本,那么就要下载releas版本,否则会报错
terminate called after throwing an instance of 'std::bad_alloc'.
因为我在windows只做debug调试后期会将项目移植到Linux端,所以这里只下载debug版
下载地址
https://dev.mysql.com/downloads/connector/cpp/
如果下载缓慢可以去我的网盘下载 https://pan.baidu.com/s/1XAVhPAAzZpZahsyITua2oQ?pwd=9c1w
提取码:9c1w
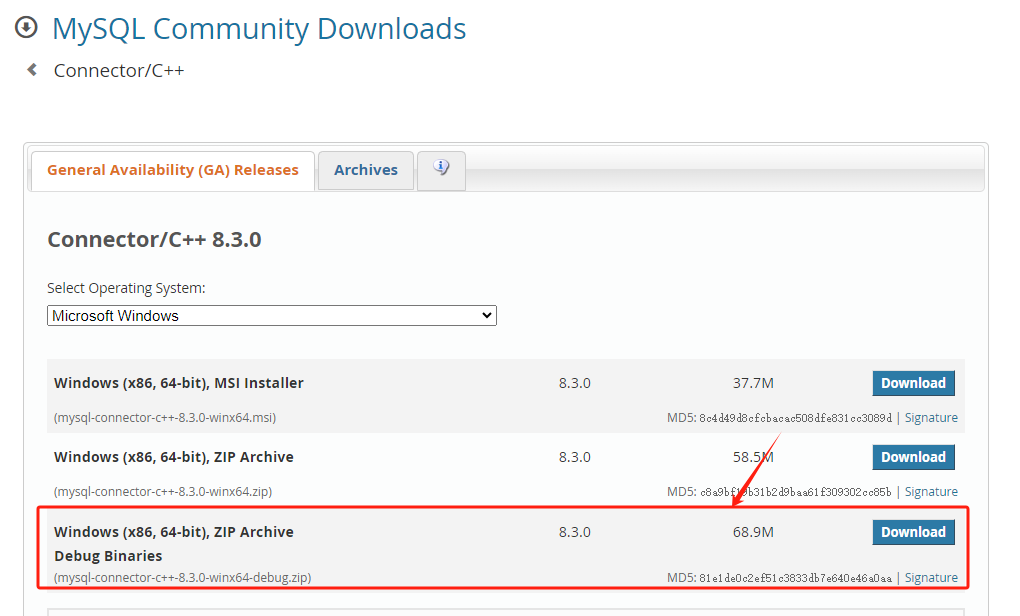
下载后将文件夹解压放在一个自己常用的目录,我放在D:\cppsoft\mysql_connector
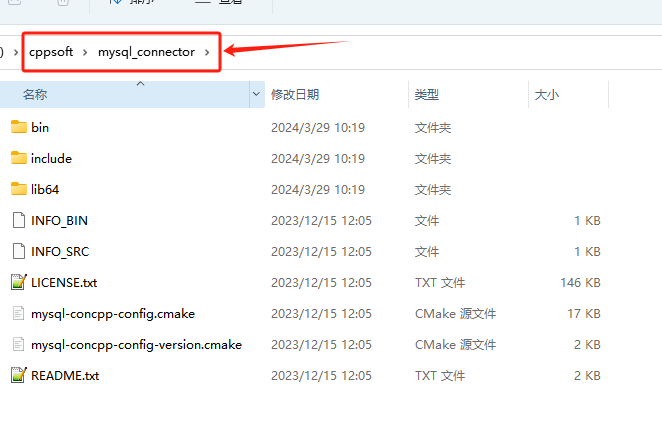
接下来去visual studio中配置项目
VC++ 包含目录添加D:\cppsoft\mysql_connector\include
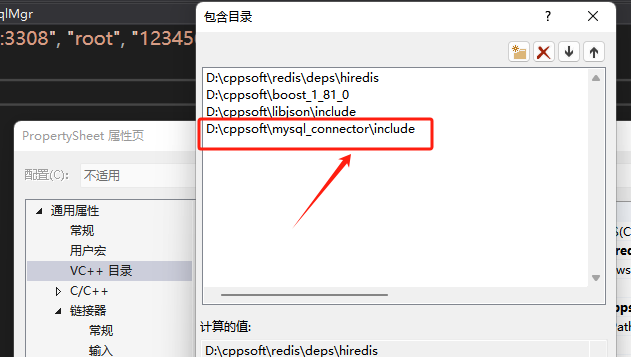
库目录包含D:\cppsoft\mysql_connector\lib64\vs14
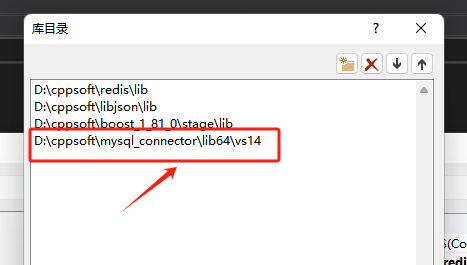
然后将D:\cppsoft\mysql_connector\lib64\debug下的mysqlcppconn8-2-vs14.dll和mysqlcppconn9-vs14.dll分别拷贝到项目中
为了让项目自动将dll拷贝到运行目录,可以在生成事件->生成后事件中添加xcopy命令
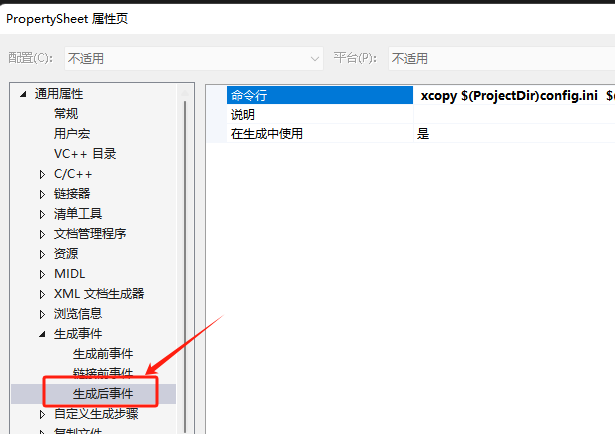
bash展开代码xcopy $(ProjectDir)config.ini  $(SolutionDir)$(Platform)\$(Configuration)\   /y
xcopy $(ProjectDir)*.dll   $(SolutionDir)$(Platform)\$(Configuration)\   /y
封装mysql连接池
cpp展开代码class MySqlPool {
public:
	MySqlPool(const std::string& url, const std::string& user, const std::string& pass, const std::string& schema, int poolSize)
		: url_(url), user_(user), pass_(pass), schema_(schema), poolSize_(poolSize), b_stop_(false){
		try {
			for (int i = 0; i < poolSize_; ++i) {
				sql::mysql::MySQL_Driver* driver = sql::mysql::get_mysql_driver_instance();
				std::unique_ptr<sql::Connection> con(driver->connect(url_, user_, pass_));
				con->setSchema(schema_);
				pool_.push(std::move(con));
			}
		}
		catch (sql::SQLException& e) {
			// 处理异常
			std::cout << "mysql pool init failed" << std::endl;
		}
	}

	std::unique_ptr<sql::Connection> getConnection() {
		std::unique_lock<std::mutex> lock(mutex_);
		cond_.wait(lock, [this] {
			if (b_stop_) {
				return true;
			}
			return !pool_.empty(); });
		if (b_stop_) {
			return nullptr;
		}
		std::unique_ptr<sql::Connection> con(std::move(pool_.front()));
		pool_.pop();
		return con;
	}

	void returnConnection(std::unique_ptr<sql::Connection> con) {
		std::unique_lock<std::mutex> lock(mutex_);
		if (b_stop_) {
			return;
		}
		pool_.push(std::move(con));
		cond_.notify_one();
	}

	void Close() {
		b_stop_ = true;
		cond_.notify_all();
	}

	~MySqlPool() {
		std::unique_lock<std::mutex> lock(mutex_);
		while (!pool_.empty()) {
			pool_.pop();
		}
	}

private:
	std::string url_;
	std::string user_;
	std::string pass_;
	std::string schema_;
	int poolSize_;
	std::queue<std::unique_ptr<sql::Connection>> pool_;
	std::mutex mutex_;
	std::condition_variable cond_;
	std::atomic<bool> b_stop_;
};
封装DAO操作层
类的声明
cpp展开代码class MysqlDao
{
public:
	MysqlDao();
	~MysqlDao();
	int RegUser(const std::string& name, const std::string& email, const std::string& pwd);
private:
	std::unique_ptr<MySqlPool> pool_;
};
实现
cpp展开代码MysqlDao::MysqlDao()
{
	auto & cfg = ConfigMgr::Inst();
	const auto& host = cfg["Mysql"]["Host"];
	const auto& port = cfg["Mysql"]["Port"];
	const auto& pwd = cfg["Mysql"]["Passwd"];
	const auto& schema = cfg["Mysql"]["Schema"];
	const auto& user = cfg["Mysql"]["User"];
	pool_.reset(new MySqlPool(host+":"+port, user, pwd,schema, 5));
}

MysqlDao::~MysqlDao(){
	pool_->Close();
}

int MysqlDao::RegUser(const std::string& name, const std::string& email, const std::string& pwd)
{
	auto con = pool_->getConnection();
	try {
		if (con == nullptr) {
			pool_->returnConnection(std::move(con));
			return false;
		}
		// 准备调用存储过程
		unique_ptr < sql::PreparedStatement > stmt(con->prepareStatement("CALL reg_user(?,?,?,@result)"));
		// 设置输入参数
		stmt->setString(1, name);
		stmt->setString(2, email);
		stmt->setString(3, pwd);

		// 由于PreparedStatement不直接支持注册输出参数,我们需要使用会话变量或其他方法来获取输出参数的值

		  // 执行存储过程
		stmt->execute();
		// 如果存储过程设置了会话变量或有其他方式获取输出参数的值,你可以在这里执行SELECT查询来获取它们
	   // 例如,如果存储过程设置了一个会话变量@result来存储输出结果,可以这样获取:
	   unique_ptr<sql::Statement> stmtResult(con->createStatement());
	  unique_ptr<sql::ResultSet> res(stmtResult->executeQuery("SELECT @result AS result"));
	  if (res->next()) {
	       int result = res->getInt("result");
	      cout << "Result: " << result << endl;
		  pool_->returnConnection(std::move(con));
		  return result;
	  }
	  pool_->returnConnection(std::move(con));
		return -1;
	}
	catch (sql::SQLException& e) {
		pool_->returnConnection(std::move(con));
		std::cerr << "SQLException: " << e.what();
		std::cerr << " (MySQL error code: " << e.getErrorCode();
		std::cerr << ", SQLState: " << e.getSQLState() << " )" << std::endl;
		return -1;
	}
}
新建数据库llfc, llfc数据库添加user表和user_id表
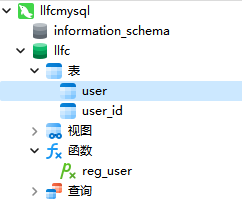
user表
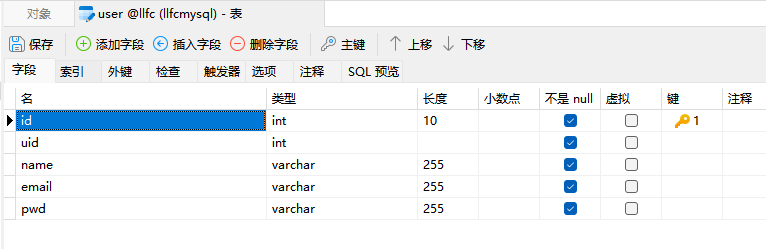
user_id就一行数据,用来记录用户id

这里id用简单计数表示,不考虑以后合服务器和分表分库,如果考虑大家可以采取不同的策略,雪花算法等。
新建存储过程
cpp展开代码CREATE DEFINER=`root`@`%` PROCEDURE `reg_user`(
    IN `new_name` VARCHAR(255),
    IN `new_email` VARCHAR(255),
    IN `new_pwd` VARCHAR(255),
    OUT `result` INT)
BEGIN
    -- 如果在执行过程中遇到任何错误,则回滚事务
    DECLARE EXIT HANDLER FOR SQLEXCEPTION
    BEGIN
        -- 回滚事务
        ROLLBACK;
        -- 设置返回值为-1,表示错误
        SET result = -1;
    END;

    -- 开始事务
    START TRANSACTION;

    -- 检查用户名是否已存在
    IF EXISTS (SELECT 1 FROM `user` WHERE `name` = new_name) THEN
        SET result = 0; -- 用户名已存在
        COMMIT;
    ELSE
        -- 用户名不存在,检查email是否已存在
        IF EXISTS (SELECT 1 FROM `user` WHERE `email` = new_email) THEN
            SET result = 0; -- email已存在
            COMMIT;
        ELSE
            -- email也不存在,更新user_id表
            UPDATE `user_id` SET `id` = `id` + 1;

            -- 获取更新后的id
            SELECT `id` INTO @new_id FROM `user_id`;

            -- 在user表中插入新记录
            INSERT INTO `user` (`uid`, `name`, `email`, `pwd`) VALUES (@new_id, new_name, new_email, new_pwd);
            -- 设置result为新插入的uid
            SET result = @new_id; -- 插入成功,返回新的uid
            COMMIT;

        END IF;
    END IF;

END
数据库管理者
我们需要建立一个数据库管理者用来实现服务层,对接逻辑层的调用
cpp展开代码#include "const.h"
#include "MysqlDao.h"
class MysqlMgr: public Singleton<MysqlMgr>
{
	friend class Singleton<MysqlMgr>;
public:
	~MysqlMgr();
	int RegUser(const std::string& name, const std::string& email,  const std::string& pwd);
private:
	MysqlMgr();
	MysqlDao  _dao;
};
实现
cpp展开代码#include "MysqlMgr.h"


MysqlMgr::~MysqlMgr() {

}

int MysqlMgr::RegUser(const std::string& name, const std::string& email, const std::string& pwd)
{
	return _dao.RegUser(name, email, pwd);
}

MysqlMgr::MysqlMgr() {
}
逻辑层调用
在逻辑层注册消息处理。
cpp展开代码RegPost("/user_register", [](std::shared_ptr<HttpConnection> connection) {
    auto body_str = boost::beast::buffers_to_string(connection->_request.body().data());
    std::cout << "receive body is " << body_str << std::endl;
    connection->_response.set(http::field::content_type, "text/json");
    Json::Value root;
    Json::Reader reader;
    Json::Value src_root;
    bool parse_success = reader.parse(body_str, src_root);
    if (!parse_success) {
        std::cout << "Failed to parse JSON data!" << std::endl;
        root["error"] = ErrorCodes::Error_Json;
        std::string jsonstr = root.toStyledString();
        beast::ostream(connection->_response.body()) << jsonstr;
        return true;
    }

    auto email = src_root["email"].asString();
    auto name = src_root["user"].asString();
    auto pwd = src_root["passwd"].asString();
    auto confirm = src_root["confirm"].asString();

    if (pwd != confirm) {
        std::cout << "password err " << std::endl;
        root["error"] = ErrorCodes::PasswdErr;
        std::string jsonstr = root.toStyledString();
        beast::ostream(connection->_response.body()) << jsonstr;
        return true;
    }

    //先查找redis中email对应的验证码是否合理
    std::string  varify_code;
    bool b_get_varify = RedisMgr::GetInstance()->Get(CODEPREFIX+src_root["email"].asString(), varify_code);
    if (!b_get_varify) {
        std::cout << " get varify code expired" << std::endl;
        root["error"] = ErrorCodes::VarifyExpired;
        std::string jsonstr = root.toStyledString();
        beast::ostream(connection->_response.body()) << jsonstr;
        return true;
    }

    if (varify_code != src_root["varifycode"].asString()) {
        std::cout << " varify code error" << std::endl;
        root["error"] = ErrorCodes::VarifyCodeErr;
        std::string jsonstr = root.toStyledString();
        beast::ostream(connection->_response.body()) << jsonstr;
        return true;
    }

    //查找数据库判断用户是否存在
    int uid = MysqlMgr::GetInstance()->RegUser(name, email, pwd);
    if (uid == 0 || uid == -1) {
        std::cout << " user or email exist" << std::endl;
        root["error"] = ErrorCodes::UserExist;
        std::string jsonstr = root.toStyledString();
        beast::ostream(connection->_response.body()) << jsonstr;
        return true;
    }
    root["error"] = 0;
    root["uid"] = uid;
    root["email"] = email;
    root ["user"]= name;
    root["passwd"] = pwd;
    root["confirm"] = confirm;
    root["varifycode"] = src_root["varifycode"].asString();
    std::string jsonstr = root.toStyledString();
    beast::ostream(connection->_response.body()) << jsonstr;
    return true;
    });
再次启动客户端测试,可以注册成功
day12-注册界面完善
增加定时按钮
点击获取验证码后需要让按钮显示倒计时,然后倒计时结束后再次可点击。 添加TimberBtn类
cpp展开代码#ifndef TIMERBTN_H
#define TIMERBTN_H
#include <QPushButton>
#include <QTimer>

class TimerBtn : public QPushButton
{
public:
    TimerBtn(QWidget *parent = nullptr);
    ~ TimerBtn();

    // 重写mouseReleaseEvent
    virtual void mouseReleaseEvent(QMouseEvent *e) override;
private:
    QTimer  *_timer;
    int _counter;
};

#endif // TIMERBTN_H
添加实现
cpp展开代码#include "timerbtn.h"
#include <QMouseEvent>
#include <QDebug>

TimerBtn::TimerBtn(QWidget *parent):QPushButton(parent),_counter(10)
{
    _timer = new QTimer(this);

    connect(_timer, &QTimer::timeout, [this](){
        _counter--;
        if(_counter <= 0){
            _timer->stop();
            _counter = 10;
            this->setText("获取");
            this->setEnabled(true);
            return;
        }
        this->setText(QString::number(_counter));
    });
}

TimerBtn::~TimerBtn()
{
    _timer->stop();
}

void TimerBtn::mouseReleaseEvent(QMouseEvent *e)
{
    if (e->button() == Qt::LeftButton) {
        // 在这里处理鼠标左键释放事件
        qDebug() << "MyButton was released!";
        this->setEnabled(false);
         this->setText(QString::number(_counter));
        _timer->start(1000);
        emit clicked();
    }
    // 调用基类的mouseReleaseEvent以确保正常的事件处理(如点击效果)
    QPushButton::mouseReleaseEvent(e);
}
然后将注册界面获取按钮升级为TimerBtn
调整输入框错误提示
在RegisterDialog构造函数中删除原来的输入框editing信号和逻辑,添加editingFinished信号和处理逻辑。
cpp展开代码//day11 设定输入框输入后清空字符串
ui->err_tip->clear();

connect(ui->user_edit,&QLineEdit::editingFinished,this,[this](){
    checkUserValid();
});

connect(ui->email_edit, &QLineEdit::editingFinished, this, [this](){
    checkEmailValid();
});

connect(ui->pass_edit, &QLineEdit::editingFinished, this, [this](){
    checkPassValid();
});

connect(ui->confirm_edit, &QLineEdit::editingFinished, this, [this](){
    checkConfirmValid();
});

connect(ui->varify_edit, &QLineEdit::editingFinished, this, [this](){
        checkVarifyValid();
});
global.h中添加TipErr定义
cpp展开代码enum TipErr{
    TIP_SUCCESS = 0,
    TIP_EMAIL_ERR = 1,
    TIP_PWD_ERR = 2,
    TIP_CONFIRM_ERR = 3,
    TIP_PWD_CONFIRM = 4,
    TIP_VARIFY_ERR = 5,
    TIP_USER_ERR = 6
};
RegisterDialog声明中添加
cpp展开代码QMap<TipErr, QString> _tip_errs;
_tip_errs用来缓存各个输入框输入完成后提示的错误,如果该输入框错误清除后就显示剩余的错误,每次只显示一条
实现添加错误和删除错误
cpp展开代码void ResetDialog::AddTipErr(TipErr te, QString tips)
{
    _tip_errs[te] = tips;
    showTip(tips, false);
}

void ResetDialog::DelTipErr(TipErr te)
{
    _tip_errs.remove(te);
    if(_tip_errs.empty()){
      ui->err_tip->clear();
      return;
    }

    showTip(_tip_errs.first(), false);
}
实现错误检测
cpp展开代码bool ResetDialog::checkUserValid()
{
    if(ui->user_edit->text() == ""){
        AddTipErr(TipErr::TIP_USER_ERR, tr("用户名不能为空"));
        return false;
    }

    DelTipErr(TipErr::TIP_USER_ERR);
    return true;
}


bool ResetDialog::checkPassValid()
{
    auto pass = ui->pwd_edit->text();

    if(pass.length() < 6 || pass.length()>15){
        //提示长度不准确
        AddTipErr(TipErr::TIP_PWD_ERR, tr("密码长度应为6~15"));
        return false;
    }

    // 创建一个正则表达式对象,按照上述密码要求
    // 这个正则表达式解释:
    // ^[a-zA-Z0-9!@#$%^&*]{6,15}$ 密码长度至少6,可以是字母、数字和特定的特殊字符
    QRegularExpression regExp("^[a-zA-Z0-9!@#$%^&*]{6,15}$");
    bool match = regExp.match(pass).hasMatch();
    if(!match){
        //提示字符非法
        AddTipErr(TipErr::TIP_PWD_ERR, tr("不能包含非法字符"));
        return false;;
    }

    DelTipErr(TipErr::TIP_PWD_ERR);

    return true;
}


bool ResetDialog::checkEmailValid()
{
    //验证邮箱的地址正则表达式
    auto email = ui->email_edit->text();
    // 邮箱地址的正则表达式
    QRegularExpression regex(R"((\w+)(\.|_)?(\w*)@(\w+)(\.(\w+))+)");
    bool match = regex.match(email).hasMatch(); // 执行正则表达式匹配
    if(!match){
        //提示邮箱不正确
        AddTipErr(TipErr::TIP_EMAIL_ERR, tr("邮箱地址不正确"));
        return false;
    }

    DelTipErr(TipErr::TIP_EMAIL_ERR);
    return true;
}

bool ResetDialog::checkVarifyValid()
{
    auto pass = ui->varify_edit->text();
    if(pass.isEmpty()){
        AddTipErr(TipErr::TIP_VARIFY_ERR, tr("验证码不能为空"));
        return false;
    }

    DelTipErr(TipErr::TIP_VARIFY_ERR);
    return true;
}
除此之外修改之前点击确认按钮的逻辑,改为检测所有条件成立后再发送请求
cpp展开代码void ResetDialog::on_sure_btn_clicked()
{
    bool valid = checkUserValid();
    if(!valid){
        return;
    }

    valid = checkEmailValid();
    if(!valid){
        return;
    }

    valid = checkPassValid();
    if(!valid){
        return;
    }

    valid = checkVarifyValid();
    if(!valid){
        return;
    }

    //发送http重置用户请求
    QJsonObject json_obj;
    json_obj["user"] = ui->user_edit->text();
    json_obj["email"] = ui->email_edit->text();
    json_obj["passwd"] = xorString(ui->pwd_edit->text());
    json_obj["varifycode"] = ui->varify_edit->text();
    HttpMgr::GetInstance()->PostHttpReq(QUrl(gate_url_prefix+"/reset_pwd"),
                 json_obj, ReqId::ID_RESET_PWD,Modules::RESETMOD);
}
隐藏和显示密码
我们在输入密码时希望能通过点击可见还是不可见,显示密码和隐藏密码,这里先添加图片放入资源中,然后在Register.ui中添加两个label,分别命名为pass_visible和confirm_visible, 用来占据位置。
因为我们要做的点击后图片要有状态切换,以及浮动显示不一样的效果等,所以我们重写ClickedLabel,继承自QLabel.
cpp展开代码#ifndef CLICKEDLABEL_H
#define CLICKEDLABEL_H
#include <QLabel>
#include "global.h"

class ClickedLabel:public QLabel
{
    Q_OBJECT
public:
    ClickedLabel(QWidget* parent);
    virtual void mousePressEvent(QMouseEvent *ev) override;
    virtual void enterEvent(QEvent* event) override;
    virtual void leaveEvent(QEvent* event) override;
    void SetState(QString normal="", QString hover="", QString press="",
                  QString select="", QString select_hover="", QString select_press="");

    ClickLbState GetCurState();
protected:

private:
    QString _normal;
    QString _normal_hover;
    QString _normal_press;

    QString _selected;
    QString _selected_hover;
    QString _selected_press;

    ClickLbState _curstate;
signals:
    void clicked(void);

};

#endif // CLICKEDLABEL_H
一个Label有六种状态,普通状态,普通的悬浮状态,普通的点击状态,选中状态,选中的悬浮状态,选中的点击状态。
当Label处于普通状态,被点击后,切换为选中状态,再次点击又切换为普通状态。
ClickLbState定义在global.h中,包含两种状态一个是普通状态,一个是选中状态。而Label中的六种状态就是基于这两种状态嵌套实现的。
cpp展开代码enum ClickLbState{
    Normal = 0,
    Selected = 1
};
六种状态用qss写好,这样我们只需要根据鼠标事件切换不同的qss就可以实现样式变换。
css展开代码#pass_visible[state='unvisible']{
   border-image: url(:/res/unvisible.png);
}

#pass_visible[state='unvisible_hover']{
   border-image: url(:/res/unvisible_hover.png);
}

#pass_visible[state='visible']{
   border-image: url(:/res/visible.png);
}

#pass_visible[state='visible_hover']{
   border-image: url(:/res/visible_hover.png);
}


#confirm_visible[state='unvisible']{
   border-image: url(:/res/unvisible.png);
}

#confirm_visible[state='unvisible_hover']{
   border-image: url(:/res/unvisible_hover.png);
}

#confirm_visible[state='visible']{
   border-image: url(:/res/visible.png);
}

#confirm_visible[state='visible_hover']{
   border-image: url(:/res/visible_hover.png);
}
我们实现ClickedLabel功能
cpp展开代码#include "clickedlabel.h"
#include <QMouseEvent>
ClickedLabel::ClickedLabel(QWidget* parent):QLabel (parent),_curstate(ClickLbState::Normal)
{

}


// 处理鼠标点击事件
void ClickedLabel::mousePressEvent(QMouseEvent* event)  {
    if (event->button() == Qt::LeftButton) {
        if(_curstate == ClickLbState::Normal){
              qDebug()<<"clicked , change to selected hover: "<< _selected_hover;
            _curstate = ClickLbState::Selected;
            setProperty("state",_selected_hover);
            repolish(this);
            update();

        }else{
               qDebug()<<"clicked , change to normal hover: "<< _normal_hover;
            _curstate = ClickLbState::Normal;
            setProperty("state",_normal_hover);
            repolish(this);
            update();
        }
        emit clicked();
    }
    // 调用基类的mousePressEvent以保证正常的事件处理
    QLabel::mousePressEvent(event);
}

// 处理鼠标悬停进入事件
void ClickedLabel::enterEvent(QEvent* event) {
    // 在这里处理鼠标悬停进入的逻辑
    if(_curstate == ClickLbState::Normal){
         qDebug()<<"enter , change to normal hover: "<< _normal_hover;
        setProperty("state",_normal_hover);
        repolish(this);
        update();

    }else{
         qDebug()<<"enter , change to selected hover: "<< _selected_hover;
        setProperty("state",_selected_hover);
        repolish(this);
        update();
    }

    QLabel::enterEvent(event);
}

// 处理鼠标悬停离开事件
void ClickedLabel::leaveEvent(QEvent* event){
    // 在这里处理鼠标悬停离开的逻辑
    if(_curstate == ClickLbState::Normal){
         qDebug()<<"leave , change to normal : "<< _normal;
        setProperty("state",_normal);
        repolish(this);
        update();

    }else{
         qDebug()<<"leave , change to normal hover: "<< _selected;
        setProperty("state",_selected);
        repolish(this);
        update();
    }
    QLabel::leaveEvent(event);
}

void ClickedLabel::SetState(QString normal, QString hover, QString press,
                            QString select, QString select_hover, QString select_press)
{
    _normal = normal;
    _normal_hover = hover;
    _normal_press = press;

    _selected = select;
    _selected_hover = select_hover;
    _selected_press = select_press;

    setProperty("state",normal);
    repolish(this);
}

ClickLbState ClickedLabel::GetCurState(){
    return _curstate;
}
将label升级为ClickedLabel,然后在RegisterDialog的构造函数中添加label点击的响应函数
cpp展开代码//设置浮动显示手形状
ui->pass_visible->setCursor(Qt::PointingHandCursor);
ui->confirm_visible->setCursor(Qt::PointingHandCursor);

ui->pass_visible->SetState("unvisible","unvisible_hover","","visible",
                            "visible_hover","");

ui->confirm_visible->SetState("unvisible","unvisible_hover","","visible",
                                "visible_hover","");
//连接点击事件

connect(ui->pass_visible, &ClickedLabel::clicked, this, [this]() {
    auto state = ui->pass_visible->GetCurState();
    if(state == ClickLbState::Normal){
        ui->pass_edit->setEchoMode(QLineEdit::Password);
    }else{
            ui->pass_edit->setEchoMode(QLineEdit::Normal);
    }
    qDebug() << "Label was clicked!";
});

connect(ui->confirm_visible, &ClickedLabel::clicked, this, [this]() {
    auto state = ui->confirm_visible->GetCurState();
    if(state == ClickLbState::Normal){
        ui->confirm_edit->setEchoMode(QLineEdit::Password);
    }else{
            ui->confirm_edit->setEchoMode(QLineEdit::Normal);
    }
    qDebug() << "Label was clicked!";
});
这样就实现了通过点击切换密码的显示和隐藏。
注册成功提示页面
注册成功后要切换到提示页面,所以在initHandlers函数内实现收到服务器注册回复的请求
cpp展开代码//注册注册用户回包逻辑
_handlers.insert(ReqId::ID_REG_USER, [this](QJsonObject jsonObj){
    int error = jsonObj["error"].toInt();
    if(error != ErrorCodes::SUCCESS){
        showTip(tr("参数错误"),false);
        return;
    }
    auto email = jsonObj["email"].toString();
    showTip(tr("用户注册成功"), true);
    qDebug()<< "email is " << email ;
    qDebug()<< "user uuid is " <<  jsonObj["uuid"].toString();
    ChangeTipPage();
});
页面切换逻辑
cpp展开代码void RegisterDialog::ChangeTipPage()
{
    _countdown_timer->stop();
    ui->stackedWidget->setCurrentWidget(ui->page_2);

    // 启动定时器,设置间隔为1000毫秒(1秒)
    _countdown_timer->start(1000);
}
在RegisterDialog.ui中stackwidget的page2添加标签和返回按钮
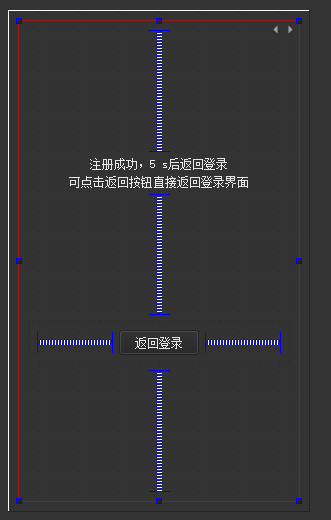
在RegisterDialog构造函数中添加定时器回调
cpp展开代码// 创建定时器
_countdown_timer = new QTimer(this);
// 连接信号和槽
connect(_countdown_timer, &QTimer::timeout, [this](){
    if(_countdown==0){
        _countdown_timer->stop();
        emit sigSwitchLogin();
        return;
    }
    _countdown--;
    auto str = QString("注册成功,%1 s后返回登录").arg(_countdown);
    ui->tip_lb->setText(str);
});
除此之外在返回按钮的槽函数中停止定时器并发送切换登录的信号
cpp展开代码void RegisterDialog::on_return_btn_clicked()
{
    _countdown_timer->stop();
    emit sigSwitchLogin();
}
取消注册也发送切换登录信号
cpp展开代码void RegisterDialog::on_cancel_btn_clicked()
{
    _countdown_timer->stop();
    emit sigSwitchLogin();
}
界面跳转
回到mainwindow,构造函数简化,只做登录界面初始化
cpp展开代码MainWindow::MainWindow(QWidget *parent) :
    QMainWindow(parent),
    ui(new Ui::MainWindow)
{
    ui->setupUi(this);
    //创建一个CentralWidget, 并将其设置为MainWindow的中心部件
    _login_dlg = new LoginDialog(this);
    _login_dlg->setWindowFlags(Qt::CustomizeWindowHint|Qt::FramelessWindowHint);
    setCentralWidget(_login_dlg);

    //连接登录界面注册信号
    connect(_login_dlg, &LoginDialog::switchRegister, this, &MainWindow::SlotSwitchReg);
    //连接登录界面忘记密码信号
    connect(_login_dlg, &LoginDialog::switchReset, this, &MainWindow::SlotSwitchReset);
}
在点击注册按钮的槽函数中
cpp展开代码void MainWindow::SlotSwitchReg()
{
    _reg_dlg = new RegisterDialog(this);
    _reg_dlg->hide();

    _reg_dlg->setWindowFlags(Qt::CustomizeWindowHint|Qt::FramelessWindowHint);

     //连接注册界面返回登录信号
    connect(_reg_dlg, &RegisterDialog::sigSwitchLogin, this, &MainWindow::SlotSwitchLogin);
    setCentralWidget(_reg_dlg);
    _login_dlg->hide();
    _reg_dlg->show();
}
切换登录界面
cpp展开代码//从注册界面返回登录界面
void MainWindow::SlotSwitchLogin()
{
    //创建一个CentralWidget, 并将其设置为MainWindow的中心部件
    _login_dlg = new LoginDialog(this);
    _login_dlg->setWindowFlags(Qt::CustomizeWindowHint|Qt::FramelessWindowHint);
    setCentralWidget(_login_dlg);

   _reg_dlg->hide();
    _login_dlg->show();
    //连接登录界面注册信号
    connect(_login_dlg, &LoginDialog::switchRegister, this, &MainWindow::SlotSwitchReg);
    //连接登录界面忘记密码信号
    connect(_login_dlg, &LoginDialog::switchReset, this, &MainWindow::SlotSwitchReset);
}
这样登录界面和注册界面的切换逻辑就写完了。
day13-重置界面
重置密码label
当我们在登录忘记密码的时候可以支持重置密码,重置密码label也要实现浮动和点击效果,以及未点击效果。所以我们复用之前的ClickedLabel, 在登录界面中升级forget_label为ClickedLabel。
cpp展开代码LoginDialog::LoginDialog(QWidget *parent) :
    QDialog(parent),
    ui(new Ui::LoginDialog)
{
    ui->setupUi(this);
    connect(ui->reg_btn, &QPushButton::clicked, this, &LoginDialog::switchRegister);
    ui->forget_label->SetState("normal","hover","","selected","selected_hover","");
    ui->forget_label->setCursor(Qt::PointingHandCursor);
    connect(ui->forget_label, &ClickedLabel::clicked, this, &LoginDialog::slot_forget_pwd);
}
点击忘记密码发送对应的信号
cpp展开代码void LoginDialog::slot_forget_pwd()
{
    qDebug()<<"slot forget pwd";
    emit switchReset();
}
我们在mainwindow中连接了重置密码的信号和槽
cpp展开代码//连接登录界面忘记密码信号
connect(_login_dlg, &LoginDialog::switchReset, this, &MainWindow::SlotSwitchReset);
实现SlotSwitchReset
cpp展开代码void MainWindow::SlotSwitchReset()
{
    //创建一个CentralWidget, 并将其设置为MainWindow的中心部件
    _reset_dlg = new ResetDialog(this);
    _reset_dlg->setWindowFlags(Qt::CustomizeWindowHint|Qt::FramelessWindowHint);
    setCentralWidget(_reset_dlg);

   _login_dlg->hide();
    _reset_dlg->show();
    //注册返回登录信号和槽函数
    connect(_reset_dlg, &ResetDialog::switchLogin, this, &MainWindow::SlotSwitchLogin2);
}
ResetDialog是我们添加的界面类,新建ResetDialog界面类,界面布局如下
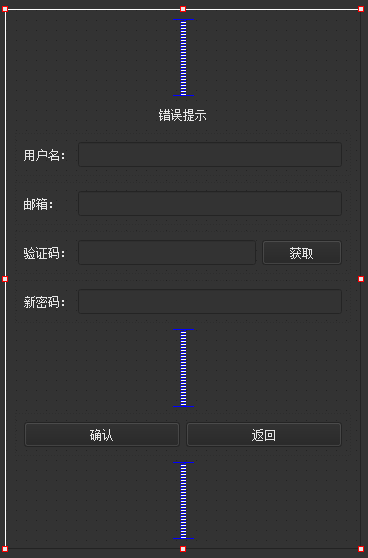
重置界面
cpp展开代码#include "resetdialog.h"
#include "ui_resetdialog.h"
#include <QDebug>
#include <QRegularExpression>
#include "global.h"
#include "httpmgr.h"

ResetDialog::ResetDialog(QWidget *parent) :
    QDialog(parent),
    ui(new Ui::ResetDialog)
{
    ui->setupUi(this);

    connect(ui->user_edit,&QLineEdit::editingFinished,this,[this](){
        checkUserValid();
    });

    connect(ui->email_edit, &QLineEdit::editingFinished, this, [this](){
        checkEmailValid();
    });

    connect(ui->pwd_edit, &QLineEdit::editingFinished, this, [this](){
        checkPassValid();
    });


    connect(ui->varify_edit, &QLineEdit::editingFinished, this, [this](){
         checkVarifyValid();
    });

    //连接reset相关信号和注册处理回调
    initHandlers();
    connect(HttpMgr::GetInstance().get(), &HttpMgr::sig_reset_mod_finish, this,
            &ResetDialog::slot_reset_mod_finish);

}
下面是检测逻辑
cpp展开代码bool ResetDialog::checkUserValid()
{
    if(ui->user_edit->text() == ""){
        AddTipErr(TipErr::TIP_USER_ERR, tr("用户名不能为空"));
        return false;
    }

    DelTipErr(TipErr::TIP_USER_ERR);
    return true;
}


bool ResetDialog::checkPassValid()
{
    auto pass = ui->pwd_edit->text();

    if(pass.length() < 6 || pass.length()>15){
        //提示长度不准确
        AddTipErr(TipErr::TIP_PWD_ERR, tr("密码长度应为6~15"));
        return false;
    }

    // 创建一个正则表达式对象,按照上述密码要求
    // 这个正则表达式解释:
    // ^[a-zA-Z0-9!@#$%^&*]{6,15}$ 密码长度至少6,可以是字母、数字和特定的特殊字符
    QRegularExpression regExp("^[a-zA-Z0-9!@#$%^&*]{6,15}$");
    bool match = regExp.match(pass).hasMatch();
    if(!match){
        //提示字符非法
        AddTipErr(TipErr::TIP_PWD_ERR, tr("不能包含非法字符"));
        return false;;
    }

    DelTipErr(TipErr::TIP_PWD_ERR);

    return true;
}

bool ResetDialog::checkEmailValid()
{
    //验证邮箱的地址正则表达式
    auto email = ui->email_edit->text();
    // 邮箱地址的正则表达式
    QRegularExpression regex(R"((\w+)(\.|_)?(\w*)@(\w+)(\.(\w+))+)");
    bool match = regex.match(email).hasMatch(); // 执行正则表达式匹配
    if(!match){
        //提示邮箱不正确
        AddTipErr(TipErr::TIP_EMAIL_ERR, tr("邮箱地址不正确"));
        return false;
    }

    DelTipErr(TipErr::TIP_EMAIL_ERR);
    return true;
}

bool ResetDialog::checkVarifyValid()
{
    auto pass = ui->varify_edit->text();
    if(pass.isEmpty()){
        AddTipErr(TipErr::TIP_VARIFY_ERR, tr("验证码不能为空"));
        return false;
    }

    DelTipErr(TipErr::TIP_VARIFY_ERR);
    return true;
}

void ResetDialog::AddTipErr(TipErr te, QString tips)
{
    _tip_errs[te] = tips;
    showTip(tips, false);
}

void ResetDialog::DelTipErr(TipErr te)
{
    _tip_errs.remove(te);
    if(_tip_errs.empty()){
      ui->err_tip->clear();
      return;
    }

    showTip(_tip_errs.first(), false);
}
显示接口
cpp展开代码void ResetDialog::showTip(QString str, bool b_ok)
{
    if(b_ok){
         ui->err_tip->setProperty("state","normal");
    }else{
        ui->err_tip->setProperty("state","err");
    }

    ui->err_tip->setText(str);

    repolish(ui->err_tip);
}
获取验证码
cpp展开代码void ResetDialog::on_varify_btn_clicked()
{
    qDebug()<<"receive varify btn clicked ";
    auto email = ui->email_edit->text();
    auto bcheck = checkEmailValid();
    if(!bcheck){
        return;
    }

    //发送http请求获取验证码
    QJsonObject json_obj;
    json_obj["email"] = email;
    HttpMgr::GetInstance()->PostHttpReq(QUrl(gate_url_prefix+"/get_varifycode"),
                                        json_obj, ReqId::ID_GET_VARIFY_CODE,Modules::RESETMOD);
}
初始化回包处理逻辑
cpp展开代码void ResetDialog::initHandlers()
{
    //注册获取验证码回包逻辑
    _handlers.insert(ReqId::ID_GET_VARIFY_CODE, [this](QJsonObject jsonObj){
        int error = jsonObj["error"].toInt();
        if(error != ErrorCodes::SUCCESS){
            showTip(tr("参数错误"),false);
            return;
        }
        auto email = jsonObj["email"].toString();
        showTip(tr("验证码已发送到邮箱,注意查收"), true);
        qDebug()<< "email is " << email ;
    });

    //注册注册用户回包逻辑
    _handlers.insert(ReqId::ID_RESET_PWD, [this](QJsonObject jsonObj){
        int error = jsonObj["error"].toInt();
        if(error != ErrorCodes::SUCCESS){
            showTip(tr("参数错误"),false);
            return;
        }
        auto email = jsonObj["email"].toString();
        showTip(tr("重置成功,点击返回登录"), true);
        qDebug()<< "email is " << email ;
        qDebug()<< "user uuid is " <<  jsonObj["uuid"].toString();
    });
}
根据返回的id调用不同的回报处理逻辑
cpp展开代码void ResetDialog::slot_reset_mod_finish(ReqId id, QString res, ErrorCodes err)
{
    if(err != ErrorCodes::SUCCESS){
        showTip(tr("网络请求错误"),false);
        return;
    }

    // 解析 JSON 字符串,res需转化为QByteArray
    QJsonDocument jsonDoc = QJsonDocument::fromJson(res.toUtf8());
    //json解析错误
    if(jsonDoc.isNull()){
        showTip(tr("json解析错误"),false);
        return;
    }

    //json解析错误
    if(!jsonDoc.isObject()){
        showTip(tr("json解析错误"),false);
        return;
    }


    //调用对应的逻辑,根据id回调。
    _handlers[id](jsonDoc.object());

    return;
}
这里实现发送逻辑
cpp展开代码void ResetDialog::on_sure_btn_clicked()
{
    bool valid = checkUserValid();
    if(!valid){
        return;
    }

    valid = checkEmailValid();
    if(!valid){
        return;
    }

    valid = checkPassValid();
    if(!valid){
        return;
    }

    valid = checkVarifyValid();
    if(!valid){
        return;
    }

    //发送http重置用户请求
    QJsonObject json_obj;
    json_obj["user"] = ui->user_edit->text();
    json_obj["email"] = ui->email_edit->text();
    json_obj["passwd"] = xorString(ui->pwd_edit->text());
    json_obj["varifycode"] = ui->varify_edit->text();
    HttpMgr::GetInstance()->PostHttpReq(QUrl(gate_url_prefix+"/reset_pwd"),
                 json_obj, ReqId::ID_RESET_PWD,Modules::RESETMOD);
}
注册、重置、登录切换
我们要实现注册、重置、登录三个界面的替换,就需要在MainWindow中添加SlotSwitchLogin2的实现
cpp展开代码//从重置界面返回登录界面
void MainWindow::SlotSwitchLogin2()
{
    //创建一个CentralWidget, 并将其设置为MainWindow的中心部件
    _login_dlg = new LoginDialog(this);
    _login_dlg->setWindowFlags(Qt::CustomizeWindowHint|Qt::FramelessWindowHint);
    setCentralWidget(_login_dlg);

   _reset_dlg->hide();
    _login_dlg->show();
    //连接登录界面忘记密码信号
    connect(_login_dlg, &LoginDialog::switchReset, this, &MainWindow::SlotSwitchReset);
    //连接登录界面注册信号
    connect(_login_dlg, &LoginDialog::switchRegister, this, &MainWindow::SlotSwitchReg);
}
服务端响应重置
在LogicSystem的构造函数中增加注册逻辑
cpp展开代码//重置回调逻辑
RegPost("/reset_pwd", [](std::shared_ptr<HttpConnection> connection) {
    auto body_str = boost::beast::buffers_to_string(connection->_request.body().data());
    std::cout << "receive body is " << body_str << std::endl;
    connection->_response.set(http::field::content_type, "text/json");
    Json::Value root;
    Json::Reader reader;
    Json::Value src_root;
    bool parse_success = reader.parse(body_str, src_root);
    if (!parse_success) {
        std::cout << "Failed to parse JSON data!" << std::endl;
        root["error"] = ErrorCodes::Error_Json;
        std::string jsonstr = root.toStyledString();
        beast::ostream(connection->_response.body()) << jsonstr;
        return true;
    }

    auto email = src_root["email"].asString();
    auto name = src_root["user"].asString();
    auto pwd = src_root["passwd"].asString();

    //先查找redis中email对应的验证码是否合理
    std::string  varify_code;
    bool b_get_varify = RedisMgr::GetInstance()->Get(CODEPREFIX + src_root["email"].asString(), varify_code);
    if (!b_get_varify) {
        std::cout << " get varify code expired" << std::endl;
        root["error"] = ErrorCodes::VarifyExpired;
        std::string jsonstr = root.toStyledString();
        beast::ostream(connection->_response.body()) << jsonstr;
        return true;
    }

    if (varify_code != src_root["varifycode"].asString()) {
        std::cout << " varify code error" << std::endl;
        root["error"] = ErrorCodes::VarifyCodeErr;
        std::string jsonstr = root.toStyledString();
        beast::ostream(connection->_response.body()) << jsonstr;
        return true;
    }
    //查询数据库判断用户名和邮箱是否匹配
    bool email_valid = MysqlMgr::GetInstance()->CheckEmail(name, email);
    if (!email_valid) {
        std::cout << " user email not match" << std::endl;
        root["error"] = ErrorCodes::EmailNotMatch;
        std::string jsonstr = root.toStyledString();
        beast::ostream(connection->_response.body()) << jsonstr;
        return true;
    }

    //更新密码为最新密码
    bool b_up = MysqlMgr::GetInstance()->UpdatePwd(name, pwd);
    if (!b_up) {
        std::cout << " update pwd failed" << std::endl;
        root["error"] = ErrorCodes::PasswdUpFailed;
        std::string jsonstr = root.toStyledString();
        beast::ostream(connection->_response.body()) << jsonstr;
        return true;
    }

    std::cout << "succeed to update password" << pwd << std::endl;
    root["error"] = 0;
    root["email"] = email;
    root["user"] = name;
    root["passwd"] = pwd;
    root["varifycode"] = src_root["varifycode"].asString();
    std::string jsonstr = root.toStyledString();
    beast::ostream(connection->_response.body()) << jsonstr;
    return true;
    });
在Mysql中新增CheckEmail和UpdatePwd函数
cpp展开代码bool MysqlMgr::CheckEmail(const std::string& name, const std::string& email) {
	return _dao.CheckEmail(name, email);
}

bool MysqlMgr::UpdatePwd(const std::string& name, const std::string& pwd) {
	return _dao.UpdatePwd(name, pwd);
}
DAO这一层写具体的逻辑, 检测邮箱是否合理
cpp展开代码bool MysqlDao::CheckEmail(const std::string& name, const std::string& email) {
	auto con = pool_->getConnection();
	try {
		if (con == nullptr) {
			pool_->returnConnection(std::move(con));
			return false;
		}

		// 准备查询语句
		std::unique_ptr<sql::PreparedStatement> pstmt(con->prepareStatement("SELECT email FROM user WHERE name = ?"));

		// 绑定参数
		pstmt->setString(1, name);

		// 执行查询
		std::unique_ptr<sql::ResultSet> res(pstmt->executeQuery());

		// 遍历结果集
		while (res->next()) {
			std::cout << "Check Email: " << res->getString("email") << std::endl;
			if (email != res->getString("email")) {
				pool_->returnConnection(std::move(con));
				return false;
			}
			pool_->returnConnection(std::move(con));
			return true;
		}
	}
	catch (sql::SQLException& e) {
		pool_->returnConnection(std::move(con));
		std::cerr << "SQLException: " << e.what();
		std::cerr << " (MySQL error code: " << e.getErrorCode();
		std::cerr << ", SQLState: " << e.getSQLState() << " )" << std::endl;
		return false;
	}
}
更新密码
cpp展开代码bool MysqlDao::UpdatePwd(const std::string& name, const std::string& newpwd) {
	auto con = pool_->getConnection();
	try {
		if (con == nullptr) {
			pool_->returnConnection(std::move(con));
			return false;
		}

		// 准备查询语句
		std::unique_ptr<sql::PreparedStatement> pstmt(con->prepareStatement("UPDATE user SET pwd = ? WHERE name = ?"));

		// 绑定参数
		pstmt->setString(2, name);
		pstmt->setString(1, newpwd);

		// 执行更新
		int updateCount = pstmt->executeUpdate();

		std::cout << "Updated rows: " << updateCount << std::endl;
		pool_->returnConnection(std::move(con));
		return true;
	}
	catch (sql::SQLException& e) {
		pool_->returnConnection(std::move(con));
		std::cerr << "SQLException: " << e.what();
		std::cerr << " (MySQL error code: " << e.getErrorCode();
		std::cerr << ", SQLState: " << e.getSQLState() << " )" << std::endl;
		return false;
	}
}
重置密码label
当我们在登录忘记密码的时候可以支持重置密码,重置密码label也要实现浮动和点击效果,以及未点击效果。所以我们复用之前的ClickedLabel, 在登录界面中升级forget_label为ClickedLabel。
cpp展开代码LoginDialog::LoginDialog(QWidget *parent) :
    QDialog(parent),
    ui(new Ui::LoginDialog)
{
    ui->setupUi(this);
    connect(ui->reg_btn, &QPushButton::clicked, this, &LoginDialog::switchRegister);
    ui->forget_label->SetState("normal","hover","","selected","selected_hover","");
    ui->forget_label->setCursor(Qt::PointingHandCursor);
    connect(ui->forget_label, &ClickedLabel::clicked, this, &LoginDialog::slot_forget_pwd);
}
点击忘记密码发送对应的信号
cpp展开代码void LoginDialog::slot_forget_pwd()
{
    qDebug()<<"slot forget pwd";
    emit switchReset();
}
我们在mainwindow中连接了重置密码的信号和槽
cpp展开代码//连接登录界面忘记密码信号
connect(_login_dlg, &LoginDialog::switchReset, this, &MainWindow::SlotSwitchReset);
实现SlotSwitchReset
cpp展开代码void MainWindow::SlotSwitchReset()
{
    //创建一个CentralWidget, 并将其设置为MainWindow的中心部件
    _reset_dlg = new ResetDialog(this);
    _reset_dlg->setWindowFlags(Qt::CustomizeWindowHint|Qt::FramelessWindowHint);
    setCentralWidget(_reset_dlg);

   _login_dlg->hide();
    _reset_dlg->show();
    //注册返回登录信号和槽函数
    connect(_reset_dlg, &ResetDialog::switchLogin, this, &MainWindow::SlotSwitchLogin2);
}
ResetDialog是我们添加的界面类,新建ResetDialog界面类,界面布局如下
重置界面
cpp展开代码#include "resetdialog.h"
#include "ui_resetdialog.h"
#include <QDebug>
#include <QRegularExpression>
#include "global.h"
#include "httpmgr.h"

ResetDialog::ResetDialog(QWidget *parent) :
    QDialog(parent),
    ui(new Ui::ResetDialog)
{
    ui->setupUi(this);

    connect(ui->user_edit,&QLineEdit::editingFinished,this,[this](){
        checkUserValid();
    });

    connect(ui->email_edit, &QLineEdit::editingFinished, this, [this](){
        checkEmailValid();
    });

    connect(ui->pwd_edit, &QLineEdit::editingFinished, this, [this](){
        checkPassValid();
    });


    connect(ui->varify_edit, &QLineEdit::editingFinished, this, [this](){
         checkVarifyValid();
    });

    //连接reset相关信号和注册处理回调
    initHandlers();
    connect(HttpMgr::GetInstance().get(), &HttpMgr::sig_reset_mod_finish, this,
            &ResetDialog::slot_reset_mod_finish);

}
下面是检测逻辑
cpp展开代码bool ResetDialog::checkUserValid()
{
    if(ui->user_edit->text() == ""){
        AddTipErr(TipErr::TIP_USER_ERR, tr("用户名不能为空"));
        return false;
    }

    DelTipErr(TipErr::TIP_USER_ERR);
    return true;
}


bool ResetDialog::checkPassValid()
{
    auto pass = ui->pwd_edit->text();

    if(pass.length() < 6 || pass.length()>15){
        //提示长度不准确
        AddTipErr(TipErr::TIP_PWD_ERR, tr("密码长度应为6~15"));
        return false;
    }

    // 创建一个正则表达式对象,按照上述密码要求
    // 这个正则表达式解释:
    // ^[a-zA-Z0-9!@#$%^&*]{6,15}$ 密码长度至少6,可以是字母、数字和特定的特殊字符
    QRegularExpression regExp("^[a-zA-Z0-9!@#$%^&*]{6,15}$");
    bool match = regExp.match(pass).hasMatch();
    if(!match){
        //提示字符非法
        AddTipErr(TipErr::TIP_PWD_ERR, tr("不能包含非法字符"));
        return false;;
    }

    DelTipErr(TipErr::TIP_PWD_ERR);

    return true;
}

bool ResetDialog::checkEmailValid()
{
    //验证邮箱的地址正则表达式
    auto email = ui->email_edit->text();
    // 邮箱地址的正则表达式
    QRegularExpression regex(R"((\w+)(\.|_)?(\w*)@(\w+)(\.(\w+))+)");
    bool match = regex.match(email).hasMatch(); // 执行正则表达式匹配
    if(!match){
        //提示邮箱不正确
        AddTipErr(TipErr::TIP_EMAIL_ERR, tr("邮箱地址不正确"));
        return false;
    }

    DelTipErr(TipErr::TIP_EMAIL_ERR);
    return true;
}

bool ResetDialog::checkVarifyValid()
{
    auto pass = ui->varify_edit->text();
    if(pass.isEmpty()){
        AddTipErr(TipErr::TIP_VARIFY_ERR, tr("验证码不能为空"));
        return false;
    }

    DelTipErr(TipErr::TIP_VARIFY_ERR);
    return true;
}

void ResetDialog::AddTipErr(TipErr te, QString tips)
{
    _tip_errs[te] = tips;
    showTip(tips, false);
}

void ResetDialog::DelTipErr(TipErr te)
{
    _tip_errs.remove(te);
    if(_tip_errs.empty()){
      ui->err_tip->clear();
      return;
    }

    showTip(_tip_errs.first(), false);
}
显示接口
cpp展开代码void ResetDialog::showTip(QString str, bool b_ok)
{
    if(b_ok){
         ui->err_tip->setProperty("state","normal");
    }else{
        ui->err_tip->setProperty("state","err");
    }

    ui->err_tip->setText(str);

    repolish(ui->err_tip);
}
获取验证码
cpp展开代码void ResetDialog::on_varify_btn_clicked()
{
    qDebug()<<"receive varify btn clicked ";
    auto email = ui->email_edit->text();
    auto bcheck = checkEmailValid();
    if(!bcheck){
        return;
    }

    //发送http请求获取验证码
    QJsonObject json_obj;
    json_obj["email"] = email;
    HttpMgr::GetInstance()->PostHttpReq(QUrl(gate_url_prefix+"/get_varifycode"),
                                        json_obj, ReqId::ID_GET_VARIFY_CODE,Modules::RESETMOD);
}
初始化回包处理逻辑
cpp展开代码void ResetDialog::initHandlers()
{
    //注册获取验证码回包逻辑
    _handlers.insert(ReqId::ID_GET_VARIFY_CODE, [this](QJsonObject jsonObj){
        int error = jsonObj["error"].toInt();
        if(error != ErrorCodes::SUCCESS){
            showTip(tr("参数错误"),false);
            return;
        }
        auto email = jsonObj["email"].toString();
        showTip(tr("验证码已发送到邮箱,注意查收"), true);
        qDebug()<< "email is " << email ;
    });

    //注册注册用户回包逻辑
    _handlers.insert(ReqId::ID_RESET_PWD, [this](QJsonObject jsonObj){
        int error = jsonObj["error"].toInt();
        if(error != ErrorCodes::SUCCESS){
            showTip(tr("参数错误"),false);
            return;
        }
        auto email = jsonObj["email"].toString();
        showTip(tr("重置成功,点击返回登录"), true);
        qDebug()<< "email is " << email ;
        qDebug()<< "user uuid is " <<  jsonObj["uuid"].toString();
    });
}
根据返回的id调用不同的回报处理逻辑
cpp展开代码void ResetDialog::slot_reset_mod_finish(ReqId id, QString res, ErrorCodes err)
{
    if(err != ErrorCodes::SUCCESS){
        showTip(tr("网络请求错误"),false);
        return;
    }

    // 解析 JSON 字符串,res需转化为QByteArray
    QJsonDocument jsonDoc = QJsonDocument::fromJson(res.toUtf8());
    //json解析错误
    if(jsonDoc.isNull()){
        showTip(tr("json解析错误"),false);
        return;
    }

    //json解析错误
    if(!jsonDoc.isObject()){
        showTip(tr("json解析错误"),false);
        return;
    }


    //调用对应的逻辑,根据id回调。
    _handlers[id](jsonDoc.object());

    return;
}
这里实现发送逻辑
cpp展开代码void ResetDialog::on_sure_btn_clicked()
{
    bool valid = checkUserValid();
    if(!valid){
        return;
    }

    valid = checkEmailValid();
    if(!valid){
        return;
    }

    valid = checkPassValid();
    if(!valid){
        return;
    }

    valid = checkVarifyValid();
    if(!valid){
        return;
    }

    //发送http重置用户请求
    QJsonObject json_obj;
    json_obj["user"] = ui->user_edit->text();
    json_obj["email"] = ui->email_edit->text();
    json_obj["passwd"] = xorString(ui->pwd_edit->text());
    json_obj["varifycode"] = ui->varify_edit->text();
    HttpMgr::GetInstance()->PostHttpReq(QUrl(gate_url_prefix+"/reset_pwd"),
                 json_obj, ReqId::ID_RESET_PWD,Modules::RESETMOD);
}
注册、重置、登录切换
我们要实现注册、重置、登录三个界面的替换,就需要在MainWindow中添加SlotSwitchLogin2的实现
cpp展开代码//从重置界面返回登录界面
void MainWindow::SlotSwitchLogin2()
{
    //创建一个CentralWidget, 并将其设置为MainWindow的中心部件
    _login_dlg = new LoginDialog(this);
    _login_dlg->setWindowFlags(Qt::CustomizeWindowHint|Qt::FramelessWindowHint);
    setCentralWidget(_login_dlg);

   _reset_dlg->hide();
    _login_dlg->show();
    //连接登录界面忘记密码信号
    connect(_login_dlg, &LoginDialog::switchReset, this, &MainWindow::SlotSwitchReset);
    //连接登录界面注册信号
    connect(_login_dlg, &LoginDialog::switchRegister, this, &MainWindow::SlotSwitchReg);
}
服务端响应重置
在LogicSystem的构造函数中增加注册逻辑
cpp展开代码//重置回调逻辑
RegPost("/reset_pwd", [](std::shared_ptr<HttpConnection> connection) {
    auto body_str = boost::beast::buffers_to_string(connection->_request.body().data());
    std::cout << "receive body is " << body_str << std::endl;
    connection->_response.set(http::field::content_type, "text/json");
    Json::Value root;
    Json::Reader reader;
    Json::Value src_root;
    bool parse_success = reader.parse(body_str, src_root);
    if (!parse_success) {
        std::cout << "Failed to parse JSON data!" << std::endl;
        root["error"] = ErrorCodes::Error_Json;
        std::string jsonstr = root.toStyledString();
        beast::ostream(connection->_response.body()) << jsonstr;
        return true;
    }

    auto email = src_root["email"].asString();
    auto name = src_root["user"].asString();
    auto pwd = src_root["passwd"].asString();

    //先查找redis中email对应的验证码是否合理
    std::string  varify_code;
    bool b_get_varify = RedisMgr::GetInstance()->Get(CODEPREFIX + src_root["email"].asString(), varify_code);
    if (!b_get_varify) {
        std::cout << " get varify code expired" << std::endl;
        root["error"] = ErrorCodes::VarifyExpired;
        std::string jsonstr = root.toStyledString();
        beast::ostream(connection->_response.body()) << jsonstr;
        return true;
    }

    if (varify_code != src_root["varifycode"].asString()) {
        std::cout << " varify code error" << std::endl;
        root["error"] = ErrorCodes::VarifyCodeErr;
        std::string jsonstr = root.toStyledString();
        beast::ostream(connection->_response.body()) << jsonstr;
        return true;
    }
    //查询数据库判断用户名和邮箱是否匹配
    bool email_valid = MysqlMgr::GetInstance()->CheckEmail(name, email);
    if (!email_valid) {
        std::cout << " user email not match" << std::endl;
        root["error"] = ErrorCodes::EmailNotMatch;
        std::string jsonstr = root.toStyledString();
        beast::ostream(connection->_response.body()) << jsonstr;
        return true;
    }

    //更新密码为最新密码
    bool b_up = MysqlMgr::GetInstance()->UpdatePwd(name, pwd);
    if (!b_up) {
        std::cout << " update pwd failed" << std::endl;
        root["error"] = ErrorCodes::PasswdUpFailed;
        std::string jsonstr = root.toStyledString();
        beast::ostream(connection->_response.body()) << jsonstr;
        return true;
    }

    std::cout << "succeed to update password" << pwd << std::endl;
    root["error"] = 0;
    root["email"] = email;
    root["user"] = name;
    root["passwd"] = pwd;
    root["varifycode"] = src_root["varifycode"].asString();
    std::string jsonstr = root.toStyledString();
    beast::ostream(connection->_response.body()) << jsonstr;
    return true;
    });
在Mysql中新增CheckEmail和UpdatePwd函数
cpp展开代码bool MysqlMgr::CheckEmail(const std::string& name, const std::string& email) {
	return _dao.CheckEmail(name, email);
}

bool MysqlMgr::UpdatePwd(const std::string& name, const std::string& pwd) {
	return _dao.UpdatePwd(name, pwd);
}
DAO这一层写具体的逻辑, 检测邮箱是否合理
cpp展开代码bool MysqlDao::CheckEmail(const std::string& name, const std::string& email) {
	auto con = pool_->getConnection();
	try {
		if (con == nullptr) {
			pool_->returnConnection(std::move(con));
			return false;
		}

		// 准备查询语句
		std::unique_ptr<sql::PreparedStatement> pstmt(con->prepareStatement("SELECT email FROM user WHERE name = ?"));

		// 绑定参数
		pstmt->setString(1, name);

		// 执行查询
		std::unique_ptr<sql::ResultSet> res(pstmt->executeQuery());

		// 遍历结果集
		while (res->next()) {
			std::cout << "Check Email: " << res->getString("email") << std::endl;
			if (email != res->getString("email")) {
				pool_->returnConnection(std::move(con));
				return false;
			}
			pool_->returnConnection(std::move(con));
			return true;
		}
	}
	catch (sql::SQLException& e) {
		pool_->returnConnection(std::move(con));
		std::cerr << "SQLException: " << e.what();
		std::cerr << " (MySQL error code: " << e.getErrorCode();
		std::cerr << ", SQLState: " << e.getSQLState() << " )" << std::endl;
		return false;
	}
}
更新密码
cpp展开代码bool MysqlDao::UpdatePwd(const std::string& name, const std::string& newpwd) {
	auto con = pool_->getConnection();
	try {
		if (con == nullptr) {
			pool_->returnConnection(std::move(con));
			return false;
		}

		// 准备查询语句
		std::unique_ptr<sql::PreparedStatement> pstmt(con->prepareStatement("UPDATE user SET pwd = ? WHERE name = ?"));

		// 绑定参数
		pstmt->setString(2, name);
		pstmt->setString(1, newpwd);

		// 执行更新
		int updateCount = pstmt->executeUpdate();

		std::cout << "Updated rows: " << updateCount << std::endl;
		pool_->returnConnection(std::move(con));
		return true;
	}
	catch (sql::SQLException& e) {
		pool_->returnConnection(std::move(con));
		std::cerr << "SQLException: " << e.what();
		std::cerr << " (MySQL error code: " << e.getErrorCode();
		std::cerr << ", SQLState: " << e.getSQLState() << " )" << std::endl;
		return false;
	}
}
day14-登录功能
客户端登录功能
登录界面新增err_tip,用来提示用户登陆结果。至于密码输入框大家可以根据注册界面的逻辑实现隐藏和显示的功能。这里留给大家自己实现。
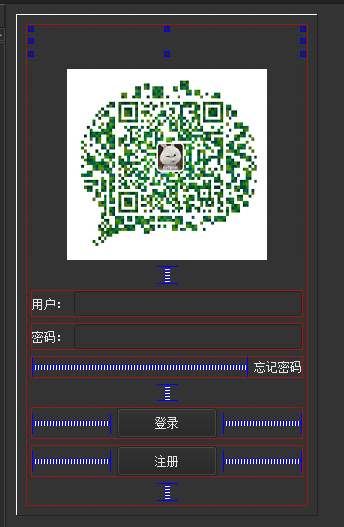
点击登录需要发送http 请求到GateServer,GateServer先验证登录密码,再调用grpc请求给StatusServer,获取聊天服务器ip信息和token信息反馈给客户端。
结构图如下
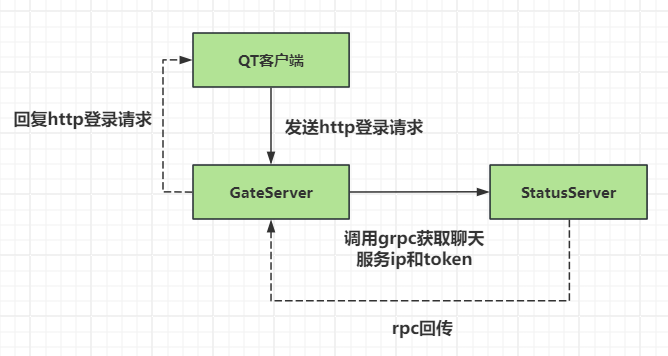
我们先实现客户端登录,为登录按钮添加槽函数响应
cpp展开代码void LoginDialog::on_login_btn_clicked()
{
    qDebug()<<"login btn clicked";
    if(checkUserValid() == false){
        return;
    }

    if(checkPwdValid() == false){
        return ;
    }

    auto user = ui->user_edit->text();
    auto pwd = ui->pass_edit->text();
    //发送http请求登录
    QJsonObject json_obj;
    json_obj["user"] = user;
    json_obj["passwd"] = xorString(pwd);
    HttpMgr::GetInstance()->PostHttpReq(QUrl(gate_url_prefix+"/user_login"),
                                        json_obj, ReqId::ID_LOGIN_USER,Modules::LOGINMOD);
}
增加检测函数
cpp展开代码bool LoginDialog::checkUserValid(){

    auto user = ui->user_edit->text();
    if(user.isEmpty()){
        qDebug() << "User empty " ;
        return false;
    }

    return true;
}

bool LoginDialog::checkPwdValid(){
    auto pwd = ui->pass_edit->text();
    if(pwd.length() < 6 || pwd.length() > 15){
        qDebug() << "Pass length invalid";
        return false;
    }

    return true;
}
在HttpMgr中添加sig_login_mod_finish信号,收到http请求完成回包的槽函数中添加登录模块的响应,将登录模块的消息发送到登录界面
cpp展开代码void HttpMgr::slot_http_finish(ReqId id, QString res, ErrorCodes err, Modules mod)
{
if(mod == Modules::REGISTERMOD){
//发送信号通知指定模块http响应结束
emit sig_reg_mod_finish(id, res, err);
}
if(mod == Modules::RESETMOD){
//发送信号通知指定模块http响应结束
emit sig_reset_mod_finish(id, res, err);
}
if(mod == Modules::LOGINMOD){
emit sig_login_mod_finish(id, res, err);
}
}
在LoginDialog的构造函数中添加消息对应的槽函数连接
cpp展开代码LoginDialog::LoginDialog(QWidget *parent) :
QDialog(parent),
ui(new Ui::LoginDialog)
{
ui->setupUi(this);
connect(ui->reg_btn, &QPushButton::clicked, this, &LoginDialog::switchRegister);
ui->forget_label->SetState("normal","hover","","selected","selected_hover","");
ui->forget_label->setCursor(Qt::PointingHandCursor);
connect(ui->forget_label, &ClickedLabel::clicked, this, &LoginDialog::slot_forget_pwd);
initHttpHandlers();
//连接登录回包信号
connect(HttpMgr::GetInstance().get(), &HttpMgr::sig_login_mod_finish, this,
&LoginDialog::slot_login_mod_finish);
}
initHttpHandlers为初始化http回调逻辑, 并添加_handlers成员
cpp展开代码void LoginDialog::initHttpHandlers()
{
//注册获取登录回包逻辑
_handlers.insert(ReqId::ID_LOGIN_USER, [this](QJsonObject jsonObj){
int error = jsonObj["error"].toInt();
if(error != ErrorCodes::SUCCESS){
showTip(tr("参数错误"),false);
return;
}
auto user = jsonObj["user"].toString();
showTip(tr("登录成功"), true);
qDebug()<< "user is " << user ;
});
}
在LoginDialog中添加槽函数slot_login_mod_finish
cpp展开代码void LoginDialog::slot_login_mod_finish(ReqId id, QString res, ErrorCodes err)
{
if(err != ErrorCodes::SUCCESS){
showTip(tr("网络请求错误"),false);
return;
}
// 解析 JSON 字符串,res需转化为QByteArray
QJsonDocument jsonDoc = QJsonDocument::fromJson(res.toUtf8());
//json解析错误
if(jsonDoc.isNull()){
showTip(tr("json解析错误"),false);
return;
}
//json解析错误
if(!jsonDoc.isObject()){
showTip(tr("json解析错误"),false);
return;
}
//调用对应的逻辑,根据id回调。
_handlers[id](jsonDoc.object());
return;
}
到此客户端登陆请求发送的模块封装完了
GateServer完善登陆逻辑
在LogicSystem的构造函数中添加登陆请求的注册。
cpp展开代码//用户登录逻辑
RegPost("/user_login", [](std::shared_ptr<HttpConnection> connection) {
auto body_str = boost::beast::buffers_to_string(connection->_request.body().data());
std::cout << "receive body is " << body_str << std::endl;
connection->_response.set(http::field::content_type, "text/json");
Json::Value root;
Json::Reader reader;
Json::Value src_root;
bool parse_success = reader.parse(body_str, src_root);
if (!parse_success) {
std::cout << "Failed to parse JSON data!" << std::endl;
root["error"] = ErrorCodes::Error_Json;
std::string jsonstr = root.toStyledString();
beast::ostream(connection->_response.body()) << jsonstr;
return true;
}
auto name = src_root["user"].asString();
auto pwd = src_root["passwd"].asString();
UserInfo userInfo;
//查询数据库判断用户名和密码是否匹配
bool pwd_valid = MysqlMgr::GetInstance()->CheckPwd(name, pwd, userInfo);
if (!pwd_valid) {
std::cout << " user pwd not match" << std::endl;
root["error"] = ErrorCodes::PasswdInvalid;
std::string jsonstr = root.toStyledString();
beast::ostream(connection->_response.body()) << jsonstr;
return true;
}
//查询StatusServer找到合适的连接
auto reply = StatusGrpcClient::GetInstance()->GetChatServer(userInfo.uid);
if (reply.error()) {
std::cout << " grpc get chat server failed, error is " << reply.error()<< std::endl;
root["error"] = ErrorCodes::RPCGetFailed;
std::string jsonstr = root.toStyledString();
beast::ostream(connection->_response.body()) << jsonstr;
return true;
}
std::cout << "succeed to load userinfo uid is " << userInfo.uid << std::endl;
root["error"] = 0;
root["user"] = name;
root["uid"] = userInfo.uid;
root["token"] = reply.token();
root["host"] = reply.host();
std::string jsonstr = root.toStyledString();
beast::ostream(connection->_response.body()) << jsonstr;
return true;
});
在MysqlMgr中添加CheckPwd函数
cpp展开代码bool MysqlMgr::CheckPwd(const std::string& name, const std::string& pwd, UserInfo& userInfo) {
return _dao.CheckPwd(name, pwd, userInfo);
}
在DAO层添加根据用户名查询sql逻辑,并且判断pwd是否匹配。
cpp展开代码bool MysqlDao::CheckPwd(const std::string& name, const std::string& pwd, UserInfo& userInfo) {
auto con = pool_->getConnection();
Defer defer([this, &con]() {
pool_->returnConnection(std::move(con));
});
try {
if (con == nullptr) {
return false;
}
// 准备SQL语句
std::unique_ptr<sql::PreparedStatement> pstmt(con->prepareStatement("SELECT * FROM user WHERE name = ?"));
pstmt->setString(1, name); // 将username替换为你要查询的用户名
// 执行查询
std::unique_ptr<sql::ResultSet> res(pstmt->executeQuery());
std::string origin_pwd = "";
// 遍历结果集
while (res->next()) {
origin_pwd = res->getString("pwd");
// 输出查询到的密码
std::cout << "Password: " << origin_pwd << std::endl;
break;
}
if (pwd != origin_pwd) {
return false;
}
userInfo.name = name;
userInfo.email = res->getString("email");
userInfo.uid = res->getInt("uid");
userInfo.pwd = origin_pwd;
return true;
}
catch (sql::SQLException& e) {
std::cerr << "SQLException: " << e.what();
std::cerr << " (MySQL error code: " << e.getErrorCode();
std::cerr << ", SQLState: " << e.getSQLState() << " )" << std::endl;
return false;
}
}
因为要调用grpc访问StatusServer,所以我们这里先完善协议proto文件
proto展开代码syntax = "proto3"; package message; service VarifyService { rpc GetVarifyCode (GetVarifyReq) returns (GetVarifyRsp) {} } message GetVarifyReq { string email = 1; } message GetVarifyRsp { int32 error = 1; string email = 2; string code = 3; } message GetChatServerReq { int32 uid = 1; } message GetChatServerRsp { int32 error = 1; string host = 2; string port = 3; string token = 4; } service StatusService { rpc GetChatServer (GetChatServerReq) returns (GetChatServerRsp) {} }
我们用下面两条命令重新生成pb.h和grpc.pb.h
bash展开代码D:\cppsoft\grpc\visualpro\third_party\protobuf\Debug\protoc.exe --cpp_out=. "message.proto"
生成grpc.pb.h
bash展开代码D:\cppsoft\grpc\visualpro\third_party\protobuf\Debug\protoc.exe -I="." --grpc_out="." --plugin=protoc-gen-grpc="D:\cppsoft\grpc\visualpro\Debug\grpc_cpp_plugin.exe" "message.proto"
这俩命令执行完成后总计生成四个文件
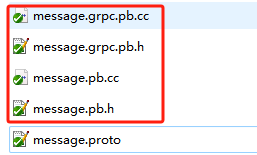
实现StatusGrpcClient
cpp展开代码#include "const.h"
#include "Singleton.h"
#include "ConfigMgr.h"
using grpc::Channel;
using grpc::Status;
using grpc::ClientContext;
using message::GetChatServerReq;
using message::GetChatServerRsp;
using message::StatusService;
class StatusGrpcClient :public Singleton<StatusGrpcClient>
{
friend class Singleton<StatusGrpcClient>;
public:
~StatusGrpcClient() {
}
GetChatServerRsp GetChatServer(int uid);
private:
StatusGrpcClient();
std::unique_ptr<StatusConPool> pool_;
};
具体实现
cpp展开代码#include "StatusGrpcClient.h"
GetChatServerRsp StatusGrpcClient::GetChatServer(int uid)
{
ClientContext context;
GetChatServerRsp reply;
GetChatServerReq request;
request.set_uid(uid);
auto stub = pool_->getConnection();
Status status = stub->GetChatServer(&context, request, &reply);
Defer defer([&stub, this]() {
pool_->returnConnection(std::move(stub));
});
if (status.ok()) {
return reply;
}
else {
reply.set_error(ErrorCodes::RPCFailed);
return reply;
}
}
StatusGrpcClient::StatusGrpcClient()
{
auto& gCfgMgr = ConfigMgr::Inst();
std::string host = gCfgMgr["StatusServer"]["Host"];
std::string port = gCfgMgr["StatusServer"]["Port"];
pool_.reset(new StatusConPool(5, host, port));
}
当然GateServer的config.ini文件也要做更新
ini展开代码[GateServer]
Port = 8080
[VarifyServer]
Host = 127.0.0.1
Port = 50051
[StatusServer]
Host = 127.0.0.1
Port = 50052
[Mysql]
Host = 81.68.86.146
Port = 3308
User = root
Passwd = 123456
Schema = llfc
[Redis]
Host = 81.68.86.146
Port = 6380
Passwd = 123456
StatusGrpcClient用到了StatusConPool, 将其实现放在StatusGrpcClient类之上
cpp展开代码class StatusConPool {
public:
StatusConPool(size_t poolSize, std::string host, std::string port)
: poolSize_(poolSize), host_(host), port_(port), b_stop_(false) {
for (size_t i = 0; i < poolSize_; ++i) {
std::shared_ptr<Channel> channel = grpc::CreateChannel(host + ":" + port,
grpc::InsecureChannelCredentials());
connections_.push(StatusService::NewStub(channel));
}
}
~StatusConPool() {
std::lock_guard<std::mutex> lock(mutex_);
Close();
while (!connections_.empty()) {
connections_.pop();
}
}
std::unique_ptr<StatusService::Stub> getConnection() {
std::unique_lock<std::mutex> lock(mutex_);
cond_.wait(lock, [this] {
if (b_stop_) {
return true;
}
return !connections_.empty();
});
//如果停止则直接返回空指针
if (b_stop_) {
return nullptr;
}
auto context = std::move(connections_.front());
connections_.pop();
return context;
}
void returnConnection(std::unique_ptr<StatusService::Stub> context) {
std::lock_guard<std::mutex> lock(mutex_);
if (b_stop_) {
return;
}
connections_.push(std::move(context));
cond_.notify_one();
}
void Close() {
b_stop_ = true;
cond_.notify_all();
}
private:
atomic<bool> b_stop_;
size_t poolSize_;
std::string host_;
std::string port_;
std::queue<std::unique_ptr<StatusService::Stub>> connections_;
std::mutex mutex_;
std::condition_variable cond_;
};
StatusServer状态服务
我们要实现状态服务,主要是用来监听其他服务器的查询请求, 用visual studio创建项目,名字为StatusServer.
在主函数所在文件StatusServer.cpp中实现如下逻辑
cpp展开代码#include <iostream>
#include <json/json.h>
#include <json/value.h>
#include <json/reader.h>
#include "const.h"
#include "ConfigMgr.h"
#include "hiredis.h"
#include "RedisMgr.h"
#include "MysqlMgr.h"
#include "AsioIOServicePool.h"
#include <iostream>
#include <memory>
#include <string>
#include <thread>
#include <boost/asio.hpp>
#include "StatusServiceImpl.h"
void RunServer() {
auto & cfg = ConfigMgr::Inst();
std::string server_address(cfg["StatusServer"]["Host"]+":"+ cfg["StatusServer"]["Port"]);
StatusServiceImpl service;
grpc::ServerBuilder builder;
// 监听端口和添加服务
builder.AddListeningPort(server_address, grpc::InsecureServerCredentials());
builder.RegisterService(&service);
// 构建并启动gRPC服务器
std::unique_ptr<grpc::Server> server(builder.BuildAndStart());
std::cout << "Server listening on " << server_address << std::endl;
// 创建Boost.Asio的io_context
boost::asio::io_context io_context;
// 创建signal_set用于捕获SIGINT
boost::asio::signal_set signals(io_context, SIGINT, SIGTERM);
// 设置异步等待SIGINT信号
signals.async_wait([&server](const boost::system::error_code& error, int signal_number) {
if (!error) {
std::cout << "Shutting down server..." << std::endl;
server->Shutdown(); // 优雅地关闭服务器
}
});
// 在单独的线程中运行io_context
std::thread([&io_context]() { io_context.run(); }).detach();
// 等待服务器关闭
server->Wait();
io_context.stop(); // 停止io_context
}
int main(int argc, char** argv) {
try {
RunServer();
}
catch (std::exception const& e) {
std::cerr << "Error: " << e.what() << std::endl;
return EXIT_FAILURE;
}
return 0;
}
在开始逻辑之前,我们需要先更新下config.ini文件
ini展开代码[StatusServer]
Port = 50052
Host = 0.0.0.0
[Mysql]
Host = 81.68.86.146
Port = 3308
User = root
Passwd = 123456
Schema = llfc
[Redis]
Host = 81.68.86.146
Port = 6380
Passwd = 123456
[ChatServer1]
Host = 127.0.0.1
Port = 8090
[ChatServer2]
Host = 127.0.0.1
Port = 8091
然后我们将GateServer之前生成的pb文件和proto文件拷贝到StatusServer中。并且加入到项目中。
我们在项目中添加一个新的类StatusServiceImpl,该类主要继承自StatusService::Service。
cpp展开代码#include <grpcpp/grpcpp.h>
#include "message.grpc.pb.h"
using grpc::Server;
using grpc::ServerBuilder;
using grpc::ServerContext;
using grpc::Status;
using message::GetChatServerReq;
using message::GetChatServerRsp;
using message::StatusService;
struct ChatServer {
std::string host;
std::string port;
};
class StatusServiceImpl final : public StatusService::Service
{
public:
StatusServiceImpl();
Status GetChatServer(ServerContext* context, const GetChatServerReq* request,
GetChatServerRsp* reply) override;
std::vector<ChatServer> _servers;
int _server_index;
};
具体实现
cpp展开代码#include "StatusServiceImpl.h"
#include "ConfigMgr.h"
#include "const.h"
std::string generate_unique_string() {
// 创建UUID对象
boost::uuids::uuid uuid = boost::uuids::random_generator()();
// 将UUID转换为字符串
std::string unique_string = to_string(uuid);
return unique_string;
}
Status StatusServiceImpl::GetChatServer(ServerContext* context, const GetChatServerReq* request, GetChatServerRsp* reply)
{
std::string prefix("llfc status server has received : ");
_server_index = (_server_index++) % (_servers.size());
auto &server = _servers[_server_index];
reply->set_host(server.host);
reply->set_port(server.port);
reply->set_error(ErrorCodes::Success);
reply->set_token(generate_unique_string());
return Status::OK;
}
StatusServiceImpl::StatusServiceImpl():_server_index(0)
{
auto& cfg = ConfigMgr::Inst();
ChatServer server;
server.port = cfg["ChatServer1"]["Port"];
server.host = cfg["ChatServer1"]["Host"];
_servers.push_back(server);
server.port = cfg["ChatServer2"]["Port"];
server.host = cfg["ChatServer2"]["Host"];
_servers.push_back(server);
}
其余的文件为了保持复用,我们不重复开发,将GateServer中的RedisMgr,MysqlMgr,Singleton,IOSerivePool等统统拷贝过来并添加到项目中。
联调测试
我们启动StatusServer,GateServer以及QT客户端,输入密码和用户名,点击登陆,会看到前端收到登陆成功的消息

day15-客户端Tcp管理类设计
客户端TCP管理者
因为聊天服务要维持一个长链接,方便服务器和客户端双向通信,那么就需要一个TCPMgr来管理TCP连接。
而实际开发中网络模块一般以单例模式使用,那我们就基于单例基类和可被分享类创建一个自定义的TcpMgr类,在QT工程中新建TcpMgr类,会生成头文件和源文件,头文件修改如下
cpp展开代码#ifndef TCPMGR_H
#define TCPMGR_H
#include <QTcpSocket>
#include "singleton.h"
#include "global.h"
class TcpMgr:public QObject, public Singleton<TcpMgr>,
public std::enable_shared_from_this<TcpMgr>
{
Q_OBJECT
public:
TcpMgr();
private:
QTcpSocket _socket;
QString _host;
uint16_t _port;
QByteArray _buffer;
bool _b_recv_pending;
quint16 _message_id;
quint16 _message_len;
public slots:
void slot_tcp_connect(ServerInfo);
void slot_send_data(ReqId reqId, QString data);
signals:
void sig_con_success(bool bsuccess);
void sig_send_data(ReqId reqId, QString data);
};
#endif // TCPMGR_H
接下来我们在构造函数中连接网络请求的各种信号
cpp展开代码TcpMgr::TcpMgr():_host(""),_port(0),_b_recv_pending(false),_message_id(0),_message_len(0)
{
QObject::connect(&_socket, &QTcpSocket::connected, [&]() {
qDebug() << "Connected to server!";
// 连接建立后发送消息
emit sig_con_success(true);
});
QObject::connect(&_socket, &QTcpSocket::readyRead, [&]() {
// 当有数据可读时,读取所有数据
// 读取所有数据并追加到缓冲区
_buffer.append(_socket.readAll());
QDataStream stream(&_buffer, QIODevice::ReadOnly);
stream.setVersion(QDataStream::Qt_5_0);
forever {
//先解析头部
if(!_b_recv_pending){
// 检查缓冲区中的数据是否足够解析出一个消息头(消息ID + 消息长度)
if (_buffer.size() < static_cast<int>(sizeof(quint16) * 2)) {
return; // 数据不够,等待更多数据
}
// 预读取消息ID和消息长度,但不从缓冲区中移除
stream >> _message_id >> _message_len;
//将buffer 中的前四个字节移除
_buffer = _buffer.mid(sizeof(quint16) * 2);
// 输出读取的数据
qDebug() << "Message ID:" << _message_id << ", Length:" << _message_len;
}
//buffer剩余长读是否满足消息体长度,不满足则退出继续等待接受
if(_buffer.size() < _message_len){
_b_recv_pending = true;
return;
}
_b_recv_pending = false;
// 读取消息体
QByteArray messageBody = _buffer.mid(0, _message_len);
qDebug() << "receive body msg is " << messageBody ;
_buffer = _buffer.mid(_message_len);
}
});
//5.15 之后版本
// QObject::connect(&_socket, QOverload<QAbstractSocket::SocketError>::of(&QTcpSocket::errorOccurred), [&](QAbstractSocket::SocketError socketError) {
// Q_UNUSED(socketError)
// qDebug() << "Error:" << _socket.errorString();
// });
// 处理错误(适用于Qt 5.15之前的版本)
QObject::connect(&_socket, static_cast<void (QTcpSocket::*)(QTcpSocket::SocketError)>(&QTcpSocket::error),
[&](QTcpSocket::SocketError socketError) {
qDebug() << "Error:" << _socket.errorString() ;
switch (socketError) {
case QTcpSocket::ConnectionRefusedError:
qDebug() << "Connection Refused!";
emit sig_con_success(false);
break;
case QTcpSocket::RemoteHostClosedError:
qDebug() << "Remote Host Closed Connection!";
break;
case QTcpSocket::HostNotFoundError:
qDebug() << "Host Not Found!";
emit sig_con_success(false);
break;
case QTcpSocket::SocketTimeoutError:
qDebug() << "Connection Timeout!";
emit sig_con_success(false);
break;
case QTcpSocket::NetworkError:
qDebug() << "Network Error!";
break;
default:
qDebug() << "Other Error!";
break;
}
});
// 处理连接断开
QObject::connect(&_socket, &QTcpSocket::disconnected, [&]() {
qDebug() << "Disconnected from server.";
});
QObject::connect(this, &TcpMgr::sig_send_data, this, &TcpMgr::slot_send_data);
}
连接对端服务器
cpp展开代码void TcpMgr::slot_tcp_connect(ServerInfo si)
{
qDebug()<< "receive tcp connect signal";
// 尝试连接到服务器
qDebug() << "Connecting to server...";
_host = si.Host;
_port = static_cast<uint16_t>(si.Port.toUInt());
_socket.connectToHost(si.Host, _port);
}
因为客户端发送数据可能在任何线程,为了保证线程安全,我们在要发送数据时发送TcpMgr的sig_send_data信号,然后实现接受这个信号的槽函数
cpp展开代码void TcpMgr::slot_send_data(ReqId reqId, QString data)
{
uint16_t id = reqId;
// 将字符串转换为UTF-8编码的字节数组
QByteArray dataBytes = data.toUtf8();
// 计算长度(使用网络字节序转换)
quint16 len = static_cast<quint16>(data.size());
// 创建一个QByteArray用于存储要发送的所有数据
QByteArray block;
QDataStream out(&block, QIODevice::WriteOnly);
// 设置数据流使用网络字节序
out.setByteOrder(QDataStream::BigEndian);
// 写入ID和长度
out << id << len;
// 添加字符串数据
block.append(data);
// 发送数据
_socket.write(block);
}
然后修改LoginDialog中的initHandlers中的收到服务器登陆回复后的逻辑,这里发送信号准备发起长链接到聊天服务器
cpp展开代码void LoginDialog::initHttpHandlers()
{
//注册获取登录回包逻辑
_handlers.insert(ReqId::ID_LOGIN_USER, [this](QJsonObject jsonObj){
int error = jsonObj["error"].toInt();
if(error != ErrorCodes::SUCCESS){
showTip(tr("参数错误"),false);
enableBtn(true);
return;
}
auto user = jsonObj["user"].toString();
//发送信号通知tcpMgr发送长链接
ServerInfo si;
si.Uid = jsonObj["uid"].toInt();
si.Host = jsonObj["host"].toString();
si.Port = jsonObj["port"].toString();
si.Token = jsonObj["token"].toString();
_uid = si.Uid;
_token = si.Token;
qDebug()<< "user is " << user << " uid is " << si.Uid <<" host is "
<< si.Host << " Port is " << si.Port << " Token is " << si.Token;
emit sig_connect_tcp(si);
});
}
在LoginDialog构造函数中连接信号,包括建立tcp连接,以及收到TcpMgr连接成功或者失败的信号处理
cpp展开代码//连接tcp连接请求的信号和槽函数
connect(this, &LoginDialog::sig_connect_tcp, TcpMgr::GetInstance().get(), &TcpMgr::slot_tcp_connect);
//连接tcp管理者发出的连接成功信号
connect(TcpMgr::GetInstance().get(), &TcpMgr::sig_con_success, this, &LoginDialog::slot_tcp_con_finish);
LoginDialog收到连接结果的槽函数
cpp展开代码void LoginDialog::slot_tcp_con_finish(bool bsuccess)
{
if(bsuccess){
showTip(tr("聊天服务连接成功,正在登录..."),true);
QJsonObject jsonObj;
jsonObj["uid"] = _uid;
jsonObj["token"] = _token;
QJsonDocument doc(jsonObj);
QString jsonString = doc.toJson(QJsonDocument::Indented);
//发送tcp请求给chat server
TcpMgr::GetInstance()->sig_send_data(ReqId::ID_CHAT_LOGIN, jsonString);
}else{
showTip(tr("网络异常"),false);
enableBtn(true);
}
}
在这个槽函数中我们发送了sig_send_data信号并且通知TcpMgr将数据发送给服务器。
这样TcpMgr发送完数据收到服务器的回复后就可以进一步根据解析出来的信息处理不同的情况了。我们先到此为止。具体如何处理后续再讲。
day16-asio实现tcp服务器
ChatServer
一个TCP服务器必然会有连接的接收,维持,收发数据等逻辑。那我们就要基于asio完成这个服务的搭建。主服务是这个样子的
cpp展开代码#include "LogicSystem.h"
#include <csignal>
#include <thread>
#include <mutex>
#include "AsioIOServicePool.h"
#include "CServer.h"
#include "ConfigMgr.h"
using namespace std;
bool bstop = false;
std::condition_variable cond_quit;
std::mutex mutex_quit;
int main()
{
try {
auto &cfg = ConfigMgr::Inst();
auto pool = AsioIOServicePool::GetInstance();
boost::asio::io_context io_context;
boost::asio::signal_set signals(io_context, SIGINT, SIGTERM);
signals.async_wait([&io_context, pool](auto, auto) {
io_context.stop();
pool->Stop();
});
auto port_str = cfg["SelfServer"]["Port"];
CServer s(io_context, atoi(port_str.c_str()));
io_context.run();
}
catch (std::exception& e) {
std::cerr << "Exception: " << e.what() << endl;
}
}
CServer类的声明
cpp展开代码#include <boost/asio.hpp>
#include "CSession.h"
#include <memory.h>
#include <map>
#include <mutex>
using namespace std;
using boost::asio::ip::tcp;
class CServer
{
public:
CServer(boost::asio::io_context& io_context, short port);
~CServer();
void ClearSession(std::string);
private:
void HandleAccept(shared_ptr<CSession>, const boost::system::error_code & error);
void StartAccept();
boost::asio::io_context &_io_context;
short _port;
tcp::acceptor _acceptor;
std::map<std::string, shared_ptr<CSession>> _sessions;
std::mutex _mutex;
};
构造函数中监听对方连接
cpp展开代码CServer::CServer(boost::asio::io_context& io_context, short port):_io_context(io_context), _port(port),
_acceptor(io_context, tcp::endpoint(tcp::v4(),port))
{
cout << "Server start success, listen on port : " << _port << endl;
StartAccept();
}
接受连接的函数
cpp展开代码void CServer::StartAccept() {
auto &io_context = AsioIOServicePool::GetInstance()->GetIOService();
shared_ptr<CSession> new_session = make_shared<CSession>(io_context, this);
_acceptor.async_accept(new_session->GetSocket(), std::bind(&CServer::HandleAccept, this, new_session, placeholders::_1));
}
AsioIOServicePool
从AsioIOServicePool中返回一个可用的iocontext构造Session,然后将接受的新链接的socket写入这个Session保管。
AsioIOServicePool已经在前面讲解很多次了,它的声明如下
cpp展开代码#include <vector>
#include <boost/asio.hpp>
#include "Singleton.h"
class AsioIOServicePool:public Singleton<AsioIOServicePool>
{
friend Singleton<AsioIOServicePool>;
public:
using IOService = boost::asio::io_context;
using Work = boost::asio::io_context::work;
using WorkPtr = std::unique_ptr<Work>;
~AsioIOServicePool();
AsioIOServicePool(const AsioIOServicePool&) = delete;
AsioIOServicePool& operator=(const AsioIOServicePool&) = delete;
// 使用 round-robin 的方式返回一个 io_service
boost::asio::io_context& GetIOService();
void Stop();
private:
AsioIOServicePool(std::size_t size = std::thread::hardware_concurrency());
std::vector<IOService> _ioServices;
std::vector<WorkPtr> _works;
std::vector<std::thread> _threads;
std::size_t _nextIOService;
};
AsioIOServicePool具体实现
cpp展开代码#include "AsioIOServicePool.h"
#include <iostream>
using namespace std;
AsioIOServicePool::AsioIOServicePool(std::size_t size):_ioServices(size),
_works(size), _nextIOService(0){
for (std::size_t i = 0; i < size; ++i) {
_works[i] = std::unique_ptr<Work>(new Work(_ioServices[i]));
}
//遍历多个ioservice,创建多个线程,每个线程内部启动ioservice
for (std::size_t i = 0; i < _ioServices.size(); ++i) {
_threads.emplace_back([this, i]() {
_ioServices[i].run();
});
}
}
AsioIOServicePool::~AsioIOServicePool() {
std::cout << "AsioIOServicePool destruct" << endl;
}
boost::asio::io_context& AsioIOServicePool::GetIOService() {
auto& service = _ioServices[_nextIOService++];
if (_nextIOService == _ioServices.size()) {
_nextIOService = 0;
}
return service;
}
void AsioIOServicePool::Stop(){
//因为仅仅执行work.reset并不能让iocontext从run的状态中退出
//当iocontext已经绑定了读或写的监听事件后,还需要手动stop该服务。
for (auto& work : _works) {
//把服务先停止
work->get_io_context().stop();
work.reset();
}
for (auto& t : _threads) {
t.join();
}
}
CServer的处理连接逻辑
cpp展开代码void CServer::HandleAccept(shared_ptr<CSession> new_session, const boost::system::error_code& error){
if (!error) {
new_session->Start();
lock_guard<mutex> lock(_mutex);
_sessions.insert(make_pair(new_session->GetUuid(), new_session));
}
else {
cout << "session accept failed, error is " << error.what() << endl;
}
StartAccept();
}
Session层
上面的逻辑接受新链接后执行Start函数,新链接接受数据,然后Server继续监听新的连接
cpp展开代码void CSession::Start(){
AsyncReadHead(HEAD_TOTAL_LEN);
}
先读取头部数据
cpp展开代码void CSession::AsyncReadHead(int total_len)
{
auto self = shared_from_this();
asyncReadFull(HEAD_TOTAL_LEN, [self, this](const boost::system::error_code& ec, std::size_t bytes_transfered) {
try {
if (ec) {
std::cout << "handle read failed, error is " << ec.what() << endl;
Close();
_server->ClearSession(_uuid);
return;
}
if (bytes_transfered < HEAD_TOTAL_LEN) {
std::cout << "read length not match, read [" << bytes_transfered << "] , total ["
<< HEAD_TOTAL_LEN << "]" << endl;
Close();
_server->ClearSession(_uuid);
return;
}
_recv_head_node->Clear();
memcpy(_recv_head_node->_data, _data, bytes_transfered);
//获取头部MSGID数据
short msg_id = 0;
memcpy(&msg_id, _recv_head_node->_data, HEAD_ID_LEN);
//网络字节序转化为本地字节序
msg_id = boost::asio::detail::socket_ops::network_to_host_short(msg_id);
std::cout << "msg_id is " << msg_id << endl;
//id非法
if (msg_id > MAX_LENGTH) {
std::cout << "invalid msg_id is " << msg_id << endl;
_server->ClearSession(_uuid);
return;
}
short msg_len = 0;
memcpy(&msg_len, _recv_head_node->_data + HEAD_ID_LEN, HEAD_DATA_LEN);
//网络字节序转化为本地字节序
msg_len = boost::asio::detail::socket_ops::network_to_host_short(msg_len);
std::cout << "msg_len is " << msg_len << endl;
//id非法
if (msg_len > MAX_LENGTH) {
std::cout << "invalid data length is " << msg_len << endl;
_server->ClearSession(_uuid);
return;
}
_recv_msg_node = make_shared<RecvNode>(msg_len, msg_id);
AsyncReadBody(msg_len);
}
catch (std::exception& e) {
std::cout << "Exception code is " << e.what() << endl;
}
});
}
上面的逻辑里调用asyncReadFull读取整个长度,然后解析收到的数据,前两个字节为id,之后两个字节为长度,最后n个长度字节为消息内容。
cpp展开代码//读取完整长度
void CSession::asyncReadFull(std::size_t maxLength, std::function<void(const boost::system::error_code&, std::size_t)> handler )
{
::memset(_data, 0, MAX_LENGTH);
asyncReadLen(0, maxLength, handler);
}
读取指定长度
cpp展开代码//读取指定字节数
void CSession::asyncReadLen(std::size_t read_len, std::size_t total_len,
std::function<void(const boost::system::error_code&, std::size_t)> handler)
{
auto self = shared_from_this();
_socket.async_read_some(boost::asio::buffer(_data + read_len, total_len-read_len),
[read_len, total_len, handler, self](const boost::system::error_code& ec, std::size_t bytesTransfered) {
if (ec) {
// 出现错误,调用回调函数
handler(ec, read_len + bytesTransfered);
return;
}
if (read_len + bytesTransfered >= total_len) {
//长度够了就调用回调函数
handler(ec, read_len + bytesTransfered);
return;
}
// 没有错误,且长度不足则继续读取
self->asyncReadLen(read_len + bytesTransfered, total_len, handler);
});
}
读取头部成功后,其回调函数内部调用了读包体的逻辑
cpp展开代码void CSession::AsyncReadBody(int total_len)
{
auto self = shared_from_this();
asyncReadFull(total_len, [self, this, total_len](const boost::system::error_code& ec, std::size_t bytes_transfered) {
try {
if (ec) {
std::cout << "handle read failed, error is " << ec.what() << endl;
Close();
_server->ClearSession(_uuid);
return;
}
if (bytes_transfered < total_len) {
std::cout << "read length not match, read [" << bytes_transfered << "] , total ["
<< total_len<<"]" << endl;
Close();
_server->ClearSession(_uuid);
return;
}
memcpy(_recv_msg_node->_data , _data , bytes_transfered);
_recv_msg_node->_cur_len += bytes_transfered;
_recv_msg_node->_data[_recv_msg_node->_total_len] = '\0';
cout << "receive data is " << _recv_msg_node->_data << endl;
//此处将消息投递到逻辑队列中
LogicSystem::GetInstance()->PostMsgToQue(make_shared<LogicNode>(shared_from_this(), _recv_msg_node));
//继续监听头部接受事件
AsyncReadHead(HEAD_TOTAL_LEN);
}
catch (std::exception& e) {
std::cout << "Exception code is " << e.what() << endl;
}
});
}
读取包体完成后,在回调中继续读包头。以此循环往复直到读完所有数据。如果对方不发送数据,则回调函数就不会触发。不影响程序执行其他工作,因为我们采用的是asio异步的读写操作。
当然我们解析完包体后会调用LogicSystem单例将解析好的消息封装为逻辑节点传递给逻辑层进行处理。
LogicSystem
我们在逻辑层处理
cpp展开代码void LogicSystem::RegisterCallBacks() {
_fun_callbacks[MSG_CHAT_LOGIN] = std::bind(&LogicSystem::LoginHandler, this,
placeholders::_1, placeholders::_2, placeholders::_3);
}
void LogicSystem::LoginHandler(shared_ptr<CSession> session, const short &msg_id, const string &msg_data) {
Json::Reader reader;
Json::Value root;
reader.parse(msg_data, root);
std::cout << "user login uid is " << root["uid"].asInt() << " user token is "
<< root["token"].asString() << endl;
std::string return_str = root.toStyledString();
session->Send(return_str, msg_id);
}
并在构造函数中注册这些处理流程
cpp展开代码LogicSystem::LogicSystem():_b_stop(false){
RegisterCallBacks();
_worker_thread = std::thread (&LogicSystem::DealMsg, this);
}
总结
到此,完成了ChatServer收到QT客户端发送过来的长链接请求,并解析读取的数据,将收到的数据通过tcp发送给对端。接下来还要做ChatServer到GateServer的token验证,判断是否合理,这个教给之后的文章处理。
day17-登录服务验证和客户端数据管理
完善proto
在proto文件里新增登陆验证服务
proto展开代码message LoginReq{ int32 uid = 1; string token= 2; } message LoginRsp { int32 error = 1; int32 uid = 2; string token = 3; } service StatusService { rpc GetChatServer (GetChatServerReq) returns (GetChatServerRsp) {} rpc Login(LoginReq) returns(LoginRsp); }
接下来是调用grpc命令生成新的pb文件覆盖原有的,并且也拷贝给StatusServer一份
我们完善登陆逻辑,先去StatusServer验证token是否合理,如果合理再从内存中寻找用户信息,如果没找到则从数据库加载一份。
cpp展开代码void LogicSystem::LoginHandler(shared_ptr<CSession> session, const short &msg_id, const string &msg_data) {
Json::Reader reader;
Json::Value root;
reader.parse(msg_data, root);
auto uid = root["uid"].asInt();
std::cout << "user login uid is " << uid << " user token is "
<< root["token"].asString() << endl;
//从状态服务器获取token匹配是否准确
auto rsp = StatusGrpcClient::GetInstance()->Login(uid, root["token"].asString());
Json::Value rtvalue;
Defer defer([this, &rtvalue, session]() {
std::string return_str = rtvalue.toStyledString();
session->Send(return_str, MSG_CHAT_LOGIN_RSP);
});
rtvalue["error"] = rsp.error();
if (rsp.error() != ErrorCodes::Success) {
return;
}
//内存中查询用户信息
auto find_iter = _users.find(uid);
std::shared_ptr<UserInfo> user_info = nullptr;
if (find_iter == _users.end()) {
//查询数据库
user_info = MysqlMgr::GetInstance()->GetUser(uid);
if (user_info == nullptr) {
rtvalue["error"] = ErrorCodes::UidInvalid;
return;
}
_users[uid] = user_info;
}
else {
user_info = find_iter->second;
}
rtvalue["uid"] = uid;
rtvalue["token"] = rsp.token();
rtvalue["name"] = user_info->name;
}
StatusServer验证token
在StatusServer验证token之前,我们需要在StatusServer中的GetServer的服务里将token写入内存
cpp展开代码Status StatusServiceImpl::GetChatServer(ServerContext* context, const GetChatServerReq* request, GetChatServerRsp* reply)
{
std::string prefix("llfc status server has received : ");
const auto& server = getChatServer();
reply->set_host(server.host);
reply->set_port(server.port);
reply->set_error(ErrorCodes::Success);
reply->set_token(generate_unique_string());
insertToken(request->uid(), reply->token());
return Status::OK;
}
接下来我们实现登陆验证服务
cpp展开代码Status StatusServiceImpl::Login(ServerContext* context, const LoginReq* request, LoginRsp* reply)
{
auto uid = request->uid();
auto token = request->token();
std::lock_guard<std::mutex> guard(_token_mtx);
auto iter = _tokens.find(uid);
if (iter == _tokens.end()) {
reply->set_error(ErrorCodes::UidInvalid);
return Status::OK;
}
if (iter->second != token) {
reply->set_error(ErrorCodes::TokenInvalid);
return Status::OK;
}
reply->set_error(ErrorCodes::Success);
reply->set_uid(uid);
reply->set_token(token);
return Status::OK;
}
这样当GateServer访问StatusServer的Login服务做验证后,就可以将数据返回给QT前端了。
客户端处理登陆回包
QT 的客户端TcpMgr收到请求后要进行对应的逻辑处理。所以我们在TcpMgr的构造函数中调用initHandlers注册消息
cpp展开代码void TcpMgr::initHandlers()
{
//auto self = shared_from_this();
_handlers.insert(ID_CHAT_LOGIN_RSP, [this](ReqId id, int len, QByteArray data){
qDebug()<< "handle id is "<< id << " data is " << data;
// 将QByteArray转换为QJsonDocument
QJsonDocument jsonDoc = QJsonDocument::fromJson(data);
// 检查转换是否成功
if(jsonDoc.isNull()){
qDebug() << "Failed to create QJsonDocument.";
return;
}
QJsonObject jsonObj = jsonDoc.object();
if(!jsonObj.contains("error")){
int err = ErrorCodes::ERR_JSON;
qDebug() << "Login Failed, err is Json Parse Err" << err ;
emit sig_login_failed(err);
return;
}
int err = jsonObj["error"].toInt();
if(err != ErrorCodes::SUCCESS){
qDebug() << "Login Failed, err is " << err ;
emit sig_login_failed(err);
return;
}
UserMgr::GetInstance()->SetUid(jsonObj["uid"].toInt());
UserMgr::GetInstance()->SetName(jsonObj["name"].toString());
UserMgr::GetInstance()->SetToken(jsonObj["token"].toString());
emit sig_swich_chatdlg();
});
}
并且增加处理请求
cpp展开代码void TcpMgr::handleMsg(ReqId id, int len, QByteArray data)
{
auto find_iter = _handlers.find(id);
if(find_iter == _handlers.end()){
qDebug()<< "not found id ["<< id << "] to handle";
return ;
}
find_iter.value()(id,len,data);
}
用户管理
为管理用户数据,需要创建一个UserMgr类,统一管理用户数据,我们这么声明
cpp展开代码#ifndef USERMGR_H
#define USERMGR_H
#include <QObject>
#include <memory>
#include <singleton.h>
class UserMgr:public QObject,public Singleton<UserMgr>,
public std::enable_shared_from_this<UserMgr>
{
Q_OBJECT
public:
friend class Singleton<UserMgr>;
~ UserMgr();
void SetName(QString name);
void SetUid(int uid);
void SetToken(QString token);
private:
UserMgr();
QString _name;
QString _token;
int _uid;
};
#endif // USERMGR_H
简单实现几个功能
cpp展开代码#include "usermgr.h"
UserMgr::~UserMgr()
{
}
void UserMgr::SetName(QString name)
{
_name = name;
}
void UserMgr::SetUid(int uid)
{
_uid = uid;
}
void UserMgr::SetToken(QString token)
{
_token = token;
}
UserMgr::UserMgr()
{
}
详细和复杂的管理后续不断往这里补充就行了。
登陆界面
登陆界面响应TcpMgr返回的登陆请求,在其构造函数中添加
cpp展开代码 //连接tcp管理者发出的登陆失败信号
connect(TcpMgr::GetInstance().get(), &TcpMgr::sig_login_failed, this, &LoginDialog::slot_login_failed);
并实现槽函数
cpp展开代码void LoginDialog::slot_login_failed(int err)
{
QString result = QString("登录失败, err is %1")
.arg(err);
showTip(result,false);
enableBtn(true);
}
到此完成了登陆的请求和响应,接下来要实现响应登陆成功后跳转到聊天界面。下一篇先实现聊天布局。
day18-聊天主界面
聊天界面整体展示
我们先看下整体的聊天界面,方便以后逐个功能添加

QT Designer中 ui 设计如下
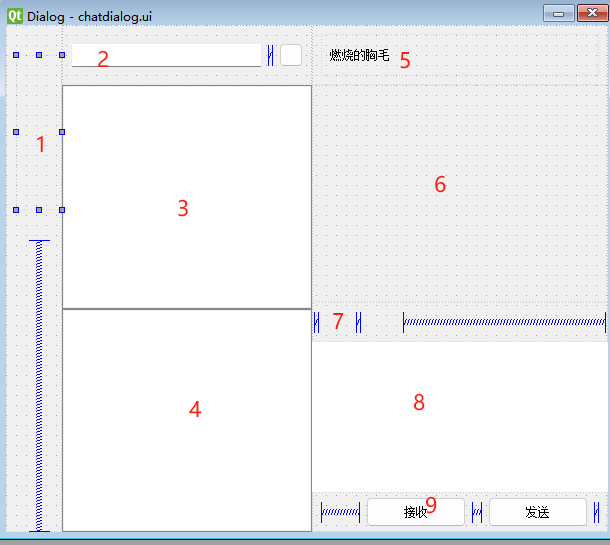
将聊天对话框分为几个部分:
1 处为左侧功能切换区域,包括聊天,联系人等。
2 处为搜索区域,可以搜索联系人,聊天记录等, 搜索框后面的按钮是快速拉人创建群聊的功能。
3 处为近期聊天联系列表
4 处为搜索结果列表,包括匹配到的联系人,聊天记录,以及添加联系人的按钮。
5 处为聊天对象名称和头像的显示区域,这里先做简单演示写死。
6 处为聊天记录区域。
7 处为工具栏区域。
8 处为输入区域
9 处为发送按钮区域。
大家可以按照这个布局拖动和修改,达到我的布局效果。
创建ChatDialog
右键项目,选择创建设计师界面类,选择创建QDialog without buttons。对话框的名字为ChatDialog
创建完成后,在之前登录成功的回调里,跳转到这个对话框。在MainWindow里添加槽函数
cpp展开代码void MainWindow::SlotSwitchChat()
{
_chat_dlg = new ChatDialog();
_chat_dlg->setWindowFlags(Qt::CustomizeWindowHint|Qt::FramelessWindowHint);
setCentralWidget(_chat_dlg);
_chat_dlg->show();
_login_dlg->hide();
this->setMinimumSize(QSize(1050,900));
this->setMaximumSize(QWIDGETSIZE_MAX, QWIDGETSIZE_MAX);
}
在MainWindow的构造函数中添加信号和槽的链接
cpp展开代码 //连接创建聊天界面信号
connect(TcpMgr::GetInstance().get(),&TcpMgr::sig_swich_chatdlg, this, &MainWindow::SlotSwitchChat);
并且在TcpMgr中添加信号
cpp展开代码void sig_swich_chatdlg();
为了方便测试,我们在MainWindow的构造函数中直接发送sig_switch_chatdlg信号,这样程序运行起来就会直接跳转到聊天界面
ChatDialog ui文件
ui文件的结构可以参考我的源码中的结构,这里我们可以简单看下
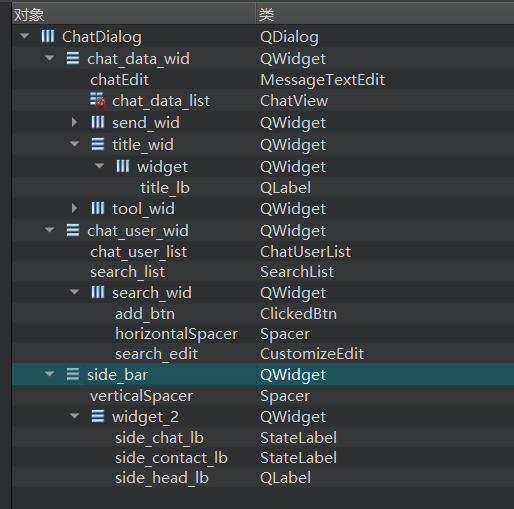
按照这个布局拖动并设置宽高即可,接下来需要设置下qss调整颜色
css展开代码#side_bar{
background-color:rgb(46,46,46);
}
重写点击按钮
为了实现点击效果,我们继承QPushButton实现按钮的点击效果,包括普通状态,悬浮状态,以及按下状态
cpp展开代码class ClickedBtn:public QPushButton
{
Q_OBJECT
public:
ClickedBtn(QWidget * parent = nullptr);
~ClickedBtn();
void SetState(QString nomal, QString hover, QString press);
protected:
virtual void enterEvent(QEvent *event) override; // 鼠标进入
virtual void leaveEvent(QEvent *event) override;// 鼠标离开
virtual void mousePressEvent(QMouseEvent *event) override; // 鼠标按下
virtual void mouseReleaseEvent(QMouseEvent *event) override; // 鼠标释放
private:
QString _normal;
QString _hover;
QString _press;
};
接下来实现其按下,离开进入等资源加载,并且重写这些事件
cpp展开代码ClickedBtn::ClickedBtn(QWidget *parent):QPushButton (parent)
{
setCursor(Qt::PointingHandCursor); // 设置光标为小手
}
ClickedBtn::~ClickedBtn(){
}
void ClickedBtn::SetState(QString normal, QString hover, QString press)
{
_hover = hover;
_normal = normal;
_press = press;
setProperty("state",normal);
repolish(this);
update();
}
void ClickedBtn::enterEvent(QEvent *event)
{
setProperty("state",_hover);
repolish(this);
update();
QPushButton::enterEvent(event);
}
void ClickedBtn::mousePressEvent(QMouseEvent *event)
{
setProperty("state",_press);
repolish(this);
update();
QPushButton::mousePressEvent(event);
}
void ClickedBtn::mouseReleaseEvent(QMouseEvent *event)
{
setProperty("state",_hover);
repolish(this);
update();
QPushButton::mouseReleaseEvent(event);
}
回到chatdialog.ui文件,将add_btn升级为ClickedBtn
接着在qss文件中添加样式
css展开代码#add_btn[state='normal']{
border-image: url(:/res/add_friend_normal.png);
}
#add_btn[state='hover']{
border-image: url(:/res/add_friend_hover.png);
}
#add_btn[state='press']{
border-image: url(:/res/add_friend_hover.png);
}
add_btn的样式一定要显示设置一下三个样式,所以我们回到ChatDialog的构造函数中设置样式
cpp展开代码 ui->add_btn->SetState("normal","hover","press");
再次启动运行,可以看到添加群组的按钮样式和sidebar的样式生效了。
为了美观显示,我们去mainwindow.ui中移除状态栏和菜单栏。
day19-实现搜索框和聊天列表
搜索框
我们需要实现如下效果
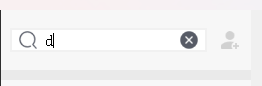
输入框默认不显示关闭按钮,当输入文字后显示关闭按钮,点击关闭按钮清空文字
添加CustomizeEdit类,头文件
cpp展开代码#ifndef CUSTOMIZEEDIT_H
#define CUSTOMIZEEDIT_H
#include <QLineEdit>
#include <QDebug>
class CustomizeEdit: public QLineEdit
{
Q_OBJECT
public:
CustomizeEdit(QWidget *parent = nullptr);
void SetMaxLength(int maxLen);
protected:
void focusOutEvent(QFocusEvent *event) override
{
// 执行失去焦点时的处理逻辑
//qDebug() << "CustomizeEdit focusout";
// 调用基类的focusOutEvent()方法,保证基类的行为得到执行
QLineEdit::focusOutEvent(event);
//发送失去焦点得信号
emit sig_foucus_out();
}
private:
void limitTextLength(QString text) {
if(_max_len <= 0){
return;
}
QByteArray byteArray = text.toUtf8();
if (byteArray.size() > _max_len) {
byteArray = byteArray.left(_max_len);
this->setText(QString::fromUtf8(byteArray));
}
}
int _max_len;
signals:
void sig_foucus_out();
};
#endif // CUSTOMIZEEDIT_H
源文件
cpp展开代码#include "customizeedit.h"
CustomizeEdit::CustomizeEdit(QWidget *parent):QLineEdit (parent),_max_len(0)
{
connect(this, &QLineEdit::textChanged, this, &CustomizeEdit::limitTextLength);
}
void CustomizeEdit::SetMaxLength(int maxLen)
{
_max_len = maxLen;
}
设计师界面类里将ui->search_edit提升为CustomizeEdit
在ChatDialog的构造函数中设置输入的长度限制以及关闭等图标的配置
cpp展开代码 QAction *searchAction = new QAction(ui->search_edit);
searchAction->setIcon(QIcon(":/res/search.png"));
ui->search_edit->addAction(searchAction,QLineEdit::LeadingPosition);
ui->search_edit->setPlaceholderText(QStringLiteral("搜索"));
// 创建一个清除动作并设置图标
QAction *clearAction = new QAction(ui->search_edit);
clearAction->setIcon(QIcon(":/res/close_transparent.png"));
// 初始时不显示清除图标
// 将清除动作添加到LineEdit的末尾位置
ui->search_edit->addAction(clearAction, QLineEdit::TrailingPosition);
// 当需要显示清除图标时,更改为实际的清除图标
connect(ui->search_edit, &QLineEdit::textChanged, [clearAction](const QString &text) {
if (!text.isEmpty()) {
clearAction->setIcon(QIcon(":/res/close_search.png"));
} else {
clearAction->setIcon(QIcon(":/res/close_transparent.png")); // 文本为空时,切换回透明图标
}
});
// 连接清除动作的触发信号到槽函数,用于清除文本
connect(clearAction, &QAction::triggered, [this, clearAction]() {
ui->search_edit->clear();
clearAction->setIcon(QIcon(":/res/close_transparent.png")); // 清除文本后,切换回透明图标
ui->search_edit->clearFocus();
//清除按钮被按下则不显示搜索框
//ShowSearch(false);
});
ui->search_edit->SetMaxLength(15);
stylesheet.qss 中修改样式
cpp展开代码#search_wid{
background-color:rgb(247,247,247);
}
#search_edit {
border: 2px solid #f1f1f1;
}
聊天记录列表
创建C++ 类ChatUserList
cpp展开代码#ifndef CHATUSERLIST_H
#define CHATUSERLIST_H
#include <QListWidget>
#include <QWheelEvent>
#include <QEvent>
#include <QScrollBar>
#include <QDebug>
class ChatUserList: public QListWidget
{
Q_OBJECT
public:
ChatUserList(QWidget *parent = nullptr);
protected:
bool eventFilter(QObject *watched, QEvent *event) override;
signals:
void sig_loading_chat_user();
};
#endif // CHATUSERLIST_H
实现
cpp展开代码#include "chatuserlist.h"
ChatUserList::ChatUserList(QWidget *parent):QListWidget(parent)
{
Q_UNUSED(parent);
this->setHorizontalScrollBarPolicy(Qt::ScrollBarAlwaysOff);
this->setVerticalScrollBarPolicy(Qt::ScrollBarAlwaysOff);
// 安装事件过滤器
this->viewport()->installEventFilter(this);
}
bool ChatUserList::eventFilter(QObject *watched, QEvent *event)
{
// 检查事件是否是鼠标悬浮进入或离开
if (watched == this->viewport()) {
if (event->type() == QEvent::Enter) {
// 鼠标悬浮,显示滚动条
this->setVerticalScrollBarPolicy(Qt::ScrollBarAsNeeded);
} else if (event->type() == QEvent::Leave) {
// 鼠标离开,隐藏滚动条
this->setVerticalScrollBarPolicy(Qt::ScrollBarAlwaysOff);
}
}
// 检查事件是否是鼠标滚轮事件
if (watched == this->viewport() && event->type() == QEvent::Wheel) {
QWheelEvent *wheelEvent = static_cast<QWheelEvent*>(event);
int numDegrees = wheelEvent->angleDelta().y() / 8;
int numSteps = numDegrees / 15; // 计算滚动步数
// 设置滚动幅度
this->verticalScrollBar()->setValue(this->verticalScrollBar()->value() - numSteps);
// 检查是否滚动到底部
QScrollBar *scrollBar = this->verticalScrollBar();
int maxScrollValue = scrollBar->maximum();
int currentValue = scrollBar->value();
//int pageSize = 10; // 每页加载的联系人数量
if (maxScrollValue - currentValue <= 0) {
// 滚动到底部,加载新的联系人
qDebug()<<"load more chat user";
//发送信号通知聊天界面加载更多聊天内容
emit sig_loading_chat_user();
}
return true; // 停止事件传递
}
return QListWidget::eventFilter(watched, event);
}
在设计师界面类里提升ui->chat_user_list为ChatUserList
在ChatDialog构造函数和搜索清除按钮的回调中增加
cpp展开代码 ShowSearch(false);
该函数的具体实现
cpp展开代码void ChatDialog::ShowSearch(bool bsearch)
{
if(bsearch){
ui->chat_user_list->hide();
ui->con_user_list->hide();
ui->search_list->show();
_mode = ChatUIMode::SearchMode;
}else if(_state == ChatUIMode::ChatMode){
ui->chat_user_list->show();
ui->con_user_list->hide();
ui->search_list->hide();
_mode = ChatUIMode::ChatMode;
}else if(_state == ChatUIMode::ContactMode){
ui->chat_user_list->hide();
ui->search_list->hide();
ui->con_user_list->show();
_mode = ChatUIMode::ContactMode;
}
}
ChatDialog类中声明添加
cpp展开代码 ChatUIMode _mode;
ChatUIMode _state;
bool _b_loading;
构造函数的初始化列表初始化这些模式和状态
cpp展开代码ChatDialog::ChatDialog(QWidget *parent) :
QDialog(parent),
ui(new Ui::ChatDialog),_mode(ChatUIMode::ChatMode),
_state(ChatUIMode::ChatMode),_b_loading(false){//...}
为了让用户聊天列表更美观,修改qss文件
cpp展开代码#chat_user_wid{
background-color:rgb(0,0,0);
}
#chat_user_list {
background-color: rgb(247,247,248);
border: none;
}
#chat_user_list::item:selected {
background-color: #d3d7d4;
border: none;
outline: none;
}
#chat_user_list::item:hover {
background-color: rgb(206,207,208);
border: none;
outline: none;
}
#chat_user_list::focus {
border: none;
outline: none;
}
添加聊天item
我们要为聊天列表添加item,每个item包含的样式为
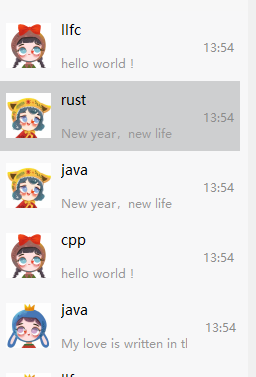
对于这样的列表元素,我们采用设计师界面类设计非常方便, 新建设计师界面类ChatUserWid, 在ChatUserWid.ui中拖动布局如下
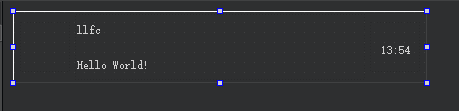
我们定义一个基类ListItemBase
cpp展开代码#ifndef LISTITEMBASE_H
#define LISTITEMBASE_H
#include <QWidget>
#include "global.h"
class ListItemBase : public QWidget
{
Q_OBJECT
public:
explicit ListItemBase(QWidget *parent = nullptr);
void SetItemType(ListItemType itemType);
ListItemType GetItemType();
private:
ListItemType _itemType;
public slots:
signals:
};
#endif // LISTITEMBASE_H
我们实现这个基类
cpp展开代码#include "listitembase.h"
ListItemBase::ListItemBase(QWidget *parent) : QWidget(parent)
{
}
void ListItemBase::SetItemType(ListItemType itemType)
{
_itemType = itemType;
}
ListItemType ListItemBase::GetItemType()
{
return _itemType;
}
我们实现ChatUserWid
cpp展开代码#ifndef CHATUSERWID_H
#define CHATUSERWID_H
#include <QWidget>
#include "listitembase.h"
namespace Ui {
class ChatUserWid;
}
class ChatUserWid : public ListItemBase
{
Q_OBJECT
public:
explicit ChatUserWid(QWidget *parent = nullptr);
~ChatUserWid();
QSize sizeHint() const override {
return QSize(250, 70); // 返回自定义的尺寸
}
void SetInfo(QString name, QString head, QString msg);
private:
Ui::ChatUserWid *ui;
QString _name;
QString _head;
QString _msg;
};
#endif // CHATUSERWID_H
具体实现
cpp展开代码#include "chatuserwid.h"
#include "ui_chatuserwid.h"
ChatUserWid::ChatUserWid(QWidget *parent) :
ListItemBase(parent),
ui(new Ui::ChatUserWid)
{
ui->setupUi(this);
SetItemType(ListItemType::CHAT_USER_ITEM);
}
ChatUserWid::~ChatUserWid()
{
delete ui;
}
void ChatUserWid::SetInfo(QString name, QString head, QString msg)
{
_name = name;
_head = head;
_msg = msg;
// 加载图片
QPixmap pixmap(_head);
// 设置图片自动缩放
ui->icon_lb->setPixmap(pixmap.scaled(ui->icon_lb->size(), Qt::KeepAspectRatio, Qt::SmoothTransformation));
ui->icon_lb->setScaledContents(true);
ui->user_name_lb->setText(_name);
ui->user_chat_lb->setText(_msg);
}
在ChatDialog里定义一些全局的变量用来做测试
cpp展开代码std::vector<QString> strs ={"hello world !",
"nice to meet u",
"New year,new life",
"You have to love yourself",
"My love is written in the wind ever since the whole world is you"};
std::vector<QString> heads = {
":/res/head_1.jpg",
":/res/head_2.jpg",
":/res/head_3.jpg",
":/res/head_4.jpg",
":/res/head_5.jpg"
};
std::vector<QString> names = {
"llfc",
"zack",
"golang",
"cpp",
"java",
"nodejs",
"python",
"rust"
};
这些数据只是测试数据,实际数据是后端传输过来的,我们目前只测试界面功能,用测试数据即可,写一个函数根据上面的数据添加13条item记录
cpp展开代码void ChatDialog::addChatUserList()
{
// 创建QListWidgetItem,并设置自定义的widget
for(int i = 0; i < 13; i++){
int randomValue = QRandomGenerator::global()->bounded(100); // 生成0到99之间的随机整数
int str_i = randomValue%strs.size();
int head_i = randomValue%heads.size();
int name_i = randomValue%names.size();
auto *chat_user_wid = new ChatUserWid();
chat_user_wid->SetInfo(names[name_i], heads[head_i], strs[str_i]);
QListWidgetItem *item = new QListWidgetItem;
//qDebug()<<"chat_user_wid sizeHint is " << chat_user_wid->sizeHint();
item->setSizeHint(chat_user_wid->sizeHint());
ui->chat_user_list->addItem(item);
ui->chat_user_list->setItemWidget(item, chat_user_wid);
}
}
在ChatDialog构造函数中添加
cpp展开代码addChatUserList();
完善界面效果,新增qss
css展开代码ChatUserWid {
background-color:rgb(247,247,247);
border: none;
}
#user_chat_lb{
color:rgb(153,153,153);
font-size: 12px;
font-family: "Microsoft YaHei";
}
#user_name_lb{
color:rgb(0,0,0);
font-size: 14px;
font-weight: normal;
font-family: "Microsoft YaHei";
}
#time_wid #time_lb{
color:rgb(140,140,140);
font-size: 12px;
font-family: "Microsoft YaHei";
}
QScrollBar:vertical {
background: transparent; /* 将轨道背景设置为透明 */
width: 8px; /* 滚动条宽度,根据需要调整 */
margin: 0px; /* 移除滚动条与滑块之间的间距 */
}
QScrollBar::handle:vertical {
background: rgb(173,170,169); /* 滑块颜色 */
min-height: 10px; /* 滑块最小高度,根据需要调整 */
border-radius: 4px; /* 滑块边缘圆角,调整以形成椭圆形状 */
}
QScrollBar::add-line:vertical, QScrollBar::sub-line:vertical {
height: 0px; /* 移除上下按钮 */
border: none; /* 移除边框 */
background: transparent; /* 背景透明 */
}
QScrollBar::add-page:vertical, QScrollBar::sub-page:vertical {
background: none; /* 页面滚动部分背景透明 */
}
测试效果
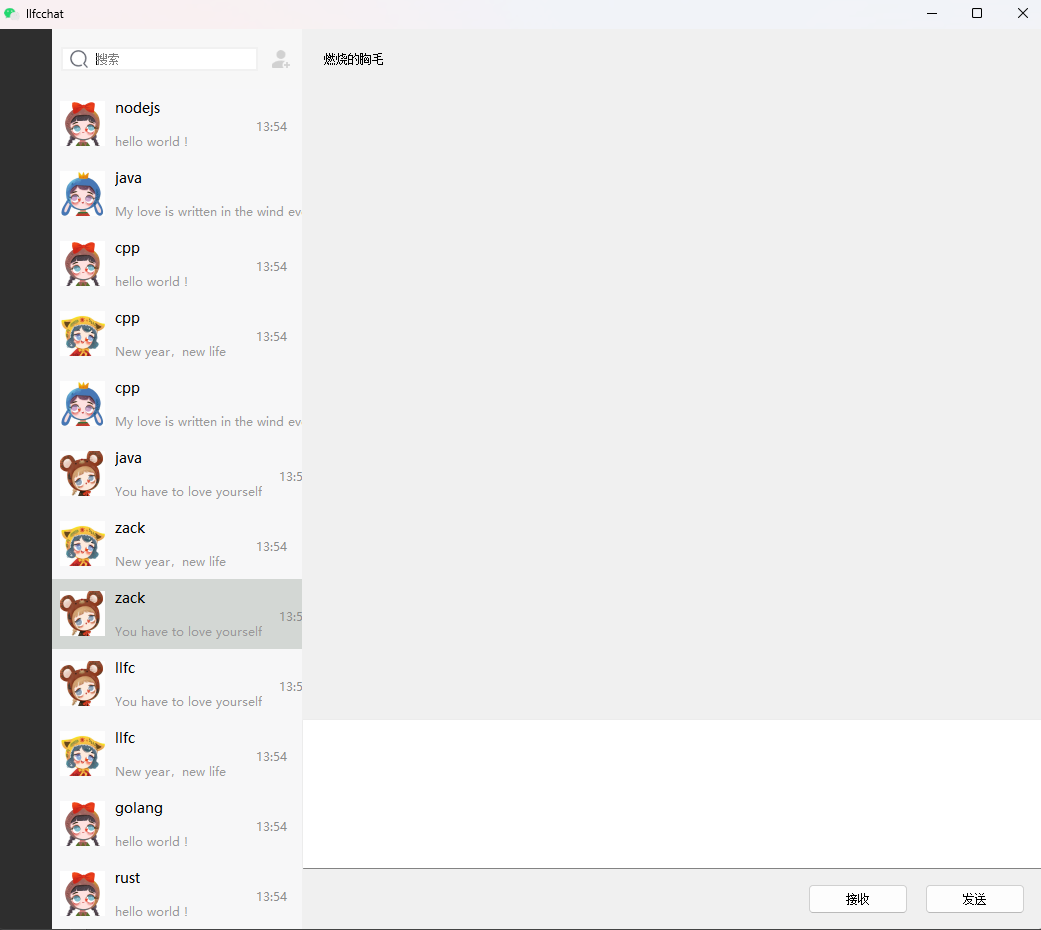
源码链接
https://gitee.com/secondtonone1/llfcchat
视频链接
day20-动态加载聊天列表
聊天列表动态加载
如果要动态加载聊天列表内容,我们可以在列表的滚动区域捕获鼠标滑轮事件,并且在滚动到底部的时候我们发送一个加载聊天用户的信号
cpp展开代码bool ChatUserList::eventFilter(QObject *watched, QEvent *event)
{
// 检查事件是否是鼠标悬浮进入或离开
if (watched == this->viewport()) {
if (event->type() == QEvent::Enter) {
// 鼠标悬浮,显示滚动条
this->setVerticalScrollBarPolicy(Qt::ScrollBarAsNeeded);
} else if (event->type() == QEvent::Leave) {
// 鼠标离开,隐藏滚动条
this->setVerticalScrollBarPolicy(Qt::ScrollBarAlwaysOff);
}
}
// 检查事件是否是鼠标滚轮事件
if (watched == this->viewport() && event->type() == QEvent::Wheel) {
QWheelEvent *wheelEvent = static_cast<QWheelEvent*>(event);
int numDegrees = wheelEvent->angleDelta().y() / 8;
int numSteps = numDegrees / 15; // 计算滚动步数
// 设置滚动幅度
this->verticalScrollBar()->setValue(this->verticalScrollBar()->value() - numSteps);
// 检查是否滚动到底部
QScrollBar *scrollBar = this->verticalScrollBar();
int maxScrollValue = scrollBar->maximum();
int currentValue = scrollBar->value();
//int pageSize = 10; // 每页加载的联系人数量
if (maxScrollValue - currentValue <= 0) {
// 滚动到底部,加载新的联系人
qDebug()<<"load more chat user";
//发送信号通知聊天界面加载更多聊天内容
emit sig_loading_chat_user();
}
return true; // 停止事件传递
}
return QListWidget::eventFilter(watched, event);
}
回到ChatDialog类里添加槽函数
cpp展开代码void ChatDialog::slot_loading_chat_user()
{
if(_b_loading){
return;
}
_b_loading = true;
LoadingDlg *loadingDialog = new LoadingDlg(this);
loadingDialog->setModal(true);
loadingDialog->show();
qDebug() << "add new data to list.....";
addChatUserList();
// 加载完成后关闭对话框
loadingDialog->deleteLater();
_b_loading = false;
}
槽函数中我们添加了LoadingDlg类,这个类也是个QT 设计师界面类,ui如下
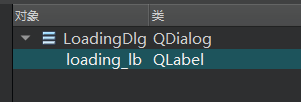
添加stackwidget管理界面
ChatDialog界面里添加stackedWidget,然后添加两个页面

回头我们将这两个界面升级为我们自定义的界面
我们先添加一个自定义的QT设计师界面类ChatPage,然后将原来放在ChatDialog.ui中的chat_data_wid这个widget移动到ChatPage中ui布局如下

布局属性如下
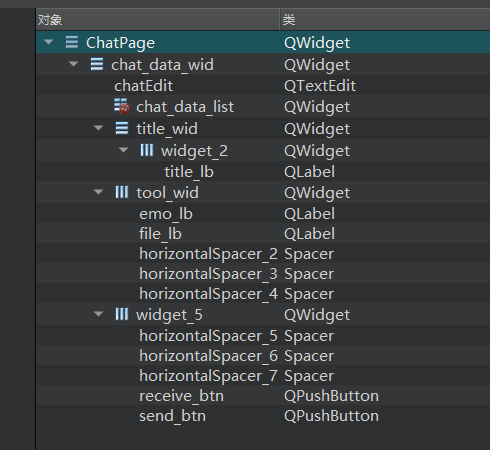
然后我们将ChatDialog.ui中的chat_page 升级为ChatPage。
接着我们将ChatPage中的一些控件比如emo_lb, file_lb升级为ClickedLabel, receive_btn, send_btn升级为ClickedBtn
如下图:
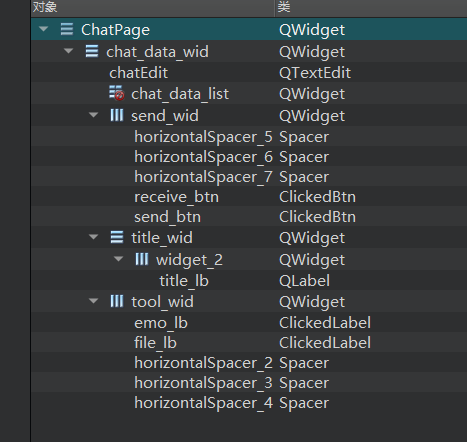
然后我们在ChatPage的构造函数中添加按钮样式的编写
cpp展开代码ChatPage::ChatPage(QWidget *parent) :
QWidget(parent),
ui(new Ui::ChatPage)
{
ui->setupUi(this);
//设置按钮样式
ui->receive_btn->SetState("normal","hover","press");
ui->send_btn->SetState("normal","hover","press");
//设置图标样式
ui->emo_lb->SetState("normal","hover","press","normal","hover","press");
ui->file_lb->SetState("normal","hover","press","normal","hover","press");
}
因为我们继承了QWidget,我们想实现样式更新,需要重写paintEvent
cpp展开代码void ChatPage::paintEvent(QPaintEvent *event)
{
QStyleOption opt;
opt.init(this);
QPainter p(this);
style()->drawPrimitive(QStyle::PE_Widget, &opt, &p, this);
}
类似的,我们的ListItemBase
cpp展开代码void ListItemBase::paintEvent(QPaintEvent *event)
{
QStyleOption opt;
opt.init(this);
QPainter p(this);
style()->drawPrimitive(QStyle::PE_Widget, &opt, &p, this);
}
ClickedLabel完善
我们希望ClickedLabel在按下的时候显示按下状态的资源,在抬起的时候显示抬起的资源,所以修改按下事件和抬起事件
cpp展开代码void ClickedLabel::mousePressEvent(QMouseEvent *event)
{
if (event->button() == Qt::LeftButton) {
if(_curstate == ClickLbState::Normal){
qDebug()<<"clicked , change to selected hover: "<< _selected_hover;
_curstate = ClickLbState::Selected;
setProperty("state",_selected_press);
repolish(this);
update();
}else{
qDebug()<<"clicked , change to normal hover: "<< _normal_hover;
_curstate = ClickLbState::Normal;
setProperty("state",_normal_press);
repolish(this);
update();
}
return;
}
// 调用基类的mousePressEvent以保证正常的事件处理
QLabel::mousePressEvent(event);
}
抬起事件
cpp展开代码void ClickedLabel::mouseReleaseEvent(QMouseEvent *event)
{
if (event->button() == Qt::LeftButton) {
if(_curstate == ClickLbState::Normal){
// qDebug()<<"ReleaseEvent , change to normal hover: "<< _normal_hover;
setProperty("state",_normal_hover);
repolish(this);
update();
}else{
// qDebug()<<"ReleaseEvent , change to select hover: "<< _selected_hover;
setProperty("state",_selected_hover);
repolish(this);
update();
}
emit clicked();
return;
}
// 调用基类的mousePressEvent以保证正常的事件处理
QLabel::mousePressEvent(event);
}
qss美化
我们添加qss美化一下
css展开代码LoadingDlg{
background: #f2eada;
}
#title_lb{
font-family: "Microsoft YaHei";
font-size: 18px;
font-weight: normal;
}
#chatEdit{
background: #ffffff;
border: none; /* 隐藏边框 */
font-family: "Microsoft YaHei"; /* 设置字体 */
font-size: 18px; /* 设置字体大小 */
padding: 5px; /* 设置内边距 */
}
#send_wid{
background: #ffffff;
border: none; /* 隐藏边框 */
}
#add_btn[state='normal']{
border-image: url(:/res/add_friend_normal.png);
}
#add_btn[state='hover']{
border-image: url(:/res/add_friend_hover.png);
}
#add_btn[state='press']{
border-image: url(:/res/add_friend_hover.png);
}
#receive_btn[state='normal']{
background: #f0f0f0;
color: #2cb46e;
font-size: 16px; /* 设置字体大小 */
font-family: "Microsoft YaHei"; /* 设置字体 */
border-radius: 20px; /* 设置圆角 */
}
#receive_btn[state='hover']{
background: #d2d2d2;
color: #2cb46e;
font-size: 16px; /* 设置字体大小 */
font-family: "Microsoft YaHei"; /* 设置字体 */
border-radius: 20px; /* 设置圆角 */
}
#receive_btn[state='press']{
background: #c6c6c6;
color: #2cb46e;
font-size: 16px; /* 设置字体大小 */
font-family: "Microsoft YaHei"; /* 设置字体 */
border-radius: 20px; /* 设置圆角 */
}
#send_btn[state='normal']{
background: #f0f0f0;
color: #2cb46e;
font-size: 16px; /* 设置字体大小 */
font-family: "Microsoft YaHei"; /* 设置字体 */
border-radius: 20px; /* 设置圆角 */
}
#send_btn[state='hover']{
background: #d2d2d2;
color: #2cb46e;
font-size: 16px; /* 设置字体大小 */
font-family: "Microsoft YaHei"; /* 设置字体 */
border-radius: 20px; /* 设置圆角 */
}
#send_btn[state='press']{
background: #c6c6c6;
color: #2cb46e;
font-size: 16px; /* 设置字体大小 */
font-family: "Microsoft YaHei"; /* 设置字体 */
border-radius: 20px; /* 设置圆角 */
}
#tool_wid{
background: #ffffff;
border-bottom: 0.5px solid #ececec; /* 设置下边框颜色和宽度 */
}
#emo_lb[state='normal']{
border-image: url(:/res/smile.png);
}
#emo_lb[state='hover']{
border-image: url(:/res/smile_hover.png);
}
#emo_lb[state='press']{
border-image: url(:/res/smile_press.png);
}
#file_lb[state='normal']{
border-image: url(:/res/filedir.png);
}
#file_lb[state='hover']{
border-image: url(:/res/filedir_hover.png);
}
#file_lb[state='press']{
border-image: url(:/res/filedir_press.png);
}
效果
最后整体运行一下看看效果, 下一节我们实现红框内的内容
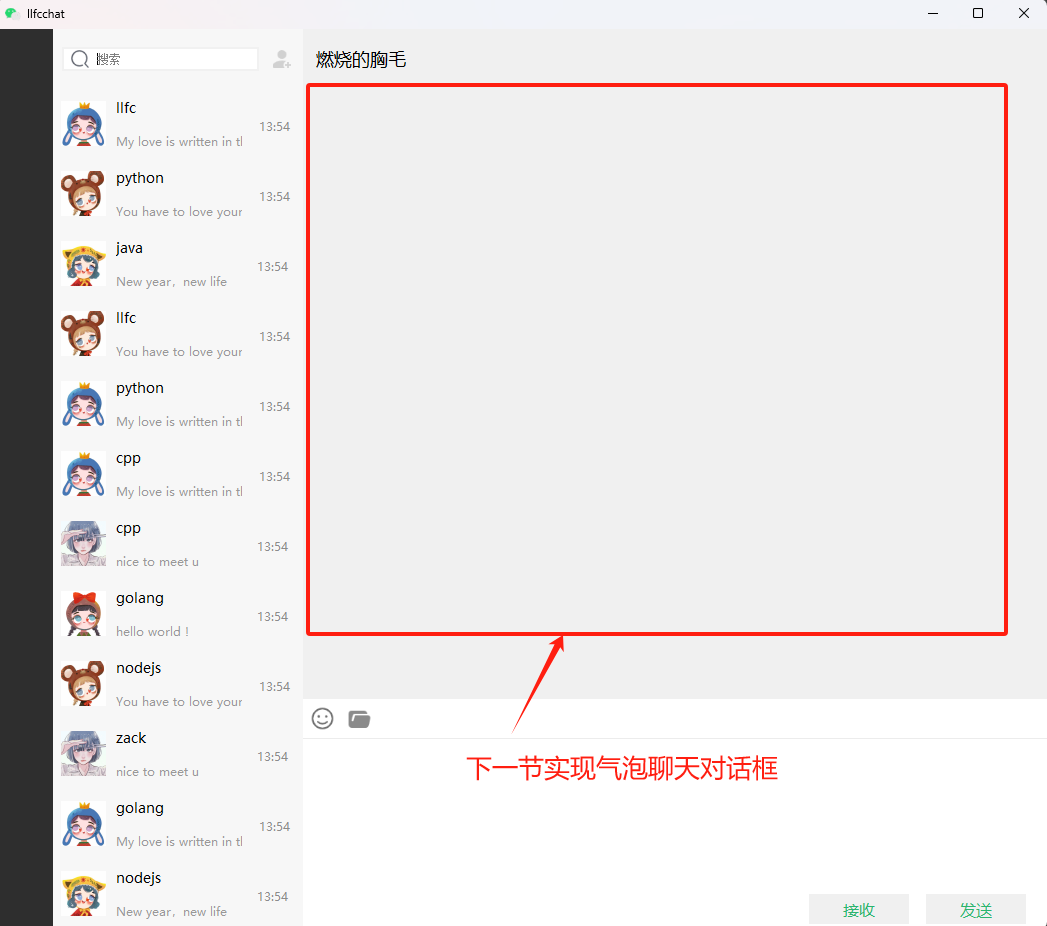
视频链接
https://www.bilibili.com/video/BV1xz421h7Ad/?vd_source=8be9e83424c2ed2c9b2a3ed1d01385e9
源码链接
https://gitee.com/secondtonone1/llfcchat
day21-滚动聊天布局设计
滚动聊天布局设计
我们的聊天布局如下图 最外层的是一个chatview(黑色), chatview内部在添加一个MainLayout(蓝色),MainLayout内部添加一个scrollarea(红色),scrollarea内部包含一个widget(绿色),同时也包含一个HLayout(紫色)用来浮动显示滚动条。widget内部包含一个垂直布局Vlayout(黄色),黄色布局内部包含一个粉色的widget,widget占据拉伸比一万,保证充满整个布局。
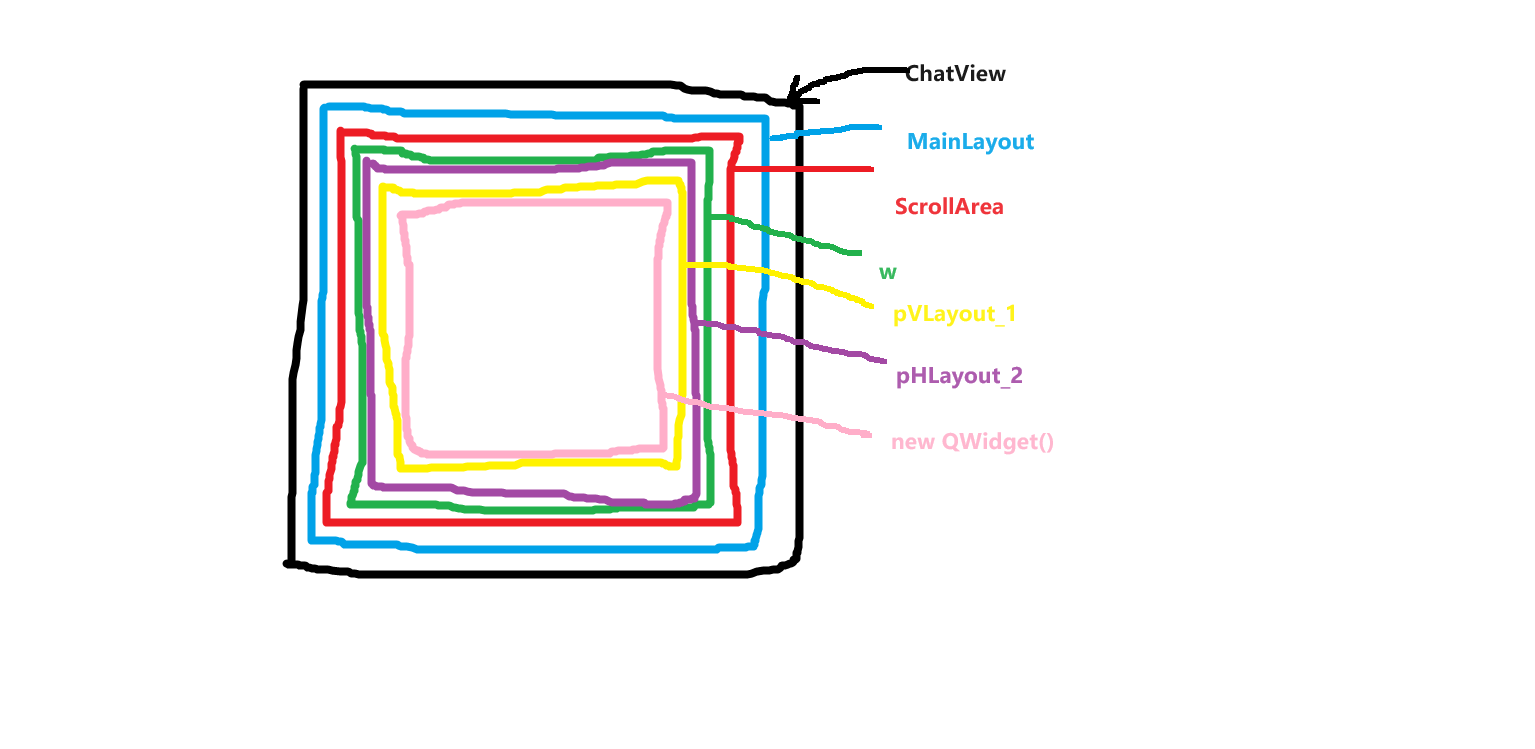
代码实现
我们对照上面的图手写代码,在项目中添加ChatView类,然后先实现类的声明
cpp展开代码class ChatView: public QWidget
{
Q_OBJECT
public:
ChatView(QWidget *parent = Q_NULLPTR);
void appendChatItem(QWidget *item); //尾插
void prependChatItem(QWidget *item); //头插
void insertChatItem(QWidget *before, QWidget *item);//中间插
protected:
bool eventFilter(QObject *o, QEvent *e) override;
void paintEvent(QPaintEvent *event) override;
private slots:
void onVScrollBarMoved(int min, int max);
private:
void initStyleSheet();
private:
//QWidget *m_pCenterWidget;
QVBoxLayout *m_pVl;
QScrollArea *m_pScrollArea;
bool isAppended;
};
接下来实现其函数定义, 先实现构造函数
cpp展开代码ChatView::ChatView(QWidget *parent) : QWidget(parent)
, isAppended(false)
{
QVBoxLayout *pMainLayout = new QVBoxLayout();
this->setLayout(pMainLayout);
pMainLayout->setMargin(0);
m_pScrollArea = new QScrollArea();
m_pScrollArea->setObjectName("chat_area");
pMainLayout->addWidget(m_pScrollArea);
QWidget *w = new QWidget(this);
w->setObjectName("chat_bg");
w->setAutoFillBackground(true);
QVBoxLayout *pVLayout_1 = new QVBoxLayout();
pVLayout_1->addWidget(new QWidget(), 100000);
w->setLayout(pVLayout_1);
m_pScrollArea->setWidget(w);
m_pScrollArea->setVerticalScrollBarPolicy(Qt::ScrollBarAlwaysOff);
QScrollBar *pVScrollBar = m_pScrollArea->verticalScrollBar();
connect(pVScrollBar, &QScrollBar::rangeChanged,this, &ChatView::onVScrollBarMoved);
//把垂直ScrollBar放到上边 而不是原来的并排
QHBoxLayout *pHLayout_2 = new QHBoxLayout();
pHLayout_2->addWidget(pVScrollBar, 0, Qt::AlignRight);
pHLayout_2->setMargin(0);
m_pScrollArea->setLayout(pHLayout_2);
pVScrollBar->setHidden(true);
m_pScrollArea->setWidgetResizable(true);
m_pScrollArea->installEventFilter(this);
initStyleSheet();
}
再实现添加条目到聊天背景
cpp展开代码void ChatView::appendChatItem(QWidget *item)
{
QVBoxLayout *vl = qobject_cast<QVBoxLayout *>(m_pScrollArea->widget()->layout());
vl->insertWidget(vl->count()-1, item);
isAppended = true;
}
重写事件过滤器
cpp展开代码bool ChatView::eventFilter(QObject *o, QEvent *e)
{
/*if(e->type() == QEvent::Resize && o == )
{
}
else */if(e->type() == QEvent::Enter && o == m_pScrollArea)
{
m_pScrollArea->verticalScrollBar()->setHidden(m_pScrollArea->verticalScrollBar()->maximum() == 0);
}
else if(e->type() == QEvent::Leave && o == m_pScrollArea)
{
m_pScrollArea->verticalScrollBar()->setHidden(true);
}
return QWidget::eventFilter(o, e);
}
重写paintEvent支持子类绘制
cpp展开代码void ChatView::paintEvent(QPaintEvent *event)
{
QStyleOption opt;
opt.init(this);
QPainter p(this);
style()->drawPrimitive(QStyle::PE_Widget, &opt, &p, this);
}
监听滚动区域变化的槽函数
cpp展开代码void ChatView::onVScrollBarMoved(int min, int max)
{
if(isAppended) //添加item可能调用多次
{
QScrollBar *pVScrollBar = m_pScrollArea->verticalScrollBar();
pVScrollBar->setSliderPosition(pVScrollBar->maximum());
//500毫秒内可能调用多次
QTimer::singleShot(500, [this]()
{
isAppended = false;
});
}
}
本节先到这里,完成聊天布局基本的构造
视频链接
https://www.bilibili.com/video/BV1xz421h7Ad/?vd_source=8be9e83424c2ed2c9b2a3ed1d01385e9
源码链接
https://gitee.com/secondtonone1/llfcchat
day22.气泡聊天对话框
气泡聊天框设计
我们期待实现如下绿色的气泡对话框
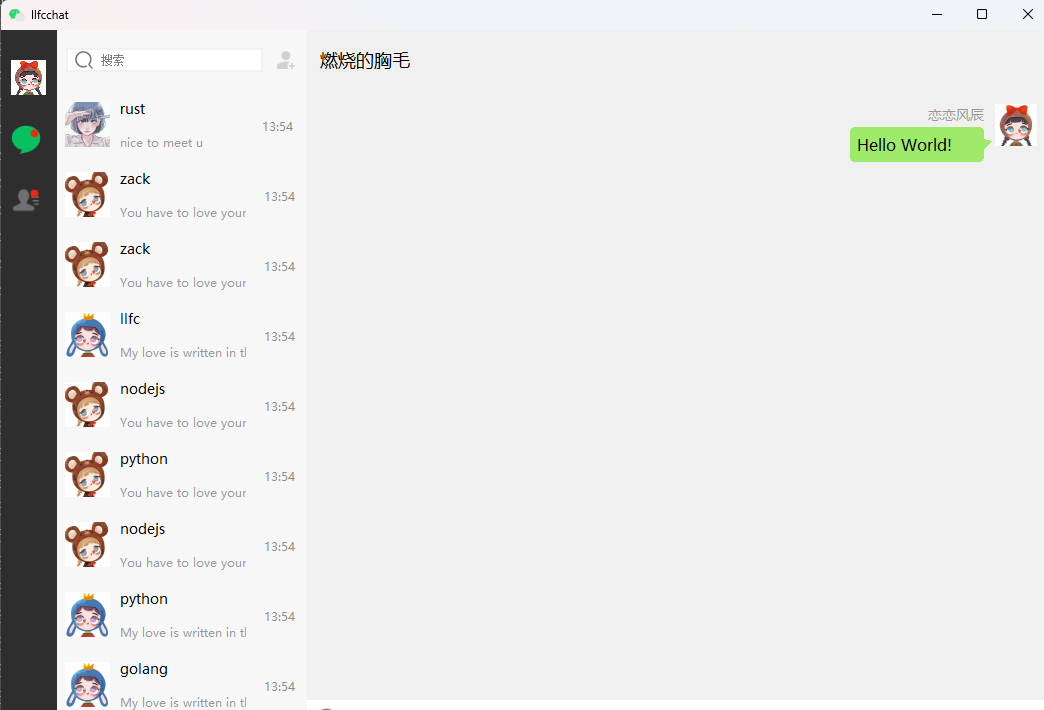
对于我们自己发出的信息,我们可以实现这样一个网格布局管理
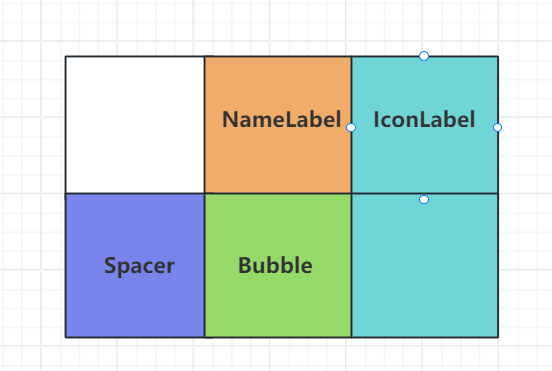
NameLabel用来显示用户的名字,Bubble用来显示聊天信息,Spacer是个弹簧,保证将NameLabel,IconLabel,Bubble等挤压到右侧。
如果是别人发出的消息,我们设置这样一个网格布局
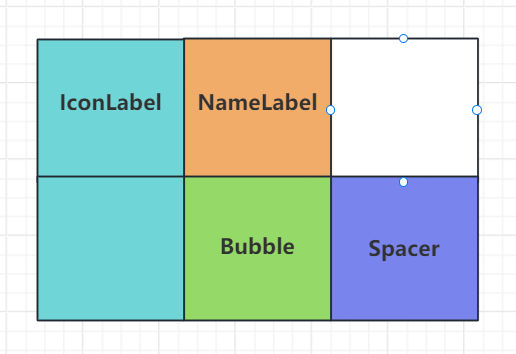
下面是实现布局的核心代码
cpp展开代码ChatItemBase::ChatItemBase(ChatRole role, QWidget *parent)
: QWidget(parent)
, m_role(role)
{
m_pNameLabel = new QLabel();
m_pNameLabel->setObjectName("chat_user_name");
QFont font("Microsoft YaHei");
font.setPointSize(9);
m_pNameLabel->setFont(font);
m_pNameLabel->setFixedHeight(20);
m_pIconLabel = new QLabel();
m_pIconLabel->setScaledContents(true);
m_pIconLabel->setFixedSize(42, 42);
m_pBubble = new QWidget();
QGridLayout *pGLayout = new QGridLayout();
pGLayout->setVerticalSpacing(3);
pGLayout->setHorizontalSpacing(3);
pGLayout->setMargin(3);
QSpacerItem*pSpacer = new QSpacerItem(40, 20, QSizePolicy::Expanding, QSizePolicy::Minimum);
if(m_role == ChatRole::Self)
{
m_pNameLabel->setContentsMargins(0,0,8,0);
m_pNameLabel->setAlignment(Qt::AlignRight);
pGLayout->addWidget(m_pNameLabel, 0,1, 1,1);
pGLayout->addWidget(m_pIconLabel, 0, 2, 2,1, Qt::AlignTop);
pGLayout->addItem(pSpacer, 1, 0, 1, 1);
pGLayout->addWidget(m_pBubble, 1,1, 1,1);
pGLayout->setColumnStretch(0, 2);
pGLayout->setColumnStretch(1, 3);
}else{
m_pNameLabel->setContentsMargins(8,0,0,0);
m_pNameLabel->setAlignment(Qt::AlignLeft);
pGLayout->addWidget(m_pIconLabel, 0, 0, 2,1, Qt::AlignTop);
pGLayout->addWidget(m_pNameLabel, 0,1, 1,1);
pGLayout->addWidget(m_pBubble, 1,1, 1,1);
pGLayout->addItem(pSpacer, 2, 2, 1, 1);
pGLayout->setColumnStretch(1, 3);
pGLayout->setColumnStretch(2, 2);
}
this->setLayout(pGLayout);
}
设置用户名和头像
cpp展开代码void ChatItemBase::setUserName(const QString &name)
{
m_pNameLabel->setText(name);
}
void ChatItemBase::setUserIcon(const QPixmap &icon)
{
m_pIconLabel->setPixmap(icon);
}
因为我们还要定制化实现气泡widget,所以要写个函数更新这个widget
cpp展开代码void ChatItemBase::setWidget(QWidget *w)
{
QGridLayout *pGLayout = (qobject_cast<QGridLayout *>)(this->layout());
pGLayout->replaceWidget(m_pBubble, w);
delete m_pBubble;
m_pBubble = w;
}
聊天气泡
我们的消息分为几种,文件,文本,图片等。所以先实现BubbleFrame作为基类
cpp展开代码class BubbleFrame : public QFrame
{
Q_OBJECT
public:
BubbleFrame(ChatRole role, QWidget *parent = nullptr);
void setMargin(int margin);
//inline int margin(){return margin;}
void setWidget(QWidget *w);
protected:
void paintEvent(QPaintEvent *e);
private:
QHBoxLayout *m_pHLayout;
ChatRole m_role;
int m_margin;
};
BubbleFrame基类构造函数创建一个布局,要根据是自己发送的消息还是别人发送的,做margin分布
cpp展开代码const int WIDTH_SANJIAO = 8; //三角宽
BubbleFrame::BubbleFrame(ChatRole role, QWidget *parent)
:QFrame(parent)
,m_role(role)
,m_margin(3)
{
m_pHLayout = new QHBoxLayout();
if(m_role == ChatRole::Self)
m_pHLayout->setContentsMargins(m_margin, m_margin, WIDTH_SANJIAO + m_margin, m_margin);
else
m_pHLayout->setContentsMargins(WIDTH_SANJIAO + m_margin, m_margin, m_margin, m_margin);
this->setLayout(m_pHLayout);
}
将气泡框内设置文本内容,或者图片内容,所以实现了下面的函数
cpp展开代码void BubbleFrame::setWidget(QWidget *w)
{
if(m_pHLayout->count() > 0)
return ;
else{
m_pHLayout->addWidget(w);
}
}
接下来绘制气泡
cpp展开代码void BubbleFrame::paintEvent(QPaintEvent *e)
{
QPainter painter(this);
painter.setPen(Qt::NoPen);
if(m_role == ChatRole::Other)
{
//画气泡
QColor bk_color(Qt::white);
painter.setBrush(QBrush(bk_color));
QRect bk_rect = QRect(WIDTH_SANJIAO, 0, this->width()-WIDTH_SANJIAO, this->height());
painter.drawRoundedRect(bk_rect,5,5);
//画小三角
QPointF points[3] = {
QPointF(bk_rect.x(), 12),
QPointF(bk_rect.x(), 10+WIDTH_SANJIAO +2),
QPointF(bk_rect.x()-WIDTH_SANJIAO, 10+WIDTH_SANJIAO-WIDTH_SANJIAO/2),
};
painter.drawPolygon(points, 3);
}
else
{
QColor bk_color(158,234,106);
painter.setBrush(QBrush(bk_color));
//画气泡
QRect bk_rect = QRect(0, 0, this->width()-WIDTH_SANJIAO, this->height());
painter.drawRoundedRect(bk_rect,5,5);
//画三角
QPointF points[3] = {
QPointF(bk_rect.x()+bk_rect.width(), 12),
QPointF(bk_rect.x()+bk_rect.width(), 12+WIDTH_SANJIAO +2),
QPointF(bk_rect.x()+bk_rect.width()+WIDTH_SANJIAO, 10+WIDTH_SANJIAO-WIDTH_SANJIAO/2),
};
painter.drawPolygon(points, 3);
}
return QFrame::paintEvent(e);
}
绘制的过程很简单,先创建QPainter,然后设置NoPen,表示不绘制轮廓线,接下来用设置指定颜色的画刷绘制图形,我们先绘制矩形再绘制三角形。
对于文本消息的绘制
cpp展开代码TextBubble::TextBubble(ChatRole role, const QString &text, QWidget *parent)
:BubbleFrame(role, parent)
{
m_pTextEdit = new QTextEdit();
m_pTextEdit->setReadOnly(true);
m_pTextEdit->setVerticalScrollBarPolicy(Qt::ScrollBarAlwaysOff);
m_pTextEdit->setHorizontalScrollBarPolicy(Qt::ScrollBarAlwaysOff);
m_pTextEdit->installEventFilter(this);
QFont font("Microsoft YaHei");
font.setPointSize(12);
m_pTextEdit->setFont(font);
setPlainText(text);
setWidget(m_pTextEdit);
initStyleSheet();
}
setPlainText设置文本最大宽度
cpp展开代码void TextBubble::setPlainText(const QString &text)
{
m_pTextEdit->setPlainText(text);
//m_pTextEdit->setHtml(text);
//找到段落中最大宽度
qreal doc_margin = m_pTextEdit->document()->documentMargin();
int margin_left = this->layout()->contentsMargins().left();
int margin_right = this->layout()->contentsMargins().right();
QFontMetricsF fm(m_pTextEdit->font());
QTextDocument *doc = m_pTextEdit->document();
int max_width = 0;
//遍历每一段找到 最宽的那一段
for (QTextBlock it = doc->begin(); it != doc->end(); it = it.next()) //字体总长
{
int txtW = int(fm.width(it.text()));
max_width = max_width < txtW ? txtW : max_width; //找到最长的那段
}
//设置这个气泡的最大宽度 只需要设置一次
setMaximumWidth(max_width + doc_margin * 2 + (margin_left + margin_right)); //设置最大宽度
}
我们拉伸的时候要调整气泡的高度,这里重写事件过滤器
cpp展开代码bool TextBubble::eventFilter(QObject *o, QEvent *e)
{
if(m_pTextEdit == o && e->type() == QEvent::Paint)
{
adjustTextHeight(); //PaintEvent中设置
}
return BubbleFrame::eventFilter(o, e);
}
调整高度
cpp展开代码void TextBubble::adjustTextHeight()
{
qreal doc_margin = m_pTextEdit->document()->documentMargin(); //字体到边框的距离默认为4
QTextDocument *doc = m_pTextEdit->document();
qreal text_height = 0;
//把每一段的高度相加=文本高
for (QTextBlock it = doc->begin(); it != doc->end(); it = it.next())
{
QTextLayout *pLayout = it.layout();
QRectF text_rect = pLayout->boundingRect(); //这段的rect
text_height += text_rect.height();
}
int vMargin = this->layout()->contentsMargins().top();
//设置这个气泡需要的高度 文本高+文本边距+TextEdit边框到气泡边框的距离
setFixedHeight(text_height + doc_margin *2 + vMargin*2 );
}
设置样式表
cpp展开代码void TextBubble::initStyleSheet()
{
m_pTextEdit->setStyleSheet("QTextEdit{background:transparent;border:none}");
}
对于图像的旗袍对话框类似,只是计算图像的宽高即可
cpp展开代码#define PIC_MAX_WIDTH 160
#define PIC_MAX_HEIGHT 90
PictureBubble::PictureBubble(const QPixmap &picture, ChatRole role, QWidget *parent)
:BubbleFrame(role, parent)
{
QLabel *lb = new QLabel();
lb->setScaledContents(true);
QPixmap pix = picture.scaled(QSize(PIC_MAX_WIDTH, PIC_MAX_HEIGHT), Qt::KeepAspectRatio);
lb->setPixmap(pix);
this->setWidget(lb);
int left_margin = this->layout()->contentsMargins().left();
int right_margin = this->layout()->contentsMargins().right();
int v_margin = this->layout()->contentsMargins().bottom();
setFixedSize(pix.width()+left_margin + right_margin, pix.height() + v_margin *2);
}
发送测试
接下来在发送处实现文本和图片消息的展示,点击发送按钮根据不同的类型创建不同的气泡消息
cpp展开代码void ChatPage::on_send_btn_clicked()
{
auto pTextEdit = ui->chatEdit;
ChatRole role = ChatRole::Self;
QString userName = QStringLiteral("恋恋风辰");
QString userIcon = ":/res/head_1.jpg";
const QVector<MsgInfo>& msgList = pTextEdit->getMsgList();
for(int i=0; i<msgList.size(); ++i)
{
QString type = msgList[i].msgFlag;
ChatItemBase *pChatItem = new ChatItemBase(role);
pChatItem->setUserName(userName);
pChatItem->setUserIcon(QPixmap(userIcon));
QWidget *pBubble = nullptr;
if(type == "text")
{
pBubble = new TextBubble(role, msgList[i].content);
}
else if(type == "image")
{
pBubble = new PictureBubble(QPixmap(msgList[i].content) , role);
}
else if(type == "file")
{
}
if(pBubble != nullptr)
{
pChatItem->setWidget(pBubble);
ui->chat_data_list->appendChatItem(pChatItem);
}
}
}
效果展示
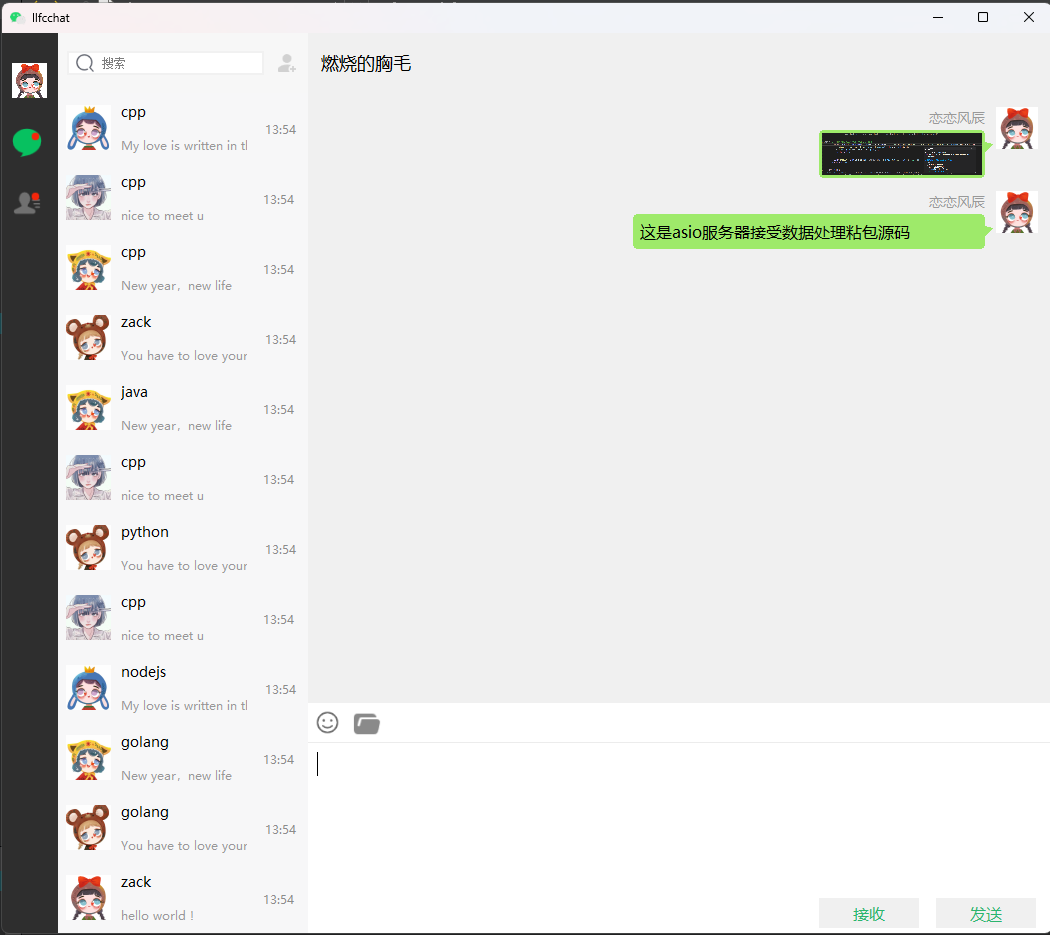
源码和视频
https://www.bilibili.com/video/BV1Mz4218783/?vd_source=8be9e83424c2ed2c9b2a3ed1d01385e9
源码链接
https://gitee.com/secondtonone1/llfcchat
day23.侧边栏切换和搜索联动功能
侧边栏按钮
我们接下来实现侧边栏按钮功能,希望点击一个按钮,清空其他按钮的选中状态。而我们又希望按钮上面能在有新的通知的时候出现红点的图标,所以不能用简单的按钮,要用自定义的一个widget实现点击效果
我们自定义StateWidget ,声明如下
cpp展开代码class StateWidget : public QWidget
{
Q_OBJECT
public:
explicit StateWidget(QWidget *parent = nullptr);
void SetState(QString normal="", QString hover="", QString press="",
QString select="", QString select_hover="", QString select_press="");
ClickLbState GetCurState();
void ClearState();
void SetSelected(bool bselected);
void AddRedPoint();
void ShowRedPoint(bool show=true);
protected:
void paintEvent(QPaintEvent* event);
virtual void mousePressEvent(QMouseEvent *ev) override;
virtual void mouseReleaseEvent(QMouseEvent *ev) override;
virtual void enterEvent(QEvent* event) override;
virtual void leaveEvent(QEvent* event) override;
private:
QString _normal;
QString _normal_hover;
QString _normal_press;
QString _selected;
QString _selected_hover;
QString _selected_press;
ClickLbState _curstate;
QLabel * _red_point;
signals:
void clicked(void);
signals:
public slots:
};
接下来实现定义
cpp展开代码StateWidget::StateWidget(QWidget *parent): QWidget(parent),_curstate(ClickLbState::Normal)
{
setCursor(Qt::PointingHandCursor);
//添加红点
AddRedPoint();
}
void StateWidget::SetState(QString normal, QString hover, QString press, QString select, QString select_hover, QString select_press)
{
_normal = normal;
_normal_hover = hover;
_normal_press = press;
_selected = select;
_selected_hover = select_hover;
_selected_press = select_press;
setProperty("state",normal);
repolish(this);
}
ClickLbState StateWidget::GetCurState()
{
return _curstate;
}
void StateWidget::ClearState()
{
_curstate = ClickLbState::Normal;
setProperty("state",_normal);
repolish(this);
update();
}
void StateWidget::SetSelected(bool bselected)
{
if(bselected){
_curstate = ClickLbState::Selected;
setProperty("state",_selected);
repolish(this);
update();
return;
}
_curstate = ClickLbState::Normal;
setProperty("state",_normal);
repolish(this);
update();
return;
}
void StateWidget::AddRedPoint()
{
//添加红点示意图
_red_point = new QLabel();
_red_point->setObjectName("red_point");
QVBoxLayout* layout2 = new QVBoxLayout;
_red_point->setAlignment(Qt::AlignCenter);
layout2->addWidget(_red_point);
layout2->setMargin(0);
this->setLayout(layout2);
_red_point->setVisible(false);
}
void StateWidget::ShowRedPoint(bool show)
{
_red_point->setVisible(true);
}
void StateWidget::paintEvent(QPaintEvent *event)
{
QStyleOption opt;
opt.init(this);
QPainter p(this);
style()->drawPrimitive(QStyle::PE_Widget, &opt, &p, this);
return;
}
void StateWidget::mousePressEvent(QMouseEvent *event)
{
if (event->button() == Qt::LeftButton) {
if(_curstate == ClickLbState::Selected){
qDebug()<<"PressEvent , already to selected press: "<< _selected_press;
//emit clicked();
// 调用基类的mousePressEvent以保证正常的事件处理
QWidget::mousePressEvent(event);
return;
}
if(_curstate == ClickLbState::Normal){
qDebug()<<"PressEvent , change to selected press: "<< _selected_press;
_curstate = ClickLbState::Selected;
setProperty("state",_selected_press);
repolish(this);
update();
}
return;
}
// 调用基类的mousePressEvent以保证正常的事件处理
QWidget::mousePressEvent(event);
}
void StateWidget::mouseReleaseEvent(QMouseEvent *event)
{
if (event->button() == Qt::LeftButton) {
if(_curstate == ClickLbState::Normal){
//qDebug()<<"ReleaseEvent , change to normal hover: "<< _normal_hover;
setProperty("state",_normal_hover);
repolish(this);
update();
}else{
//qDebug()<<"ReleaseEvent , change to select hover: "<< _selected_hover;
setProperty("state",_selected_hover);
repolish(this);
update();
}
emit clicked();
return;
}
// 调用基类的mousePressEvent以保证正常的事件处理
QWidget::mousePressEvent(event);
}
void StateWidget::enterEvent(QEvent *event)
{
// 在这里处理鼠标悬停进入的逻辑
if(_curstate == ClickLbState::Normal){
//qDebug()<<"enter , change to normal hover: "<< _normal_hover;
setProperty("state",_normal_hover);
repolish(this);
update();
}else{
//qDebug()<<"enter , change to selected hover: "<< _selected_hover;
setProperty("state",_selected_hover);
repolish(this);
update();
}
QWidget::enterEvent(event);
}
void StateWidget::leaveEvent(QEvent *event)
{
// 在这里处理鼠标悬停离开的逻辑
if(_curstate == ClickLbState::Normal){
// qDebug()<<"leave , change to normal : "<< _normal;
setProperty("state",_normal);
repolish(this);
update();
}else{
// qDebug()<<"leave , change to select normal : "<< _selected;
setProperty("state",_selected);
repolish(this);
update();
}
QWidget::leaveEvent(event);
}
为了让按钮好看一点,我们修改下qss文件
css展开代码#chat_user_name {
color:rgb(153,153,153);
font-size: 14px;
font-family: "Microsoft YaHei";
}
#side_chat_lb[state='normal']{
border-image: url(:/res/chat_icon.png);
}
#side_chat_lb[state='hover']{
border-image: url(:/res/chat_icon_hover.png);
}
#side_chat_lb[state='pressed']{
border-image: url(:/res/chat_icon_press.png);
}
#side_chat_lb[state='selected_normal']{
border-image: url(:/res/chat_icon_press.png);
}
#side_chat_lb[state='selected_hover']{
border-image: url(:/res/chat_icon_press.png);
}
#side_chat_lb[state='selected_pressed']{
border-image: url(:/res/chat_icon_press.png);
}
#side_contact_lb[state='normal']{
border-image: url(:/res/contact_list.png);
}
#side_contact_lb[state='hover']{
border-image: url(:/res/contact_list_hover.png);
}
#side_contact_lb[state='pressed']{
border-image: url(:/res/contact_list_press.png);
}
#side_contact_lb[state='selected_normal']{
border-image: url(:/res/contact_list_press.png);
}
#side_contact_lb[state='selected_hover']{
border-image: url(:/res/contact_list_press.png);
}
#side_contact_lb[state='selected_pressed']{
border-image: url(:/res/contact_list_press.png);
}
回到ChatDialog.ui中,将side_chat_lb改为StateWidget,side_contact_lb改为StateWidget。
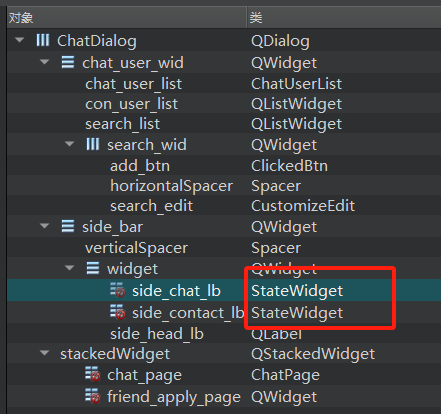
接下来回到ChatDialog.cpp中构造函数中添加
cpp展开代码 QPixmap pixmap(":/res/head_1.jpg");
ui->side_head_lb->setPixmap(pixmap); // 将图片设置到QLabel上
QPixmap scaledPixmap = pixmap.scaled( ui->side_head_lb->size(), Qt::KeepAspectRatio); // 将图片缩放到label的大小
ui->side_head_lb->setPixmap(scaledPixmap); // 将缩放后的图片设置到QLabel上
ui->side_head_lb->setScaledContents(true); // 设置QLabel自动缩放图片内容以适应大小
ui->side_chat_lb->setProperty("state","normal");
ui->side_chat_lb->SetState("normal","hover","pressed","selected_normal","selected_hover","selected_pressed");
ui->side_contact_lb->SetState("normal","hover","pressed","selected_normal","selected_hover","selected_pressed");
AddLBGroup(ui->side_chat_lb);
AddLBGroup(ui->side_contact_lb);
connect(ui->side_chat_lb, &StateWidget::clicked, this, &ChatDialog::slot_side_chat);
connect(ui->side_contact_lb, &StateWidget::clicked, this, &ChatDialog::slot_side_contact);
切换函数中实现如下
cpp展开代码void ChatDialog::slot_side_chat()
{
qDebug()<< "receive side chat clicked";
ClearLabelState(ui->side_chat_lb);
ui->stackedWidget->setCurrentWidget(ui->chat_page);
_state = ChatUIMode::ChatMode;
ShowSearch(false);
}
上述函数我们实现了清楚其他标签选中状态,只将被点击的标签设置为选中的效果,核心功能是下面
cpp展开代码void ChatDialog::ClearLabelState(StateWidget *lb)
{
for(auto & ele: _lb_list){
if(ele == lb){
continue;
}
ele->ClearState();
}
}
我们在构造函数里将要管理的标签通过AddGroup函数加入_lb_list实现管理
cpp展开代码void ChatDialog::AddLBGroup(StateWidget *lb)
{
_lb_list.push_back(lb);
}
搜索列表类
在pro中添加我们自定义一个搜索列表类
cpp展开代码class SearchList: public QListWidget
{
Q_OBJECT
public:
SearchList(QWidget *parent = nullptr);
void CloseFindDlg();
void SetSearchEdit(QWidget* edit);
protected:
bool eventFilter(QObject *watched, QEvent *event) override {
// 检查事件是否是鼠标悬浮进入或离开
if (watched == this->viewport()) {
if (event->type() == QEvent::Enter) {
// 鼠标悬浮,显示滚动条
this->setVerticalScrollBarPolicy(Qt::ScrollBarAsNeeded);
} else if (event->type() == QEvent::Leave) {
// 鼠标离开,隐藏滚动条
this->setVerticalScrollBarPolicy(Qt::ScrollBarAlwaysOff);
}
}
// 检查事件是否是鼠标滚轮事件
if (watched == this->viewport() && event->type() == QEvent::Wheel) {
QWheelEvent *wheelEvent = static_cast<QWheelEvent*>(event);
int numDegrees = wheelEvent->angleDelta().y() / 8;
int numSteps = numDegrees / 15; // 计算滚动步数
// 设置滚动幅度
this->verticalScrollBar()->setValue(this->verticalScrollBar()->value() - numSteps);
return true; // 停止事件传递
}
return QListWidget::eventFilter(watched, event);
}
private:
void waitPending(bool pending = true);
bool _send_pending;
void addTipItem();
std::shared_ptr<QDialog> _find_dlg;
QWidget* _search_edit;
LoadingDlg * _loadingDialog;
private slots:
void slot_item_clicked(QListWidgetItem *item);
void slot_user_search(std::shared_ptr<SearchInfo> si);
signals:
};
然后在构造函数中初始化条目列表
cpp展开代码SearchList::SearchList(QWidget *parent):QListWidget(parent),_find_dlg(nullptr), _search_edit(nullptr), _send_pending(false)
{
Q_UNUSED(parent);
this->setHorizontalScrollBarPolicy(Qt::ScrollBarAlwaysOff);
this->setVerticalScrollBarPolicy(Qt::ScrollBarAlwaysOff);
// 安装事件过滤器
this->viewport()->installEventFilter(this);
//连接点击的信号和槽
connect(this, &QListWidget::itemClicked, this, &SearchList::slot_item_clicked);
//添加条目
addTipItem();
//连接搜索条目
connect(TcpMgr::GetInstance().get(), &TcpMgr::sig_user_search, this, &SearchList::slot_user_search);
}
addTipItem是用来添加一个一个条目的
cpp展开代码void SearchList::addTipItem()
{
auto *invalid_item = new QWidget();
QListWidgetItem *item_tmp = new QListWidgetItem;
//qDebug()<<"chat_user_wid sizeHint is " << chat_user_wid->sizeHint();
item_tmp->setSizeHint(QSize(250,10));
this->addItem(item_tmp);
invalid_item->setObjectName("invalid_item");
this->setItemWidget(item_tmp, invalid_item);
item_tmp->setFlags(item_tmp->flags() & ~Qt::ItemIsSelectable);
auto *add_user_item = new AddUserItem();
QListWidgetItem *item = new QListWidgetItem;
//qDebug()<<"chat_user_wid sizeHint is " << chat_user_wid->sizeHint();
item->setSizeHint(add_user_item->sizeHint());
this->addItem(item);
this->setItemWidget(item, add_user_item);
}
sig_user_search可以先在TcpMgr中声明信号
cpp展开代码 void sig_user_search(std::shared_ptr<SearchInfo>);
SearchInfo定义在userdata.h中
cpp展开代码class SearchInfo {
public:
SearchInfo(int uid, QString name, QString nick, QString desc, int sex);
int _uid;
QString _name;
QString _nick;
QString _desc;
int _sex;
};
接下来实现我们自定义的AddUserItem, 在pro中添加qt设计师界面类AddUserItem
cpp展开代码class AddUserItem : public ListItemBase
{
Q_OBJECT
public:
explicit AddUserItem(QWidget *parent = nullptr);
~AddUserItem();
QSize sizeHint() const override {
return QSize(250, 70); // 返回自定义的尺寸
}
protected:
private:
Ui::AddUserItem *ui;
};
实现
cpp展开代码AddUserItem::AddUserItem(QWidget *parent) :
ListItemBase(parent),
ui(new Ui::AddUserItem)
{
ui->setupUi(this);
SetItemType(ListItemType::ADD_USER_TIP_ITEM);
}
AddUserItem::~AddUserItem()
{
delete ui;
}
我们将ChatDialog.ui中将search_list升级为SearchList类型
美化界面
我们用qss美化界面
css展开代码#search_edit {
border: 2px solid #f1f1f1;
}
/* 搜索框列表*/
#search_list {
background-color: rgb(247,247,248);
border: none;
}
#search_list::item:selected {
background-color: #d3d7d4;
border: none;
outline: none;
}
#search_list::item:hover {
background-color: rgb(206,207,208);
border: none;
outline: none;
}
#search_list::focus {
border: none;
outline: none;
}
#invalid_item {
background-color: #eaeaea;
border: none;
}
#add_tip {
border-image: url(:/res/addtip.png);
}
#right_tip{
border-image: url(:/res/right_tip.png);
}
#message_tip{
text-align: center;
font-family: "Microsoft YaHei";
font-size: 12pt;
}
我们在ChatDialog的构造函数中添加
cpp展开代码//链接搜索框输入变化
connect(ui->search_edit, &QLineEdit::textChanged, this, &ChatDialog::slot_text_changed);
slot_text_changed槽函数中实现
cpp展开代码void ChatDialog::slot_text_changed(const QString &str)
{
//qDebug()<< "receive slot text changed str is " << str;
if (!str.isEmpty()) {
ShowSearch(true);
}
}
源码和视频
再次启动后在输入框输入文字,就会显示搜索框
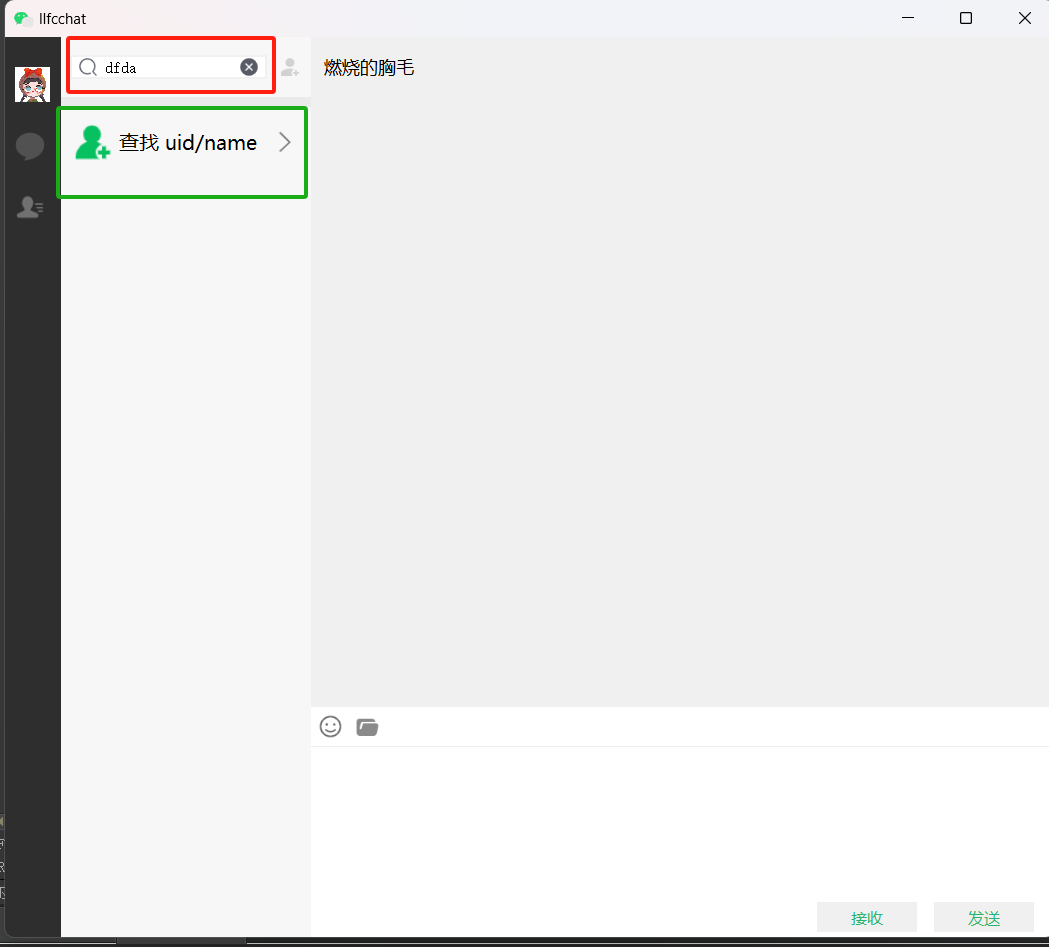
视频
源码链接
https://gitee.com/secondtonone1/llfcchat
day24.事件过滤器实现点击位置判断
事件过滤器
我们为了实现点击界面某个位置判断是否隐藏搜索框的功能。我们期待当鼠标点击搜索列表之外的区域时显示隐藏搜索框恢复聊天界面。 点击搜索列表则不隐藏搜索框。可以通过重载ChatDialog的EventFilter函数实现点击功能
cpp展开代码bool ChatDialog::eventFilter(QObject *watched, QEvent *event)
{
if (event->type() == QEvent::MouseButtonPress) {
QMouseEvent *mouseEvent = static_cast<QMouseEvent*>(event);
handleGlobalMousePress(mouseEvent);
}
return QDialog::eventFilter(watched, event);
}
具体判断全局鼠标按下位置和功能
cpp展开代码void ChatDialog::handleGlobalMousePress(QMouseEvent *event)
{
// 实现点击位置的判断和处理逻辑
// 先判断是否处于搜索模式,如果不处于搜索模式则直接返回
if( _mode != ChatUIMode::SearchMode){
return;
}
// 将鼠标点击位置转换为搜索列表坐标系中的位置
QPoint posInSearchList = ui->search_list->mapFromGlobal(event->globalPos());
// 判断点击位置是否在聊天列表的范围内
if (!ui->search_list->rect().contains(posInSearchList)) {
// 如果不在聊天列表内,清空输入框
ui->search_edit->clear();
ShowSearch(false);
}
}
在ChatDialog构造函数中添加事件过滤器
cpp展开代码//检测鼠标点击位置判断是否要清空搜索框
this->installEventFilter(this); // 安装事件过滤器
//设置聊天label选中状态
ui->side_chat_lb->SetSelected(true);
这样就可以实现在ChatDialog中点击其他位置隐藏SearchList列表了。
查找结果
在项目中添加FindSuccessDlg设计师界面类,其布局如下
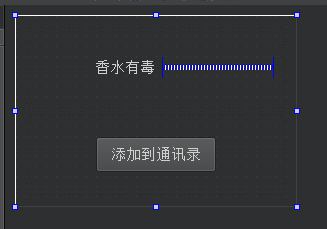
属性管理界面如下
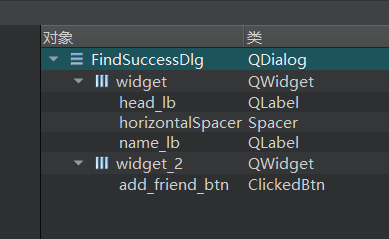
FindSuccessDlg声明如下
cpp展开代码class FindSuccessDlg : public QDialog
{
Q_OBJECT
public:
explicit FindSuccessDlg(QWidget *parent = nullptr);
~FindSuccessDlg();
void SetSearchInfo(std::shared_ptr<SearchInfo> si);
private slots:
void on_add_friend_btn_clicked();
private:
Ui::FindSuccessDlg *ui;
QWidget * _parent;
std::shared_ptr<SearchInfo> _si;
};
FindSuccessDlg实现如下
cpp展开代码FindSuccessDlg::FindSuccessDlg(QWidget *parent) :
QDialog(parent),
ui(new Ui::FindSuccessDlg)
{
ui->setupUi(this);
// 设置对话框标题
setWindowTitle("添加");
// 隐藏对话框标题栏
setWindowFlags(windowFlags() | Qt::FramelessWindowHint);
// 获取当前应用程序的路径
QString app_path = QCoreApplication::applicationDirPath();
QString pix_path = QDir::toNativeSeparators(app_path +
QDir::separator() + "static"+QDir::separator()+"head_1.jpg");
QPixmap head_pix(pix_path);
head_pix = head_pix.scaled(ui->head_lb->size(),
Qt::KeepAspectRatio, Qt::SmoothTransformation);
ui->head_lb->setPixmap(head_pix);
ui->add_friend_btn->SetState("normal","hover","press");
this->setModal(true);
}
FindSuccessDlg::~FindSuccessDlg()
{
qDebug()<<"FindSuccessDlg destruct";
delete ui;
}
void FindSuccessDlg::SetSearchInfo(std::shared_ptr<SearchInfo> si)
{
ui->name_lb->setText(si->_name);
_si = si;
}
void FindSuccessDlg::on_add_friend_btn_clicked()
{
//todo... 添加好友界面弹出
}
在SearchList 的slot_item_clicked函数中添加点击条目处理逻辑
cpp展开代码void SearchList::slot_item_clicked(QListWidgetItem *item)
{
QWidget *widget = this->itemWidget(item); //获取自定义widget对象
if(!widget){
qDebug()<< "slot item clicked widget is nullptr";
return;
}
// 对自定义widget进行操作, 将item 转化为基类ListItemBase
ListItemBase *customItem = qobject_cast<ListItemBase*>(widget);
if(!customItem){
qDebug()<< "slot item clicked widget is nullptr";
return;
}
auto itemType = customItem->GetItemType();
if(itemType == ListItemType::INVALID_ITEM){
qDebug()<< "slot invalid item clicked ";
return;
}
if(itemType == ListItemType::ADD_USER_TIP_ITEM){
//todo ...
_find_dlg = std::make_shared<FindSuccessDlg>(this);
auto si = std::make_shared<SearchInfo>(0,"llfc","llfc","hello , my friend!",0);
(std::dynamic_pointer_cast<FindSuccessDlg>(_find_dlg))->SetSearchInfo(si);
_find_dlg->show();
return;
}
//清楚弹出框
CloseFindDlg();
}
这样我们在输入框输入文字,点击搜索列表中搜索添加好友的item,就能弹出搜索结果对话框了。这里只做界面演示,之后会改为像服务器发送请求获取搜索结果。
pro的改写
我们对项目的pro做了调整,更新了static文件夹的拷贝以及编码utf-8的设定
bash展开代码QT += core gui network
greaterThan(QT_MAJOR_VERSION, 4): QT += widgets
TARGET = llfcchat
TEMPLATE = app
RC_ICONS = icon.ico
DESTDIR = ./bin
DEFINES += QT_DEPRECATED_WARNINGS
CONFIG += c++11
SOURCES += \
adduseritem.cpp \
bubbleframe.cpp \
chatdialog.cpp \
chatitembase.cpp \
chatpage.cpp \
chatuserlist.cpp \
chatuserwid.cpp \
chatview.cpp \
clickedbtn.cpp \
clickedlabel.cpp \
customizeedit.cpp \
findsuccessdlg.cpp \
global.cpp \
httpmgr.cpp \
listitembase.cpp \
loadingdlg.cpp \
logindialog.cpp \
main.cpp \
mainwindow.cpp \
messagetextedit.cpp \
picturebubble.cpp \
registerdialog.cpp \
resetdialog.cpp \
searchlist.cpp \
statewidget.cpp \
tcpmgr.cpp \
textbubble.cpp \
timerbtn.cpp \
userdata.cpp \
usermgr.cpp
HEADERS += \
adduseritem.h \
bubbleframe.h \
chatdialog.h \
chatitembase.h \
chatpage.h \
chatuserlist.h \
chatuserwid.h \
chatview.h \
clickedbtn.h \
clickedlabel.h \
customizeedit.h \
findsuccessdlg.h \
global.h \
httpmgr.h \
listitembase.h \
loadingdlg.h \
logindialog.h \
mainwindow.h \
messagetextedit.h \
picturebubble.h \
registerdialog.h \
resetdialog.h \
searchlist.h \
singleton.h \
statewidget.h \
tcpmgr.h \
textbubble.h \
timerbtn.h \
userdata.h \
usermgr.h
FORMS += \
adduseritem.ui \
chatdialog.ui \
chatpage.ui \
chatuserwid.ui \
findsuccessdlg.ui \
loadingdlg.ui \
logindialog.ui \
mainwindow.ui \
registerdialog.ui \
resetdialog.ui
# Default rules for deployment.
qnx: target.path = /tmp/$${TARGET}/bin
else: unix:!android: target.path = /opt/$${TARGET}/bin
!isEmpty(target.path): INSTALLS += target
RESOURCES += \
rc.qrc
DISTFILES += \
config.ini
CONFIG(debug, debug | release) {
#指定要拷贝的文件目录为工程目录下release目录下的所有dll、lib文件,例如工程目录在D:\QT\Test
#PWD就为D:/QT/Test,DllFile = D:/QT/Test/release/*.dll
TargetConfig = $${PWD}/config.ini
#将输入目录中的"/"替换为"\"
TargetConfig = $$replace(TargetConfig, /, \\)
#将输出目录中的"/"替换为"\"
OutputDir = $${OUT_PWD}/$${DESTDIR}
OutputDir = $$replace(OutputDir, /, \\)
//执行copy命令
QMAKE_POST_LINK += copy /Y \"$$TargetConfig\" \"$$OutputDir\" &
# 首先,定义static文件夹的路径
StaticDir = $${PWD}/static
# 将路径中的"/"替换为"\"
StaticDir = $$replace(StaticDir, /, \\)
#message($${StaticDir})
# 使用xcopy命令拷贝文件夹,/E表示拷贝子目录及其内容,包括空目录。/I表示如果目标不存在则创建目录。/Y表示覆盖现有文件而不提示。
QMAKE_POST_LINK += xcopy /Y /E /I \"$$StaticDir\" \"$$OutputDir\\static\\\"
}else{
#release
message("release mode")
#指定要拷贝的文件目录为工程目录下release目录下的所有dll、lib文件,例如工程目录在D:\QT\Test
#PWD就为D:/QT/Test,DllFile = D:/QT/Test/release/*.dll
TargetConfig = $${PWD}/config.ini
#将输入目录中的"/"替换为"\"
TargetConfig = $$replace(TargetConfig, /, \\)
#将输出目录中的"/"替换为"\"
OutputDir = $${OUT_PWD}/$${DESTDIR}
OutputDir = $$replace(OutputDir, /, \\)
//执行copy命令
QMAKE_POST_LINK += copy /Y \"$$TargetConfig\" \"$$OutputDir\"
# 首先,定义static文件夹的路径
StaticDir = $${PWD}/static
# 将路径中的"/"替换为"\"
StaticDir = $$replace(StaticDir, /, \\)
#message($${StaticDir})
# 使用xcopy命令拷贝文件夹,/E表示拷贝子目录及其内容,包括空目录。/I表示如果目标不存在则创建目录。/Y表示覆盖现有文件而不提示。
QMAKE_POST_LINK += xcopy /Y /E /I \"$$StaticDir\" \"$$OutputDir\\static\\\"
}
win32-msvc*:QMAKE_CXXFLAGS += /wd"4819" /utf-8
视频
https://www.bilibili.com/video/BV1ww4m1e72G/
源码链接
https://gitee.com/secondtonone1/llfcchat
day25-实现好友申请界面
简介
本文介绍如何实现好友申请界面, 其效果如下图所示
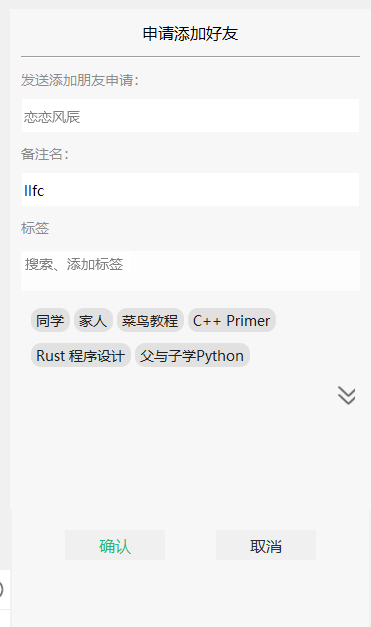
在此之前我们需要先定义一个ClickedOnceLabel类,支持点击一次的label功能。
接着新增一个ClickedOnceLabel类
cpp展开代码class ClickedOnceLabel : public QLabel
{
Q_OBJECT
public:
ClickedOnceLabel(QWidget *parent=nullptr);
virtual void mouseReleaseEvent(QMouseEvent *ev) override;
signals:
void clicked(QString);
};
实现
cpp展开代码ClickedOnceLabel::ClickedOnceLabel(QWidget *parent):QLabel(parent)
{
setCursor(Qt::PointingHandCursor);
}
void ClickedOnceLabel::mouseReleaseEvent(QMouseEvent *event)
{
if (event->button() == Qt::LeftButton) {
emit clicked(this->text());
return;
}
// 调用基类的mousePressEvent以保证正常的事件处理
QLabel::mousePressEvent(event);
}
完善ClickedLabel
我们之前实现了ClickedLabel类,接下来修改下clicked信号,使其携带参数
cpp展开代码 void clicked(QString, ClickLbState);
然后在其实现的鼠标释放事件的逻辑中添加
cpp展开代码void ClickedLabel::mouseReleaseEvent(QMouseEvent *event)
{
if (event->button() == Qt::LeftButton) {
if(_curstate == ClickLbState::Normal){
// qDebug()<<"ReleaseEvent , change to normal hover: "<< _normal_hover;
setProperty("state",_normal_hover);
repolish(this);
update();
}else{
// qDebug()<<"ReleaseEvent , change to select hover: "<< _selected_hover;
setProperty("state",_selected_hover);
repolish(this);
update();
}
emit clicked(this->text(), _curstate);
return;
}
// 调用基类的mousePressEvent以保证正常的事件处理
QLabel::mousePressEvent(event);
}
好友申请
好友申请界面和逻辑,我们可以创建一个设计师界面类叫做ApplyFriend类,我们在类的声明中添加如下成员。
cpp展开代码class ApplyFriend : public QDialog
{
Q_OBJECT
public:
explicit ApplyFriend(QWidget *parent = nullptr);
~ApplyFriend();
void InitTipLbs();
void AddTipLbs(ClickedLabel*, QPoint cur_point, QPoint &next_point, int text_width, int text_height);
bool eventFilter(QObject *obj, QEvent *event);
void SetSearchInfo(std::shared_ptr<SearchInfo> si);
private:
Ui::ApplyFriend *ui;
void resetLabels();
//已经创建好的标签
QMap<QString, ClickedLabel*> _add_labels;
std::vector<QString> _add_label_keys;
QPoint _label_point;
//用来在输入框显示添加新好友的标签
QMap<QString, FriendLabel*> _friend_labels;
std::vector<QString> _friend_label_keys;
void addLabel(QString name);
std::vector<QString> _tip_data;
QPoint _tip_cur_point;
std::shared_ptr<SearchInfo> _si;
public slots:
//显示更多label标签
void ShowMoreLabel();
//输入label按下回车触发将标签加入展示栏
void SlotLabelEnter();
//点击关闭,移除展示栏好友便签
void SlotRemoveFriendLabel(QString);
//通过点击tip实现增加和减少好友便签
void SlotChangeFriendLabelByTip(QString, ClickLbState);
//输入框文本变化显示不同提示
void SlotLabelTextChange(const QString& text);
//输入框输入完成
void SlotLabelEditFinished();
//输入标签显示提示框,点击提示框内容后添加好友便签
void SlotAddFirendLabelByClickTip(QString text);
//处理确认回调
void SlotApplySure();
//处理取消回调
void SlotApplyCancel();
};
接下来我们修改ui使其变成如下布局
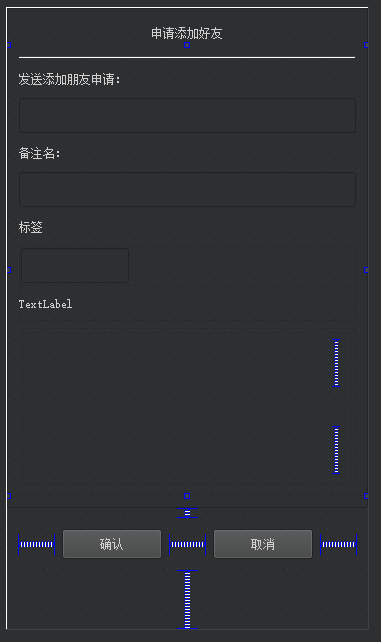
然后我们逐个实现功能,构造函数分别实现信号的链接和成员初始化,析构函数回收必要的资源。
cpp展开代码ApplyFriend::ApplyFriend(QWidget *parent) :
QDialog(parent),
ui(new Ui::ApplyFriend),_label_point(2,6)
{
ui->setupUi(this);
// 隐藏对话框标题栏
setWindowFlags(windowFlags() | Qt::FramelessWindowHint);
this->setObjectName("ApplyFriend");
this->setModal(true);
ui->name_ed->setPlaceholderText(tr("恋恋风辰"));
ui->lb_ed->setPlaceholderText("搜索、添加标签");
ui->back_ed->setPlaceholderText("燃烧的胸毛");
ui->lb_ed->SetMaxLength(21);
ui->lb_ed->move(2, 2);
ui->lb_ed->setFixedHeight(20);
ui->lb_ed->setMaxLength(10);
ui->input_tip_wid->hide();
_tip_cur_point = QPoint(5, 5);
_tip_data = { "同学","家人","菜鸟教程","C++ Primer","Rust 程序设计",
"父与子学Python","nodejs开发指南","go 语言开发指南",
"游戏伙伴","金融投资","微信读书","拼多多拼友" };
connect(ui->more_lb, &ClickedOnceLabel::clicked, this, &ApplyFriend::ShowMoreLabel);
InitTipLbs();
//链接输入标签回车事件
connect(ui->lb_ed, &CustomizeEdit::returnPressed, this, &ApplyFriend::SlotLabelEnter);
connect(ui->lb_ed, &CustomizeEdit::textChanged, this, &ApplyFriend::SlotLabelTextChange);
connect(ui->lb_ed, &CustomizeEdit::editingFinished, this, &ApplyFriend::SlotLabelEditFinished);
connect(ui->tip_lb, &ClickedOnceLabel::clicked, this, &ApplyFriend::SlotAddFirendLabelByClickTip);
ui->scrollArea->horizontalScrollBar()->setHidden(true);
ui->scrollArea->verticalScrollBar()->setHidden(true);
ui->scrollArea->installEventFilter(this);
ui->sure_btn->SetState("normal","hover","press");
ui->cancel_btn->SetState("normal","hover","press");
//连接确认和取消按钮的槽函数
connect(ui->cancel_btn, &QPushButton::clicked, this, &ApplyFriend::SlotApplyCancel);
connect(ui->sure_btn, &QPushButton::clicked, this, &ApplyFriend::SlotApplySure);
}
ApplyFriend::~ApplyFriend()
{
qDebug()<< "ApplyFriend destruct";
delete ui;
}
因为此时还未与服务器联调数据,此时我们写一个InitLabel的函数模拟创建多个标签展示
cpp展开代码void ApplyFriend::InitTipLbs()
{
int lines = 1;
for(int i = 0; i < _tip_data.size(); i++){
auto* lb = new ClickedLabel(ui->lb_list);
lb->SetState("normal", "hover", "pressed", "selected_normal",
"selected_hover", "selected_pressed");
lb->setObjectName("tipslb");
lb->setText(_tip_data[i]);
connect(lb, &ClickedLabel::clicked, this, &ApplyFriend::SlotChangeFriendLabelByTip);
QFontMetrics fontMetrics(lb->font()); // 获取QLabel控件的字体信息
int textWidth = fontMetrics.width(lb->text()); // 获取文本的宽度
int textHeight = fontMetrics.height(); // 获取文本的高度
if (_tip_cur_point.x() + textWidth + tip_offset > ui->lb_list->width()) {
lines++;
if (lines > 2) {
delete lb;
return;
}
_tip_cur_point.setX(tip_offset);
_tip_cur_point.setY(_tip_cur_point.y() + textHeight + 15);
}
auto next_point = _tip_cur_point;
AddTipLbs(lb, _tip_cur_point,next_point, textWidth, textHeight);
_tip_cur_point = next_point;
}
}
下面这个函数是将标签添加到展示区
cpp展开代码void ApplyFriend::AddTipLbs(ClickedLabel* lb, QPoint cur_point, QPoint& next_point, int text_width, int text_height)
{
lb->move(cur_point);
lb->show();
_add_labels.insert(lb->text(), lb);
_add_label_keys.push_back(lb->text());
next_point.setX(lb->pos().x() + text_width + 15);
next_point.setY(lb->pos().y());
}
重写事件过滤器展示滑动条
cpp展开代码bool ApplyFriend::eventFilter(QObject *obj, QEvent *event)
{
if (obj == ui->scrollArea && event->type() == QEvent::Enter)
{
ui->scrollArea->verticalScrollBar()->setHidden(false);
}
else if (obj == ui->scrollArea && event->type() == QEvent::Leave)
{
ui->scrollArea->verticalScrollBar()->setHidden(true);
}
return QObject::eventFilter(obj, event);
}
后期搜索用户功能用户数据会从服务器传回来,所以写了下面的接口
cpp展开代码void ApplyFriend::SetSearchInfo(std::shared_ptr<SearchInfo> si)
{
_si = si;
auto applyname = UserMgr::GetInstance()->GetName();
auto bakname = si->_name;
ui->name_ed->setText(applyname);
ui->back_ed->setText(bakname);
}
当点击按钮,可展示更多标签的功能。
cpp展开代码void ApplyFriend::ShowMoreLabel()
{
qDebug()<< "receive more label clicked";
ui->more_lb_wid->hide();
ui->lb_list->setFixedWidth(325);
_tip_cur_point = QPoint(5, 5);
auto next_point = _tip_cur_point;
int textWidth;
int textHeight;
//重拍现有的label
for(auto & added_key : _add_label_keys){
auto added_lb = _add_labels[added_key];
QFontMetrics fontMetrics(added_lb->font()); // 获取QLabel控件的字体信息
textWidth = fontMetrics.width(added_lb->text()); // 获取文本的宽度
textHeight = fontMetrics.height(); // 获取文本的高度
if(_tip_cur_point.x() +textWidth + tip_offset > ui->lb_list->width()){
_tip_cur_point.setX(tip_offset);
_tip_cur_point.setY(_tip_cur_point.y()+textHeight+15);
}
added_lb->move(_tip_cur_point);
next_point.setX(added_lb->pos().x() + textWidth + 15);
next_point.setY(_tip_cur_point.y());
_tip_cur_point = next_point;
}
//添加未添加的
for(int i = 0; i < _tip_data.size(); i++){
auto iter = _add_labels.find(_tip_data[i]);
if(iter != _add_labels.end()){
continue;
}
auto* lb = new ClickedLabel(ui->lb_list);
lb->SetState("normal", "hover", "pressed", "selected_normal",
"selected_hover", "selected_pressed");
lb->setObjectName("tipslb");
lb->setText(_tip_data[i]);
connect(lb, &ClickedLabel::clicked, this, &ApplyFriend::SlotChangeFriendLabelByTip);
QFontMetrics fontMetrics(lb->font()); // 获取QLabel控件的字体信息
int textWidth = fontMetrics.width(lb->text()); // 获取文本的宽度
int textHeight = fontMetrics.height(); // 获取文本的高度
if (_tip_cur_point.x() + textWidth + tip_offset > ui->lb_list->width()) {
_tip_cur_point.setX(tip_offset);
_tip_cur_point.setY(_tip_cur_point.y() + textHeight + 15);
}
next_point = _tip_cur_point;
AddTipLbs(lb, _tip_cur_point, next_point, textWidth, textHeight);
_tip_cur_point = next_point;
}
int diff_height = next_point.y() + textHeight + tip_offset - ui->lb_list->height();
ui->lb_list->setFixedHeight(next_point.y() + textHeight + tip_offset);
//qDebug()<<"after resize ui->lb_list size is " << ui->lb_list->size();
ui->scrollcontent->setFixedHeight(ui->scrollcontent->height()+diff_height);
}
重排好友标签编辑栏的标签
cpp展开代码void ApplyFriend::resetLabels()
{
auto max_width = ui->gridWidget->width();
auto label_height = 0;
for(auto iter = _friend_labels.begin(); iter != _friend_labels.end(); iter++){
//todo... 添加宽度统计
if( _label_point.x() + iter.value()->width() > max_width) {
_label_point.setY(_label_point.y()+iter.value()->height()+6);
_label_point.setX(2);
}
iter.value()->move(_label_point);
iter.value()->show();
_label_point.setX(_label_point.x()+iter.value()->width()+2);
_label_point.setY(_label_point.y());
label_height = iter.value()->height();
}
if(_friend_labels.isEmpty()){
ui->lb_ed->move(_label_point);
return;
}
if(_label_point.x() + MIN_APPLY_LABEL_ED_LEN > ui->gridWidget->width()){
ui->lb_ed->move(2,_label_point.y()+label_height+6);
}else{
ui->lb_ed->move(_label_point);
}
}
添加好友标签编辑栏的标签
cpp展开代码void ApplyFriend::addLabel(QString name)
{
if (_friend_labels.find(name) != _friend_labels.end()) {
return;
}
auto tmplabel = new FriendLabel(ui->gridWidget);
tmplabel->SetText(name);
tmplabel->setObjectName("FriendLabel");
auto max_width = ui->gridWidget->width();
//todo... 添加宽度统计
if (_label_point.x() + tmplabel->width() > max_width) {
_label_point.setY(_label_point.y() + tmplabel->height() + 6);
_label_point.setX(2);
}
else {
}
tmplabel->move(_label_point);
tmplabel->show();
_friend_labels[tmplabel->Text()] = tmplabel;
_friend_label_keys.push_back(tmplabel->Text());
connect(tmplabel, &FriendLabel::sig_close, this, &ApplyFriend::SlotRemoveFriendLabel);
_label_point.setX(_label_point.x() + tmplabel->width() + 2);
if (_label_point.x() + MIN_APPLY_LABEL_ED_LEN > ui->gridWidget->width()) {
ui->lb_ed->move(2, _label_point.y() + tmplabel->height() + 2);
}
else {
ui->lb_ed->move(_label_point);
}
ui->lb_ed->clear();
if (ui->gridWidget->height() < _label_point.y() + tmplabel->height() + 2) {
ui->gridWidget->setFixedHeight(_label_point.y() + tmplabel->height() * 2 + 2);
}
}
点击回车后,在好友标签编辑栏添加标签,在标签展示栏添加标签
cpp展开代码void ApplyFriend::SlotLabelEnter()
{
if(ui->lb_ed->text().isEmpty()){
return;
}
auto text = ui->lb_ed->text();
addLabel(ui->lb_ed->text());
ui->input_tip_wid->hide();
auto find_it = std::find(_tip_data.begin(), _tip_data.end(), text);
//找到了就只需设置状态为选中即可
if (find_it == _tip_data.end()) {
_tip_data.push_back(text);
}
//判断标签展示栏是否有该标签
auto find_add = _add_labels.find(text);
if (find_add != _add_labels.end()) {
find_add.value()->SetCurState(ClickLbState::Selected);
return;
}
//标签展示栏也增加一个标签, 并设置绿色选中
auto* lb = new ClickedLabel(ui->lb_list);
lb->SetState("normal", "hover", "pressed", "selected_normal",
"selected_hover", "selected_pressed");
lb->setObjectName("tipslb");
lb->setText(text);
connect(lb, &ClickedLabel::clicked, this, &ApplyFriend::SlotChangeFriendLabelByTip);
qDebug() << "ui->lb_list->width() is " << ui->lb_list->width();
qDebug() << "_tip_cur_point.x() is " << _tip_cur_point.x();
QFontMetrics fontMetrics(lb->font()); // 获取QLabel控件的字体信息
int textWidth = fontMetrics.width(lb->text()); // 获取文本的宽度
int textHeight = fontMetrics.height(); // 获取文本的高度
qDebug() << "textWidth is " << textWidth;
if (_tip_cur_point.x() + textWidth + tip_offset + 3 > ui->lb_list->width()) {
_tip_cur_point.setX(5);
_tip_cur_point.setY(_tip_cur_point.y() + textHeight + 15);
}
auto next_point = _tip_cur_point;
AddTipLbs(lb, _tip_cur_point, next_point, textWidth, textHeight);
_tip_cur_point = next_point;
int diff_height = next_point.y() + textHeight + tip_offset - ui->lb_list->height();
ui->lb_list->setFixedHeight(next_point.y() + textHeight + tip_offset);
lb->SetCurState(ClickLbState::Selected);
ui->scrollcontent->setFixedHeight(ui->scrollcontent->height() + diff_height);
}
当我们点击好友标签编辑栏的标签的关闭按钮时会调用下面的槽函数
cpp展开代码void ApplyFriend::SlotRemoveFriendLabel(QString name)
{
qDebug() << "receive close signal";
_label_point.setX(2);
_label_point.setY(6);
auto find_iter = _friend_labels.find(name);
if(find_iter == _friend_labels.end()){
return;
}
auto find_key = _friend_label_keys.end();
for(auto iter = _friend_label_keys.begin(); iter != _friend_label_keys.end();
iter++){
if(*iter == name){
find_key = iter;
break;
}
}
if(find_key != _friend_label_keys.end()){
_friend_label_keys.erase(find_key);
}
delete find_iter.value();
_friend_labels.erase(find_iter);
resetLabels();
auto find_add = _add_labels.find(name);
if(find_add == _add_labels.end()){
return;
}
find_add.value()->ResetNormalState();
}
当我们点击标签展示栏的标签,可以实现标签添加和删除
cpp展开代码//点击标已有签添加或删除新联系人的标签
void ApplyFriend::SlotChangeFriendLabelByTip(QString lbtext, ClickLbState state)
{
auto find_iter = _add_labels.find(lbtext);
if(find_iter == _add_labels.end()){
return;
}
if(state == ClickLbState::Selected){
//编写添加逻辑
addLabel(lbtext);
return;
}
if(state == ClickLbState::Normal){
//编写删除逻辑
SlotRemoveFriendLabel(lbtext);
return;
}
}
当标签文本变化时,下面提示框的文本跟随变化
cpp展开代码void ApplyFriend::SlotLabelTextChange(const QString& text)
{
if (text.isEmpty()) {
ui->tip_lb->setText("");
ui->input_tip_wid->hide();
return;
}
auto iter = std::find(_tip_data.begin(), _tip_data.end(), text);
if (iter == _tip_data.end()) {
auto new_text = add_prefix + text;
ui->tip_lb->setText(new_text);
ui->input_tip_wid->show();
return;
}
ui->tip_lb->setText(text);
ui->input_tip_wid->show();
}
如果编辑完成,则隐藏编辑框
cpp展开代码void ApplyFriend::SlotLabelEditFinished()
{
ui->input_tip_wid->hide();
}
点击提示框,也会添加标签,功能如下
cpp展开代码void ApplyFriend::SlotAddFirendLabelByClickTip(QString text)
{
int index = text.indexOf(add_prefix);
if (index != -1) {
text = text.mid(index + add_prefix.length());
}
addLabel(text);
auto find_it = std::find(_tip_data.begin(), _tip_data.end(), text);
//找到了就只需设置状态为选中即可
if (find_it == _tip_data.end()) {
_tip_data.push_back(text);
}
//判断标签展示栏是否有该标签
auto find_add = _add_labels.find(text);
if (find_add != _add_labels.end()) {
find_add.value()->SetCurState(ClickLbState::Selected);
return;
}
//标签展示栏也增加一个标签, 并设置绿色选中
auto* lb = new ClickedLabel(ui->lb_list);
lb->SetState("normal", "hover", "pressed", "selected_normal",
"selected_hover", "selected_pressed");
lb->setObjectName("tipslb");
lb->setText(text);
connect(lb, &ClickedLabel::clicked, this, &ApplyFriend::SlotChangeFriendLabelByTip);
qDebug() << "ui->lb_list->width() is " << ui->lb_list->width();
qDebug() << "_tip_cur_point.x() is " << _tip_cur_point.x();
QFontMetrics fontMetrics(lb->font()); // 获取QLabel控件的字体信息
int textWidth = fontMetrics.width(lb->text()); // 获取文本的宽度
int textHeight = fontMetrics.height(); // 获取文本的高度
qDebug() << "textWidth is " << textWidth;
if (_tip_cur_point.x() + textWidth+ tip_offset+3 > ui->lb_list->width()) {
_tip_cur_point.setX(5);
_tip_cur_point.setY(_tip_cur_point.y() + textHeight + 15);
}
auto next_point = _tip_cur_point;
AddTipLbs(lb, _tip_cur_point, next_point, textWidth,textHeight);
_tip_cur_point = next_point;
int diff_height = next_point.y() + textHeight + tip_offset - ui->lb_list->height();
ui->lb_list->setFixedHeight(next_point.y() + textHeight + tip_offset);
lb->SetCurState(ClickLbState::Selected);
ui->scrollcontent->setFixedHeight(ui->scrollcontent->height()+ diff_height );
}
确认申请和取消申请只是打印了对应信息,并且回收界面
cpp展开代码void ApplyFriend::SlotApplyCancel()
{
qDebug() << "Slot Apply Cancel";
this->hide();
deleteLater();
}
void ApplyFriend::SlotApplySure()
{
qDebug()<<"Slot Apply Sure called" ;
this->hide();
deleteLater();
}
美化界面
添加如下qss文件美化界面
qss展开代码#ApplyFriend{ border: 2px solid #f1f1f1; font-size: 14px; background: #f7f7f8; } #scrollArea{ background: #f7f7f8; border: none; } #scrollcontent{ background: #f7f7f8; } #scrollcontent #apply_lb{ font-family: "Microsoft YaHei"; font-size: 16px; font-weight: normal; } #apply_wid QLabel{ color:rgb(140,140,140); font-size: 14px; font-family: "Microsoft YaHei"; height: 25px; } #apply_wid #name_ed, #apply_wid #back_ed{ border: 1px solid #f7f7f8; font-size: 14px; font-family: "Microsoft YaHei"; } #apply_wid #lb_ed { border: none; font-size: 14px; font-family: "Microsoft YaHei"; } #apply_wid #more_lb{ border-image: url(:/res/arowdown.png); } #apply_wid #tipslb[state='normal'] { padding: 2px; background: #e1e1e1; color: #1e1e1e; border-radius: 10px; } #apply_wid #tipslb[state='hover'] { padding: 2px; background: #e1e1e1; color: #1e1e1e; border-radius: 10px; } #apply_wid #tipslb[state='pressed'] { padding: 2px; background: #e1e1e1; color: #48bf56; border-radius: 10px; } #apply_wid #tipslb[state='selected_normal'] { padding: 2px; background: #e1e1e1; color: #48bf56; border-radius: 10px; } #apply_wid #tipslb[state='selected_hover'] { padding: 2px; background: #e1e1e1; color: #48bf56; border-radius: 10px; } #apply_wid #tipslb[state='selected_pressed'] { padding: 2px; background: #e1e1e1; color: #1e1e1e; border-radius: 10px; } #input_tip_wid { background: #d3eaf8; } #apply_wid #FriendLabel { background: #daf6e7; color: #48bf56; border-radius: 10px; } #apply_wid #tip_lb { padding-left: 2px; color:rgb(153,153,153); font-size: 14px; font-family: "Microsoft YaHei"; } #gridWidget { background: #fdfdfd; } #close_lb[state='normal'] { border-image: url(:/res/tipclose.png); } #close_lb[state='hover'] { border-image: url(:/res/tipclose.png); } #close_lb[state='pressed'] { border-image: url(:/res/tipclose.png); } #close_lb[state='select_normal'] { border-image: url(:/res/tipclose.png); } #close_lb[state='select_hover'] { border-image: url(:/res/tipclose.png); } #close_lb[state='select_pressed'] { border-image: url(:/res/tipclose.png); } #apply_sure_wid #sure_btn[state='normal'] { background: #f0f0f0; color: #2cb46e; font-size: 16px; /* 设置字体大小 */ font-family: "Microsoft YaHei"; /* 设置字体 */ border-radius: 20px; /* 设置圆角 */ } #apply_sure_wid #sure_btn[state='hover'] { background: #d2d2d2; color: #2cb46e; font-size: 16px; /* 设置字体大小 */ font-family: "Microsoft YaHei"; /* 设置字体 */ border-radius: 20px; /* 设置圆角 */ } #apply_sure_wid #sure_btn[state='press'] { background: #c6c6c6; color: #2cb46e; font-size: 16px; /* 设置字体大小 */ font-family: "Microsoft YaHei"; /* 设置字体 */ border-radius: 20px; /* 设置圆角 */ } #apply_sure_wid #cancel_btn[state='normal'] { background: #f0f0f0; color: #2e2f30; font-size: 16px; /* 设置字体大小 */ font-family: "Microsoft YaHei"; /* 设置字体 */ border-radius: 20px; /* 设置圆角 */ } #apply_sure_wid #cancel_btn[state='hover'] { background: #d2d2d2; color: #2e2f30; font-size: 16px; /* 设置字体大小 */ font-family: "Microsoft YaHei"; /* 设置字体 */ border-radius: 20px; /* 设置圆角 */ } #apply_sure_wid #cancel_btn[state='press'] { background: #c6c6c6; color: #2e2f30; font-size: 16px; /* 设置字体大小 */ font-family: "Microsoft YaHei"; /* 设置字体 */ border-radius: 20px; /* 设置圆角 */ }
视频
https://www.bilibili.com/video/BV1ZM4m127z8/?vd_source=8be9e83424c2ed2c9b2a3ed1d01385e9
源码链接
https://gitee.com/secondtonone1/llfcchat
day26-实现联系人列表和好友申请列表
简介
今日实现界面效果
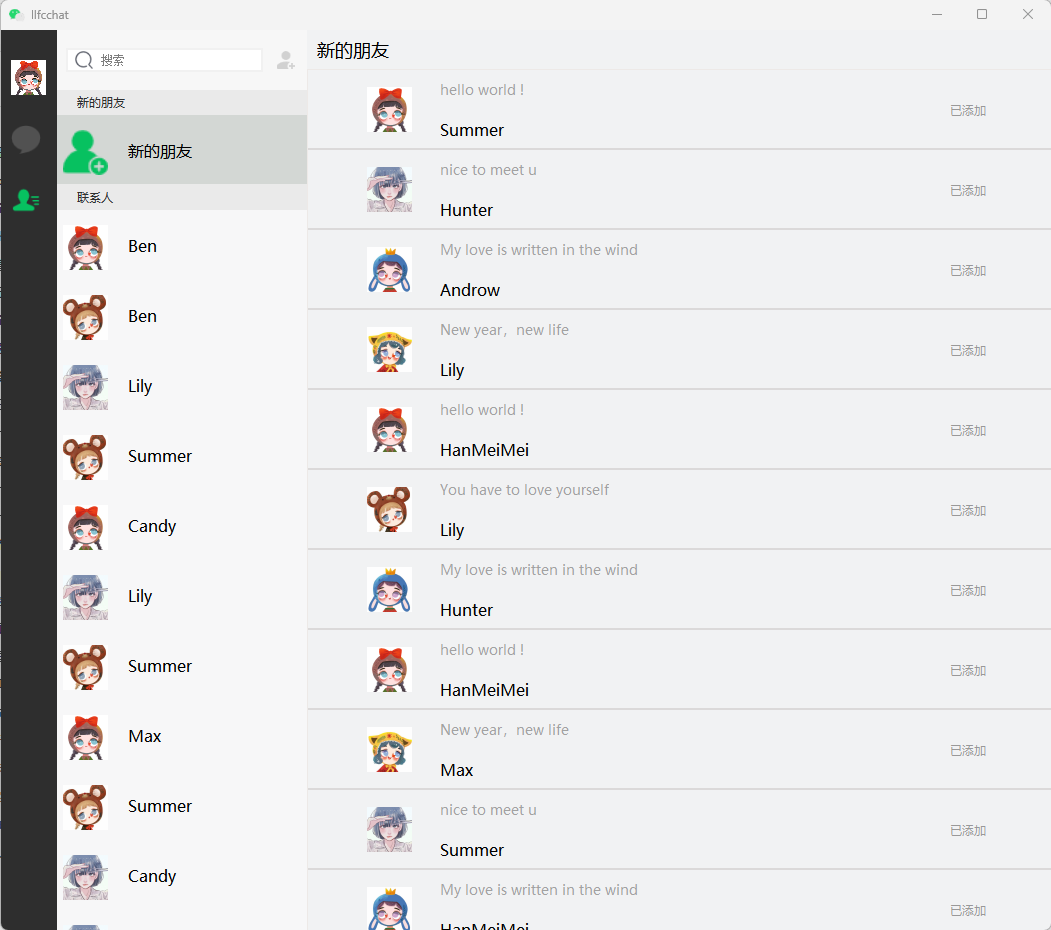
联系人列表
我们自定义一个ChatUserList类,用来管理聊天列表。其声明如下:
cpp展开代码class ContactUserList : public QListWidget
{
Q_OBJECT
public:
ContactUserList(QWidget *parent = nullptr);
void ShowRedPoint(bool bshow = true);
protected:
bool eventFilter(QObject *watched, QEvent *event) override ;
private:
void addContactUserList();
public slots:
void slot_item_clicked(QListWidgetItem *item);
// void slot_add_auth_firend(std::shared_ptr<AuthInfo>);
// void slot_auth_rsp(std::shared_ptr<AuthRsp>);
signals:
void sig_loading_contact_user();
void sig_switch_apply_friend_page();
void sig_switch_friend_info_page();
private:
ConUserItem* _add_friend_item;
QListWidgetItem * _groupitem;
};
具体实现
cpp展开代码ContactUserList::ContactUserList(QWidget *parent)
{
Q_UNUSED(parent);
this->setHorizontalScrollBarPolicy(Qt::ScrollBarAlwaysOff);
this->setVerticalScrollBarPolicy(Qt::ScrollBarAlwaysOff);
// 安装事件过滤器
this->viewport()->installEventFilter(this);
//模拟从数据库或者后端传输过来的数据,进行列表加载
addContactUserList();
//连接点击的信号和槽
connect(this, &QListWidget::itemClicked, this, &ContactUserList::slot_item_clicked);
// //链接对端同意认证后通知的信号
// connect(TcpMgr::GetInstance().get(), &TcpMgr::sig_add_auth_friend,this,
// &ContactUserList::slot_add_auth_firend);
// //链接自己点击同意认证后界面刷新
// connect(TcpMgr::GetInstance().get(), &TcpMgr::sig_auth_rsp,this,
// &ContactUserList::slot_auth_rsp);
}
void ContactUserList::ShowRedPoint(bool bshow /*= true*/)
{
_add_friend_item->ShowRedPoint(bshow);
}
void ContactUserList::addContactUserList()
{
auto * groupTip = new GroupTipItem();
QListWidgetItem *item = new QListWidgetItem;
item->setSizeHint(groupTip->sizeHint());
this->addItem(item);
this->setItemWidget(item, groupTip);
item->setFlags(item->flags() & ~Qt::ItemIsSelectable);
_add_friend_item = new ConUserItem();
_add_friend_item->setObjectName("new_friend_item");
_add_friend_item->SetInfo(0,tr("新的朋友"),":/res/add_friend.png");
_add_friend_item->SetItemType(ListItemType::APPLY_FRIEND_ITEM);
QListWidgetItem *add_item = new QListWidgetItem;
//qDebug()<<"chat_user_wid sizeHint is " << chat_user_wid->sizeHint();
add_item->setSizeHint(_add_friend_item->sizeHint());
this->addItem(add_item);
this->setItemWidget(add_item, _add_friend_item);
//默认设置新的朋友申请条目被选中
this->setCurrentItem(add_item);
auto * groupCon = new GroupTipItem();
groupCon->SetGroupTip(tr("联系人"));
_groupitem = new QListWidgetItem;
_groupitem->setSizeHint(groupCon->sizeHint());
this->addItem(_groupitem);
this->setItemWidget(_groupitem, groupCon);
_groupitem->setFlags(_groupitem->flags() & ~Qt::ItemIsSelectable);
// 创建QListWidgetItem,并设置自定义的widget
for(int i = 0; i < 13; i++){
int randomValue = QRandomGenerator::global()->bounded(100); // 生成0到99之间的随机整数
int str_i = randomValue%strs.size();
int head_i = randomValue%heads.size();
int name_i = randomValue%names.size();
auto *con_user_wid = new ConUserItem();
con_user_wid->SetInfo(0,names[name_i], heads[head_i]);
QListWidgetItem *item = new QListWidgetItem;
//qDebug()<<"chat_user_wid sizeHint is " << chat_user_wid->sizeHint();
item->setSizeHint(con_user_wid->sizeHint());
this->addItem(item);
this->setItemWidget(item, con_user_wid);
}
}
bool ContactUserList::eventFilter(QObject *watched, QEvent *event)
{
// 检查事件是否是鼠标悬浮进入或离开
if (watched == this->viewport()) {
if (event->type() == QEvent::Enter) {
// 鼠标悬浮,显示滚动条
this->setVerticalScrollBarPolicy(Qt::ScrollBarAsNeeded);
} else if (event->type() == QEvent::Leave) {
// 鼠标离开,隐藏滚动条
this->setVerticalScrollBarPolicy(Qt::ScrollBarAlwaysOff);
}
}
// 检查事件是否是鼠标滚轮事件
if (watched == this->viewport() && event->type() == QEvent::Wheel) {
QWheelEvent *wheelEvent = static_cast<QWheelEvent*>(event);
int numDegrees = wheelEvent->angleDelta().y() / 8;
int numSteps = numDegrees / 15; // 计算滚动步数
// 设置滚动幅度
this->verticalScrollBar()->setValue(this->verticalScrollBar()->value() - numSteps);
// 检查是否滚动到底部
QScrollBar *scrollBar = this->verticalScrollBar();
int maxScrollValue = scrollBar->maximum();
int currentValue = scrollBar->value();
//int pageSize = 10; // 每页加载的联系人数量
if (maxScrollValue - currentValue <= 0) {
// 滚动到底部,加载新的联系人
qDebug()<<"load more contact user";
//发送信号通知聊天界面加载更多聊天内容
emit sig_loading_contact_user();
}
return true; // 停止事件传递
}
return QListWidget::eventFilter(watched, event);
}
void ContactUserList::slot_item_clicked(QListWidgetItem *item)
{
QWidget *widget = this->itemWidget(item); // 获取自定义widget对象
if(!widget){
qDebug()<< "slot item clicked widget is nullptr";
return;
}
// 对自定义widget进行操作, 将item 转化为基类ListItemBase
ListItemBase *customItem = qobject_cast<ListItemBase*>(widget);
if(!customItem){
qDebug()<< "slot item clicked widget is nullptr";
return;
}
auto itemType = customItem->GetItemType();
if(itemType == ListItemType::INVALID_ITEM
|| itemType == ListItemType::GROUP_TIP_ITEM){
qDebug()<< "slot invalid item clicked ";
return;
}
if(itemType == ListItemType::APPLY_FRIEND_ITEM){
// 创建对话框,提示用户
qDebug()<< "apply friend item clicked ";
//跳转到好友申请界面
emit sig_switch_apply_friend_page();
return;
}
if(itemType == ListItemType::CONTACT_USER_ITEM){
// 创建对话框,提示用户
qDebug()<< "contact user item clicked ";
//跳转到好友申请界面
emit sig_switch_friend_info_page();
return;
}
}
构造函数中关闭了滚动条的显示,重写了事件过滤器,实现了根据鼠标区域判断是否显示滚动条的功能。
并且实现了点击其中某个item响应对应的功能。并根据不同的item类型跳转不同的页面。
联系人item
因为每一个item都是我们自己定义的,所以我们添加设计师界面类,界面布局如下所示
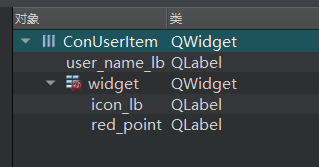
类的声明如下
cpp展开代码class ConUserItem : public ListItemBase
{
Q_OBJECT
public:
explicit ConUserItem(QWidget *parent = nullptr);
~ConUserItem();
QSize sizeHint() const override;
void SetInfo(std::shared_ptr<AuthInfo> auth_info);
void SetInfo(std::shared_ptr<AuthRsp> auth_rsp);
void SetInfo(int uid, QString name, QString icon);
void ShowRedPoint(bool show = false);
private:
Ui::ConUserItem *ui;
std::shared_ptr<UserInfo> _info;
};
具体实现
cpp展开代码ConUserItem::ConUserItem(QWidget *parent) :
ListItemBase(parent),
ui(new Ui::ConUserItem)
{
ui->setupUi(this);
SetItemType(ListItemType::CONTACT_USER_ITEM);
ui->red_point->raise();
ShowRedPoint(true);
}
ConUserItem::~ConUserItem()
{
delete ui;
}
QSize ConUserItem::sizeHint() const
{
return QSize(250, 70); // 返回自定义的尺寸
}
void ConUserItem::SetInfo(std::shared_ptr<AuthInfo> auth_info)
{
_info = std::make_shared<UserInfo>(auth_info);
// 加载图片
QPixmap pixmap(_info->_icon);
// 设置图片自动缩放
ui->icon_lb->setPixmap(pixmap.scaled(ui->icon_lb->size(), Qt::KeepAspectRatio, Qt::SmoothTransformation));
ui->icon_lb->setScaledContents(true);
ui->user_name_lb->setText(_info->_name);
}
void ConUserItem::SetInfo(int uid, QString name, QString icon)
{
_info = std::make_shared<UserInfo>(uid,name, icon);
// 加载图片
QPixmap pixmap(_info->_icon);
// 设置图片自动缩放
ui->icon_lb->setPixmap(pixmap.scaled(ui->icon_lb->size(), Qt::KeepAspectRatio, Qt::SmoothTransformation));
ui->icon_lb->setScaledContents(true);
ui->user_name_lb->setText(_info->_name);
}
void ConUserItem::SetInfo(std::shared_ptr<AuthRsp> auth_rsp){
_info = std::make_shared<UserInfo>(auth_rsp);
// 加载图片
QPixmap pixmap(_info->_icon);
// 设置图片自动缩放
ui->icon_lb->setPixmap(pixmap.scaled(ui->icon_lb->size(), Qt::KeepAspectRatio, Qt::SmoothTransformation));
ui->icon_lb->setScaledContents(true);
ui->user_name_lb->setText(_info->_name);
}
void ConUserItem::ShowRedPoint(bool show)
{
if(show){
ui->red_point->show();
}else{
ui->red_point->hide();
}
}
这样我们启动程序就能看到模拟的联系人列表被加载进来了。
申请列表
申请页面ui布局如下
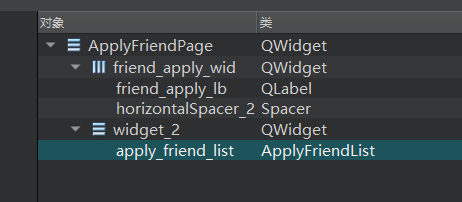
我们新增ApplyFriendPage类,用来显示申请列表
cpp展开代码class ApplyFriendPage : public QWidget
{
Q_OBJECT
public:
explicit ApplyFriendPage(QWidget *parent = nullptr);
~ApplyFriendPage();
void AddNewApply(std::shared_ptr<AddFriendApply> apply);
protected:
void paintEvent(QPaintEvent *event);
private:
void loadApplyList();
Ui::ApplyFriendPage *ui;
std::unordered_map<int, ApplyFriendItem*> _unauth_items;
public slots:
void slot_auth_rsp(std::shared_ptr<AuthRsp> );
signals:
void sig_show_search(bool);
};
具体实现
cpp展开代码ApplyFriendPage::ApplyFriendPage(QWidget *parent) :
QWidget(parent),
ui(new Ui::ApplyFriendPage)
{
ui->setupUi(this);
connect(ui->apply_friend_list, &ApplyFriendList::sig_show_search, this, &ApplyFriendPage::sig_show_search);
loadApplyList();
//接受tcp传递的authrsp信号处理
connect(TcpMgr::GetInstance().get(), &TcpMgr::sig_auth_rsp, this, &ApplyFriendPage::slot_auth_rsp);
}
ApplyFriendPage::~ApplyFriendPage()
{
delete ui;
}
void ApplyFriendPage::AddNewApply(std::shared_ptr<AddFriendApply> apply)
{
//先模拟头像随机,以后头像资源增加资源服务器后再显示
int randomValue = QRandomGenerator::global()->bounded(100); // 生成0到99之间的随机整数
int head_i = randomValue % heads.size();
auto* apply_item = new ApplyFriendItem();
auto apply_info = std::make_shared<ApplyInfo>(apply->_from_uid,
apply->_name, apply->_desc,heads[head_i], apply->_name, 0, 0);
apply_item->SetInfo( apply_info);
QListWidgetItem* item = new QListWidgetItem;
//qDebug()<<"chat_user_wid sizeHint is " << chat_user_wid->sizeHint();
item->setSizeHint(apply_item->sizeHint());
item->setFlags(item->flags() & ~Qt::ItemIsEnabled & ~Qt::ItemIsSelectable);
ui->apply_friend_list->insertItem(0,item);
ui->apply_friend_list->setItemWidget(item, apply_item);
apply_item->ShowAddBtn(true);
//收到审核好友信号
connect(apply_item, &ApplyFriendItem::sig_auth_friend, [this](std::shared_ptr<ApplyInfo> apply_info) {
// auto* authFriend = new AuthenFriend(this);
// authFriend->setModal(true);
// authFriend->SetApplyInfo(apply_info);
// authFriend->show();
});
}
void ApplyFriendPage::paintEvent(QPaintEvent *event)
{
QStyleOption opt;
opt.init(this);
QPainter p(this);
style()->drawPrimitive(QStyle::PE_Widget, &opt, &p, this);
}
void ApplyFriendPage::loadApplyList()
{
//添加好友申请
auto apply_list = UserMgr::GetInstance()->GetApplyList();
for(auto &apply: apply_list){
int randomValue = QRandomGenerator::global()->bounded(100); // 生成0到99之间的随机整数
int head_i = randomValue % heads.size();
auto* apply_item = new ApplyFriendItem();
apply->SetIcon(heads[head_i]);
apply_item->SetInfo(apply);
QListWidgetItem* item = new QListWidgetItem;
//qDebug()<<"chat_user_wid sizeHint is " << chat_user_wid->sizeHint();
item->setSizeHint(apply_item->sizeHint());
item->setFlags(item->flags() & ~Qt::ItemIsEnabled & ~Qt::ItemIsSelectable);
ui->apply_friend_list->insertItem(0,item);
ui->apply_friend_list->setItemWidget(item, apply_item);
if(apply->_status){
apply_item->ShowAddBtn(false);
}else{
apply_item->ShowAddBtn(true);
auto uid = apply_item->GetUid();
_unauth_items[uid] = apply_item;
}
//收到审核好友信号
connect(apply_item, &ApplyFriendItem::sig_auth_friend, [this](std::shared_ptr<ApplyInfo> apply_info) {
// auto* authFriend = new AuthenFriend(this);
// authFriend->setModal(true);
// authFriend->SetApplyInfo(apply_info);
// authFriend->show();
});
}
// 模拟假数据,创建QListWidgetItem,并设置自定义的widget
for(int i = 0; i < 13; i++){
int randomValue = QRandomGenerator::global()->bounded(100); // 生成0到99之间的随机整数
int str_i = randomValue%strs.size();
int head_i = randomValue%heads.size();
int name_i = randomValue%names.size();
auto *apply_item = new ApplyFriendItem();
auto apply = std::make_shared<ApplyInfo>(0, names[name_i], strs[str_i],
heads[head_i], names[name_i], 0, 1);
apply_item->SetInfo(apply);
QListWidgetItem *item = new QListWidgetItem;
//qDebug()<<"chat_user_wid sizeHint is " << chat_user_wid->sizeHint();
item->setSizeHint(apply_item->sizeHint());
item->setFlags(item->flags() & ~Qt::ItemIsEnabled & ~Qt::ItemIsSelectable);
ui->apply_friend_list->addItem(item);
ui->apply_friend_list->setItemWidget(item, apply_item);
//收到审核好友信号
connect(apply_item, &ApplyFriendItem::sig_auth_friend, [this](std::shared_ptr<ApplyInfo> apply_info){
// auto *authFriend = new AuthenFriend(this);
// authFriend->setModal(true);
// authFriend->SetApplyInfo(apply_info);
// authFriend->show();
});
}
}
void ApplyFriendPage::slot_auth_rsp(std::shared_ptr<AuthRsp> auth_rsp)
{
auto uid = auth_rsp->_uid;
auto find_iter = _unauth_items.find(uid);
if (find_iter == _unauth_items.end()) {
return;
}
find_iter->second->ShowAddBtn(false);
}
因为每个item自定义,所以我们新增设计师界面类ApplyFriendItem
界面布局
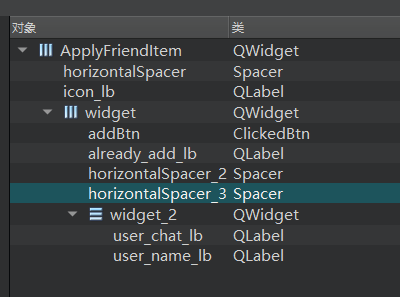
类的声明如下:
cpp展开代码class ApplyFriendItem : public ListItemBase
{
Q_OBJECT
public:
explicit ApplyFriendItem(QWidget *parent = nullptr);
~ApplyFriendItem();
void SetInfo(std::shared_ptr<ApplyInfo> apply_info);
void ShowAddBtn(bool bshow);
QSize sizeHint() const override {
return QSize(250, 80); // 返回自定义的尺寸
}
int GetUid();
private:
Ui::ApplyFriendItem *ui;
std::shared_ptr<ApplyInfo> _apply_info;
bool _added;
signals:
void sig_auth_friend(std::shared_ptr<ApplyInfo> apply_info);
};
以下为具体实现
cpp展开代码ApplyFriendItem::ApplyFriendItem(QWidget *parent) :
ListItemBase(parent), _added(false),
ui(new Ui::ApplyFriendItem)
{
ui->setupUi(this);
SetItemType(ListItemType::APPLY_FRIEND_ITEM);
ui->addBtn->SetState("normal","hover", "press");
ui->addBtn->hide();
connect(ui->addBtn, &ClickedBtn::clicked, [this](){
emit this->sig_auth_friend(_apply_info);
});
}
ApplyFriendItem::~ApplyFriendItem()
{
delete ui;
}
void ApplyFriendItem::SetInfo(std::shared_ptr<ApplyInfo> apply_info)
{
_apply_info = apply_info;
// 加载图片
QPixmap pixmap(_apply_info->_icon);
// 设置图片自动缩放
ui->icon_lb->setPixmap(pixmap.scaled(ui->icon_lb->size(), Qt::KeepAspectRatio, Qt::SmoothTransformation));
ui->icon_lb->setScaledContents(true);
ui->user_name_lb->setText(_apply_info->_name);
ui->user_chat_lb->setText(_apply_info->_desc);
}
void ApplyFriendItem::ShowAddBtn(bool bshow)
{
if (bshow) {
ui->addBtn->show();
ui->already_add_lb->hide();
_added = false;
}
else {
ui->addBtn->hide();
ui->already_add_lb->show();
_added = true;
}
}
int ApplyFriendItem::GetUid() {
return _apply_info->_uid;
}
申请列表类ApplyFriendList的声明如下
cpp展开代码class ApplyFriendList: public QListWidget
{
Q_OBJECT
public:
ApplyFriendList(QWidget *parent = nullptr);
protected:
bool eventFilter(QObject *watched, QEvent *event) override;
private slots:
signals:
void sig_show_search(bool);
};
具体实现
cpp展开代码ApplyFriendList::ApplyFriendList(QWidget *parent)
{
Q_UNUSED(parent);
this->setHorizontalScrollBarPolicy(Qt::ScrollBarAlwaysOff);
this->setVerticalScrollBarPolicy(Qt::ScrollBarAlwaysOff);
// 安装事件过滤器
this->viewport()->installEventFilter(this);
}
bool ApplyFriendList::eventFilter(QObject *watched, QEvent *event)
{
// 检查事件是否是鼠标悬浮进入或离开
if (watched == this->viewport()) {
if (event->type() == QEvent::Enter) {
// 鼠标悬浮,显示滚动条
this->setVerticalScrollBarPolicy(Qt::ScrollBarAsNeeded);
} else if (event->type() == QEvent::Leave) {
// 鼠标离开,隐藏滚动条
this->setVerticalScrollBarPolicy(Qt::ScrollBarAlwaysOff);
}
}
if (watched == this->viewport()) {
if (event->type() == QEvent::MouseButtonPress) {
emit sig_show_search(false);
}
}
// 检查事件是否是鼠标滚轮事件
if (watched == this->viewport() && event->type() == QEvent::Wheel) {
QWheelEvent *wheelEvent = static_cast<QWheelEvent*>(event);
int numDegrees = wheelEvent->angleDelta().y() / 8;
int numSteps = numDegrees / 15; // 计算滚动步数
// 设置滚动幅度
this->verticalScrollBar()->setValue(this->verticalScrollBar()->value() - numSteps);
return true; // 停止事件传递
}
return QListWidget::eventFilter(watched, event);
}
然后在ChatDialog的stackedWidget中将friend_apply_page升级为ApplyFriendPage.
这样我们启动程序就能看到联系人列表和申请列表了。
下一步还需要写QSS美化以下
css展开代码#con_user_list {
background-color: rgb(247,247,248);
border: none;
}
#con_user_list::item:selected {
background-color: #d3d7d4;
border: none;
outline: none;
}
#con_user_list::item:hover {
background-color: rgb(206,207,208);
border: none;
outline: none;
}
#con_user_list::focus {
border: none;
outline: none;
}
#GroupTipItem {
background-color: #eaeaea;
border: none;
}
#GroupTipItem QLabel{
color: #2e2f30;
font-size: 12px; /* 设置字体大小 */
font-family: "Microsoft YaHei"; /* 设置字体 */
border: none;
}
#new_friend_item {
border-bottom: 1px solid #eaeaea;
}
#LineItem {
background-color:rgb(247,247,247);
border: none;
}
#friend_apply_lb {
font-family: "Microsoft YaHei";
font-size: 18px;
font-weight: normal;
}
#friend_apply_wid {
background-color: #f1f2f3;
border-bottom: 1px solid #ede9e7;
}
#apply_friend_list {
background-color: #f1f2f3;
border-left: 1px solid #ede9e7;
border-top: none;
border-right: none;
border-bottom: none;
}
ApplyFriendItem {
background-color: #f1f2f3;
border-bottom: 2px solid #dbd9d9;
}
ApplyFriendItem #user_chat_lb{
color: #a2a2a2;
font-size: 14px; /* 设置字体大小 */
font-family: "Microsoft YaHei"; /* 设置字体 */
}
ApplyFriendItem #addBtn[state='normal'] {
background-color: #d3d7d4;
color: #2cb46e;
font-size: 16px; /* 设置字体大小 */
font-family: "Microsoft YaHei"; /* 设置字体 */
border-radius: 20px; /* 设置圆角 */
}
ApplyFriendItem #addBtn[state='hover'] {
background-color: #D3D3D3;
color: #2cb46e;
font-size: 16px; /* 设置字体大小 */
font-family: "Microsoft YaHei"; /* 设置字体 */
border-radius: 20px; /* 设置圆角 */
}
ApplyFriendItem #addBtn[state='press'] {
background-color: #BEBEBE;
color: #2cb46e;
font-size: 16px; /* 设置字体大小 */
font-family: "Microsoft YaHei"; /* 设置字体 */
border-radius: 20px; /* 设置圆角 */
}
#already_add_lb{
color:rgb(153,153,153);
font-size: 12px;
font-family: "Microsoft YaHei";
}
#user_name_lb{
color:rgb(0,0,0);
font-size: 16px;
font-weight: normal;
font-family: "Microsoft YaHei";
}
源码连接
https://gitee.com/secondtonone1/llfcchat
视频连接
https://www.bilibili.com/video/BV1SS42197Yo/?vd_source=8be9e83424c2ed2c9b2a3ed1d01385e9
day27-分布式服务设计
简介
本文介绍如何将chatserver设置为分布式服务,并且实现statusserver的负载均衡处理,根据每个chatserver现有的连接数匹配最小的chatserver返回给GateServer并返回给客户端。
为了实现这一系列分布式设计,我们需要先完善chatserver,增加grpc客户端和服务端。这样能实现两个chatserver之间端对端的通信。
visual studio中右键chatserver项目选择添加新文件ChatGrpcClient, 会为我们生成ChatGrpcClient.h和ChatGrpcClient.cpp文件。
连接池客户端
先实现ChatConPool连接池
cpp展开代码class ChatConPool {
public:
ChatConPool(size_t poolSize, std::string host, std::string port):
poolSize_(poolSize), host_(host),port_(port),b_stop_(false){
for (size_t i = 0; i < poolSize_; ++i) {
std::shared_ptr<Channel> channel = grpc::CreateChannel(host + ":" + port, grpc::InsecureChannelCredentials());
connections_.push(ChatService::NewStub(channel));
}
}
~ChatConPool() {
std::lock_guard<std::mutex> lock(mutex_);
Close();
while (!connections_.empty()) {
connections_.pop();
}
}
std::unique_ptr<ChatService::Stub> getConnection() {
std::unique_lock<std::mutex> lock(mutex_);
cond_.wait(lock, [this] {
if (b_stop_) {
return true;
}
return !connections_.empty();
});
//如果停止则直接返回空指针
if (b_stop_) {
return nullptr;
}
auto context = std::move(connections_.front());
connections_.pop();
return context;
}
void returnConnection(std::unique_ptr<ChatService::Stub> context) {
std::lock_guard<std::mutex> lock(mutex_);
if (b_stop_) {
return;
}
connections_.push(std::move(context));
cond_.notify_one();
}
void Close() {
b_stop_ = true;
cond_.notify_all();
}
private:
atomic<bool> b_stop_;
size_t poolSize_;
std::string host_;
std::string port_;
std::queue<std::unique_ptr<ChatService::Stub> > connections_;
std::mutex mutex_;
std::condition_variable cond_;
};
然后利用单例模式实现grpc通信的客户端
cpp展开代码class ChatGrpcClient: public Singleton<ChatGrpcClient>
{
friend class Singleton<ChatGrpcClient>;
public:
~ChatGrpcClient() {
}
AddFriendRsp NotifyAddFriend(std::string server_ip, const AddFriendReq& req);
AuthFriendRsp NotifyAuthFriend(std::string server_ip, const AuthFriendReq& req);
bool GetBaseInfo(std::string base_key, int uid, std::shared_ptr<UserInfo>& userinfo);
TextChatMsgRsp NotifyTextChatMsg(std::string server_ip, const TextChatMsgReq& req, const Json::Value& rtvalue);
private:
ChatGrpcClient();
unordered_map<std::string, std::unique_ptr<ChatConPool>> _pools;
};
实现具体的ChatGrpcClient
cpp展开代码ChatGrpcClient::ChatGrpcClient()
{
auto& cfg = ConfigMgr::Inst();
auto server_list = cfg["PeerServer"]["Servers"];
std::vector<std::string> words;
std::stringstream ss(server_list);
std::string word;
while (std::getline(ss, word, ',')) {
words.push_back(word);
}
for (auto& word : words) {
if (cfg[word]["Name"].empty()) {
continue;
}
_pools[cfg[word]["Name"]] = std::make_unique<ChatConPool>(5, cfg[word]["Host"], cfg[word]["Port"]);
}
}
AddFriendRsp ChatGrpcClient::NotifyAddFriend(std::string server_ip, const AddFriendReq& req) {
AddFriendRsp rsp;
return rsp;
}
AuthFriendRsp ChatGrpcClient::NotifyAuthFriend(std::string server_ip, const AuthFriendReq& req) {
AuthFriendRsp rsp;
return rsp;
}
bool ChatGrpcClient::GetBaseInfo(std::string base_key, int uid, std::shared_ptr<UserInfo>& userinfo) {
return true;
}
TextChatMsgRsp ChatGrpcClient::NotifyTextChatMsg(std::string server_ip,
const TextChatMsgReq& req, const Json::Value& rtvalue) {
TextChatMsgRsp rsp;
return rsp;
}
连接池服务端
向ChatServer中添加ChatServiceImpl类,自动生成头文件和源文件
cpp展开代码class ChatServiceImpl final : public ChatService::Service
{
public:
ChatServiceImpl();
Status NotifyAddFriend(ServerContext* context, const AddFriendReq* request,
AddFriendRsp* reply) override;
Status NotifyAuthFriend(ServerContext* context,
const AuthFriendReq* request, AuthFriendRsp* response) override;
Status NotifyTextChatMsg(::grpc::ServerContext* context,
const TextChatMsgReq* request, TextChatMsgRsp* response) override;
bool GetBaseInfo(std::string base_key, int uid, std::shared_ptr<UserInfo>& userinfo);
private:
};
实现服务逻辑,先简单写成不处理直接返回。
cpp展开代码ChatServiceImpl::ChatServiceImpl()
{
}
Status ChatServiceImpl::NotifyAddFriend(ServerContext* context, const AddFriendReq* request,
AddFriendRsp* reply) {
return Status::OK;
}
Status ChatServiceImpl::NotifyAuthFriend(ServerContext* context,
const AuthFriendReq* request, AuthFriendRsp* response) {
return Status::OK;
}
Status ChatServiceImpl::NotifyTextChatMsg(::grpc::ServerContext* context,
const TextChatMsgReq* request, TextChatMsgRsp* response) {
return Status::OK;
}
bool ChatServiceImpl::GetBaseInfo(std::string base_key, int uid, std::shared_ptr<UserInfo>& userinfo) {
return true;
}
并且完善chatserver配置
ini展开代码[GateServer]
Port = 8080
[VarifyServer]
Host = 127.0.0.1
Port = 50051
[StatusServer]
Host = 127.0.0.1
Port = 50052
[SelfServer]
Name = chatserver1
Host = 0.0.0.0
Port = 8090
RPCPort = 50055
[Mysql]
Host = 81.68.86.146
Port = 3308
User = root
Passwd = 123456.
Schema = llfc
[Redis]
Host = 81.68.86.146
Port = 6380
Passwd = 123456
[PeerServer]
Servers = chatserver2
[chatserver2]
Name = chatserver2
Host = 127.0.0.1
Port = 50056
增加了PeerServer字段,存储对端server列表,通过逗号分隔,可以通过逗号切割对端服务器名字,再根据名字去配置里查找对应字段。
对应的chatserver复制一份,改名为chatserver2,然后修改config.ini配置。要和server1配置不同,实现端对端的配置。具体详见服务器代码。
服务器连接数管理
每当服务器chatserver启动后,都要重新设置一下用户连接数管理,并且我们每个chatserver既要有tcp服务监听也要有grpc服务监听
cpp展开代码using namespace std;
bool bstop = false;
std::condition_variable cond_quit;
std::mutex mutex_quit;
int main()
{
auto& cfg = ConfigMgr::Inst();
auto server_name = cfg["SelfServer"]["Name"];
try {
auto pool = AsioIOServicePool::GetInstance();
//将登录数设置为0
RedisMgr::GetInstance()->HSet(LOGIN_COUNT, server_name, "0");
//定义一个GrpcServer
std::string server_address(cfg["SelfServer"]["Host"] + ":" + cfg["SelfServer"]["RPCPort"]);
ChatServiceImpl service;
grpc::ServerBuilder builder;
// 监听端口和添加服务
builder.AddListeningPort(server_address, grpc::InsecureServerCredentials());
builder.RegisterService(&service);
// 构建并启动gRPC服务器
std::unique_ptr<grpc::Server> server(builder.BuildAndStart());
std::cout << "RPC Server listening on " << server_address << std::endl;
//单独启动一个线程处理grpc服务
std::thread grpc_server_thread([&server]() {
server->Wait();
});
boost::asio::io_context io_context;
boost::asio::signal_set signals(io_context, SIGINT, SIGTERM);
signals.async_wait([&io_context, pool, &server](auto, auto) {
io_context.stop();
pool->Stop();
server->Shutdown();
});
auto port_str = cfg["SelfServer"]["Port"];
CServer s(io_context, atoi(port_str.c_str()));
io_context.run();
RedisMgr::GetInstance()->HDel(LOGIN_COUNT, server_name);
RedisMgr::GetInstance()->Close();
grpc_server_thread.join();
}
catch (std::exception& e) {
std::cerr << "Exception: " << e.what() << endl;
}
}
我们在服务器启动后将本服务器的登录数量设置为0.
同样的道理,我们将服务器关闭后,也要删除对应key。
用户连接管理
因为我们用户登录后,要将连接(session)和用户uid绑定。为以后登陆踢人做准备。所以新增UserMgr管理类.
其声明如下
cpp展开代码class CSession;
class UserMgr : public Singleton<UserMgr>
{
friend class Singleton<UserMgr>;
public:
~UserMgr();
std::shared_ptr<CSession> GetSession(int uid);
void SetUserSession(int uid, std::shared_ptr<CSession> session);
void RmvUserSession(int uid);
private:
UserMgr();
std::mutex _session_mtx;
std::unordered_map<int, std::shared_ptr<CSession>> _uid_to_session;
};
其实现如下
cpp展开代码UserMgr:: ~UserMgr() {
_uid_to_session.clear();
}
std::shared_ptr<CSession> UserMgr::GetSession(int uid)
{
std::lock_guard<std::mutex> lock(_session_mtx);
auto iter = _uid_to_session.find(uid);
if (iter == _uid_to_session.end()) {
return nullptr;
}
return iter->second;
}
void UserMgr::SetUserSession(int uid, std::shared_ptr<CSession> session)
{
std::lock_guard<std::mutex> lock(_session_mtx);
_uid_to_session[uid] = session;
}
void UserMgr::RmvUserSession(int uid)
{
auto uid_str = std::to_string(uid);
//因为再次登录可能是其他服务器,所以会造成本服务器删除key,其他服务器注册key的情况
// 有可能其他服务登录,本服删除key造成找不到key的情况
//RedisMgr::GetInstance()->Del(USERIPPREFIX + uid_str);
{
std::lock_guard<std::mutex> lock(_session_mtx);
_uid_to_session.erase(uid);
}
}
UserMgr::UserMgr()
{
}
RmvUserSession 暂时屏蔽,以后做登录踢人后能保证有序移除用户ip操作。
当有连接异常时,可以调用移除用户Session的接口
cpp展开代码void CServer::ClearSession(std::string session_id) {
if (_sessions.find(session_id) != _sessions.end()) {
//移除用户和session的关联
UserMgr::GetInstance()->RmvUserSession(_sessions[session_id]->GetUserId());
}
{
lock_guard<mutex> lock(_mutex);
_sessions.erase(session_id);
}
}
聊天服务完善用户登录,当用户登录后, 设置其uid对应的serverip。以及更新其所在服务器的连接数。
cpp展开代码void LogicSystem::LoginHandler(shared_ptr<CSession> session, const short &msg_id, const string &msg_data) {
Json::Reader reader;
Json::Value root;
reader.parse(msg_data, root);
auto uid = root["uid"].asInt();
auto token = root["token"].asString();
std::cout << "user login uid is " << uid << " user token is "
<< token << endl;
Json::Value rtvalue;
Defer defer([this, &rtvalue, session]() {
std::string return_str = rtvalue.toStyledString();
session->Send(return_str, MSG_CHAT_LOGIN_RSP);
});
//从redis获取用户token是否正确
std::string uid_str = std::to_string(uid);
std::string token_key = USERTOKENPREFIX + uid_str;
std::string token_value = "";
bool success = RedisMgr::GetInstance()->Get(token_key, token_value);
if (!success) {
rtvalue["error"] = ErrorCodes::UidInvalid;
return;
}
if (token_value != token) {
rtvalue["error"] = ErrorCodes::TokenInvalid;
return;
}
rtvalue["error"] = ErrorCodes::Success;
std::string base_key = USER_BASE_INFO + uid_str;
auto user_info = std::make_shared<UserInfo>();
bool b_base = GetBaseInfo(base_key, uid, user_info);
if (!b_base) {
rtvalue["error"] = ErrorCodes::UidInvalid;
return;
}
rtvalue["uid"] = uid;
rtvalue["pwd"] = user_info->pwd;
rtvalue["name"] = user_info->name;
rtvalue["email"] = user_info->email;
rtvalue["nick"] = user_info->nick;
rtvalue["desc"] = user_info->desc;
rtvalue["sex"] = user_info->sex;
rtvalue["icon"] = user_info->icon;
//从数据库获取申请列表
//获取好友列表
auto server_name = ConfigMgr::Inst().GetValue("SelfServer", "Name");
//将登录数量增加
auto rd_res = RedisMgr::GetInstance()->HGet(LOGIN_COUNT, server_name);
int count = 0;
if (!rd_res.empty()) {
count = std::stoi(rd_res);
}
count++;
auto count_str = std::to_string(count);
RedisMgr::GetInstance()->HSet(LOGIN_COUNT, server_name, count_str);
//session绑定用户uid
session->SetUserId(uid);
//为用户设置登录ip server的名字
std::string ipkey = USERIPPREFIX + uid_str;
RedisMgr::GetInstance()->Set(ipkey, server_name);
//uid和session绑定管理,方便以后踢人操作
UserMgr::GetInstance()->SetUserSession(uid, session);
return;
}
状态服务
状态服务更新配置
ini展开代码[StatusServer]
Port = 50052
Host = 0.0.0.0
[Mysql]
Host = 81.68.86.146
Port = 3308
User = root
Passwd = 123456.
Schema = llfc
[Redis]
Host = 81.68.86.146
Port = 6380
Passwd = 123456
[chatservers]
Name = chatserver1,chatserver2
[chatserver1]
Name = chatserver1
Host = 127.0.0.1
Port = 8090
[chatserver2]
Name = chatserver2
Host = 127.0.0.1
Port = 8091
配置文件同样增加了chatservers列表,用来管理多个服务,接下来实现根据连接数动态返回chatserverip的功能
cpp展开代码Status StatusServiceImpl::GetChatServer(ServerContext* context,
const GetChatServerReq* request, GetChatServerRsp* reply)
{
std::string prefix("llfc status server has received : ");
const auto& server = getChatServer();
reply->set_host(server.host);
reply->set_port(server.port);
reply->set_error(ErrorCodes::Success);
reply->set_token(generate_unique_string());
insertToken(request->uid(), reply->token());
return Status::OK;
}
getChatServer用来获取最小连接数的chatserver 名字
cpp展开代码ChatServer StatusServiceImpl::getChatServer() {
std::lock_guard<std::mutex> guard(_server_mtx);
auto minServer = _servers.begin()->second;
auto count_str = RedisMgr::GetInstance()->HGet(LOGIN_COUNT, minServer.name);
if (count_str.empty()) {
//不存在则默认设置为最大
minServer.con_count = INT_MAX;
}
else {
minServer.con_count = std::stoi(count_str);
}
// 使用范围基于for循环
for (auto& server : _servers) {
if (server.second.name == minServer.name) {
continue;
}
auto count_str = RedisMgr::GetInstance()->HGet(LOGIN_COUNT, server.second.name);
if (count_str.empty()) {
server.second.con_count = INT_MAX;
}
else {
server.second.con_count = std::stoi(count_str);
}
if (server.second.con_count < minServer.con_count) {
minServer = server.second;
}
}
return minServer;
}
测试
分别启动两个chatserver,gateserver,以及statusserver,并且启动两个客户端登录,
分别查看登录信息,发现两个客户端被分配到不同的chatserver了,说明我们实现了负载均衡的分配方式。
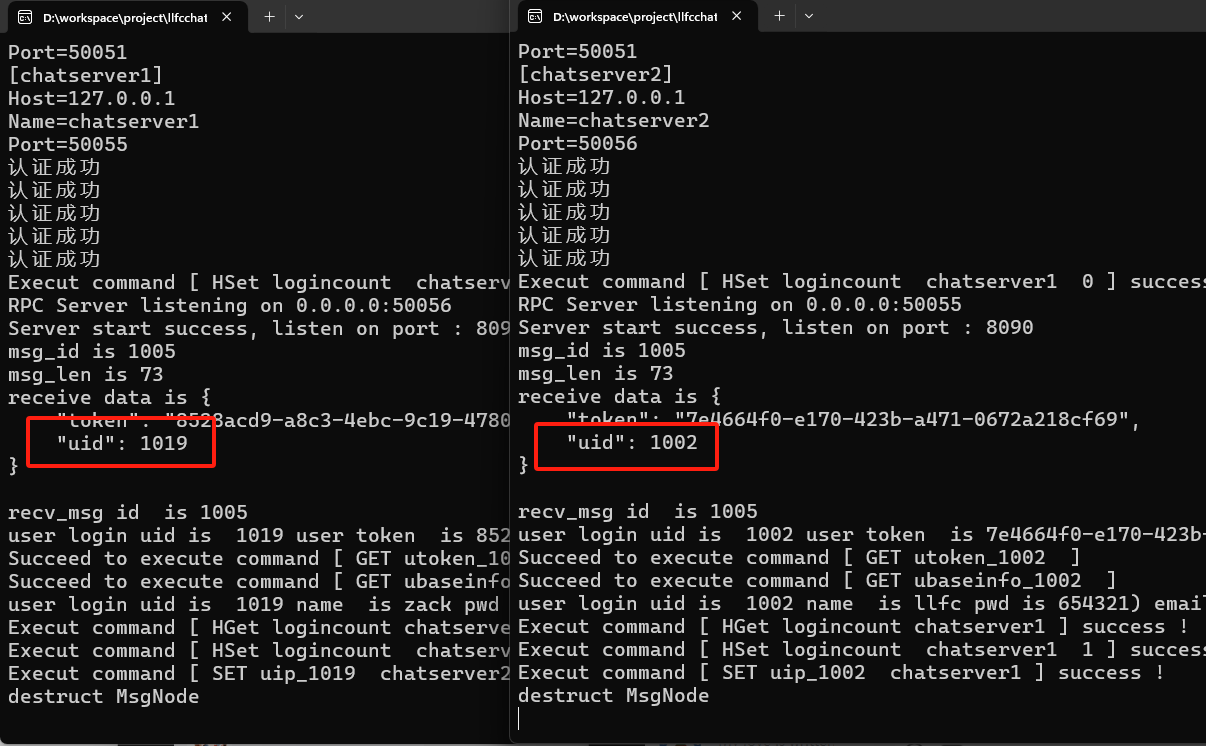
源码连接
https://gitee.com/secondtonone1/llfcchat
视频连接
day28-好友查询和申请
简介
本文介绍如何实现用户查找和好友申请功能。查找和申请好友会涉及前后端通信和rpc服务间调用。所以目前先从客户端入手,搜索用户后发送查找好友申请请求给服务器,服务器收到后判断是否存在,如果不存在则显示未找到,如果存在则显示查找到的结果
点击查询
客户端点击搜索列表的添加好友item后,先弹出一个模态对话框,上面有loading动作表示加载,直到服务器返回结果
cpp展开代码void SearchList::slot_item_clicked(QListWidgetItem *item)
{
QWidget *widget = this->itemWidget(item); //获取自定义widget对象
if(!widget){
qDebug()<< "slot item clicked widget is nullptr";
return;
}
// 对自定义widget进行操作, 将item 转化为基类ListItemBase
ListItemBase *customItem = qobject_cast<ListItemBase*>(widget);
if(!customItem){
qDebug()<< "slot item clicked widget is nullptr";
return;
}
auto itemType = customItem->GetItemType();
if(itemType == ListItemType::INVALID_ITEM){
qDebug()<< "slot invalid item clicked ";
return;
}
if(itemType == ListItemType::ADD_USER_TIP_ITEM){
if(_send_pending){
return;
}
if (!_search_edit) {
return;
}
waitPending(true);
auto search_edit = dynamic_cast<CustomizeEdit*>(_search_edit);
auto uid_str = search_edit->text();
QJsonObject jsonObj;
jsonObj["uid"] = uid_str;
QJsonDocument doc(jsonObj);
QByteArray jsonData = doc.toJson(QJsonDocument::Compact);
emit TcpMgr::GetInstance()->sig_send_data(ReqId::ID_SEARCH_USER_REQ,
jsonData);
return;
}
//清楚弹出框
CloseFindDlg();
}
_send_pending为新增的成员变量,如果为true则表示发送阻塞.构造函数中将其设置为false。
waitPending函数为根据pending状态展示加载框
cpp展开代码void SearchList::waitPending(bool pending)
{
if(pending){
_loadingDialog = new LoadingDlg(this);
_loadingDialog->setModal(true);
_loadingDialog->show();
_send_pending = pending;
}else{
_loadingDialog->hide();
_loadingDialog->deleteLater();
_send_pending = pending;
}
}
当我们发送数据后服务器会处理,返回ID_SEARCH_USER_RSP包,所以客户端要实现对ID_SEARCH_USER_RSP包的处理
cpp展开代码 _handlers.insert(ID_SEARCH_USER_RSP, [this](ReqId id, int len, QByteArray data){
Q_UNUSED(len);
qDebug()<< "handle id is "<< id << " data is " << data;
// 将QByteArray转换为QJsonDocument
QJsonDocument jsonDoc = QJsonDocument::fromJson(data);
// 检查转换是否成功
if(jsonDoc.isNull()){
qDebug() << "Failed to create QJsonDocument.";
return;
}
QJsonObject jsonObj = jsonDoc.object();
if(!jsonObj.contains("error")){
int err = ErrorCodes::ERR_JSON;
qDebug() << "Login Failed, err is Json Parse Err" << err ;
emit sig_login_failed(err);
return;
}
int err = jsonObj["error"].toInt();
if(err != ErrorCodes::SUCCESS){
qDebug() << "Login Failed, err is " << err ;
emit sig_login_failed(err);
return;
}
auto search_info = std::make_shared<SearchInfo>(jsonObj["uid"].toInt(),
jsonObj["name"].toString(), jsonObj["nick"].toString(),
jsonObj["desc"].toString(), jsonObj["sex"].toInt(), jsonObj["icon"].toString());
emit sig_user_search(search_info);
});
将搜索到的结果封装为search_info发送给SearchList类做展示, search_list中连接信号和槽
cpp展开代码//连接搜索条目
connect(TcpMgr::GetInstance().get(), &TcpMgr::sig_user_search, this, &SearchList::slot_user_search);
slot_user_search槽函数弹出搜索结果
cpp展开代码void SearchList::slot_user_search(std::shared_ptr<SearchInfo> si)
{
waitPending(false);
if(si == nullptr){
_find_dlg = std::make_shared<FindFailDlg>(this);
}else{
//此处分两种情况,一种是搜多到已经是自己的朋友了,一种是未添加好友
//查找是否已经是好友 todo...
_find_dlg = std::make_shared<FindSuccessDlg>(this);
std::dynamic_pointer_cast<FindSuccessDlg>(_find_dlg)->SetSearchInfo(si);
}
_find_dlg->show();
}
FindSuccessDlg是找到的结果展示,FindFailDlg是未找到结果展示。以下为FindSuccessDlg的ui布局
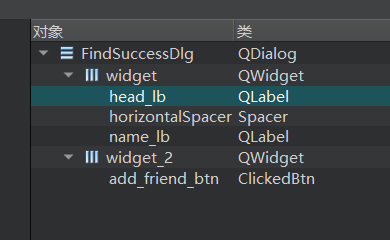
具体声明如下
cpp展开代码class FindSuccessDlg : public QDialog
{
Q_OBJECT
public:
explicit FindSuccessDlg(QWidget *parent = nullptr);
~FindSuccessDlg();
void SetSearchInfo(std::shared_ptr<SearchInfo> si);
private:
Ui::FindSuccessDlg *ui;
std::shared_ptr<SearchInfo> _si;
QWidget * _parent;
private slots:
void on_add_friend_btn_clicked();
};
具体实现如下
cpp展开代码FindSuccessDlg::FindSuccessDlg(QWidget *parent) :
QDialog(parent), _parent(parent),
ui(new Ui::FindSuccessDlg)
{
ui->setupUi(this);
// 设置对话框标题
setWindowTitle("添加");
// 隐藏对话框标题栏
setWindowFlags(windowFlags() | Qt::FramelessWindowHint);
// 获取当前应用程序的路径
QString app_path = QCoreApplication::applicationDirPath();
QString pix_path = QDir::toNativeSeparators(app_path +
QDir::separator() + "static"+QDir::separator()+"head_1.jpg");
QPixmap head_pix(pix_path);
head_pix = head_pix.scaled(ui->head_lb->size(),
Qt::KeepAspectRatio, Qt::SmoothTransformation);
ui->head_lb->setPixmap(head_pix);
ui->add_friend_btn->SetState("normal","hover","press");
this->setModal(true);
}
FindSuccessDlg::~FindSuccessDlg()
{
qDebug()<<"FindSuccessDlg destruct";
delete ui;
}
void FindSuccessDlg::SetSearchInfo(std::shared_ptr<SearchInfo> si)
{
ui->name_lb->setText(si->_name);
_si = si;
}
void FindSuccessDlg::on_add_friend_btn_clicked()
{
//todo... 添加好友界面弹出
this->hide();
//弹出加好友界面
auto applyFriend = new ApplyFriend(_parent);
applyFriend->SetSearchInfo(_si);
applyFriend->setModal(true);
applyFriend->show();
}
类似的FindFailDlg也是这种思路,大家自己实现即可。
服务器查询逻辑
chatserver服务器要根据客户端发送过来的用户id进行查找,chatserver服务器需先注册ID_SEARCH_USER_REQ和回调函数
cpp展开代码void LogicSystem::RegisterCallBacks() {
_fun_callbacks[MSG_CHAT_LOGIN] = std::bind(&LogicSystem::LoginHandler, this,
placeholders::_1, placeholders::_2, placeholders::_3);
_fun_callbacks[ID_SEARCH_USER_REQ] = std::bind(&LogicSystem::SearchInfo, this,
placeholders::_1, placeholders::_2, placeholders::_3);
}
SearchInfo根据用户uid查询具体信息
cpp展开代码void LogicSystem::SearchInfo(std::shared_ptr<CSession> session, const short& msg_id, const string& msg_data) {
Json::Reader reader;
Json::Value root;
reader.parse(msg_data, root);
auto uid_str = root["uid"].asString();
std::cout << "user SearchInfo uid is " << uid_str << endl;
Json::Value rtvalue;
Defer deder([this, &rtvalue, session]() {
std::string return_str = rtvalue.toStyledString();
session->Send(return_str, ID_SEARCH_USER_RSP);
});
bool b_digit = isPureDigit(uid_str);
if (b_digit) {
GetUserByUid(uid_str, rtvalue);
}
else {
GetUserByName(uid_str, rtvalue);
}
}
到此客户端和服务器搜索查询的联调功能已经解决了。
客户端添加好友
当Client1搜索到好友后,点击添加弹出信息界面,然后点击确定即可向对方Client2申请添加好友,这个请求要先发送到Client1所在的服务器Server1,服务器收到后判断Client2所在服务器,如果Client2在Server1则直接在Server1中查找Client2的连接信息,没找到说明Client2未在内存中,找到了则通过Session发送tcp给对方。如果Client2不在Server1而在Server2上,则需要让Server1通过grpc接口通知Server2,Server2收到后继续判断Client2是否在线,如果在线则通知。
如下图,Client1想和Client2以及Client3分别通信,需要先将请求发给Client1所在的Server1,再考虑是否rpc调用。
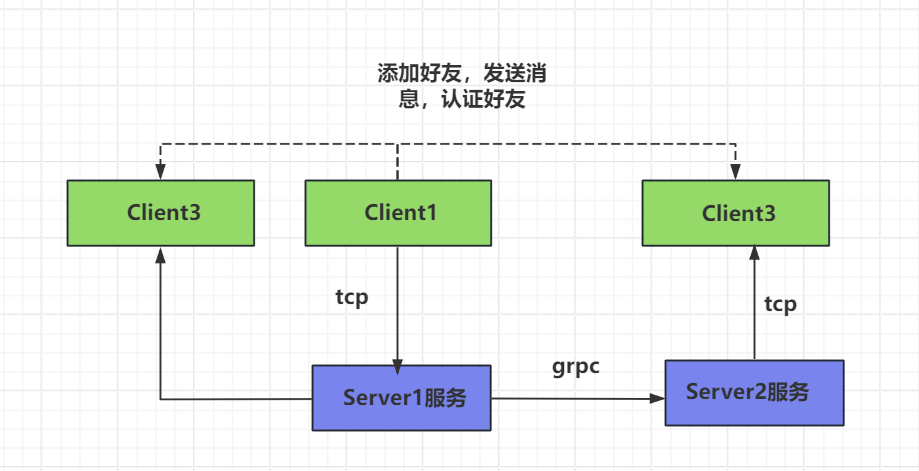
客户端在ApplySure槽函数中添加好友请求
cpp展开代码void ApplyFriend::SlotApplySure()
{
qDebug() << "Slot Apply Sure called" ;
QJsonObject jsonObj;
auto uid = UserMgr::GetInstance()->GetUid();
jsonObj["uid"] = uid;
auto name = ui->name_ed->text();
if(name.isEmpty()){
name = ui->name_ed->placeholderText();
}
jsonObj["applyname"] = name;
auto bakname = ui->back_ed->text();
if(bakname.isEmpty()){
bakname = ui->back_ed->placeholderText();
}
jsonObj["bakname"] = bakname;
jsonObj["touid"] = _si->_uid;
QJsonDocument doc(jsonObj);
QByteArray jsonData = doc.toJson(QJsonDocument::Compact);
//发送tcp请求给chat server
emit TcpMgr::GetInstance()->sig_send_data(ReqId::ID_ADD_FRIEND_REQ, jsonData);
this->hide();
deleteLater();
}
另一个客户端会收到服务器通知添加好友的请求,所以在TcpMgr里监听这个请求
cpp展开代码 _handlers.insert(ID_NOTIFY_ADD_FRIEND_REQ, [this](ReqId id, int len, QByteArray data) {
Q_UNUSED(len);
qDebug() << "handle id is " << id << " data is " << data;
// 将QByteArray转换为QJsonDocument
QJsonDocument jsonDoc = QJsonDocument::fromJson(data);
// 检查转换是否成功
if (jsonDoc.isNull()) {
qDebug() << "Failed to create QJsonDocument.";
return;
}
QJsonObject jsonObj = jsonDoc.object();
if (!jsonObj.contains("error")) {
int err = ErrorCodes::ERR_JSON;
qDebug() << "Login Failed, err is Json Parse Err" << err;
emit sig_user_search(nullptr);
return;
}
int err = jsonObj["error"].toInt();
if (err != ErrorCodes::SUCCESS) {
qDebug() << "Login Failed, err is " << err;
emit sig_user_search(nullptr);
return;
}
int from_uid = jsonObj["applyuid"].toInt();
QString name = jsonObj["name"].toString();
QString desc = jsonObj["desc"].toString();
QString icon = jsonObj["icon"].toString();
QString nick = jsonObj["nick"].toString();
int sex = jsonObj["sex"].toInt();
auto apply_info = std::make_shared<AddFriendApply>(
from_uid, name, desc,
icon, nick, sex);
emit sig_friend_apply(apply_info);
});
服务调用
服务器要处理客户端发过来的添加好友的请求,并决定是否调用rpc通知其他服务。
先将AddFriendApply函数注册到回调map里
cpp展开代码void LogicSystem::RegisterCallBacks() {
_fun_callbacks[MSG_CHAT_LOGIN] = std::bind(&LogicSystem::LoginHandler, this,
placeholders::_1, placeholders::_2, placeholders::_3);
_fun_callbacks[ID_SEARCH_USER_REQ] = std::bind(&LogicSystem::SearchInfo, this,
placeholders::_1, placeholders::_2, placeholders::_3);
_fun_callbacks[ID_ADD_FRIEND_REQ] = std::bind(&LogicSystem::AddFriendApply, this,
placeholders::_1, placeholders::_2, placeholders::_3);
}
接下来实现AddFriendApply
cpp展开代码void LogicSystem::AddFriendApply(std::shared_ptr<CSession> session, const short& msg_id, const string& msg_data) {
Json::Reader reader;
Json::Value root;
reader.parse(msg_data, root);
auto uid = root["uid"].asInt();
auto applyname = root["applyname"].asString();
auto bakname = root["bakname"].asString();
auto touid = root["touid"].asInt();
std::cout << "user login uid is " << uid << " applyname is "
<< applyname << " bakname is " << bakname << " touid is " << touid << endl;
Json::Value rtvalue;
rtvalue["error"] = ErrorCodes::Success;
Defer defer([this, &rtvalue, session]() {
std::string return_str = rtvalue.toStyledString();
session->Send(return_str, ID_ADD_FRIEND_RSP);
});
//先更新数据库
MysqlMgr::GetInstance()->AddFriendApply(uid, touid);
//查询redis 查找touid对应的server ip
auto to_str = std::to_string(touid);
auto to_ip_key = USERIPPREFIX + to_str;
std::string to_ip_value = "";
bool b_ip = RedisMgr::GetInstance()->Get(to_ip_key, to_ip_value);
if (!b_ip) {
return;
}
auto& cfg = ConfigMgr::Inst();
auto self_name = cfg["SelfServer"]["Name"];
//直接通知对方有申请消息
if (to_ip_value == self_name) {
auto session = UserMgr::GetInstance()->GetSession(touid);
if (session) {
//在内存中则直接发送通知对方
Json::Value notify;
notify["error"] = ErrorCodes::Success;
notify["applyuid"] = uid;
notify["name"] = applyname;
notify["desc"] = "";
std::string return_str = notify.toStyledString();
session->Send(return_str, ID_NOTIFY_ADD_FRIEND_REQ);
}
return;
}
std::string base_key = USER_BASE_INFO + std::to_string(uid);
auto apply_info = std::make_shared<UserInfo>();
bool b_info = GetBaseInfo(base_key, uid, apply_info);
AddFriendReq add_req;
add_req.set_applyuid(uid);
add_req.set_touid(touid);
add_req.set_name(applyname);
add_req.set_desc("");
if (b_info) {
add_req.set_icon(apply_info->icon);
add_req.set_sex(apply_info->sex);
add_req.set_nick(apply_info->nick);
}
//发送通知
ChatGrpcClient::GetInstance()->NotifyAddFriend(to_ip_value, add_req);
}
上面的函数中先更新数据库将申请写入数据库中
cpp展开代码bool MysqlMgr::AddFriendApply(const int& from, const int& to) {
return _dao.AddFriendApply(from, to);
}
内部调用dao层面的添加好友请求
cpp展开代码bool MysqlDao::AddFriendApply(const int& from, const int& to) {
auto con = pool_->getConnection();
if (con == nullptr) {
return false;
}
Defer defer([this, &con]() {
pool_->returnConnection(std::move(con));
});
try {
std::unique_ptr<sql::PreparedStatement> pstmt(con->_con->prepareStatement("INSERT INTO friend_apply (from_uid, to_uid) values (?,?) "
"ON DUPLICATE KEY UPDATE from_uid = from_uid, to_uid = to_uid "));
pstmt->setInt(1, from);
pstmt->setInt(2, to);
//执行更新
int rowAffected = pstmt->executeUpdate();
if (rowAffected < 0) {
return false;
}
return true;
}
catch (sql::SQLException& e) {
std::cerr << "SQLException: " << e.what();
std::cerr << " (MySQL error code: " << e.getErrorCode();
std::cerr << ", SQLState: " << e.getSQLState() << " )" << std::endl;
return false;
}
return true;
}
添加完成后判断要通知的对端是否在本服务器,如果在本服务器则直接通过uid查找session,判断用户是否在线,如果在线则直接通知对端。
如果不在本服务器,则需要通过rpc通知对端服务器。rpc的客户端这么写即可。
cpp展开代码AddFriendRsp ChatGrpcClient::NotifyAddFriend(std::string server_ip, const AddFriendReq& req) {
AddFriendRsp rsp;
Defer defer([&rsp, &req]() {
rsp.set_error(ErrorCodes::Success);
rsp.set_applyuid(req.applyuid());
rsp.set_touid(req.touid());
});
auto find_iter = _pools.find(server_ip);
if (find_iter == _pools.end()) {
return rsp;
}
auto& pool = find_iter->second;
ClientContext context;
auto stub = pool->getConnection();
Status status = stub->NotifyAddFriend(&context, req, &rsp);
Defer defercon([&stub, this, &pool]() {
pool->returnConnection(std::move(stub));
});
if (!status.ok()) {
rsp.set_error(ErrorCodes::RPCFailed);
return rsp;
}
return rsp;
}
同样rpc的服务端也要实现,我们先将rpc客户端和服务端的逻辑都在ChatServer1写好,然后复制给ChatServer2即可。 rpc的服务实现如下
cpp展开代码Status ChatServiceImpl::NotifyAddFriend(ServerContext* context, const AddFriendReq* request,
AddFriendRsp* reply) {
//查找用户是否在本服务器
auto touid = request->touid();
auto session = UserMgr::GetInstance()->GetSession(touid);
Defer defer([request, reply]() {
reply->set_error(ErrorCodes::Success);
reply->set_applyuid(request->applyuid());
reply->set_touid(request->touid());
});
//用户不在内存中则直接返回
if (session == nullptr) {
return Status::OK;
}
//在内存中则直接发送通知对方
Json::Value rtvalue;
rtvalue["error"] = ErrorCodes::Success;
rtvalue["applyuid"] = request->applyuid();
rtvalue["name"] = request->name();
rtvalue["desc"] = request->desc();
rtvalue["icon"] = request->icon();
rtvalue["sex"] = request->sex();
rtvalue["nick"] = request->nick();
std::string return_str = rtvalue.toStyledString();
session->Send(return_str, ID_NOTIFY_ADD_FRIEND_REQ);
return Status::OK;
}
上面的代码也是判断要通知的客户端是否在内存中,如果在就通过session发送tcp请求。
将ChatServer1的代码拷贝给ChatServer2,重启两个服务,再启动两个客户端,一个客户端申请另一个客户端,通过查看客户端日志是能看到申请信息的。
申请显示
接下来被通知申请的客户端要做界面显示,我们实现被通知的客户端收到sig_friend_apply信号的处理逻辑。在ChatDialog的构造函数中连接信号和槽
cpp展开代码 //连接申请添加好友信号
connect(TcpMgr::GetInstance().get(), &TcpMgr::sig_friend_apply, this, &ChatDialog::slot_apply_friend);
实现申请好友的槽函数
cpp展开代码void ChatDialog::slot_apply_friend(std::shared_ptr<AddFriendApply> apply)
{
qDebug() << "receive apply friend slot, applyuid is " << apply->_from_uid << " name is "
<< apply->_name << " desc is " << apply->_desc;
bool b_already = UserMgr::GetInstance()->AlreadyApply(apply->_from_uid);
if(b_already){
return;
}
UserMgr::GetInstance()->AddApplyList(std::make_shared<ApplyInfo>(apply));
ui->side_contact_lb->ShowRedPoint(true);
ui->con_user_list->ShowRedPoint(true);
ui->friend_apply_page->AddNewApply(apply);
}
这样就能显示新的申请消息和红点了。具体添加一个新的申请条目到申请好友页面的逻辑如下:
cpp展开代码void ApplyFriendPage::AddNewApply(std::shared_ptr<AddFriendApply> apply)
{
//先模拟头像随机,以后头像资源增加资源服务器后再显示
int randomValue = QRandomGenerator::global()->bounded(100); // 生成0到99之间的随机整数
int head_i = randomValue % heads.size();
auto* apply_item = new ApplyFriendItem();
auto apply_info = std::make_shared<ApplyInfo>(apply->_from_uid,
apply->_name, apply->_desc,heads[head_i], apply->_name, 0, 0);
apply_item->SetInfo( apply_info);
QListWidgetItem* item = new QListWidgetItem;
//qDebug()<<"chat_user_wid sizeHint is " << chat_user_wid->sizeHint();
item->setSizeHint(apply_item->sizeHint());
item->setFlags(item->flags() & ~Qt::ItemIsEnabled & ~Qt::ItemIsSelectable);
ui->apply_friend_list->insertItem(0,item);
ui->apply_friend_list->setItemWidget(item, apply_item);
apply_item->ShowAddBtn(true);
//收到审核好友信号
connect(apply_item, &ApplyFriendItem::sig_auth_friend, [this](std::shared_ptr<ApplyInfo> apply_info) {
auto* authFriend = new AuthenFriend(this);
authFriend->setModal(true);
authFriend->SetApplyInfo(apply_info);
authFriend->show();
});
}
测试效果, 收到对方请求后如下图
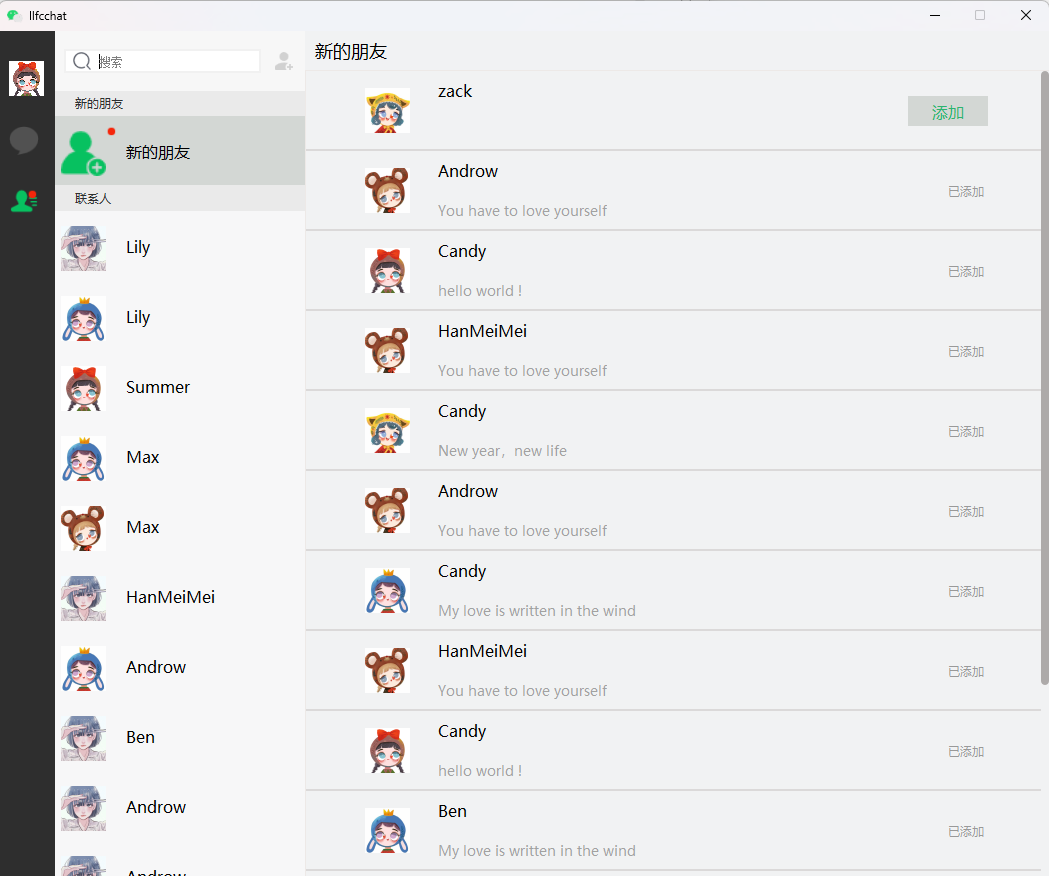
登录加载申请
当用户登录后,服务器需要将申请列表同步给客户端, 写在登录逻辑里。
cpp展开代码 //从数据库获取申请列表
std::vector<std::shared_ptr<ApplyInfo>> apply_list;
auto b_apply = GetFriendApplyInfo(uid,apply_list);
if (b_apply) {
for (auto & apply : apply_list) {
Json::Value obj;
obj["name"] = apply->_name;
obj["uid"] = apply->_uid;
obj["icon"] = apply->_icon;
obj["nick"] = apply->_nick;
obj["sex"] = apply->_sex;
obj["desc"] = apply->_desc;
obj["status"] = apply->_status;
rtvalue["apply_list"].append(obj);
}
}
获取好友申请信息函数
cpp展开代码bool LogicSystem::GetFriendApplyInfo(int to_uid, std::vector<std::shared_ptr<ApplyInfo>> &list) {
//从mysql获取好友申请列表
return MysqlMgr::GetInstance()->GetApplyList(to_uid, list, 0, 10);
}
dao层面实现获取申请列表
cpp展开代码bool MysqlMgr::GetApplyList(int touid,
std::vector<std::shared_ptr<ApplyInfo>>& applyList, int begin, int limit) {
return _dao.GetApplyList(touid, applyList, begin, limit);
}
bool MysqlDao::GetApplyList(int touid, std::vector<std::shared_ptr<ApplyInfo>>& applyList, int begin, int limit) {
auto con = pool_->getConnection();
if (con == nullptr) {
return false;
}
Defer defer([this, &con]() {
pool_->returnConnection(std::move(con));
});
try {
// 准备SQL语句, 根据起始id和限制条数返回列表
std::unique_ptr<sql::PreparedStatement> pstmt(con->_con->prepareStatement("select apply.from_uid, apply.status, user.name, "
"user.nick, user.sex from friend_apply as apply join user on apply.from_uid = user.uid where apply.to_uid = ? "
"and apply.id > ? order by apply.id ASC LIMIT ? "));
pstmt->setInt(1, touid); // 将uid替换为你要查询的uid
pstmt->setInt(2, begin); // 起始id
pstmt->setInt(3, limit); //偏移量
// 执行查询
std::unique_ptr<sql::ResultSet> res(pstmt->executeQuery());
// 遍历结果集
while (res->next()) {
auto name = res->getString("name");
auto uid = res->getInt("from_uid");
auto status = res->getInt("status");
auto nick = res->getString("nick");
auto sex = res->getInt("sex");
auto apply_ptr = std::make_shared<ApplyInfo>(uid, name, "", "", nick, sex, status);
applyList.push_back(apply_ptr);
}
return true;
}
catch (sql::SQLException& e) {
std::cerr << "SQLException: " << e.what();
std::cerr << " (MySQL error code: " << e.getErrorCode();
std::cerr << ", SQLState: " << e.getSQLState() << " )" << std::endl;
return false;
}
}
好友认证界面
客户端需要实现好友认证界面,当点击同意对方好友申请后,弹出认证信息,点击确定后将认证同意的请求发给服务器,服务器再通知申请方,告知对方被申请人已经同意加好友了。认证界面和申请界面类似, 这个大家自己实现即可。
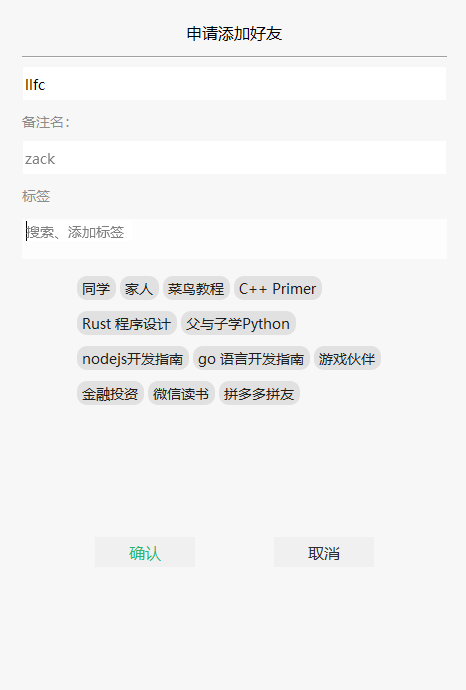
认证界面的函数和逻辑可以照抄申请好友的逻辑。
cpp展开代码AuthenFriend::AuthenFriend(QWidget *parent) :
QDialog(parent),
ui(new Ui::AuthenFriend),_label_point(2,6)
{
ui->setupUi(this);
// 隐藏对话框标题栏
setWindowFlags(windowFlags() | Qt::FramelessWindowHint);
this->setObjectName("AuthenFriend");
this->setModal(true);
ui->lb_ed->setPlaceholderText("搜索、添加标签");
ui->back_ed->setPlaceholderText("燃烧的胸毛");
ui->lb_ed->SetMaxLength(21);
ui->lb_ed->move(2, 2);
ui->lb_ed->setFixedHeight(20);
ui->lb_ed->setMaxLength(10);
ui->input_tip_wid->hide();
_tip_cur_point = QPoint(5, 5);
_tip_data = { "同学","家人","菜鸟教程","C++ Primer","Rust 程序设计",
"父与子学Python","nodejs开发指南","go 语言开发指南",
"游戏伙伴","金融投资","微信读书","拼多多拼友" };
connect(ui->more_lb, &ClickedOnceLabel::clicked, this, &AuthenFriend::ShowMoreLabel);
InitTipLbs();
//链接输入标签回车事件
connect(ui->lb_ed, &CustomizeEdit::returnPressed, this, &AuthenFriend::SlotLabelEnter);
connect(ui->lb_ed, &CustomizeEdit::textChanged, this, &AuthenFriend::SlotLabelTextChange);
connect(ui->lb_ed, &CustomizeEdit::editingFinished, this, &AuthenFriend::SlotLabelEditFinished);
connect(ui->tip_lb, &ClickedOnceLabel::clicked, this, &AuthenFriend::SlotAddFirendLabelByClickTip);
ui->scrollArea->horizontalScrollBar()->setHidden(true);
ui->scrollArea->verticalScrollBar()->setHidden(true);
ui->scrollArea->installEventFilter(this);
ui->sure_btn->SetState("normal","hover","press");
ui->cancel_btn->SetState("normal","hover","press");
//连接确认和取消按钮的槽函数
connect(ui->cancel_btn, &QPushButton::clicked, this, &AuthenFriend::SlotApplyCancel);
connect(ui->sure_btn, &QPushButton::clicked, this, &AuthenFriend::SlotApplySure);
}
AuthenFriend::~AuthenFriend()
{
qDebug()<< "AuthenFriend destruct";
delete ui;
}
void AuthenFriend::InitTipLbs()
{
int lines = 1;
for(int i = 0; i < _tip_data.size(); i++){
auto* lb = new ClickedLabel(ui->lb_list);
lb->SetState("normal", "hover", "pressed", "selected_normal",
"selected_hover", "selected_pressed");
lb->setObjectName("tipslb");
lb->setText(_tip_data[i]);
connect(lb, &ClickedLabel::clicked, this, &AuthenFriend::SlotChangeFriendLabelByTip);
QFontMetrics fontMetrics(lb->font()); // 获取QLabel控件的字体信息
int textWidth = fontMetrics.width(lb->text()); // 获取文本的宽度
int textHeight = fontMetrics.height(); // 获取文本的高度
if (_tip_cur_point.x() + textWidth + tip_offset > ui->lb_list->width()) {
lines++;
if (lines > 2) {
delete lb;
return;
}
_tip_cur_point.setX(tip_offset);
_tip_cur_point.setY(_tip_cur_point.y() + textHeight + 15);
}
auto next_point = _tip_cur_point;
AddTipLbs(lb, _tip_cur_point,next_point, textWidth, textHeight);
_tip_cur_point = next_point;
}
}
void AuthenFriend::AddTipLbs(ClickedLabel* lb, QPoint cur_point, QPoint& next_point, int text_width, int text_height)
{
lb->move(cur_point);
lb->show();
_add_labels.insert(lb->text(), lb);
_add_label_keys.push_back(lb->text());
next_point.setX(lb->pos().x() + text_width + 15);
next_point.setY(lb->pos().y());
}
bool AuthenFriend::eventFilter(QObject *obj, QEvent *event)
{
if (obj == ui->scrollArea && event->type() == QEvent::Enter)
{
ui->scrollArea->verticalScrollBar()->setHidden(false);
}
else if (obj == ui->scrollArea && event->type() == QEvent::Leave)
{
ui->scrollArea->verticalScrollBar()->setHidden(true);
}
return QObject::eventFilter(obj, event);
}
void AuthenFriend::SetApplyInfo(std::shared_ptr<ApplyInfo> apply_info)
{
_apply_info = apply_info;
ui->back_ed->setPlaceholderText(apply_info->_name);
}
void AuthenFriend::ShowMoreLabel()
{
qDebug()<< "receive more label clicked";
ui->more_lb_wid->hide();
ui->lb_list->setFixedWidth(325);
_tip_cur_point = QPoint(5, 5);
auto next_point = _tip_cur_point;
int textWidth;
int textHeight;
//重拍现有的label
for(auto & added_key : _add_label_keys){
auto added_lb = _add_labels[added_key];
QFontMetrics fontMetrics(added_lb->font()); // 获取QLabel控件的字体信息
textWidth = fontMetrics.width(added_lb->text()); // 获取文本的宽度
textHeight = fontMetrics.height(); // 获取文本的高度
if(_tip_cur_point.x() +textWidth + tip_offset > ui->lb_list->width()){
_tip_cur_point.setX(tip_offset);
_tip_cur_point.setY(_tip_cur_point.y()+textHeight+15);
}
added_lb->move(_tip_cur_point);
next_point.setX(added_lb->pos().x() + textWidth + 15);
next_point.setY(_tip_cur_point.y());
_tip_cur_point = next_point;
}
//添加未添加的
for(int i = 0; i < _tip_data.size(); i++){
auto iter = _add_labels.find(_tip_data[i]);
if(iter != _add_labels.end()){
continue;
}
auto* lb = new ClickedLabel(ui->lb_list);
lb->SetState("normal", "hover", "pressed", "selected_normal",
"selected_hover", "selected_pressed");
lb->setObjectName("tipslb");
lb->setText(_tip_data[i]);
connect(lb, &ClickedLabel::clicked, this, &AuthenFriend::SlotChangeFriendLabelByTip);
QFontMetrics fontMetrics(lb->font()); // 获取QLabel控件的字体信息
int textWidth = fontMetrics.width(lb->text()); // 获取文本的宽度
int textHeight = fontMetrics.height(); // 获取文本的高度
if (_tip_cur_point.x() + textWidth + tip_offset > ui->lb_list->width()) {
_tip_cur_point.setX(tip_offset);
_tip_cur_point.setY(_tip_cur_point.y() + textHeight + 15);
}
next_point = _tip_cur_point;
AddTipLbs(lb, _tip_cur_point, next_point, textWidth, textHeight);
_tip_cur_point = next_point;
}
int diff_height = next_point.y() + textHeight + tip_offset - ui->lb_list->height();
ui->lb_list->setFixedHeight(next_point.y() + textHeight + tip_offset);
//qDebug()<<"after resize ui->lb_list size is " << ui->lb_list->size();
ui->scrollcontent->setFixedHeight(ui->scrollcontent->height()+diff_height);
}
void AuthenFriend::resetLabels()
{
auto max_width = ui->gridWidget->width();
auto label_height = 0;
for(auto iter = _friend_labels.begin(); iter != _friend_labels.end(); iter++){
//todo... 添加宽度统计
if( _label_point.x() + iter.value()->width() > max_width) {
_label_point.setY(_label_point.y()+iter.value()->height()+6);
_label_point.setX(2);
}
iter.value()->move(_label_point);
iter.value()->show();
_label_point.setX(_label_point.x()+iter.value()->width()+2);
_label_point.setY(_label_point.y());
label_height = iter.value()->height();
}
if(_friend_labels.isEmpty()){
ui->lb_ed->move(_label_point);
return;
}
if(_label_point.x() + MIN_APPLY_LABEL_ED_LEN > ui->gridWidget->width()){
ui->lb_ed->move(2,_label_point.y()+label_height+6);
}else{
ui->lb_ed->move(_label_point);
}
}
void AuthenFriend::addLabel(QString name)
{
if (_friend_labels.find(name) != _friend_labels.end()) {
return;
}
auto tmplabel = new FriendLabel(ui->gridWidget);
tmplabel->SetText(name);
tmplabel->setObjectName("FriendLabel");
auto max_width = ui->gridWidget->width();
//todo... 添加宽度统计
if (_label_point.x() + tmplabel->width() > max_width) {
_label_point.setY(_label_point.y() + tmplabel->height() + 6);
_label_point.setX(2);
}
else {
}
tmplabel->move(_label_point);
tmplabel->show();
_friend_labels[tmplabel->Text()] = tmplabel;
_friend_label_keys.push_back(tmplabel->Text());
connect(tmplabel, &FriendLabel::sig_close, this, &AuthenFriend::SlotRemoveFriendLabel);
_label_point.setX(_label_point.x() + tmplabel->width() + 2);
if (_label_point.x() + MIN_APPLY_LABEL_ED_LEN > ui->gridWidget->width()) {
ui->lb_ed->move(2, _label_point.y() + tmplabel->height() + 2);
}
else {
ui->lb_ed->move(_label_point);
}
ui->lb_ed->clear();
if (ui->gridWidget->height() < _label_point.y() + tmplabel->height() + 2) {
ui->gridWidget->setFixedHeight(_label_point.y() + tmplabel->height() * 2 + 2);
}
}
void AuthenFriend::SlotLabelEnter()
{
if(ui->lb_ed->text().isEmpty()){
return;
}
addLabel(ui->lb_ed->text());
ui->input_tip_wid->hide();
}
void AuthenFriend::SlotRemoveFriendLabel(QString name)
{
qDebug() << "receive close signal";
_label_point.setX(2);
_label_point.setY(6);
auto find_iter = _friend_labels.find(name);
if(find_iter == _friend_labels.end()){
return;
}
auto find_key = _friend_label_keys.end();
for(auto iter = _friend_label_keys.begin(); iter != _friend_label_keys.end();
iter++){
if(*iter == name){
find_key = iter;
break;
}
}
if(find_key != _friend_label_keys.end()){
_friend_label_keys.erase(find_key);
}
delete find_iter.value();
_friend_labels.erase(find_iter);
resetLabels();
auto find_add = _add_labels.find(name);
if(find_add == _add_labels.end()){
return;
}
find_add.value()->ResetNormalState();
}
//点击标已有签添加或删除新联系人的标签
void AuthenFriend::SlotChangeFriendLabelByTip(QString lbtext, ClickLbState state)
{
auto find_iter = _add_labels.find(lbtext);
if(find_iter == _add_labels.end()){
return;
}
if(state == ClickLbState::Selected){
//编写添加逻辑
addLabel(lbtext);
return;
}
if(state == ClickLbState::Normal){
//编写删除逻辑
SlotRemoveFriendLabel(lbtext);
return;
}
}
void AuthenFriend::SlotLabelTextChange(const QString& text)
{
if (text.isEmpty()) {
ui->tip_lb->setText("");
ui->input_tip_wid->hide();
return;
}
auto iter = std::find(_tip_data.begin(), _tip_data.end(), text);
if (iter == _tip_data.end()) {
auto new_text = add_prefix + text;
ui->tip_lb->setText(new_text);
ui->input_tip_wid->show();
return;
}
ui->tip_lb->setText(text);
ui->input_tip_wid->show();
}
void AuthenFriend::SlotLabelEditFinished()
{
ui->input_tip_wid->hide();
}
void AuthenFriend::SlotAddFirendLabelByClickTip(QString text)
{
int index = text.indexOf(add_prefix);
if (index != -1) {
text = text.mid(index + add_prefix.length());
}
addLabel(text);
//标签展示栏也增加一个标签, 并设置绿色选中
if (index != -1) {
_tip_data.push_back(text);
}
auto* lb = new ClickedLabel(ui->lb_list);
lb->SetState("normal", "hover", "pressed", "selected_normal",
"selected_hover", "selected_pressed");
lb->setObjectName("tipslb");
lb->setText(text);
connect(lb, &ClickedLabel::clicked, this, &AuthenFriend::SlotChangeFriendLabelByTip);
qDebug() << "ui->lb_list->width() is " << ui->lb_list->width();
qDebug() << "_tip_cur_point.x() is " << _tip_cur_point.x();
QFontMetrics fontMetrics(lb->font()); // 获取QLabel控件的字体信息
int textWidth = fontMetrics.width(lb->text()); // 获取文本的宽度
int textHeight = fontMetrics.height(); // 获取文本的高度
qDebug() << "textWidth is " << textWidth;
if (_tip_cur_point.x() + textWidth+ tip_offset+3 > ui->lb_list->width()) {
_tip_cur_point.setX(5);
_tip_cur_point.setY(_tip_cur_point.y() + textHeight + 15);
}
auto next_point = _tip_cur_point;
AddTipLbs(lb, _tip_cur_point, next_point, textWidth,textHeight);
_tip_cur_point = next_point;
int diff_height = next_point.y() + textHeight + tip_offset - ui->lb_list->height();
ui->lb_list->setFixedHeight(next_point.y() + textHeight + tip_offset);
lb->SetCurState(ClickLbState::Selected);
ui->scrollcontent->setFixedHeight(ui->scrollcontent->height()+ diff_height );
}
void AuthenFriend::SlotApplySure()
{
qDebug() << "Slot Apply Sure ";
//添加发送逻辑
QJsonObject jsonObj;
auto uid = UserMgr::GetInstance()->GetUid();
jsonObj["fromuid"] = uid;
jsonObj["touid"] = _apply_info->_uid;
QString back_name = "";
if(ui->back_ed->text().isEmpty()){
back_name = ui->back_ed->placeholderText();
}else{
back_name = ui->back_ed->text();
}
jsonObj["back"] = back_name;
QJsonDocument doc(jsonObj);
QByteArray jsonData = doc.toJson(QJsonDocument::Compact);
//发送tcp请求给chat server
emit TcpMgr::GetInstance()->sig_send_data(ReqId::ID_AUTH_FRIEND_REQ, jsonData);
this->hide();
deleteLater();
}
void AuthenFriend::SlotApplyCancel()
{
this->hide();
deleteLater();
}
源码连接
https://gitee.com/secondtonone1/llfcchat
视频连接
https://www.bilibili.com/video/BV1Ex4y1s7cq/
day29-好友认证和聊天通信
好友认证
服务器响应
服务器接受客户端发送过来的好友认证请求
cpp展开代码void LogicSystem::AuthFriendApply(std::shared_ptr<CSession> session, const short& msg_id, const string& msg_data) {
Json::Reader reader;
Json::Value root;
reader.parse(msg_data, root);
auto uid = root["fromuid"].asInt();
auto touid = root["touid"].asInt();
auto back_name = root["back"].asString();
std::cout << "from " << uid << " auth friend to " << touid << std::endl;
Json::Value rtvalue;
rtvalue["error"] = ErrorCodes::Success;
auto user_info = std::make_shared<UserInfo>();
std::string base_key = USER_BASE_INFO + std::to_string(touid);
bool b_info = GetBaseInfo(base_key, touid, user_info);
if (b_info) {
rtvalue["name"] = user_info->name;
rtvalue["nick"] = user_info->nick;
rtvalue["icon"] = user_info->icon;
rtvalue["sex"] = user_info->sex;
rtvalue["uid"] = touid;
}
else {
rtvalue["error"] = ErrorCodes::UidInvalid;
}
Defer defer([this, &rtvalue, session]() {
std::string return_str = rtvalue.toStyledString();
session->Send(return_str, ID_AUTH_FRIEND_RSP);
});
//先更新数据库
MysqlMgr::GetInstance()->AuthFriendApply(uid, touid);
//更新数据库添加好友
MysqlMgr::GetInstance()->AddFriend(uid, touid,back_name);
//查询redis 查找touid对应的server ip
auto to_str = std::to_string(touid);
auto to_ip_key = USERIPPREFIX + to_str;
std::string to_ip_value = "";
bool b_ip = RedisMgr::GetInstance()->Get(to_ip_key, to_ip_value);
if (!b_ip) {
return;
}
auto& cfg = ConfigMgr::Inst();
auto self_name = cfg["SelfServer"]["Name"];
//直接通知对方有认证通过消息
if (to_ip_value == self_name) {
auto session = UserMgr::GetInstance()->GetSession(touid);
if (session) {
//在内存中则直接发送通知对方
Json::Value notify;
notify["error"] = ErrorCodes::Success;
notify["fromuid"] = uid;
notify["touid"] = touid;
std::string base_key = USER_BASE_INFO + std::to_string(uid);
auto user_info = std::make_shared<UserInfo>();
bool b_info = GetBaseInfo(base_key, uid, user_info);
if (b_info) {
notify["name"] = user_info->name;
notify["nick"] = user_info->nick;
notify["icon"] = user_info->icon;
notify["sex"] = user_info->sex;
}
else {
notify["error"] = ErrorCodes::UidInvalid;
}
std::string return_str = notify.toStyledString();
session->Send(return_str, ID_NOTIFY_AUTH_FRIEND_REQ);
}
return ;
}
AuthFriendReq auth_req;
auth_req.set_fromuid(uid);
auth_req.set_touid(touid);
//发送通知
ChatGrpcClient::GetInstance()->NotifyAuthFriend(to_ip_value, auth_req);
}
将请求注册到map里,在LogicSystem::RegisterCallBacks中添加
cpp展开代码_fun_callbacks[ID_AUTH_FRIEND_REQ] = std::bind(&LogicSystem::AuthFriendApply, this,
placeholders::_1, placeholders::_2, placeholders::_3);
因为上面的逻辑调用了grpc发送通知,所以实现grpc发送认证通知的逻辑
cpp展开代码AuthFriendRsp ChatGrpcClient::NotifyAuthFriend(std::string server_ip, const AuthFriendReq& req) {
AuthFriendRsp rsp;
rsp.set_error(ErrorCodes::Success);
Defer defer([&rsp, &req]() {
rsp.set_fromuid(req.fromuid());
rsp.set_touid(req.touid());
});
auto find_iter = _pools.find(server_ip);
if (find_iter == _pools.end()) {
return rsp;
}
auto& pool = find_iter->second;
ClientContext context;
auto stub = pool->getConnection();
Status status = stub->NotifyAuthFriend(&context, req, &rsp);
Defer defercon([&stub, this, &pool]() {
pool->returnConnection(std::move(stub));
});
if (!status.ok()) {
rsp.set_error(ErrorCodes::RPCFailed);
return rsp;
}
return rsp;
}
这里注意,stub之所以能发送通知,是因为proto里定义了认证通知等服务,大家记得更新proto和我的一样,这事完整的proto
cpp展开代码syntax = "proto3";
package message;
service VarifyService {
rpc GetVarifyCode (GetVarifyReq) returns (GetVarifyRsp) {}
}
message GetVarifyReq {
string email = 1;
}
message GetVarifyRsp {
int32 error = 1;
string email = 2;
string code = 3;
}
message GetChatServerReq {
int32 uid = 1;
}
message GetChatServerRsp {
int32 error = 1;
string host = 2;
string port = 3;
string token = 4;
}
message LoginReq{
int32 uid = 1;
string token= 2;
}
message LoginRsp {
int32 error = 1;
int32 uid = 2;
string token = 3;
}
service StatusService {
rpc GetChatServer (GetChatServerReq) returns (GetChatServerRsp) {}
rpc Login(LoginReq) returns(LoginRsp);
}
message AddFriendReq {
int32 applyuid = 1;
string name = 2;
string desc = 3;
string icon = 4;
string nick = 5;
int32 sex = 6;
int32 touid = 7;
}
message AddFriendRsp {
int32 error = 1;
int32 applyuid = 2;
int32 touid = 3;
}
message RplyFriendReq {
int32 rplyuid = 1;
bool agree = 2;
int32 touid = 3;
}
message RplyFriendRsp {
int32 error = 1;
int32 rplyuid = 2;
int32 touid = 3;
}
message SendChatMsgReq{
int32 fromuid = 1;
int32 touid = 2;
string message = 3;
}
message SendChatMsgRsp{
int32 error = 1;
int32 fromuid = 2;
int32 touid = 3;
}
message AuthFriendReq{
int32 fromuid = 1;
int32 touid = 2;
}
message AuthFriendRsp{
int32 error = 1;
int32 fromuid = 2;
int32 touid = 3;
}
message TextChatMsgReq {
int32 fromuid = 1;
int32 touid = 2;
repeated TextChatData textmsgs = 3;
}
message TextChatData{
string msgid = 1;
string msgcontent = 2;
}
message TextChatMsgRsp {
int32 error = 1;
int32 fromuid = 2;
int32 touid = 3;
repeated TextChatData textmsgs = 4;
}
service ChatService {
rpc NotifyAddFriend(AddFriendReq) returns (AddFriendRsp) {}
rpc RplyAddFriend(RplyFriendReq) returns (RplyFriendRsp) {}
rpc SendChatMsg(SendChatMsgReq) returns (SendChatMsgRsp) {}
rpc NotifyAuthFriend(AuthFriendReq) returns (AuthFriendRsp) {}
rpc NotifyTextChatMsg(TextChatMsgReq) returns (TextChatMsgRsp){}
}
为了方便生成grpcpb文件,我写了一个start.bat批处理文件
bat展开代码@echo off set PROTOC_PATH=D:\cppsoft\grpc\visualpro\third_party\protobuf\Debug\protoc.exe set GRPC_PLUGIN_PATH=D:\cppsoft\grpc\visualpro\Debug\grpc_cpp_plugin.exe set PROTO_FILE=message.proto echo Generating gRPC code... %PROTOC_PATH% -I="." --grpc_out="." --plugin=protoc-gen-grpc="%GRPC_PLUGIN_PATH%" "%PROTO_FILE%" echo Generating C++ code... %PROTOC_PATH% --cpp_out=. "%PROTO_FILE%" echo Done.
执行这个批处理文件就能生成最新的pb文件了。
接下来实现grpc服务对认证的处理
cpp展开代码Status ChatServiceImpl::NotifyAuthFriend(ServerContext* context, const AuthFriendReq* request,
AuthFriendRsp* reply) {
//查找用户是否在本服务器
auto touid = request->touid();
auto fromuid = request->fromuid();
auto session = UserMgr::GetInstance()->GetSession(touid);
Defer defer([request, reply]() {
reply->set_error(ErrorCodes::Success);
reply->set_fromuid(request->fromuid());
reply->set_touid(request->touid());
});
//用户不在内存中则直接返回
if (session == nullptr) {
return Status::OK;
}
//在内存中则直接发送通知对方
Json::Value rtvalue;
rtvalue["error"] = ErrorCodes::Success;
rtvalue["fromuid"] = request->fromuid();
rtvalue["touid"] = request->touid();
std::string base_key = USER_BASE_INFO + std::to_string(fromuid);
auto user_info = std::make_shared<UserInfo>();
bool b_info = GetBaseInfo(base_key, fromuid, user_info);
if (b_info) {
rtvalue["name"] = user_info->name;
rtvalue["nick"] = user_info->nick;
rtvalue["icon"] = user_info->icon;
rtvalue["sex"] = user_info->sex;
}
else {
rtvalue["error"] = ErrorCodes::UidInvalid;
}
std::string return_str = rtvalue.toStyledString();
session->Send(return_str, ID_NOTIFY_AUTH_FRIEND_REQ);
return Status::OK;
}
所以A认证B为好友,A所在的服务器会给A回复一个ID_AUTH_FRIEND_RSP的消息,B所在的服务器会给B回复一个ID_NOTIFY_AUTH_FRIEND_REQ消息。
客户端响应
客户端需要响应服务器发过来的ID_AUTH_FRIEND_RSP和ID_NOTIFY_AUTH_FRIEND_REQ消息
客户端响应ID_AUTH_FRIEND_RSP,在initHandlers中添加
cpp展开代码_handlers.insert(ID_AUTH_FRIEND_RSP, [this](ReqId id, int len, QByteArray data) {
Q_UNUSED(len);
qDebug() << "handle id is " << id << " data is " << data;
// 将QByteArray转换为QJsonDocument
QJsonDocument jsonDoc = QJsonDocument::fromJson(data);
// 检查转换是否成功
if (jsonDoc.isNull()) {
qDebug() << "Failed to create QJsonDocument.";
return;
}
QJsonObject jsonObj = jsonDoc.object();
if (!jsonObj.contains("error")) {
int err = ErrorCodes::ERR_JSON;
qDebug() << "Auth Friend Failed, err is Json Parse Err" << err;
return;
}
int err = jsonObj["error"].toInt();
if (err != ErrorCodes::SUCCESS) {
qDebug() << "Auth Friend Failed, err is " << err;
return;
}
auto name = jsonObj["name"].toString();
auto nick = jsonObj["nick"].toString();
auto icon = jsonObj["icon"].toString();
auto sex = jsonObj["sex"].toInt();
auto uid = jsonObj["uid"].toInt();
auto rsp = std::make_shared<AuthRsp>(uid, name, nick, icon, sex);
emit sig_auth_rsp(rsp);
qDebug() << "Auth Friend Success " ;
});
在initHandlers中添加ID_NOTIFY_AUTH_FRIEND_REQ
cpp展开代码_handlers.insert(ID_NOTIFY_AUTH_FRIEND_REQ, [this](ReqId id, int len, QByteArray data) {
Q_UNUSED(len);
qDebug() << "handle id is " << id << " data is " << data;
// 将QByteArray转换为QJsonDocument
QJsonDocument jsonDoc = QJsonDocument::fromJson(data);
// 检查转换是否成功
if (jsonDoc.isNull()) {
qDebug() << "Failed to create QJsonDocument.";
return;
}
QJsonObject jsonObj = jsonDoc.object();
if (!jsonObj.contains("error")) {
int err = ErrorCodes::ERR_JSON;
qDebug() << "Auth Friend Failed, err is " << err;
return;
}
int err = jsonObj["error"].toInt();
if (err != ErrorCodes::SUCCESS) {
qDebug() << "Auth Friend Failed, err is " << err;
return;
}
int from_uid = jsonObj["fromuid"].toInt();
QString name = jsonObj["name"].toString();
QString nick = jsonObj["nick"].toString();
QString icon = jsonObj["icon"].toString();
int sex = jsonObj["sex"].toInt();
auto auth_info = std::make_shared<AuthInfo>(from_uid,name,
nick, icon, sex);
emit sig_add_auth_friend(auth_info);
});
客户端ChatDialog中添加对sig_add_auth_friend响应,实现添加好友到聊天列表中
cpp展开代码void ChatDialog::slot_add_auth_friend(std::shared_ptr<AuthInfo> auth_info) {
qDebug() << "receive slot_add_auth__friend uid is " << auth_info->_uid
<< " name is " << auth_info->_name << " nick is " << auth_info->_nick;
//判断如果已经是好友则跳过
auto bfriend = UserMgr::GetInstance()->CheckFriendById(auth_info->_uid);
if(bfriend){
return;
}
UserMgr::GetInstance()->AddFriend(auth_info);
int randomValue = QRandomGenerator::global()->bounded(100); // 生成0到99之间的随机整数
int str_i = randomValue % strs.size();
int head_i = randomValue % heads.size();
int name_i = randomValue % names.size();
auto* chat_user_wid = new ChatUserWid();
auto user_info = std::make_shared<UserInfo>(auth_info);
chat_user_wid->SetInfo(user_info);
QListWidgetItem* item = new QListWidgetItem;
//qDebug()<<"chat_user_wid sizeHint is " << chat_user_wid->sizeHint();
item->setSizeHint(chat_user_wid->sizeHint());
ui->chat_user_list->insertItem(0, item);
ui->chat_user_list->setItemWidget(item, chat_user_wid);
_chat_items_added.insert(auth_info->_uid, item);
}
客户端ChatDialog中添加对sig_auth_rsp响应, 实现添加好友到聊天列表中
cpp展开代码void ChatDialog::slot_auth_rsp(std::shared_ptr<AuthRsp> auth_rsp)
{
qDebug() << "receive slot_auth_rsp uid is " << auth_rsp->_uid
<< " name is " << auth_rsp->_name << " nick is " << auth_rsp->_nick;
//判断如果已经是好友则跳过
auto bfriend = UserMgr::GetInstance()->CheckFriendById(auth_rsp->_uid);
if(bfriend){
return;
}
UserMgr::GetInstance()->AddFriend(auth_rsp);
int randomValue = QRandomGenerator::global()->bounded(100); // 生成0到99之间的随机整数
int str_i = randomValue % strs.size();
int head_i = randomValue % heads.size();
int name_i = randomValue % names.size();
auto* chat_user_wid = new ChatUserWid();
auto user_info = std::make_shared<UserInfo>(auth_rsp);
chat_user_wid->SetInfo(user_info);
QListWidgetItem* item = new QListWidgetItem;
//qDebug()<<"chat_user_wid sizeHint is " << chat_user_wid->sizeHint();
item->setSizeHint(chat_user_wid->sizeHint());
ui->chat_user_list->insertItem(0, item);
ui->chat_user_list->setItemWidget(item, chat_user_wid);
_chat_items_added.insert(auth_rsp->_uid, item);
}
因为认证对方为好友后,需要将申请页面的添加按钮变成已添加,所以ApplyFriendPage响应sig_auth_rsp信号
cpp展开代码void ApplyFriendPage::slot_auth_rsp(std::shared_ptr<AuthRsp> auth_rsp) {
auto uid = auth_rsp->_uid;
auto find_iter = _unauth_items.find(uid);
if (find_iter == _unauth_items.end()) {
return;
}
find_iter->second->ShowAddBtn(false);
}
同意并认证对方为好友后,也需要将对方添加到联系人列表,ContactUserList响应sig_auth_rsp信号
cpp展开代码void ContactUserList::slot_auth_rsp(std::shared_ptr<AuthRsp> auth_rsp)
{
qDebug() << "slot auth rsp called";
bool isFriend = UserMgr::GetInstance()->CheckFriendById(auth_rsp->_uid);
if(isFriend){
return;
}
// 在 groupitem 之后插入新项
int randomValue = QRandomGenerator::global()->bounded(100); // 生成0到99之间的随机整数
int str_i = randomValue%strs.size();
int head_i = randomValue%heads.size();
auto *con_user_wid = new ConUserItem();
con_user_wid->SetInfo(auth_rsp->_uid ,auth_rsp->_name, heads[head_i]);
QListWidgetItem *item = new QListWidgetItem;
//qDebug()<<"chat_user_wid sizeHint is " << chat_user_wid->sizeHint();
item->setSizeHint(con_user_wid->sizeHint());
// 获取 groupitem 的索引
int index = this->row(_groupitem);
// 在 groupitem 之后插入新项
this->insertItem(index + 1, item);
this->setItemWidget(item, con_user_wid);
}
登录加载好友
因为添加好友后,如果客户端重新登录,服务器LoginHandler需要加载好友列表,所以服务器要返回好友列表
cpp展开代码void LogicSystem::LoginHandler(shared_ptr<CSession> session, const short &msg_id, const string &msg_data) {
Json::Reader reader;
Json::Value root;
reader.parse(msg_data, root);
auto uid = root["uid"].asInt();
auto token = root["token"].asString();
std::cout << "user login uid is " << uid << " user token is "
<< token << endl;
Json::Value rtvalue;
Defer defer([this, &rtvalue, session]() {
std::string return_str = rtvalue.toStyledString();
session->Send(return_str, MSG_CHAT_LOGIN_RSP);
});
//从redis获取用户token是否正确
std::string uid_str = std::to_string(uid);
std::string token_key = USERTOKENPREFIX + uid_str;
std::string token_value = "";
bool success = RedisMgr::GetInstance()->Get(token_key, token_value);
if (!success) {
rtvalue["error"] = ErrorCodes::UidInvalid;
return ;
}
if (token_value != token) {
rtvalue["error"] = ErrorCodes::TokenInvalid;
return ;
}
rtvalue["error"] = ErrorCodes::Success;
std::string base_key = USER_BASE_INFO + uid_str;
auto user_info = std::make_shared<UserInfo>();
bool b_base = GetBaseInfo(base_key, uid, user_info);
if (!b_base) {
rtvalue["error"] = ErrorCodes::UidInvalid;
return;
}
rtvalue["uid"] = uid;
rtvalue["pwd"] = user_info->pwd;
rtvalue["name"] = user_info->name;
rtvalue["email"] = user_info->email;
rtvalue["nick"] = user_info->nick;
rtvalue["desc"] = user_info->desc;
rtvalue["sex"] = user_info->sex;
rtvalue["icon"] = user_info->icon;
//从数据库获取申请列表
std::vector<std::shared_ptr<ApplyInfo>> apply_list;
auto b_apply = GetFriendApplyInfo(uid,apply_list);
if (b_apply) {
for (auto & apply : apply_list) {
Json::Value obj;
obj["name"] = apply->_name;
obj["uid"] = apply->_uid;
obj["icon"] = apply->_icon;
obj["nick"] = apply->_nick;
obj["sex"] = apply->_sex;
obj["desc"] = apply->_desc;
obj["status"] = apply->_status;
rtvalue["apply_list"].append(obj);
}
}
//获取好友列表
std::vector<std::shared_ptr<UserInfo>> friend_list;
bool b_friend_list = GetFriendList(uid, friend_list);
for (auto& friend_ele : friend_list) {
Json::Value obj;
obj["name"] = friend_ele->name;
obj["uid"] = friend_ele->uid;
obj["icon"] = friend_ele->icon;
obj["nick"] = friend_ele->nick;
obj["sex"] = friend_ele->sex;
obj["desc"] = friend_ele->desc;
obj["back"] = friend_ele->back;
rtvalue["friend_list"].append(obj);
}
auto server_name = ConfigMgr::Inst().GetValue("SelfServer", "Name");
//将登录数量增加
auto rd_res = RedisMgr::GetInstance()->HGet(LOGIN_COUNT, server_name);
int count = 0;
if (!rd_res.empty()) {
count = std::stoi(rd_res);
}
count++;
auto count_str = std::to_string(count);
RedisMgr::GetInstance()->HSet(LOGIN_COUNT, server_name, count_str);
//session绑定用户uid
session->SetUserId(uid);
//为用户设置登录ip server的名字
std::string ipkey = USERIPPREFIX + uid_str;
RedisMgr::GetInstance()->Set(ipkey, server_name);
//uid和session绑定管理,方便以后踢人操作
UserMgr::GetInstance()->SetUserSession(uid, session);
return;
}
客户端在initHandlers中加载聊天列表
cpp展开代码_handlers.insert(ID_CHAT_LOGIN_RSP, [this](ReqId id, int len, QByteArray data){
Q_UNUSED(len);
qDebug()<< "handle id is "<< id ;
// 将QByteArray转换为QJsonDocument
QJsonDocument jsonDoc = QJsonDocument::fromJson(data);
// 检查转换是否成功
if(jsonDoc.isNull()){
qDebug() << "Failed to create QJsonDocument.";
return;
}
QJsonObject jsonObj = jsonDoc.object();
qDebug()<< "data jsonobj is " << jsonObj ;
if(!jsonObj.contains("error")){
int err = ErrorCodes::ERR_JSON;
qDebug() << "Login Failed, err is Json Parse Err" << err ;
emit sig_login_failed(err);
return;
}
int err = jsonObj["error"].toInt();
if(err != ErrorCodes::SUCCESS){
qDebug() << "Login Failed, err is " << err ;
emit sig_login_failed(err);
return;
}
auto uid = jsonObj["uid"].toInt();
auto name = jsonObj["name"].toString();
auto nick = jsonObj["nick"].toString();
auto icon = jsonObj["icon"].toString();
auto sex = jsonObj["sex"].toInt();
auto user_info = std::make_shared<UserInfo>(uid, name, nick, icon, sex);
UserMgr::GetInstance()->SetUserInfo(user_info);
UserMgr::GetInstance()->SetToken(jsonObj["token"].toString());
if(jsonObj.contains("apply_list")){
UserMgr::GetInstance()->AppendApplyList(jsonObj["apply_list"].toArray());
}
//添加好友列表
if (jsonObj.contains("friend_list")) {
UserMgr::GetInstance()->AppendFriendList(jsonObj["friend_list"].toArray());
}
emit sig_swich_chatdlg();
});
好友聊天
客户端发送聊天消息
客户端发送聊天消息,在输入框输入消息后,点击发送回执行下面的槽函数
cpp展开代码void ChatPage::on_send_btn_clicked()
{
if (_user_info == nullptr) {
qDebug() << "friend_info is empty";
return;
}
auto user_info = UserMgr::GetInstance()->GetUserInfo();
auto pTextEdit = ui->chatEdit;
ChatRole role = ChatRole::Self;
QString userName = user_info->_name;
QString userIcon = user_info->_icon;
const QVector<MsgInfo>& msgList = pTextEdit->getMsgList();
QJsonObject textObj;
QJsonArray textArray;
int txt_size = 0;
for(int i=0; i<msgList.size(); ++i)
{
//消息内容长度不合规就跳过
if(msgList[i].content.length() > 1024){
continue;
}
QString type = msgList[i].msgFlag;
ChatItemBase *pChatItem = new ChatItemBase(role);
pChatItem->setUserName(userName);
pChatItem->setUserIcon(QPixmap(userIcon));
QWidget *pBubble = nullptr;
if(type == "text")
{
//生成唯一id
QUuid uuid = QUuid::createUuid();
//转为字符串
QString uuidString = uuid.toString();
pBubble = new TextBubble(role, msgList[i].content);
if(txt_size + msgList[i].content.length()> 1024){
textObj["fromuid"] = user_info->_uid;
textObj["touid"] = _user_info->_uid;
textObj["text_array"] = textArray;
QJsonDocument doc(textObj);
QByteArray jsonData = doc.toJson(QJsonDocument::Compact);
//发送并清空之前累计的文本列表
txt_size = 0;
textArray = QJsonArray();
textObj = QJsonObject();
//发送tcp请求给chat server
emit TcpMgr::GetInstance()->sig_send_data(ReqId::ID_TEXT_CHAT_MSG_REQ, jsonData);
}
//将bubble和uid绑定,以后可以等网络返回消息后设置是否送达
//_bubble_map[uuidString] = pBubble;
txt_size += msgList[i].content.length();
QJsonObject obj;
QByteArray utf8Message = msgList[i].content.toUtf8();
obj["content"] = QString::fromUtf8(utf8Message);
obj["msgid"] = uuidString;
textArray.append(obj);
auto txt_msg = std::make_shared<TextChatData>(uuidString, obj["content"].toString(),
user_info->_uid, _user_info->_uid);
emit sig_append_send_chat_msg(txt_msg);
}
else if(type == "image")
{
pBubble = new PictureBubble(QPixmap(msgList[i].content) , role);
}
else if(type == "file")
{
}
//发送消息
if(pBubble != nullptr)
{
pChatItem->setWidget(pBubble);
ui->chat_data_list->appendChatItem(pChatItem);
}
}
qDebug() << "textArray is " << textArray ;
//发送给服务器
textObj["text_array"] = textArray;
textObj["fromuid"] = user_info->_uid;
textObj["touid"] = _user_info->_uid;
QJsonDocument doc(textObj);
QByteArray jsonData = doc.toJson(QJsonDocument::Compact);
//发送并清空之前累计的文本列表
txt_size = 0;
textArray = QJsonArray();
textObj = QJsonObject();
//发送tcp请求给chat server
emit TcpMgr::GetInstance()->sig_send_data(ReqId::ID_TEXT_CHAT_MSG_REQ, jsonData);
}
TcpMgr响应发送信号
cpp展开代码void TcpMgr::slot_send_data(ReqId reqId, QByteArray dataBytes)
{
uint16_t id = reqId;
// 计算长度(使用网络字节序转换)
quint16 len = static_cast<quint16>(dataBytes.length());
// 创建一个QByteArray用于存储要发送的所有数据
QByteArray block;
QDataStream out(&block, QIODevice::WriteOnly);
// 设置数据流使用网络字节序
out.setByteOrder(QDataStream::BigEndian);
// 写入ID和长度
out << id << len;
// 添加字符串数据
block.append(dataBytes);
// 发送数据
_socket.write(block);
qDebug() << "tcp mgr send byte data is " << block ;
}
服务器响应
服务器响应客户端发送过来文本消息,在initHandlers中添加处理文本消息的逻辑
cpp展开代码void LogicSystem::DealChatTextMsg(std::shared_ptr<CSession> session, const short& msg_id, const string& msg_data) {
Json::Reader reader;
Json::Value root;
reader.parse(msg_data, root);
auto uid = root["fromuid"].asInt();
auto touid = root["touid"].asInt();
const Json::Value arrays = root["text_array"];
Json::Value rtvalue;
rtvalue["error"] = ErrorCodes::Success;
rtvalue["text_array"] = arrays;
rtvalue["fromuid"] = uid;
rtvalue["touid"] = touid;
Defer defer([this, &rtvalue, session]() {
std::string return_str = rtvalue.toStyledString();
session->Send(return_str, ID_TEXT_CHAT_MSG_RSP);
});
//查询redis 查找touid对应的server ip
auto to_str = std::to_string(touid);
auto to_ip_key = USERIPPREFIX + to_str;
std::string to_ip_value = "";
bool b_ip = RedisMgr::GetInstance()->Get(to_ip_key, to_ip_value);
if (!b_ip) {
return;
}
auto& cfg = ConfigMgr::Inst();
auto self_name = cfg["SelfServer"]["Name"];
//直接通知对方有认证通过消息
if (to_ip_value == self_name) {
auto session = UserMgr::GetInstance()->GetSession(touid);
if (session) {
//在内存中则直接发送通知对方
std::string return_str = rtvalue.toStyledString();
session->Send(return_str, ID_NOTIFY_TEXT_CHAT_MSG_REQ);
}
return ;
}
TextChatMsgReq text_msg_req;
text_msg_req.set_fromuid(uid);
text_msg_req.set_touid(touid);
for (const auto& txt_obj : arrays) {
auto content = txt_obj["content"].asString();
auto msgid = txt_obj["msgid"].asString();
std::cout << "content is " << content << std::endl;
std::cout << "msgid is " << msgid << std::endl;
auto *text_msg = text_msg_req.add_textmsgs();
text_msg->set_msgid(msgid);
text_msg->set_msgcontent(content);
}
//发送通知 todo...
ChatGrpcClient::GetInstance()->NotifyTextChatMsg(to_ip_value, text_msg_req, rtvalue);
}
服务器实现发送消息的rpc客户端
cpp展开代码TextChatMsgRsp ChatGrpcClient::NotifyTextChatMsg(std::string server_ip,
const TextChatMsgReq& req, const Json::Value& rtvalue) {
TextChatMsgRsp rsp;
rsp.set_error(ErrorCodes::Success);
Defer defer([&rsp, &req]() {
rsp.set_fromuid(req.fromuid());
rsp.set_touid(req.touid());
for (const auto& text_data : req.textmsgs()) {
TextChatData* new_msg = rsp.add_textmsgs();
new_msg->set_msgid(text_data.msgid());
new_msg->set_msgcontent(text_data.msgcontent());
}
});
auto find_iter = _pools.find(server_ip);
if (find_iter == _pools.end()) {
return rsp;
}
auto& pool = find_iter->second;
ClientContext context;
auto stub = pool->getConnection();
Status status = stub->NotifyTextChatMsg(&context, req, &rsp);
Defer defercon([&stub, this, &pool]() {
pool->returnConnection(std::move(stub));
});
if (!status.ok()) {
rsp.set_error(ErrorCodes::RPCFailed);
return rsp;
}
return rsp;
}
服务器实现rpc服务端处理消息通知
cpp展开代码Status ChatServiceImpl::NotifyTextChatMsg(::grpc::ServerContext* context,
const TextChatMsgReq* request, TextChatMsgRsp* reply) {
//查找用户是否在本服务器
auto touid = request->touid();
auto session = UserMgr::GetInstance()->GetSession(touid);
reply->set_error(ErrorCodes::Success);
//用户不在内存中则直接返回
if (session == nullptr) {
return Status::OK;
}
//在内存中则直接发送通知对方
Json::Value rtvalue;
rtvalue["error"] = ErrorCodes::Success;
rtvalue["fromuid"] = request->fromuid();
rtvalue["touid"] = request->touid();
//将聊天数据组织为数组
Json::Value text_array;
for (auto& msg : request->textmsgs()) {
Json::Value element;
element["content"] = msg.msgcontent();
element["msgid"] = msg.msgid();
text_array.append(element);
}
rtvalue["text_array"] = text_array;
std::string return_str = rtvalue.toStyledString();
session->Send(return_str, ID_NOTIFY_TEXT_CHAT_MSG_REQ);
return Status::OK;
}
客户端响应通知
客户端响应服务器返回的消息,包括两种:
- A给B发送文本消息,A所在的服务器会给A发送ID_TEXT_CHAT_MSG_RSP消息。
- B所在的服务器会通知B,告诉B有来自A的消息,通知消息为ID_NOTIFY_TEXT_CHAT_MSG_REQ
所以在tcpmgr的initHandlers中添加响应ID_TEXT_CHAT_MSG_RSP消息
cpp展开代码_handlers.insert(ID_TEXT_CHAT_MSG_RSP, [this](ReqId id, int len, QByteArray data) {
Q_UNUSED(len);
qDebug() << "handle id is " << id << " data is " << data;
// 将QByteArray转换为QJsonDocument
QJsonDocument jsonDoc = QJsonDocument::fromJson(data);
// 检查转换是否成功
if (jsonDoc.isNull()) {
qDebug() << "Failed to create QJsonDocument.";
return;
}
QJsonObject jsonObj = jsonDoc.object();
if (!jsonObj.contains("error")) {
int err = ErrorCodes::ERR_JSON;
qDebug() << "Chat Msg Rsp Failed, err is Json Parse Err" << err;
return;
}
int err = jsonObj["error"].toInt();
if (err != ErrorCodes::SUCCESS) {
qDebug() << "Chat Msg Rsp Failed, err is " << err;
return;
}
qDebug() << "Receive Text Chat Rsp Success " ;
//ui设置送达等标记 todo...
});
在TcpMgr的initHandlers中添加ID_NOTIFY_TEXT_CHAT_MSG_REQ
cpp展开代码_handlers.insert(ID_NOTIFY_TEXT_CHAT_MSG_REQ, [this](ReqId id, int len, QByteArray data) {
Q_UNUSED(len);
qDebug() << "handle id is " << id << " data is " << data;
// 将QByteArray转换为QJsonDocument
QJsonDocument jsonDoc = QJsonDocument::fromJson(data);
// 检查转换是否成功
if (jsonDoc.isNull()) {
qDebug() << "Failed to create QJsonDocument.";
return;
}
QJsonObject jsonObj = jsonDoc.object();
if (!jsonObj.contains("error")) {
int err = ErrorCodes::ERR_JSON;
qDebug() << "Notify Chat Msg Failed, err is Json Parse Err" << err;
return;
}
int err = jsonObj["error"].toInt();
if (err != ErrorCodes::SUCCESS) {
qDebug() << "Notify Chat Msg Failed, err is " << err;
return;
}
qDebug() << "Receive Text Chat Notify Success " ;
auto msg_ptr = std::make_shared<TextChatMsg>(jsonObj["fromuid"].toInt(),
jsonObj["touid"].toInt(),jsonObj["text_array"].toArray());
emit sig_text_chat_msg(msg_ptr);
});
客户端ChatDialog添加对sig_text_chat_msg的响应
cpp展开代码void ChatDialog::slot_text_chat_msg(std::shared_ptr<TextChatMsg> msg)
{
auto find_iter = _chat_items_added.find(msg->_from_uid);
if(find_iter != _chat_items_added.end()){
qDebug() << "set chat item msg, uid is " << msg->_from_uid;
QWidget *widget = ui->chat_user_list->itemWidget(find_iter.value());
auto chat_wid = qobject_cast<ChatUserWid*>(widget);
if(!chat_wid){
return;
}
chat_wid->updateLastMsg(msg->_chat_msgs);
//更新当前聊天页面记录
UpdateChatMsg(msg->_chat_msgs);
UserMgr::GetInstance()->AppendFriendChatMsg(msg->_from_uid,msg->_chat_msgs);
return;
}
//如果没找到,则创建新的插入listwidget
auto* chat_user_wid = new ChatUserWid();
//查询好友信息
auto fi_ptr = UserMgr::GetInstance()->GetFriendById(msg->_from_uid);
chat_user_wid->SetInfo(fi_ptr);
QListWidgetItem* item = new QListWidgetItem;
//qDebug()<<"chat_user_wid sizeHint is " << chat_user_wid->sizeHint();
item->setSizeHint(chat_user_wid->sizeHint());
chat_user_wid->updateLastMsg(msg->_chat_msgs);
UserMgr::GetInstance()->AppendFriendChatMsg(msg->_from_uid,msg->_chat_msgs);
ui->chat_user_list->insertItem(0, item);
ui->chat_user_list->setItemWidget(item, chat_user_wid);
_chat_items_added.insert(msg->_from_uid, item);
}
效果展示
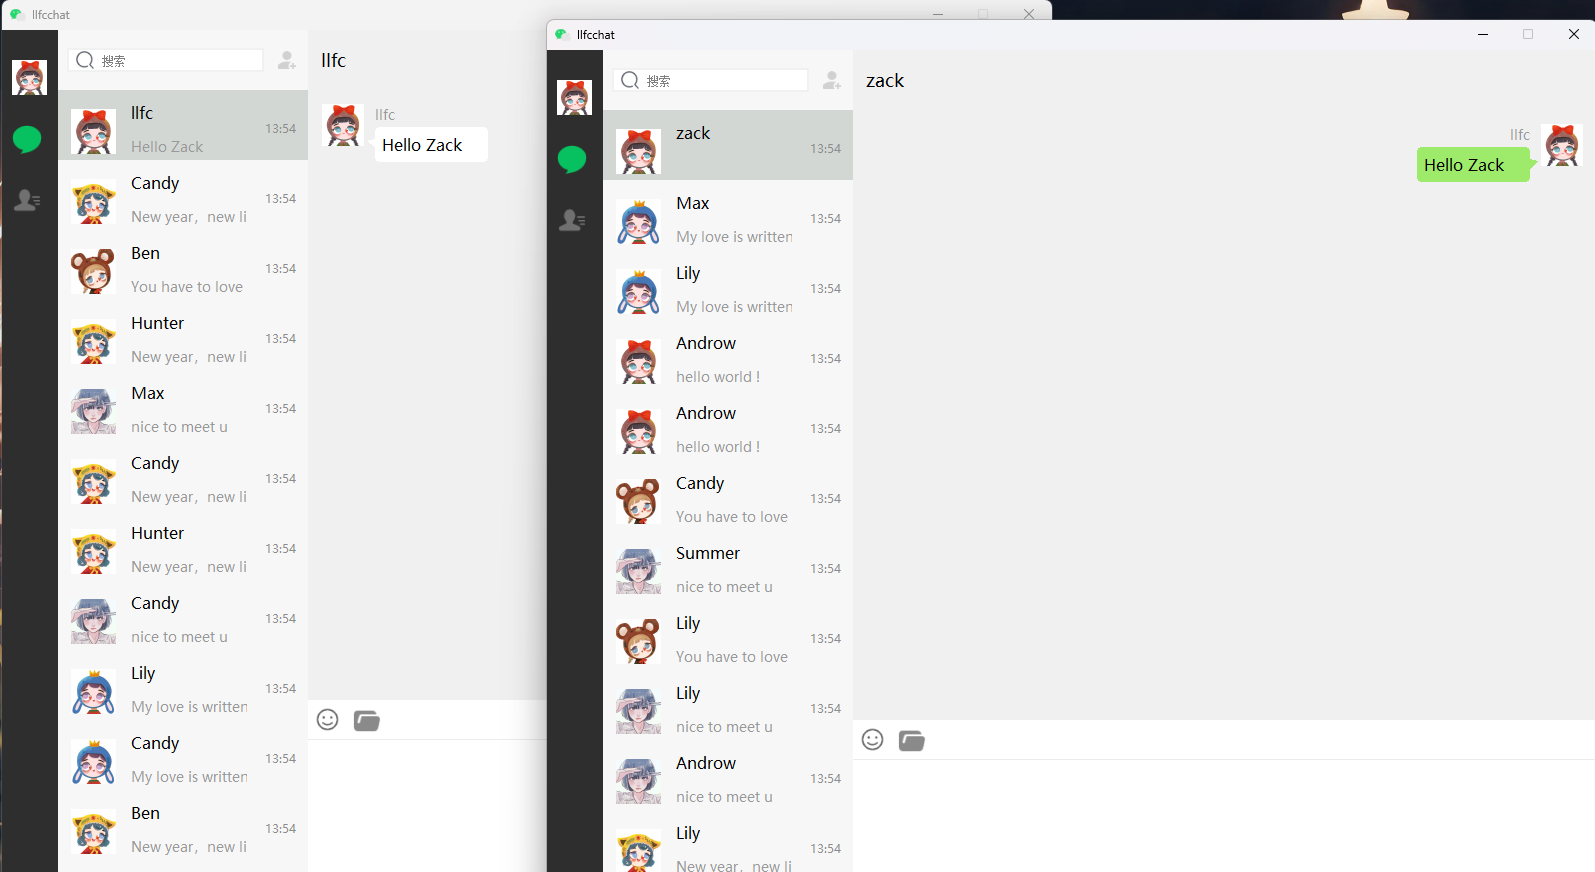
源码连接
https://gitee.com/secondtonone1/llfcchat
视频连接
https://www.bilibili.com/video/BV1ib421J745/?vd_source=8be9e83424c2ed2c9b2a3ed1d01385e9
day30-项目难点和面试技巧
简介
项目第一季完结了,本文做一个整理,介绍面试将被问到的相关问题和技术难点,以及第二季将涉及的开发内容。
下面先介绍项目如何描述。
项目如何描述
按照HR搜索简历的方式,基本都是采用关键字搜索,所以要在简历中暴露项目中的技术亮点。
为了让面试官通过简历快速的了解项目和采用的技术,需在项目介绍时融入技术细节,让项目描述更饱满一点。
可增加个人业绩或者个人成长,让面试官了解到项目的意义等。
所以综上所述,简单做个总结,一个项目的描述需包含如下几点:
- 项目描述
- 技术亮点
- 项目价值
项目描述
这是一个全栈的即时通讯项目,前端基于QT实现气泡聊天对话框,通过QListWidget实现好友列表,利用GridLayout和QPainter封装气泡聊天框组件,基于QT network模块封装http和tcp服务。支持添加好友,好友通信,聊天记录展示等功能,仿微信布局并使用qss优化界面
后端采用分布式设计,分为GateServer网关服务,多个ChatServer聊天服务,StatusServer状态服务以及VerifyServer验证服务。
各服务通过grpc通信,支持断线重连。GateServer网关对外采用http服务,负责处理用户登录和注册功能。登录时GateServer从StatusServer查询聊天服务达到负载均衡,ChatServer聊天服务采用asio实现tcp可靠长链接异步通信和转发, 采用多线程模式封装iocontext池提升并发性能。数据存储采用mysql服务,并基于mysqlconnector库封装连接池,同时封装redis连接池处理缓存数据,以及grpc连接池保证多服务并发访问。
经测试单服务器支持8000连接,多服务器分布部署可支持1W~2W活跃用户。
技术点
asio 网络库,grpc,Node.js,多线程,Redis, MySql,Qt 信号槽,网络编程,设计模式
项目意义
关于项目意义可结合自身讨论,比如项目解决了高并发场景下单个服务连接数吃紧的情况,提升了自己对并发和异步的认知和处理能力等。
考察点
1 如何利用asio实现的tcp服务
利用asio 的多线程模式,根据cpu核数封装iocontext连接池,每个连接池跑在独立线程,采用异步async_read和assync_write方式读写,通过消息回调完成数据收发。整个项目采用的网络模式是Proactor模式,每个连接通过Session类管理,通过智能指针管理Session,b保证回调之前Session可用,底层绑定用户id和session关联,回调函数可根据session反向查找用户进行消息推送。客户端和服务器通信采用json, 通过tlv方式(消息头(消息id+消息长度)+消息内容)封装消息包防止粘包。通过心跳机制检测连接可用性。
2 如何保证服务高可用
- 故障检测与自动恢复:
- 实施监控系统,实时检测服务的健康状况。
- 配置自动重启或故障转移机制,确保在故障发生时能够迅速恢复服务。
- 分布式架构:
- 采用微服务架构,将应用拆分为多个独立的服务,降低单个服务故障对整体系统的影响。
- 数据备份与恢复:
- 定期备份数据,并进行恢复演练,确保在数据丢失或损坏时能够快速恢复。
- 多活部署:
- 在不同地理位置部署多个活跃的数据中心,确保在某个数据中心发生故障时,其他数据中心可以继续提供服务。
3 为何封装Mysql连接池
首先多个线程使用同一个mysql连接是不安全的,所以要为每个线程分配独立连接,而连接数不能随着线程数无线增加,所以考虑连接池,每个线程想要操作mysql的时候从连接池取出连接进行数据访问。
Mysql连接池封装包括Mgr管理层和Dao数据访问层,Mgr管理层是单例模式,Dao层包含了一个连接池,采用生产者消费者模式管理可用连接,并且通过心跳定时访问mysql保活连接。
4 如何测试性能
测试性能分为三个方面:
-
压力测试,测试服务器连接上限
-
测试一定连接数下,收发效率稳定性
-
采用pingpong协议,收发效率稳定在10ms下,连接数上限
压力测试,看服务器性能,客户端初始多个线程定时间隔连接,单服务节点连接上限2w以上稳定连接,并未出现掉线情况
测试稳定性,单服务节点连接数1W情况下,收发稳定未出现丢包和断线,并且延迟稳定在10ms
保证10ms延迟情况下,增加连接数,测下连接数上限,这个看机器性能,8000~2W连接不等。
5 用到哪些设计模式和思想
- Acto模式,逻辑解耦
- 生产者消费者模式(涉及线程池)
- 单例模式(网络管理和数据库管理类)
- RAII思想(defer 回收连接)
- 代理模式(数据库,redis等通过代理对接应用层调用,底层线程池隐藏技术细节)
- MVC控制思想,客户端通过MVC三层结构设计
- 线程分离,网络线程,数据处理线程,以及UI渲染线程分离
- 心跳服务
- 数据序列化压缩发送(Protobuf,Json)
- 队列解耦合,服务器采用发送队列保证异步顺序,通过接受队列缓存收到数据,通过逻辑队列处理数据。
- 分布式设计,多服务通过grpc通信,支持断线重连
- C++11 现代化技术,智能指针,伪闭包,模板类型推导,线程池,future, promise等
6 描述线程池封装
描述线程池封装,线程池采用C++ 11 风格编写,整体来说线程池通过单例封装,内部初始化N个线程,采用生产者消费者方式管理线程,包含任务队列,任务队列采用package_task打包存储,提供对外接口commit提交任务,采用bind语法实现任务提交在commit内部自行绑定,通过智能指针伪闭包方式保证任务生命周期。同时使用C++ 11 future特性,允许外部等待任务执行完成。
7 为什么要设计心跳?
在网络情况下,会出现各种各样的中断,有些是网络不稳定或者客户端主动断开连接,这种服务器是可以检测到的。
PC拔掉网线,还有一种情况客户端突然崩溃,有时候服务器会检测不到断开连接,那么你这个用户就相当于僵尸连接。
当服务器有太多僵尸连接就会造成服务器性能的损耗。
另外心跳还有一个作用,保证连接持续可用,比如mysql,redis这种连接池,如果不设计心跳,
时间过长没有访问的时候连接会自动断开。
第二季待完成内容
第二季半年后开发并更新视频
待开发内容
-
未实现资源服务器及断点续传
-
客户端和聊天服务的心跳机制
-
实现断线重连和踢人操作(未完全实现,目前仅支持客户端重新登录,服务器重新绑定连接,原连接未踢掉)
-
未完整实现用户离线后数据清空操作
-
客户端未实现用户信息编辑,头像上传等UI和逻辑
-
未实现文件,图片,语音等信息传输
-
未实现语音,视频实时通信,涉及音视频编程
day31-文件传输
title: 聊天项目(31) 文件传输 date: 2024-11-24 18:04:18 tags: [C++聊天项目] categories: [C++聊天项目]
设计思路
文件传输必须满足以下几个条件:
- 限制文件大小(不超过
4G) - 长连接传输(效率高,支持大文件)
- 客户端和服务器都知道传输进度,以保证支持断点续传(后续实现)
- 先实现服务器单线程处理版本,在实现多线程处理版本
如遇问题可添加我的微信

也可以去我得哔哩哔哩主页查看项目视频详细讲解
B站主页 https://space.bilibili.com/271469206
客户端
客户端还是采用聊天项目客户端封装的TcpClient, 只是修改了发送逻辑
cpp展开代码//发送数据槽函数
void TcpClient::slot_send_msg(quint16 id, QByteArray body)
{
//如果连接异常则直接返回
if(_socket->state() != QAbstractSocket::ConnectedState){
emit sig_net_error(QString("断开连接无法发送"));
return;
}
//获取body的长度
quint32 bodyLength = body.size();
//创建字节数组
QByteArray data;
//绑定字节数组
QDataStream stream(&data, QIODevice::WriteOnly);
//设置大端模式
stream.setByteOrder(QDataStream::BigEndian);
//写入ID
stream << id;
//写入长度
stream << bodyLength;
//写入包体
data.append(body);
//发送消息
_socket->write(data);
}
这里着重叙述以下,发送的格式是id + bodyLength + 文件流数据
其中id 为2字节,bodyLength为4字节,之后就是传输的文件流
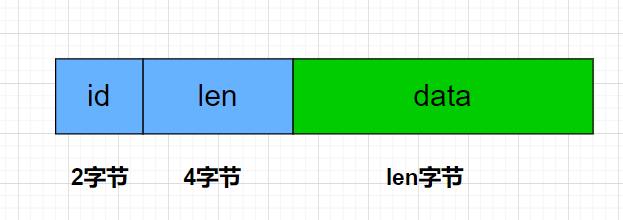
slot_send_msg是槽函数,和 sig_send_msg信号连接
cpp展开代码 //连接 发送数据信号和槽函数
connect(this, &TcpClient::sig_send_msg, this, &TcpClient::slot_send_msg);
客户端在发送数据的时候调用
cpp展开代码void TcpClient::sendMsg(quint16 id,QByteArray data)
{
//发送信号,统一交给槽函数处理,这么做的好处是多线程安全
emit sig_send_msg(id, data);
}
客户端在打开文件对话框后选择文件,接下来,点击发送会将文件切分成固定大小的报文发送
cpp展开代码void MainWindow::on_uploadBtn_clicked()
{
ui->uploadBtn->setEnabled(false);
// 打开文件
QFile file(_file_name);
if (!file.open(QIODevice::ReadOnly)) {
qWarning() << "Could not open file:" << file.errorString();
return;
}
// 保存当前文件指针位置
qint64 originalPos = file.pos();
QCryptographicHash hash(QCryptographicHash::Md5);
if (!hash.addData(&file)) {
qWarning() << "Failed to read data from file:" << _file_name;
return ;
}
_file_md5 = hash.result().toHex(); // 返回十六进制字符串
// 读取文件内容并发送
QByteArray buffer;
int seq = 0;
QFileInfo fileInfo(_file_name); // 创建 QFileInfo 对象
QString fileName = fileInfo.fileName(); // 获取文件名
qDebug() << "文件名是:" << fileName; // 输出文件名
int total_size = fileInfo.size();
int last_seq = 0;
if(total_size % MAX_FILE_LEN){
last_seq = (total_size/MAX_FILE_LEN)+1;
}else{
last_seq = total_size/MAX_FILE_LEN;
}
// 恢复文件指针到原来的位置
file.seek(originalPos);
while (!file.atEnd()) {
//每次读取2048字节发送
buffer = file.read(MAX_FILE_LEN);
QJsonObject jsonObj;
// 将文件内容转换为 Base64 编码(可选)
QString base64Data = buffer.toBase64();
//qDebug() << "send data is " << base64Data;
++seq;
jsonObj["md5"] = _file_md5;
jsonObj["name"] = fileName;
jsonObj["seq"] = seq;
jsonObj["trans_size"] = buffer.size() + (seq-1)*MAX_FILE_LEN;
jsonObj["total_size"] = total_size;
if(buffer.size() < MAX_FILE_LEN){
jsonObj["last"] = 1;
}else{
jsonObj["last"] = 0;
}
jsonObj["data"]= base64Data;
jsonObj["last_seq"] = last_seq;
QJsonDocument doc(jsonObj);
auto send_data = doc.toJson();
TcpClient::Inst().sendMsg(ID_UPLOAD_FILE_REQ, send_data);
//startDelay(500);
}
//关闭文件
file.close();
}
发送时数据字段分别为:
-
文件
md5: 以后用来做断点续传校验 -
name: 文件名 -
seq: 报文序列号,类似于TCP序列号,自己定义的,服务器根据这个序列号组合数据写入文件。 -
trans_size: 当前已经传输的大小 -
total_size: 传输文件的总大小。
客户端需要接受服务器返回的消息更新进度条
cpp展开代码//接受服务器发送的信息
void TcpClient::slot_ready_read()
{
//读取所有数据
QByteArray data = _socket->readAll();
//将数据缓存起来
_buffer.append(data);
//处理收到的数据
processData();
}
处理消息更新进度条
cpp展开代码void TcpClient::processData()
{
while(_buffer.size() >= TCP_HEAD_LEN){
//先取出八字节头部
auto head_byte = _buffer.left(TCP_HEAD_LEN);
QDataStream stream(head_byte);
//设置为大端模式
stream.setByteOrder(QDataStream::BigEndian);
//读取ID
quint16 msg_id;
stream >> msg_id;
//读取长度
quint32 body_length;
stream >> body_length;
if(_buffer.size() >= TCP_HEAD_LEN+body_length){
//完整的消息体已经接受
QByteArray body = _buffer.mid(TCP_HEAD_LEN,body_length);
//去掉完整的消息包
_buffer = _buffer.mid(TCP_HEAD_LEN+body_length);
// 解析服务器发过来的消息
QJsonDocument jsonDoc = QJsonDocument::fromJson(body);
if(jsonDoc.isNull()){
qDebug() << "Failed to create JSON doc.";
this->_socket->close();
return;
}
if(!jsonDoc.isObject()){
qDebug() << "JSON is not an object.";
this->_socket->close();
return;
}
//qDebug() << "receive data is " << body;
// 获取 JSON 对象
QJsonObject jsonObject = jsonDoc.object();
emit sig_logic_process(msg_id, jsonObject);
}else{
//消息未完全接受,所以中断
break;
}
}
}
单线程逻辑服务器
我们先讲解单线程处理收包逻辑的服务器,以后再给大家将多线程的。
服务器要配合客户端,对报文头部大小做修改
cpp展开代码//头部总长度
#define HEAD_TOTAL_LEN 6
//头部id长度
#define HEAD_ID_LEN 2
//头部数据长度
#define HEAD_DATA_LEN 4
// 接受队列最大个数
#define MAX_RECVQUE 2000000
// 发送队列最大个数
#define MAX_SENDQUE 2000000
其余逻辑和我们在网络编程中讲的IocontextPool模型服务器一样
服务器收到报文头后调用LogicSystem来处理
cpp展开代码void CSession::AsyncReadBody(int total_len)
{
auto self = shared_from_this();
asyncReadFull(total_len, [self, this, total_len](const boost::system::error_code& ec, std::size_t bytes_transfered) {
try {
if (ec) {
std::cout << "handle read failed, error is " << ec.what() << endl;
Close();
_server->ClearSession(_session_id);
return;
}
if (bytes_transfered < total_len) {
std::cout << "read length not match, read [" << bytes_transfered << "] , total ["
<< total_len<<"]" << endl;
Close();
_server->ClearSession(_session_id);
return;
}
memcpy(_recv_msg_node->_data , _data , bytes_transfered);
_recv_msg_node->_cur_len += bytes_transfered;
_recv_msg_node->_data[_recv_msg_node->_total_len] = '\0';
cout << "receive data is " << _recv_msg_node->_data << endl;
//此处将消息投递到逻辑队列中
LogicSystem::GetInstance()->PostMsgToQue(make_shared<LogicNode>(shared_from_this(), _recv_msg_node));
//继续监听头部接受事件
AsyncReadHead(HEAD_TOTAL_LEN);
}
catch (std::exception& e) {
std::cout << "Exception code is " << e.what() << endl;
}
});
}
我们知道LogicSystem会将消息投递到队列里,然后单线程处理, 服务器LogicSystem注册上传逻辑
cpp展开代码void LogicSystem::RegisterCallBacks() {
_fun_callbacks[ID_TEST_MSG_REQ] = [this](shared_ptr<CSession> session, const short& msg_id,
const string& msg_data) {
Json::Reader reader;
Json::Value root;
reader.parse(msg_data, root);
auto data = root["data"].asString();
std::cout << "recv test data is " << data << std::endl;
Json::Value rtvalue;
Defer defer([this, &rtvalue, session]() {
std::string return_str = rtvalue.toStyledString();
session->Send(return_str, ID_TEST_MSG_RSP);
});
rtvalue["error"] = ErrorCodes::Success;
rtvalue["data"] = data;
};
_fun_callbacks[ID_UPLOAD_FILE_REQ] = [this](shared_ptr<CSession> session, const short& msg_id,
const string& msg_data) {
Json::Reader reader;
Json::Value root;
reader.parse(msg_data, root);
auto data = root["data"].asString();
//std::cout << "recv file data is " << data << std::endl;
Json::Value rtvalue;
Defer defer([this, &rtvalue, session]() {
std::string return_str = rtvalue.toStyledString();
session->Send(return_str, ID_UPLOAD_FILE_RSP);
});
// 解码
std::string decoded = base64_decode(data);
auto seq = root["seq"].asInt();
auto name = root["name"].asString();
auto total_size = root["total_size"].asInt();
auto trans_size = root["trans_size"].asInt();
auto file_path = ConfigMgr::Inst().GetFileOutPath();
auto file_path_str = (file_path / name).string();
std::cout << "file_path_str is " << file_path_str << std::endl;
std::ofstream outfile;
//第一个包
if (seq == 1) {
// 打开文件,如果存在则清空,不存在则创建
outfile.open(file_path_str, std::ios::binary | std::ios::trunc);
}
else {
// 保存为文件
outfile.open(file_path_str, std::ios::binary | std::ios::app);
}
if (!outfile) {
std::cerr << "无法打开文件进行写入。" << std::endl;
return 1;
}
outfile.write(decoded.data(), decoded.size());
if (!outfile) {
std::cerr << "写入文件失败。" << std::endl;
return 1;
}
outfile.close();
std::cout << "文件已成功保存为: " << name << std::endl;
rtvalue["error"] = ErrorCodes::Success;
rtvalue["total_size"] = total_size;
rtvalue["seq"] = seq;
rtvalue["name"] = name;
rtvalue["trans_size"] = trans_size;
};
}
收到上传消息后写入文件。
多线程逻辑服务器
多线程逻辑服务器主要是为了缓解单线程接受数据造成的瓶颈,因为单线程接收数据,就会影响其他线程接收数据,所以考虑引入线程池处理收到的数据。
在多线程编程中我们讲过划分多线程设计的几种思路:
- 按照任务划分,将不同的任务投递给不同的线程
- 按照线程数轮询处理
- 按照递归的方式划分
很明显我们不是做二分查找之类的算法处理,所以不会采用第三种。
现在考虑第二种,如果客户端发送一个很大的文件,客户端将文件切分为几个小份发送,服务器通过iocontext池接受数据, 将接受的数据投递到线程池。
我们知道线程池处理任务是不分先后顺序的,只要投递到队列中的都会被无序取出处理。
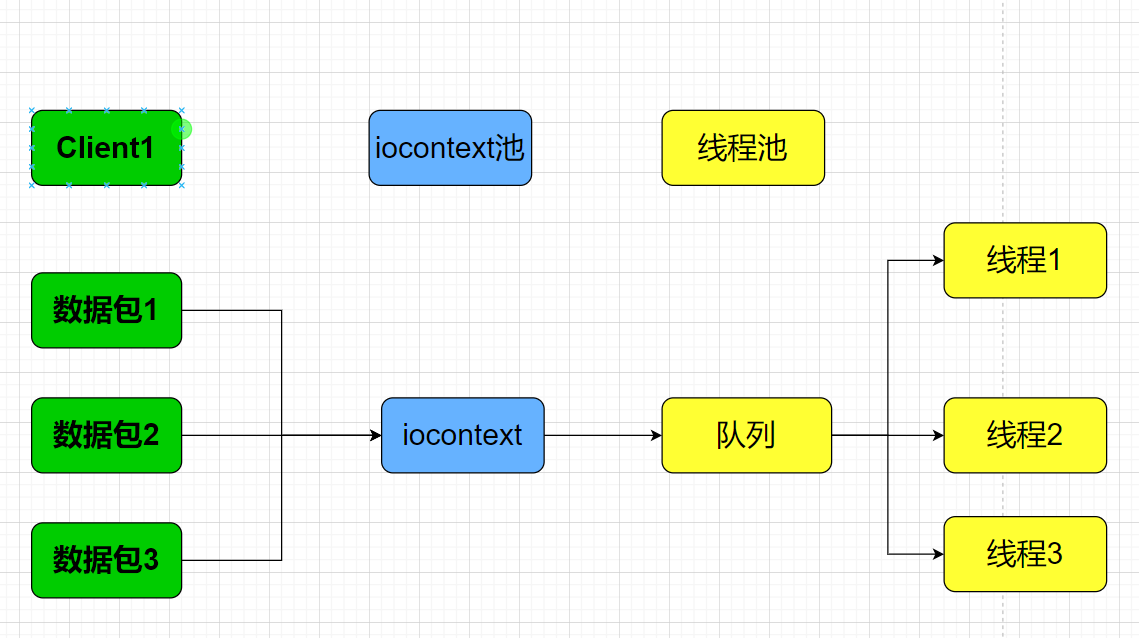
会造成数据包处理的乱序,当然可以最后交给一个线程去组合,统一写入文件,这么做的一个弊端就是如果文件很大,那就要等待完全重组完成才能组合为一个统一的包,如果文件很大,这个时间就会很长,当然也可以暂时缓存这些数据,每次收到后排序组合,比较麻烦。
所以这里推荐按照任务划分。
按照任务划分就是按照不同的客户端做区分,一个客户端传输的数据按照文件名字的hash值划分给不同的线程单独处理,也就是一个线程专门处理对应的hash值的任务,这样既能保证有序,又能保证其他线程可以处理其他任务,也有概率会命中hash同样的值投递给一个队列,但也扩充了并发能力。
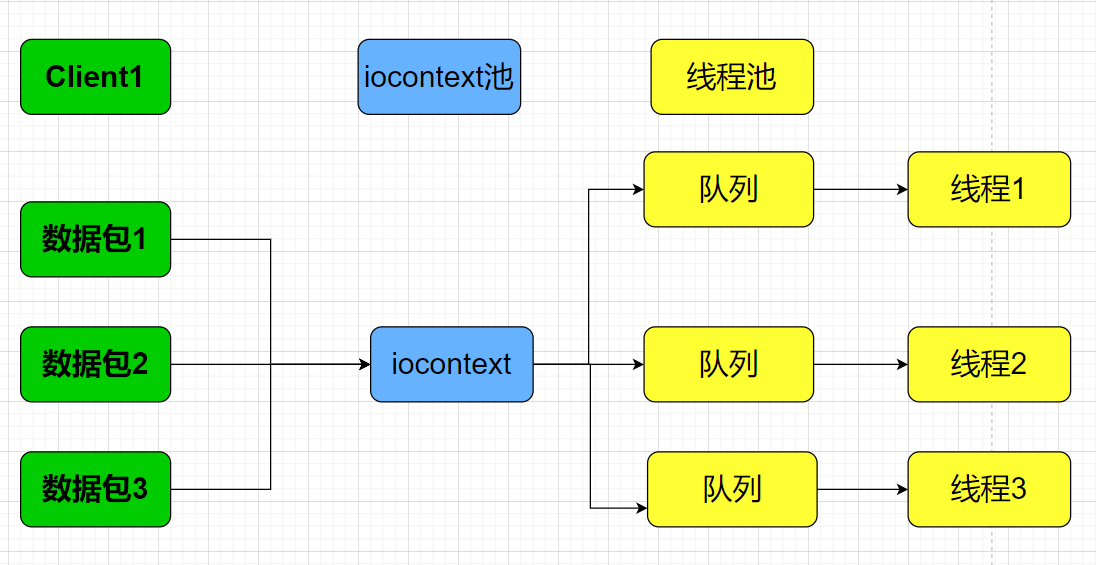
因为我们之前的逻辑处理也是单线程,所以考虑在逻辑层这里做一下解耦合,因为这个服务只是用来处理数据接受,不涉及多个连接互相访问。所以可以讲logic线程扩充为多个,按照sessionid将不同的逻辑分配给不同的线程处理。
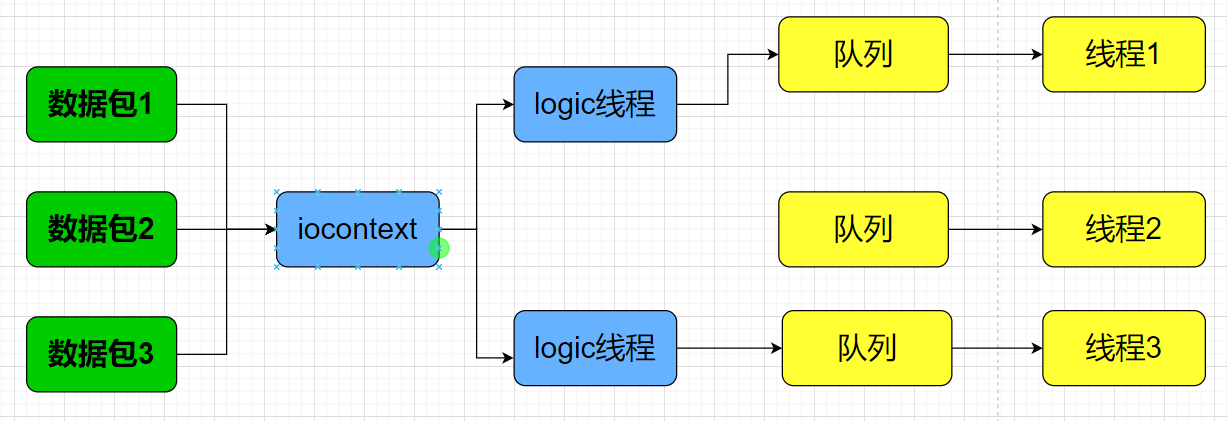
多线程处理逻辑
将LogicSystem中添加多个LogicWorker用来处理逻辑
cpp展开代码typedef function<void(shared_ptr<CSession>, const short &msg_id, const string &msg_data)> FunCallBack;
class LogicSystem:public Singleton<LogicSystem>
{
friend class Singleton<LogicSystem>;
public:
~LogicSystem();
void PostMsgToQue(shared_ptr < LogicNode> msg, int index);
private:
LogicSystem();
std::vector<std::shared_ptr<LogicWorker> > _workers;
};
实现投递逻辑
cpp展开代码LogicSystem::LogicSystem(){
for (int i = 0; i < LOGIC_WORKER_COUNT; i++) {
_workers.push_back(std::make_shared<LogicWorker>());
}
}
LogicSystem::~LogicSystem(){
}
void LogicSystem::PostMsgToQue(shared_ptr < LogicNode> msg, int index) {
_workers[index]->PostTask(msg);
}
每一个LogicWorker都包含一个线程,这样LogicWorker可以在独立的线程里处理任务
cpp展开代码class LogicWorker
{
public:
LogicWorker();
~LogicWorker();
void PostTask(std::shared_ptr<LogicNode> task);
void RegisterCallBacks();
private:
void task_callback(std::shared_ptr<LogicNode>);
std::thread _work_thread;
std::queue<std::shared_ptr<LogicNode>> _task_que;
std::atomic<bool> _b_stop;
std::mutex _mtx;
std::condition_variable _cv;
std::unordered_map<short, FunCallBack> _fun_callbacks;
};
LogicWorker启动一个线程处理任务
cpp展开代码LogicWorker::LogicWorker():_b_stop(false)
{
RegisterCallBacks();
_work_thread = std::thread([this]() {
while (!_b_stop) {
std::unique_lock<std::mutex> lock(_mtx);
_cv.wait(lock, [this]() {
if(_b_stop) {
return true;
}
if (_task_que.empty()) {
return false;
}
return true;
});
if (_b_stop) {
return;
}
auto task = _task_que.front();
task_callback(task);
_task_que.pop();
}
});
}
当然要提前注册好任务
cpp展开代码void LogicWorker::RegisterCallBacks()
{
_fun_callbacks[ID_TEST_MSG_REQ] = [this](shared_ptr<CSession> session, const short& msg_id,
const string& msg_data) {
Json::Reader reader;
Json::Value root;
reader.parse(msg_data, root);
auto data = root["data"].asString();
std::cout << "recv test data is " << data << std::endl;
Json::Value rtvalue;
Defer defer([this, &rtvalue, session]() {
std::string return_str = rtvalue.toStyledString();
session->Send(return_str, ID_TEST_MSG_RSP);
});
rtvalue["error"] = ErrorCodes::Success;
rtvalue["data"] = data;
};
_fun_callbacks[ID_UPLOAD_FILE_REQ] = [this](shared_ptr<CSession> session, const short& msg_id,
const string& msg_data) {
Json::Reader reader;
Json::Value root;
reader.parse(msg_data, root);
auto seq = root["seq"].asInt();
auto name = root["name"].asString();
auto total_size = root["total_size"].asInt();
auto trans_size = root["trans_size"].asInt();
auto last = root["last"].asInt();
auto file_data = root["data"].asString();
Json::Value rtvalue;
Defer defer([this, &rtvalue, session]() {
std::string return_str = rtvalue.toStyledString();
session->Send(return_str, ID_UPLOAD_FILE_RSP);
});
// 使用 std::hash 对字符串进行哈希
std::hash<std::string> hash_fn;
size_t hash_value = hash_fn(name); // 生成哈希值
int index = hash_value % FILE_WORKER_COUNT;
std::cout << "Hash value: " << hash_value << std::endl;
FileSystem::GetInstance()->PostMsgToQue(
std::make_shared<FileTask>(session, name, seq, total_size,
trans_size, last, file_data),
index
);
rtvalue["error"] = ErrorCodes::Success;
rtvalue["total_size"] = total_size;
rtvalue["seq"] = seq;
rtvalue["name"] = name;
rtvalue["trans_size"] = trans_size;
rtvalue["last"] = last;
};
}
处理逻辑
cpp展开代码void LogicWorker::task_callback(std::shared_ptr<LogicNode> task)
{
cout << "recv_msg id is " << task->_recvnode->_msg_id << endl;
auto call_back_iter = _fun_callbacks.find(task->_recvnode->_msg_id);
if (call_back_iter == _fun_callbacks.end()) {
return;
}
call_back_iter->second(task->_session, task->_recvnode->_msg_id,
std::string(task->_recvnode->_data, task->_recvnode->_cur_len));
}
比如对于文件上传,ID_UPLOAD_FILE_REQ就调用对应的回调,在回调函数里我们再次将要处理的任务封装好投递到文件系统
cpp展开代码FileSystem::GetInstance()->PostMsgToQue(
std::make_shared<FileTask>(session, name, seq, total_size,
trans_size, last, file_data),
index
);
文件系统和逻辑系统类似,包含一堆FileWorker
cpp展开代码class FileSystem :public Singleton<FileSystem>
{
friend class Singleton<FileSystem>;
public:
~FileSystem();
void PostMsgToQue(shared_ptr <FileTask> msg, int index);
private:
FileSystem();
std::vector<std::shared_ptr<FileWorker>> _file_workers;
};
实现投递逻辑
cpp展开代码FileSystem::~FileSystem()
{
}
void FileSystem::PostMsgToQue(shared_ptr<FileTask> msg, int index)
{
_file_workers[index]->PostTask(msg);
}
FileSystem::FileSystem()
{
for (int i = 0; i < FILE_WORKER_COUNT; i++) {
_file_workers.push_back(std::make_shared<FileWorker>());
}
}
定义文件任务
cpp展开代码class CSession;
struct FileTask {
FileTask(std::shared_ptr<CSession> session, std::string name,
int seq, int total_size, int trans_size, int last,
std::string file_data) :_session(session),
_seq(seq),_name(name),_total_size(total_size),
_trans_size(trans_size),_last(last),_file_data(file_data)
{}
~FileTask(){}
std::shared_ptr<CSession> _session;
int _seq ;
std::string _name ;
int _total_size ;
int _trans_size ;
int _last ;
std::string _file_data;
};
实现文件工作者
cpp展开代码class FileWorker
{
public:
FileWorker();
~FileWorker();
void PostTask(std::shared_ptr<FileTask> task);
private:
void task_callback(std::shared_ptr<FileTask>);
std::thread _work_thread;
std::queue<std::shared_ptr<FileTask>> _task_que;
std::atomic<bool> _b_stop;
std::mutex _mtx;
std::condition_variable _cv;
};
构造函数启动线程
cpp展开代码FileWorker::FileWorker():_b_stop(false)
{
_work_thread = std::thread([this]() {
while (!_b_stop) {
std::unique_lock<std::mutex> lock(_mtx);
_cv.wait(lock, [this]() {
if (_b_stop) {
return true;
}
if (_task_que.empty()) {
return false;
}
return true;
});
if (_b_stop) {
break;
}
auto task = _task_que.front();
_task_que.pop();
task_callback(task);
}
});
}
析构需等待线程
cpp展开代码FileWorker::~FileWorker()
{
_b_stop = true;
_cv.notify_one();
_work_thread.join();
}
投递任务
cpp展开代码void FileWorker::PostTask(std::shared_ptr<FileTask> task)
{
{
std::lock_guard<std::mutex> lock(_mtx);
_task_que.push(task);
}
_cv.notify_one();
}
因为线程会触发回调函数保存文件,所以我们实现回调函数
cpp展开代码void FileWorker::task_callback(std::shared_ptr<FileTask> task)
{
// 解码
std::string decoded = base64_decode(task->_file_data);
auto file_path = ConfigMgr::Inst().GetFileOutPath();
auto file_path_str = (file_path / task->_name).string();
auto last = task->_last;
//std::cout << "file_path_str is " << file_path_str << std::endl;
std::ofstream outfile;
//第一个包
if (task->_seq == 1) {
// 打开文件,如果存在则清空,不存在则创建
outfile.open(file_path_str, std::ios::binary | std::ios::trunc);
}
else {
// 保存为文件
outfile.open(file_path_str, std::ios::binary | std::ios::app);
}
if (!outfile) {
std::cerr << "无法打开文件进行写入。" << std::endl;
return ;
}
outfile.write(decoded.data(), decoded.size());
if (!outfile) {
std::cerr << "写入文件失败。" << std::endl;
return ;
}
outfile.close();
if (last) {
std::cout << "文件已成功保存为: " << task->_name << std::endl;
}
}
测试效果
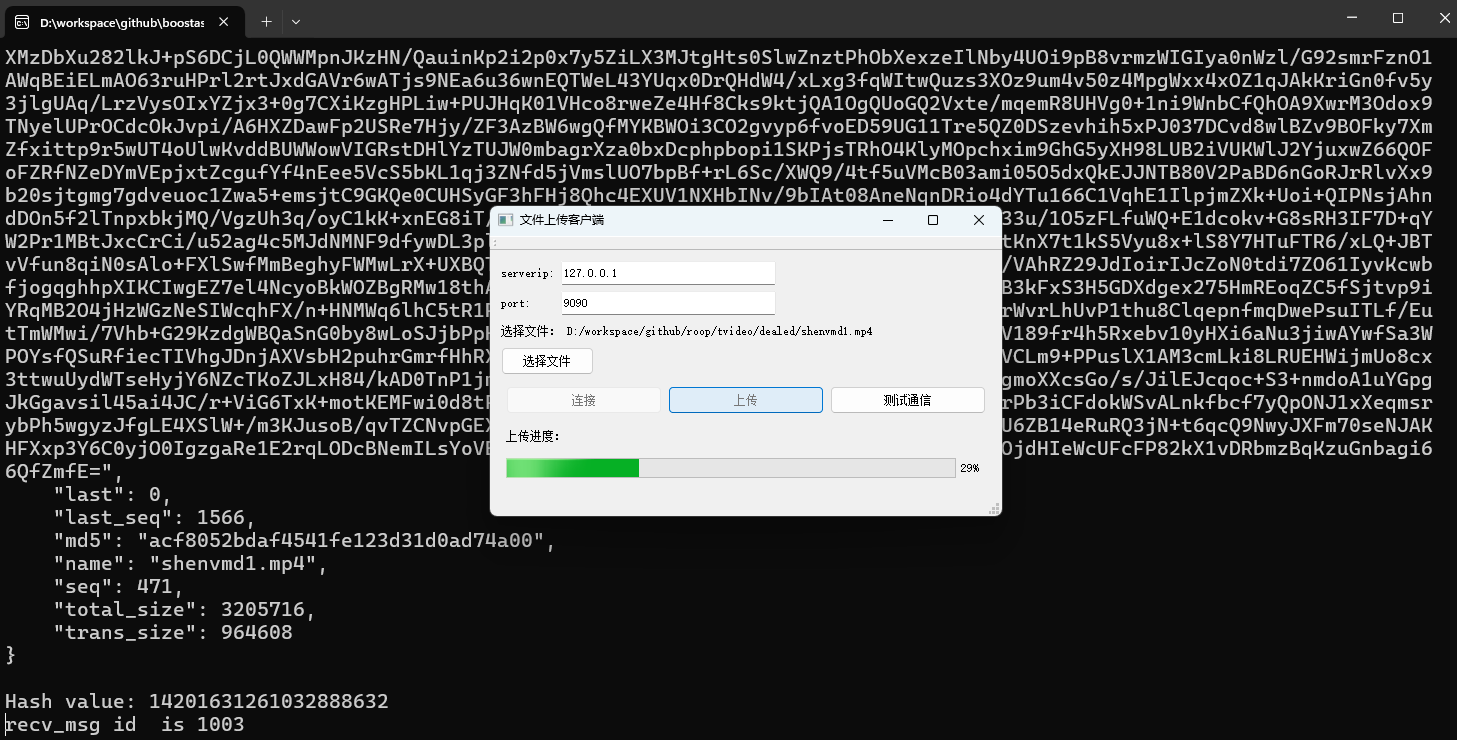
源码链接
https://gitee.com/secondtonone1/boostasio-learn/tree/master/network/day26-multithread-res-server
day32分布式锁设计思路
title: 分布式锁设计思路 date: 2025-03-31 19:05:14 tags: [C++聊天项目] categories: [C++聊天项目]
1. 引言
在分布式系统中,多个客户端可能同时访问和操作共享资源。为了防止数据竞争和不一致,分布式锁是一个常见的解决方案。Redis 提供了强大的功能来实现高效且可靠的分布式锁。本文将通过 C++ 和 Redis(通过 hredis 库)实现一个简单的分布式锁。
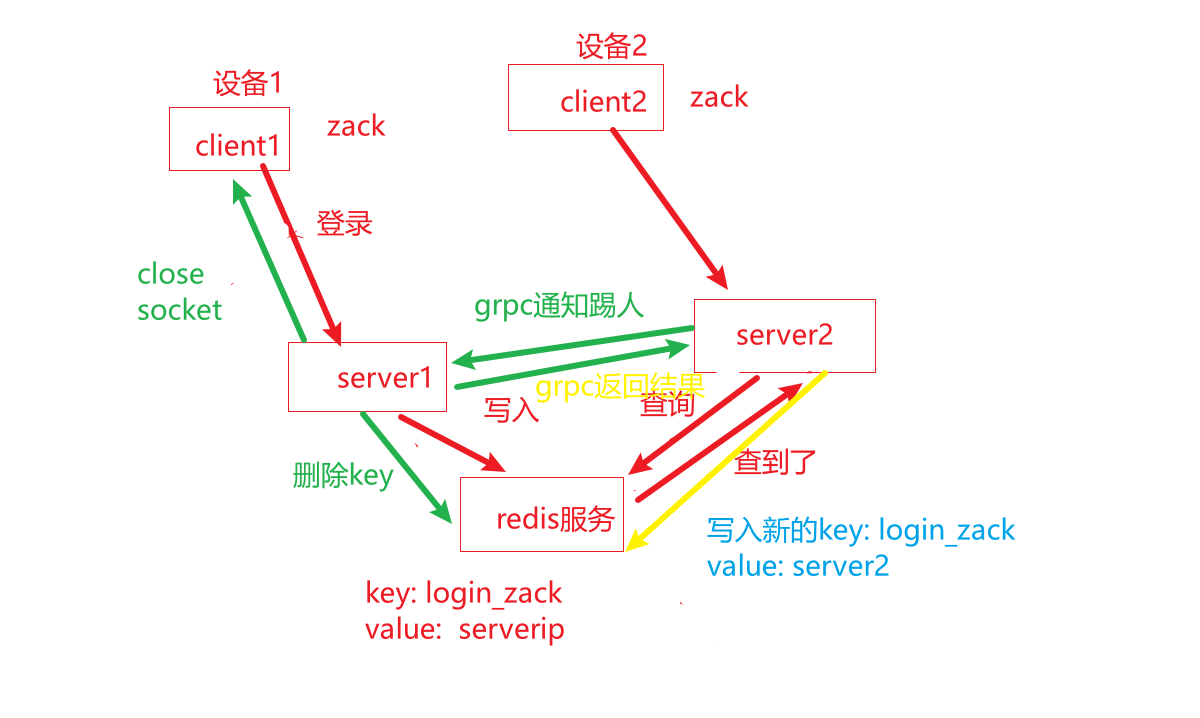
2. 项目背景
- 分布式锁:它是一种机制,用于保证在分布式系统中,某一时刻只有一个客户端能够执行某些共享资源的操作。
- 使用 Redis 作为锁存储:Redis 被用作集中式存储,可以确保锁的状态在所有参与者之间同步。
3. 设计思路
分布式锁的核心思想是:
- 加锁:客户端通过设置一个 Redis 键来获取锁。通过 Redis 的原子操作,确保只有一个客户端能够成功设置该键。
- 持有者标识符:每个客户端在加锁时生成一个唯一的标识符(UUID),该标识符用来标识锁的持有者。
- 超时机制:锁会在一定时间后自动释放(过期),防止因程序异常导致的死锁。
- 解锁:只有锁的持有者才能释放锁,这通过 Redis Lua 脚本来保证。
4. 代码实现步骤
4.1 生成全局唯一标识符 (UUID)
使用 Boost UUID 库生成一个全局唯一的标识符(UUID)。这个标识符会被用作锁的持有者标识符。它确保每个客户端在加锁时拥有唯一的标识,从而能够确保锁的唯一性。
代码:
cpp展开代码std::string generateUUID() {
boost::uuids::uuid uuid = boost::uuids::random_generator()();
return to_string(uuid);
}
4.2 尝试加锁(acquireLock 函数)
客户端通过 Redis 的 SET 命令尝试加锁。该命令的参数如下:
NX:确保只有当键不存在时才能成功设置(即,只有一个客户端能够成功设置锁)。EX:设置一个超时时间,锁会在超时后自动释放,避免死锁。
如果加锁成功,返回一个唯一标识符。如果加锁失败,则会在指定的超时时间内多次尝试。
代码如下:
cpp展开代码// 尝试获取锁,返回锁的唯一标识符(UUID),如果获取失败则返回空字符串
std::string acquireLock(redisContext* context, const std::string& lockName, int lockTimeout, int acquireTimeout) {
std::string identifier = generateUUID();
std::string lockKey = "lock:" + lockName;
auto endTime = std::chrono::steady_clock::now() + std::chrono::seconds(acquireTimeout);
while (std::chrono::steady_clock::now() < endTime) {
// 使用 SET 命令尝试加锁:SET lockKey identifier NX EX lockTimeout
redisReply* reply = (redisReply*)redisCommand(context, "SET %s %s NX EX %d", lockKey.c_str(), identifier.c_str(), lockTimeout);
if (reply != nullptr) {
// 判断返回结果是否为 OK
if (reply->type == REDIS_REPLY_STATUS && std::string(reply->str) == "OK") {
freeReplyObject(reply);
return identifier;
}
freeReplyObject(reply);
}
// 暂停 1 毫秒后重试,防止忙等待
std::this_thread::sleep_for(std::chrono::milliseconds(1));
}
return "";
}
函数参数说明
redisContext* context 这是一个指向 Redis 连接上下文的指针,用于与 Redis 服务器通信。通过这个上下文,你可以发送命令和接收响应。
const std::string& lockName
这是你想要加锁的资源名称。例如,如果你需要对某个资源加锁,可以用 "my_resource",函数内部会把它拼接成 "lock:my_resource" 作为 Redis 中的 key。
int lockTimeout 这是锁的有效期,单位是秒。设置这个值的目的是防止因程序异常或崩溃而导致的死锁。当锁达到这个超时时间后,Redis 会自动删除这个 key,从而释放锁。
int acquireTimeout 这是获取锁的最大等待时间,单位也是秒。如果在这个时间内没有成功获取到锁,函数就会停止尝试,并返回空字符串。这样可以避免程序无限等待。
Redis 命令解释
在 acquireLock 函数中,使用的 Redis 命令格式是:
展开代码"SET %s %s NX EX %d"
这个命令实际上是一个格式化字符串,参数会被填入以下位置:
- SET Redis 的基本命令,用于设置一个 key 的值。
- %s(第一个 %s)
代表锁的 key(例如
"lock:my_resource")。 - %s(第二个 %s)
代表锁的持有者标识符,也就是通过
generateUUID()生成的 UUID。 - NX 表示 “Not eXists”,意思是“只有当 key 不存在时才进行设置”。这可以保证如果其他客户端已经设置了这个 key(即已经有锁了),那么当前客户端就不会覆盖原来的锁。
- EX %d
EX参数用于指定 key 的过期时间,%d表示锁的有效期(lockTimeout),单位为秒。这样即使客户端因某些原因没有正常释放锁,锁也会在指定时间后自动失效。
构造锁的 Redis 键
cpp展开代码std::string lockKey = "lock:" + lockName;
- 构造出 Redis 键,格式为
lock:lockName,用于存储锁的状态。
设置获取锁的截止时间
cpp展开代码auto endTime = std::chrono::steady_clock::now() + std::chrono::seconds(acquireTimeout);
- 设置一个截止时间
endTime,表示最多尝试获取锁的时间,单位为秒。当前时间加上acquireTimeout秒即为截止时间。
尝试获取锁
cpp展开代码while (std::chrono::steady_clock::now() < endTime) {
- 通过一个
while循环,不断尝试获取锁,直到超时或成功获取锁。
使用 Redis 的 SET 命令尝试加锁
cpp展开代码redisReply* reply = (redisReply*)redisCommand(context, "SET %s %s NX EX %d", lockKey.c_str(), identifier.c_str(), lockTimeout);
- 通过 Redis 的
SET命令来尝试获取锁,命令格式为:SET lockKey identifier NX EX lockTimeout:NX:只有当lockKey不存在时才会设置成功(即实现了锁的功能,防止其他客户端重入)。EX lockTimeout:设置锁的过期时间为lockTimeout秒,防止锁永远占用。
- 如果锁成功获取,Redis 会返回
OK。
检查返回结果
cpp展开代码if (reply != nullptr) {
if (reply->type == REDIS_REPLY_STATUS && std::string(reply->str) == "OK") {
freeReplyObject(reply);
return identifier;
}
freeReplyObject(reply);
}
- 如果 Redis 返回的
reply不为空,检查返回值类型是否为REDIS_REPLY_STATUS,并且返回的字符串是否是OK,表示锁成功获取。 - 如果获取锁成功,释放
redisReply对象,并返回生成的唯一标识符identifier,表示锁已经成功获得。
暂停并重试
展开代码std::this_thread::sleep_for(std::chrono::milliseconds(1));
- 如果获取锁失败,则通过
std::this_thread::sleep_for暂停 1 毫秒,避免忙等待,提高 CPU 的利用率。
超时返回空字符串
cpp展开代码return "";
- 如果在指定的
acquireTimeout时间内没有成功获取锁,函数返回空字符串,表示获取锁失败。
4.3 释放锁(releaseLock 函数)
释放锁的操作使用 Redis Lua 脚本,确保只有持有锁的客户端才能释放锁。脚本通过判断当前锁的持有者是否与传入的标识符一致来决定是否删除锁。
Lua 脚本:
lua展开代码if redis.call('get', KEYS[1]) == ARGV[1] then
return redis.call('del', KEYS[1])
else
return 0
end
KEYS[1]:锁的 key(例如lock:my_resource)。ARGV[1]:客户端在加锁时生成的唯一标识符。- 如果当前锁的值(标识符)与传入的标识符一致,删除该锁。
Lua 脚本的作用是:
redis.call('get', KEYS[1]):从 Redis 获取lockKey对应的值。if redis.call('get', KEYS[1]) == ARGV[1]:检查获取到的值是否与传入的identifier相同,只有标识符匹配时才能删除锁。return redis.call('del', KEYS[1]):如果匹配,执行删除操作,释放锁。else return 0:如果标识符不匹配,返回0,表示没有成功释放锁。
代码:
cpp展开代码// 释放锁,只有锁的持有者才能释放,返回是否成功
bool releaseLock(redisContext* context, const std::string& lockName, const std::string& identifier) {
std::string lockKey = "lock:" + lockName;
// Lua 脚本:判断锁标识是否匹配,匹配则删除锁
const char* luaScript = "if redis.call('get', KEYS[1]) == ARGV[1] then \
return redis.call('del', KEYS[1]) \
else \
return 0 \
end";
// 调用 EVAL 命令执行 Lua 脚本,第一个参数为脚本,后面依次为 key 的数量、key 以及对应的参数
redisReply* reply = (redisReply*)redisCommand(context, "EVAL %s 1 %s %s", luaScript, lockKey.c_str(), identifier.c_str());
bool success = false;
if (reply != nullptr) {
// 当返回整数值为 1 时,表示成功删除了锁
if (reply->type == REDIS_REPLY_INTEGER && reply->integer == 1) {
success = true;
}
freeReplyObject(reply);
}
return success;
}
函数参数说明
redisContext* context:指向 Redis 连接上下文的指针,用于执行 Redis 命令。const std::string& lockName:锁的名称,用于生成 Redis 键的名称。const std::string& identifier:标识符,用于标识哪个客户端持有锁。
函数返回一个布尔值,通常表示释放锁操作是否成功。
执行 Lua 脚本
cpp展开代码redisReply* reply = (redisReply*)redisCommand(context, "EVAL %s 1 %s %s", luaScript, lockKey.c_str(), identifier.c_str());
- 使用
redisCommand函数执行 Redis 的EVAL命令,传入脚本、键的数量(在这里是 1,因为只有一个lockKey),然后依次传入lockKey和identifier。 redisCommand会返回一个redisReply指针,表示命令的返回结果。
处理返回结果
cpp展开代码cpp复制bool success = false;
if (reply != nullptr) {
// 当返回整数值为 1 时,表示成功删除了锁
if (reply->type == REDIS_REPLY_INTEGER && reply->integer == 1) {
success = true;
}
freeReplyObject(reply);
}
- 如果返回的
redisReply不为空,表示 Redis 执行了命令。 - 检查返回值的类型是否是整数(
REDIS_REPLY_INTEGER),并且它的值是否是 1。如果是 1,表示删除锁成功,将success设置为true。 - 释放
redisReply对象,防止内存泄漏。
4.4 主函数(main 函数)
主函数执行以下操作:
- 创建 Redis 客户端并连接到 Redis 服务器。
- 尝试加锁,若成功获取锁,则执行临界区代码。
- 在临界区代码执行完后,释放锁。
代码:
cpp展开代码int main() {
// 连接到 Redis 服务器(根据实际情况修改主机和端口)
redisContext* context = redisConnect("127.0.0.1", 6379);
if (context == nullptr || context->err) {
if (context) {
std::cerr << "连接错误: " << context->errstr << std::endl;
redisFree(context);
} else {
std::cerr << "无法分配 redis context" << std::endl;
}
return 1;
}
// 尝试获取锁(锁有效期 10 秒,获取超时时间 5 秒)
std::string lockId = acquireLock(context, "my_resource", 10, 5);
if (!lockId.empty()) {
std::cout << "子进程 " << GetCurrentProcessId() << " 成功获取锁,锁 ID: " << lockId << std::endl;
// 执行需要保护的临界区代码
std::this_thread::sleep_for(std::chrono::seconds(2));
// 释放锁
if (releaseLock(context, "my_resource", lockId)) {
std::cout << "成功释放锁" << std::endl;
} else {
std::cout << "释放锁失败" << std::endl;
}
} else {
std::cout << "获取锁失败" << std::endl;
}
// 释放 Redis 连接
redisFree(context);
return 0;
}
5. 封装为单例类操作
类声明如下
cpp展开代码#include <string>
#include <hiredis.h>
class DistLock
{
public:
static DistLock& Inst();
~DistLock();
std::string acquireLock(redisContext* context, const std::string& lockName,
int lockTimeout, int acquireTimeout);
bool releaseLock(redisContext* context, const std::string& lockName,
const std::string& identifier);
private:
DistLock() = default;
};
类定义如下
cpp展开代码#include <iostream>
#include <string>
#include <chrono>
#include <thread>
#include <cstdlib>
#include <boost/uuid/uuid.hpp>
#include <boost/uuid/uuid_generators.hpp>
#include <boost/uuid/uuid_io.hpp>
#include <hiredis.h>
DistLock& DistLock::Inst() {
static DistLock lock;
return lock;
}
DistLock::~DistLock() {
}
// 尝试获取锁,返回锁的唯一标识符(UUID),如果获取失败则返回空字符串
std::string DistLock::acquireLock(redisContext* context, const std::string& lockName,
int lockTimeout, int acquireTimeout) {
std::string identifier = generateUUID();
std::string lockKey = "lock:" + lockName;
auto endTime = std::chrono::steady_clock::now() + std::chrono::seconds(acquireTimeout);
while (std::chrono::steady_clock::now() < endTime) {
// 使用 SET 命令尝试加锁:SET lockKey identifier NX EX lockTimeout
redisReply* reply = (redisReply*)redisCommand(context, "SET %s %s NX EX %d",
lockKey.c_str(), identifier.c_str(), lockTimeout);
if (reply != nullptr) {
// 判断返回结果是否为 OK
if (reply->type == REDIS_REPLY_STATUS && std::string(reply->str) == "OK") {
freeReplyObject(reply);
return identifier;
}
freeReplyObject(reply);
}
// 暂停 1 毫秒后重试,防止忙等待
std::this_thread::sleep_for(std::chrono::milliseconds(1));
}
return "";
}
// 释放锁,只有锁的持有者才能释放,返回是否成功
bool DistLock::releaseLock(redisContext* context, const std::string& lockName,
const std::string& identifier) {
std::string lockKey = "lock:" + lockName;
// Lua 脚本:判断锁标识是否匹配,匹配则删除锁
const char* luaScript = "if redis.call('get', KEYS[1]) == ARGV[1] then \
return redis.call('del', KEYS[1]) \
else \
return 0 \
end";
// 调用 EVAL 命令执行 Lua 脚本,第一个参数为脚本,后面依次为 key 的数量、key 以及对应的参数
redisReply* reply = (redisReply*)redisCommand(context, "EVAL %s 1 %s %s",
luaScript, lockKey.c_str(), identifier.c_str());
bool success = false;
if (reply != nullptr) {
// 当返回整数值为 1 时,表示成功删除了锁
if (reply->type == REDIS_REPLY_INTEGER && reply->integer == 1) {
success = true;
}
freeReplyObject(reply);
}
return success;
}
测试用例
cpp展开代码int TestDisLock() {
// 连接到 Redis 服务器(根据实际情况修改主机和端口)
redisContext* context = redisConnect("81.68.86.146", 6380);
if (context == nullptr || context->err) {
if (context) {
std::cerr << "连接错误: " << context->errstr << std::endl;
redisFree(context);
}
else {
std::cerr << "无法分配 redis context" << std::endl;
}
return 1;
}
std::string redis_password = "123456";
redisReply* r = (redisReply*)redisCommand(context, "AUTH %s", redis_password.c_str());
if (r->type == REDIS_REPLY_ERROR) {
printf("Redis认证失败!\n");
}
else {
printf("Redis认证成功!\n");
}
// 尝试获取锁(锁有效期 10 秒,获取超时时间 5 秒)
std::string lockId = DistLock::Inst().acquireLock(context, "my_resource", 10, 5);
if (!lockId.empty()) {
std::cout << "子进程 " << GetCurrentProcessId() << " 成功获取锁,锁 ID: " << lockId << std::endl;
// 执行需要保护的临界区代码
std::this_thread::sleep_for(std::chrono::seconds(2));
// 释放锁
if (DistLock::Inst().releaseLock(context, "my_resource", lockId)) {
std::cout << "子进程 " << GetCurrentProcessId() << " 成功释放锁" << std::endl;
}
else {
std::cout << "子进程 " << GetCurrentProcessId() << " 释放锁失败" << std::endl;
}
}
else {
std::cout << "子进程 " << GetCurrentProcessId() << " 获取锁失败" << std::endl;
}
// 释放 Redis 连接
redisFree(context);
}
6. 多进程测试
我们可以创建另一个项目,调用之前生成好的distribute.exe
cpp展开代码#include <windows.h>
#include <iostream>
#include <vector>
int main() {
const int numProcesses = 5; // 需要启动 5 个子进程
std::vector<PROCESS_INFORMATION> procInfos;
for (int i = 0; i < numProcesses; i++) {
STARTUPINFO si = { 0 };
si.cb = sizeof(si);
PROCESS_INFORMATION pi = { 0 };
// 这里假设 ChildTest.exe 在当前目录下
if (CreateProcess(TEXT("DistributeLock.exe"), // 应用程序名
NULL, // 命令行参数
NULL, // 进程句柄不可继承
NULL, // 线程句柄不可继承
FALSE, // 不继承句柄
0, // 没有特殊创建标志
NULL, // 使用父进程的环境
NULL, // 使用父进程的当前目录
&si, // 指向 STARTUPINFO 结构体的指针
&pi)) // 指向 PROCESS_INFORMATION 结构体的指针
{
std::cout << "成功创建子进程, PID: " << pi.dwProcessId << std::endl;
procInfos.push_back(pi);
}
else {
std::cerr << "创建子进程失败: " << GetLastError() << std::endl;
}
}
// 等待所有子进程结束
for (auto& pi : procInfos) {
WaitForSingleObject(pi.hProcess, INFINITE);
CloseHandle(pi.hProcess);
CloseHandle(pi.hThread);
}
std::cout << "所有子进程已结束" << std::endl;
system("pause");
return 0;
}
测试效果
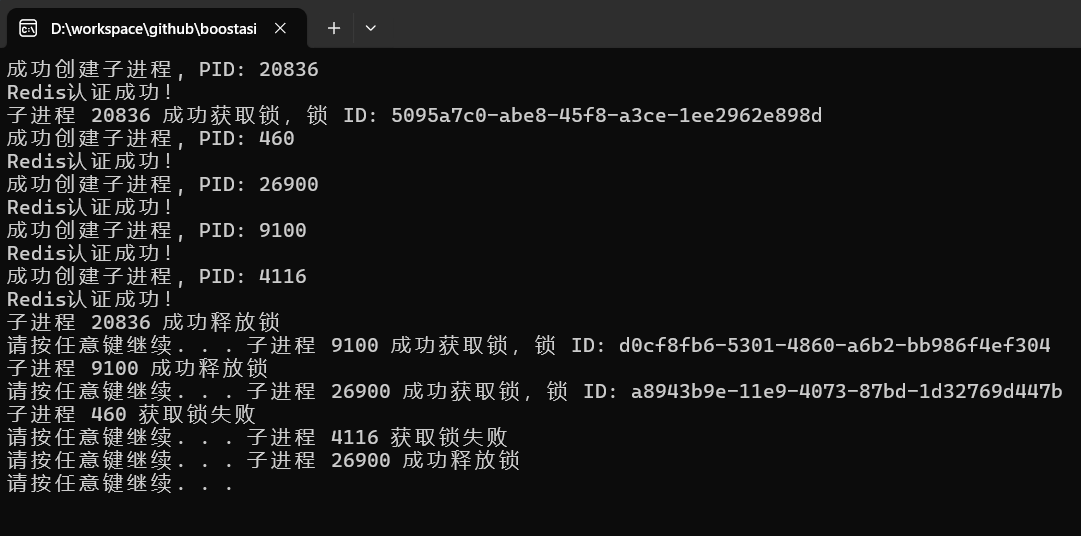
7. 总结
- 分布式锁:使用 Redis 和 Boost UUID 实现了一个简单的分布式锁,确保多个客户端可以同步地访问共享资源。
- 加锁:通过 Redis 的
SET命令,使用NX和EX参数确保只有一个客户端可以成功加锁。 - 解锁:通过 Lua 脚本确保只有锁的持有者能够释放锁,避免其他客户端误释放锁。
- 持有者标识符:每个客户端在加锁时生成一个唯一的标识符(UUID),它作为锁的持有者标识。
day33单服程踢人逻辑
title: 单服务器踢人逻辑实现 date: 2025-04-12 11:37:54 tags: [C++聊天项目] categories: [C++聊天项目]
1. 为什么要有踢人逻辑
在服务器中经常会设计的同账户异地登陆时,将旧有账号的连接断开,必要时先发送下线消息通知旧账号的客户端,然后关闭这个连接。
服务器设计中尽量不要采用服务器主动关闭连接,那样会造成大量TIME_WAIT问题,这个之后再说。
先用一个图示说明踢人逻辑
旧客户端登录
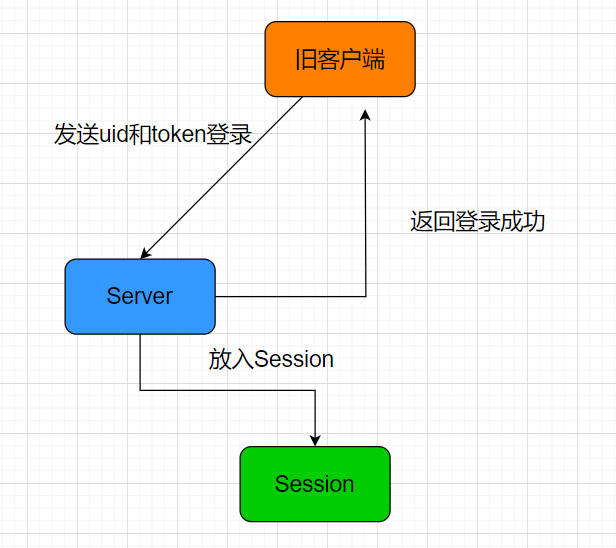
当有新客户端连接时
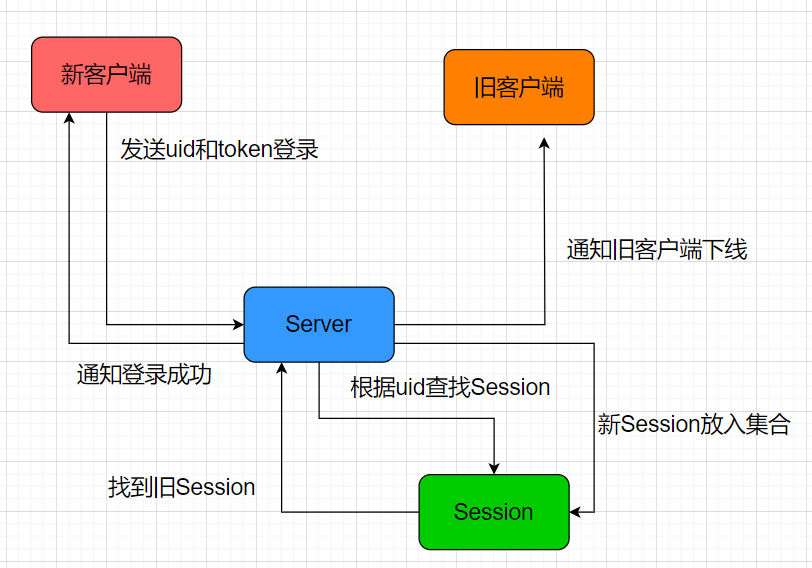
上述图形演示的是单服务器踢人逻辑,多服务器踢人逻辑应配合分布式锁,锁住分布式的操作,保证在一个时刻只能一个客户端登录,客户端登陆完再解锁。
分布式登录我们放在下一节,这一节我们模拟两个客户端同账号登录同一个服务器,实现踢人逻辑。
2. 分布式锁和redis封装
为了更方便操作,我们将分布式锁加锁和解锁的操作封装到redis接口中
因为分布式锁也会占用连接,为了防止连接被占用耗尽连接池,所以我们提前扩大连接池的数量为10
cpp展开代码RedisMgr::RedisMgr() {
auto& gCfgMgr = ConfigMgr::Inst();
auto host = gCfgMgr["Redis"]["Host"];
auto port = gCfgMgr["Redis"]["Port"];
auto pwd = gCfgMgr["Redis"]["Passwd"];
_con_pool.reset(new RedisConPool(10, host.c_str(), atoi(port.c_str()), pwd.c_str()));
}
封装加锁操作, 内部调用了之前封装的分布式锁DistLock
cpp展开代码std::string RedisMgr::acquireLock(const std::string& lockName,
int lockTimeout, int acquireTimeout) {
auto connect = _con_pool->getConnection();
if (connect == nullptr) {
return "";
}
Defer defer([&connect, this]() {
_con_pool->returnConnection(connect);
});
return DistLock::Inst().acquireLock(connect, lockName, lockTimeout, acquireTimeout);
}
解锁操作
cpp展开代码bool RedisMgr::releaseLock(const std::string& lockName,
const std::string& identifier) {
if (identifier.empty()) {
return true;
}
auto connect = _con_pool->getConnection();
if (connect == nullptr) {
return false;
}
Defer defer([&connect, this]() {
_con_pool->returnConnection(connect);
});
return DistLock::Inst().releaseLock(connect, lockName, identifier);
}
3. 加锁和解锁调用
对于踢人逻辑,最难的就是思考如何加锁和解锁,进行踢人,以保证将来分布式登录也会安全。
这里我们先考虑几个情形
- B新登录,此时A已登录,这种最简单,根据uid找到A的session发送踢人通知。
- B新登录,此时A将下线,这种要保证B和A互斥,要么B先登陆完,A再下线,要么A先下线,B再登录。
这么做的好处就是保证互斥
如果B先登录,会将uid对应的session更新为最新的。A下线时会优先查找uid对应的session,发现不是自己,则直接退出即可,同时不需要修改uid对应的session为空。
如果A先退出,A下线时会优先查找uid对应的session, 发现uid对应的session和自己的连接吻合,则会将uid对应的session设置为空,然后B登录,将uid对应的session设置为新连接,这样是安全的。
- B登录,A退出,此时C查找uid发送消息,三个操作都会添加分布式锁。谁先竞争到锁谁操作,能保证操作的互斥。
基本就是这三种情况。接下来我们回顾下uid和Session的对应关系
4. 用户和会话关系
添加用户和会话关联
cpp展开代码class UserMgr: public Singleton<UserMgr>
{
friend class Singleton<UserMgr>;
public:
~UserMgr();
std::shared_ptr<CSession> GetSession(int uid);
void SetUserSession(int uid, std::shared_ptr<CSession> session);
void RmvUserSession(int uid, std::string session_id);
private:
UserMgr();
std::mutex _session_mtx;
std::unordered_map<int, std::shared_ptr<CSession>> _uid_to_session;
};
UserMgr中可以根据uid查找到对应的CSession。具体实现
cpp展开代码#include "UserMgr.h"
#include "CSession.h"
#include "RedisMgr.h"
UserMgr:: ~ UserMgr(){
_uid_to_session.clear();
}
std::shared_ptr<CSession> UserMgr::GetSession(int uid)
{
std::lock_guard<std::mutex> lock(_session_mtx);
auto iter = _uid_to_session.find(uid);
if (iter == _uid_to_session.end()) {
return nullptr;
}
return iter->second;
}
void UserMgr::SetUserSession(int uid, std::shared_ptr<CSession> session)
{
std::lock_guard<std::mutex> lock(_session_mtx);
_uid_to_session[uid] = session;
}
void UserMgr::RmvUserSession(int uid, std::string session_id)
{
{
std::lock_guard<std::mutex> lock(_session_mtx);
auto iter = _uid_to_session.find(uid);
if (iter != _uid_to_session.end()) {
return;
}
auto session_id_ = iter->second->GetSessionId();
//不相等说明是其他地方登录了
if (session_id_ != session_id) {
return;
}
_uid_to_session.erase(uid);
}
}
UserMgr::UserMgr()
{
}
大家有没有注意到,对Session的操作没有加分布式锁,只加了线程锁,因为我的思路是在最外层加分布式锁,而接口内部只加线程锁,保证同一个服务器操作的原子性。
CSession类和之前一样, 里面有user_id和session_id
cpp展开代码class CSession: public std::enable_shared_from_this<CSession>
{
public:
CSession(boost::asio::io_context& io_context, CServer* server);
~CSession();
tcp::socket& GetSocket();
std::string& GetSessionId();
void SetUserId(int uid);
int GetUserId();
void Start();
void Send(char* msg, short max_length, short msgid);
void Send(std::string msg, short msgid);
void Close();
std::shared_ptr<CSession> SharedSelf();
void AsyncReadBody(int length);
void AsyncReadHead(int total_len);
void NotifyOffline(int uid);
private:
void asyncReadFull(std::size_t maxLength, std::function<void(const boost::system::error_code& , std::size_t)> handler);
void asyncReadLen(std::size_t read_len, std::size_t total_len,
std::function<void(const boost::system::error_code&, std::size_t)> handler);
void HandleWrite(const boost::system::error_code& error, std::shared_ptr<CSession> shared_self);
tcp::socket _socket;
std::string _session_id;
char _data[MAX_LENGTH];
CServer* _server;
bool _b_close;
std::queue<shared_ptr<SendNode> > _send_que;
std::mutex _send_lock;
//收到的消息结构
std::shared_ptr<RecvNode> _recv_msg_node;
bool _b_head_parse;
//收到的头部结构
std::shared_ptr<MsgNode> _recv_head_node;
int _user_uid;
};
通过上述结构,我们可以通过UserMgr查找到CSession, 也可以通过CSession查找到userid, 实现了双向关联
5.登录添加分布式锁
我们需要对登录流程添加分布式锁,收到登录请求会做如下事情
- 判断
token和uid是否合理 - 根据
uid构造分布式锁key,然后实现分布式锁加锁操作。比如uid为1001,则分布式锁的key为"lock_1001" - 加锁后通过defer自动析构解锁
- 通过
uid获取用户之前登录的服务器,如果存在则说明uid对应的用户还在线,此时要做踢人,判断serverip和现在的服务器ip是否相等,如果相等则说明是
本服务器踢人,只需要通过线程锁控制好并发逻辑即可,将uid对应的旧session发送信息通知客户端下线,并且将旧session从server中移除。
如果不是本服务器,则要做跨服踢人,调用grpc踢人即可,留作之后做。
- 登录成功后,要将
uid和对应的ip信息写入redis,方便以后跨服查找。另外uid对应的session信息也要写入redis, 同时将uid和session关联,这样可以通过uid快速找到session
cpp展开代码void LogicSystem::LoginHandler(shared_ptr<CSession> session, const short &msg_id, const string &msg_data) {
Json::Reader reader;
Json::Value root;
reader.parse(msg_data, root);
auto uid = root["uid"].asInt();
auto token = root["token"].asString();
std::cout << "user login uid is " << uid << " user token is "
<< token << endl;
Json::Value rtvalue;
Defer defer([this, &rtvalue, session]() {
std::string return_str = rtvalue.toStyledString();
session->Send(return_str, MSG_CHAT_LOGIN_RSP);
});
//从redis获取用户token是否正确
std::string uid_str = std::to_string(uid);
std::string token_key = USERTOKENPREFIX + uid_str;
std::string token_value = "";
bool success = RedisMgr::GetInstance()->Get(token_key, token_value);
if (!success) {
rtvalue["error"] = ErrorCodes::UidInvalid;
return ;
}
if (token_value != token) {
rtvalue["error"] = ErrorCodes::TokenInvalid;
return ;
}
rtvalue["error"] = ErrorCodes::Success;
//此处添加分布式锁,让该线程独占登录
//拼接用户ip对应的key
auto lock_key = LOCK_PREFIX + uid_str;
auto identifier = RedisMgr::GetInstance()->acquireLock(lock_key, LOCK_TIME_OUT, ACQUIRE_TIME_OUT);
//利用defer解锁
Defer defer2([this, identifier, lock_key]() {
RedisMgr::GetInstance()->releaseLock(lock_key, identifier);
});
//此处判断该用户是否在别处或者本服务器登录
std::string uid_ip_value = "";
auto uid_ip_key = USERIPPREFIX + uid_str;
bool b_ip = RedisMgr::GetInstance()->Get(uid_ip_key, uid_ip_value);
//说明用户已经登录了,此处应该踢掉之前的用户登录状态
if (b_ip) {
//获取当前服务器ip信息
auto& cfg = ConfigMgr::Inst();
auto self_name = cfg["SelfServer"]["Name"];
//如果之前登录的服务器和当前相同,则直接在本服务器踢掉
if (uid_ip_value == self_name) {
//查找旧有的连接
auto old_session = UserMgr::GetInstance()->GetSession(uid);
//此处应该发送踢人消息
if (old_session) {
old_session->NotifyOffline(uid);
//清除旧的连接
_p_server->ClearSession(old_session->GetSessionId());
}
}
else {
//如果不是本服务器,则通知grpc通知其他服务器踢掉
}
}
std::string base_key = USER_BASE_INFO + uid_str;
auto user_info = std::make_shared<UserInfo>();
bool b_base = GetBaseInfo(base_key, uid, user_info);
if (!b_base) {
rtvalue["error"] = ErrorCodes::UidInvalid;
return;
}
rtvalue["uid"] = uid;
rtvalue["pwd"] = user_info->pwd;
rtvalue["name"] = user_info->name;
rtvalue["email"] = user_info->email;
rtvalue["nick"] = user_info->nick;
rtvalue["desc"] = user_info->desc;
rtvalue["sex"] = user_info->sex;
rtvalue["icon"] = user_info->icon;
//从数据库获取申请列表
std::vector<std::shared_ptr<ApplyInfo>> apply_list;
auto b_apply = GetFriendApplyInfo(uid,apply_list);
if (b_apply) {
for (auto & apply : apply_list) {
Json::Value obj;
obj["name"] = apply->_name;
obj["uid"] = apply->_uid;
obj["icon"] = apply->_icon;
obj["nick"] = apply->_nick;
obj["sex"] = apply->_sex;
obj["desc"] = apply->_desc;
obj["status"] = apply->_status;
rtvalue["apply_list"].append(obj);
}
}
//获取好友列表
std::vector<std::shared_ptr<UserInfo>> friend_list;
bool b_friend_list = GetFriendList(uid, friend_list);
for (auto& friend_ele : friend_list) {
Json::Value obj;
obj["name"] = friend_ele->name;
obj["uid"] = friend_ele->uid;
obj["icon"] = friend_ele->icon;
obj["nick"] = friend_ele->nick;
obj["sex"] = friend_ele->sex;
obj["desc"] = friend_ele->desc;
obj["back"] = friend_ele->back;
rtvalue["friend_list"].append(obj);
}
auto server_name = ConfigMgr::Inst().GetValue("SelfServer", "Name");
//将登录数量增加
auto rd_res = RedisMgr::GetInstance()->HGet(LOGIN_COUNT, server_name);
int count = 0;
if (!rd_res.empty()) {
count = std::stoi(rd_res);
}
count++;
auto count_str = std::to_string(count);
RedisMgr::GetInstance()->HSet(LOGIN_COUNT, server_name, count_str);
//session绑定用户uid
session->SetUserId(uid);
//为用户设置登录ip server的名字
std::string ipkey = USERIPPREFIX + uid_str;
RedisMgr::GetInstance()->Set(ipkey, server_name);
//uid和session绑定管理,方便以后踢人操作
UserMgr::GetInstance()->SetUserSession(uid, session);
std::string uid_session_key = USER_SESSION_PREFIX + uid_str;
RedisMgr::GetInstance()->Set(uid_session_key, session->GetSessionId());
return;
}
6. 检测离线处理
服务器也会检测到离线也会清理连接,但是要注意,连接可以不按照分布式锁加锁清理,但是连接的信息要加分布式锁后再更新。
比如是否将uid对应的session更新到redis中,因为很可能用户在别的新服务器登录,新服务器给旧的客户端通知离线,旧的客户端不按理连接,导致旧的服务器检测连接断开,此时不能将uid对应的session清空,因为uid对应的session已经被新服务器更新了。
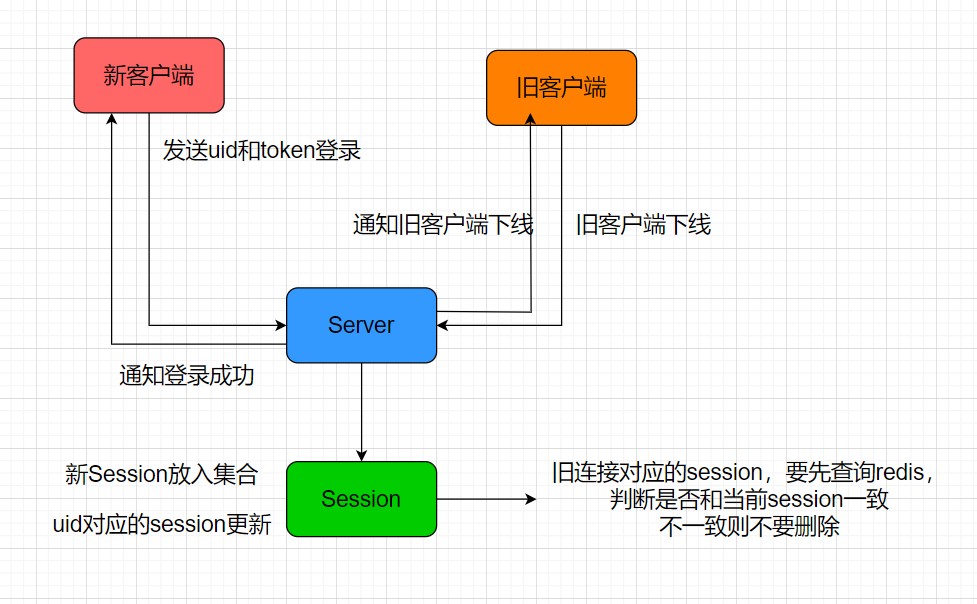
在发送和接收的时候都可能检测到对方离线而报错,所以在AsyncReadBody和AsyncReadHead以及AsyncWrite等错误处理的时候记得加上连接清理操作
我们以读取body为例
cpp展开代码void CSession::AsyncReadBody(int total_len)
{
auto self = shared_from_this();
asyncReadFull(total_len, [self, this, total_len](const boost::system::error_code& ec, std::size_t bytes_transfered) {
try {
if (ec) {
std::cout << "handle read failed, error is " << ec.what() << endl;
Close();
//加锁清除session
auto uid_str = std::to_string(_user_uid);
auto lock_key = LOCK_PREFIX + uid_str;
auto identifier = RedisMgr::GetInstance()->acquireLock(lock_key, LOCK_TIME_OUT, ACQUIRE_TIME_OUT);
Defer defer([identifier, lock_key,self,this]() {
_server->ClearSession(_session_id);
RedisMgr::GetInstance()->releaseLock(lock_key, identifier);
});
if (identifier.empty()) {
return;
}
std::string redis_session_id = "";
auto bsuccess = RedisMgr::GetInstance()->Get(USER_SESSION_PREFIX + uid_str, redis_session_id);
if (!bsuccess) {
return;
}
if (redis_session_id != _session_id) {
//说明有客户在其他服务器异地登录了
return;
}
RedisMgr::GetInstance()->Del(USER_SESSION_PREFIX + uid_str);
//清除用户登录信息
RedisMgr::GetInstance()->Del(USERIPPREFIX + uid_str);
return;
}
if (bytes_transfered < total_len) {
std::cout << "read length not match, read [" << bytes_transfered << "] , total ["
<< total_len<<"]" << endl;
Close();
_server->ClearSession(_session_id);
return;
}
memcpy(_recv_msg_node->_data , _data , bytes_transfered);
_recv_msg_node->_cur_len += bytes_transfered;
_recv_msg_node->_data[_recv_msg_node->_total_len] = '\0';
cout << "receive data is " << _recv_msg_node->_data << endl;
//此处将消息投递到逻辑队列中
LogicSystem::GetInstance()->PostMsgToQue(make_shared<LogicNode>(shared_from_this(), _recv_msg_node));
//继续监听头部接受事件
AsyncReadHead(HEAD_TOTAL_LEN);
}
catch (std::exception& e) {
std::cout << "Exception code is " << e.what() << endl;
}
});
}
7. 测试效果
本节先测试单服务器同账号不同客户端登录情况,为了将同账号客户端派发到同一个服务器,暂时修改StatusServer的派发逻辑为同一个服务器
cpp展开代码ChatServer StatusServiceImpl::getChatServer() {
std::lock_guard<std::mutex> guard(_server_mtx);
auto minServer = _servers.begin()->second;
//暂时注释,测试单服务器模式
//auto count_str = RedisMgr::GetInstance()->HGet(LOGIN_COUNT, minServer.name);
//if (count_str.empty()) {
// //不存在则默认设置为最大
// minServer.con_count = INT_MAX;
//}
//else {
// minServer.con_count = std::stoi(count_str);
//}
//// 使用范围基于for循环
//for ( auto& server : _servers) {
//
// if (server.second.name == minServer.name) {
// continue;
// }
// auto count_str = RedisMgr::GetInstance()->HGet(LOGIN_COUNT, server.second.name);
// if (count_str.empty()) {
// server.second.con_count = INT_MAX;
// }
// else {
// server.second.con_count = std::stoi(count_str);
// }
// if (server.second.con_count < minServer.con_count) {
// minServer = server.second;
// }
//}
return minServer;
}
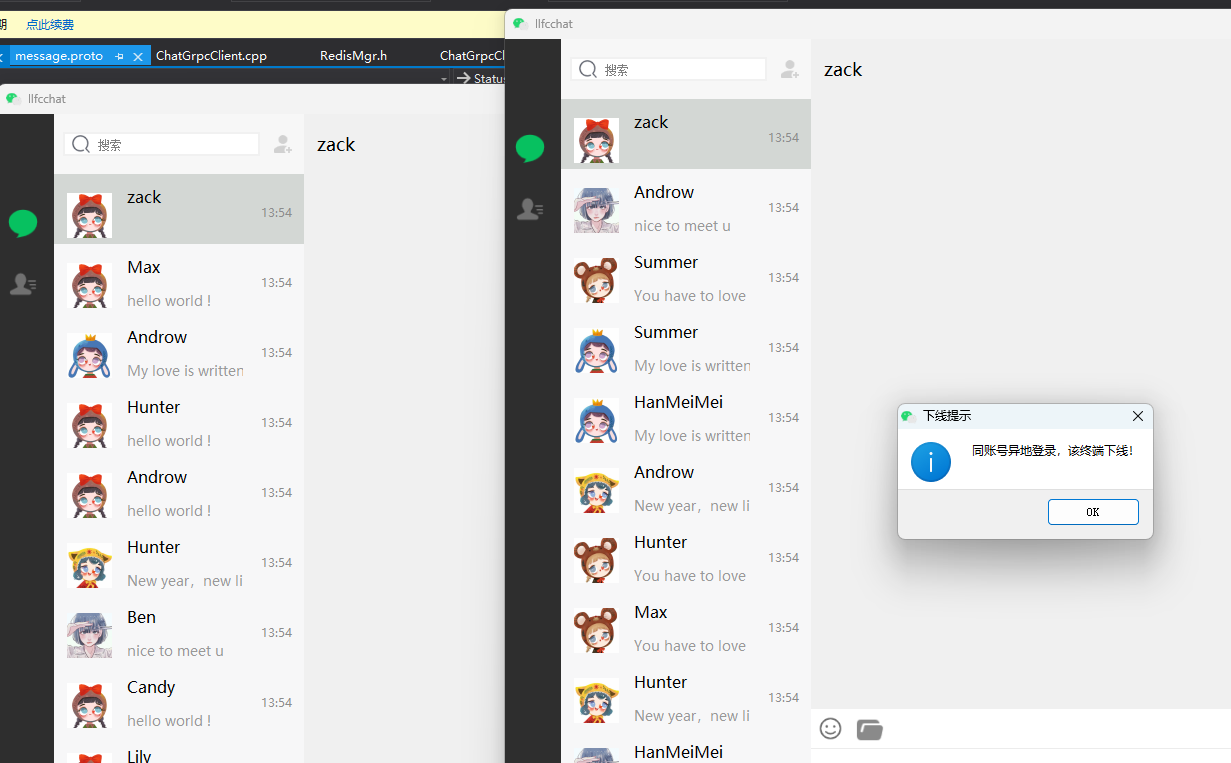
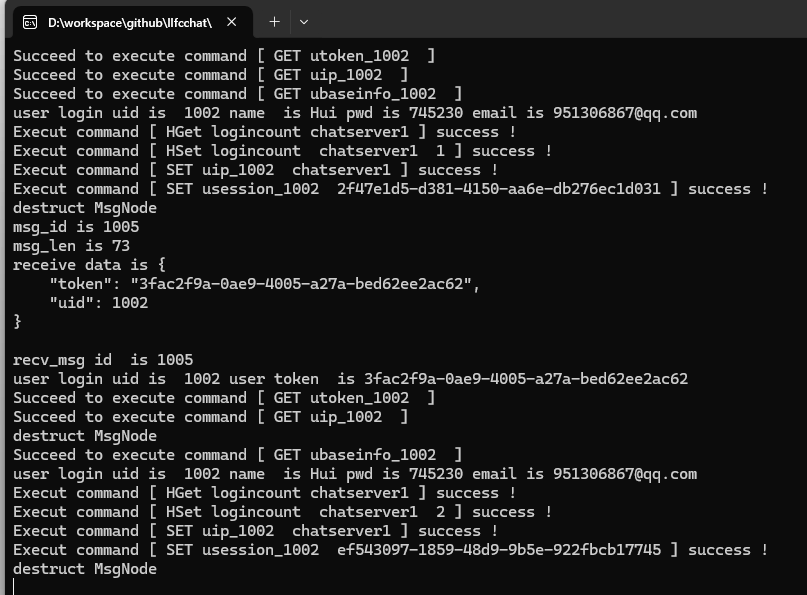
8. 待做事项
- 跨服踢人留作下一节处理
- 心跳检测未作,留作以后处理
- 心跳检测发现僵尸连接,需要踢人,留作以后处理。
9. 源码
https://gitee.com/secondtonone1/llfcchat
day34多服程踢人逻辑
title: 跨服踢人逻辑实现 date: 2025-04-19 10:25:18 tags: [C++聊天项目] categories: [C++聊天项目]
前情回顾
前文我们实现了单服务器踢人的逻辑,通过分布式锁锁住登录过程,在这个期间对用户相关的信息进行更改,主要包括用户id对应的serverip, sessionid等。
同时对用户离线消息进行了处理,也是通过分布式锁锁住退出过程,判断此时用户id对应的sessionid是否和本服记录相等,如果不相等则说明有用户异地登录,此时只要退出即可,否则要清理id对应的sessionid以及serverip等信息。
接下来我们实现跨服踢人逻辑
RPC封装
因为跨服踢人,所以要调用Grpc踢人,我们在message.proto中添加踢人消息
cpp展开代码message KickUserReq{
int32 uid = 1;
}
message KickUserRsp{
int32 error = 1;
int32 uid = 2;
}
同时添加服务调用
cpp展开代码service ChatService {
//...其他服务略去
rpc NotifyKickUser(KickUserReq) returns (KickUserRsp){}
}
编写bat脚本自动生成, start.bat内容如下
bash展开代码@echo off
set PROTOC_PATH=D:\cppsoft\grpc\visualpro\third_party\protobuf\Debug\protoc.exe
set GRPC_PLUGIN_PATH=D:\cppsoft\grpc\visualpro\Debug\grpc_cpp_plugin.exe
set PROTO_FILE=message.proto
echo Generating gRPC code...
%PROTOC_PATH% -I="." --grpc_out="." --plugin=protoc-gen-grpc="%GRPC_PLUGIN_PATH%" "%PROTO_FILE%"
echo Generating C++ code...
%PROTOC_PATH% --cpp_out=. "%PROTO_FILE%"
echo Done.
双击start.bat或者在cmd中执行start.bat也可以
执行后可以发现产生了四个文件

跨服踢人示意图
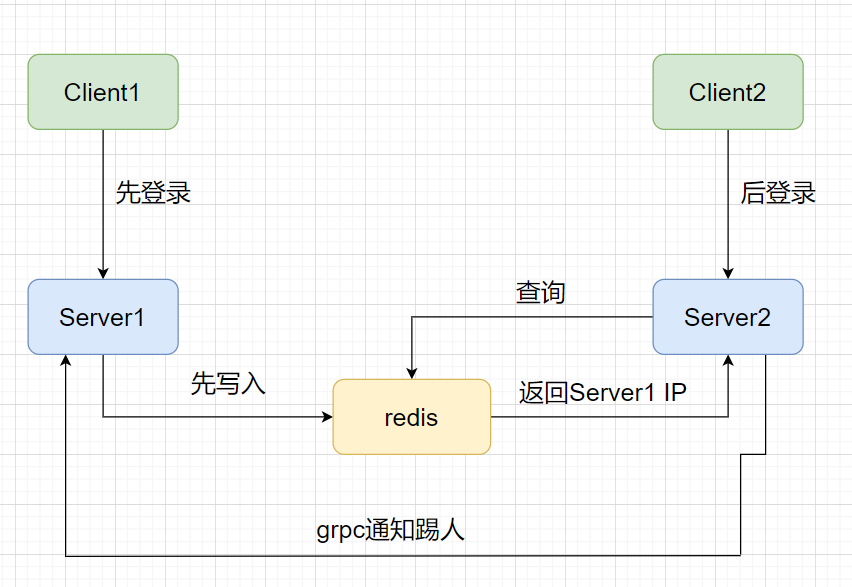
逻辑编写
StatusServer动态分配
StatusServer中修改动态分配server逻辑
cpp展开代码ChatServer StatusServiceImpl::getChatServer() {
std::lock_guard<std::mutex> guard(_server_mtx);
auto minServer = _servers.begin()->second;
auto lock_key = LOCK_COUNT;
auto identifier = RedisMgr::GetInstance()->acquireLock(lock_key, LOCK_TIME_OUT, ACQUIRE_TIME_OUT);
//利用defer解锁
Defer defer2([this, identifier, lock_key]() {
RedisMgr::GetInstance()->releaseLock(lock_key, identifier);
});
auto count_str = RedisMgr::GetInstance()->HGet(LOGIN_COUNT, minServer.name);
if (count_str.empty()) {
//不存在则默认设置为最大
minServer.con_count = INT_MAX;
}
else {
minServer.con_count = std::stoi(count_str);
}
// 使用范围基于for循环
for ( auto& server : _servers) {
if (server.second.name == minServer.name) {
continue;
}
auto count_str = RedisMgr::GetInstance()->HGet(LOGIN_COUNT, server.second.name);
if (count_str.empty()) {
server.second.con_count = INT_MAX;
}
else {
server.second.con_count = std::stoi(count_str);
}
if (server.second.con_count < minServer.con_count) {
minServer = server.second;
}
}
return minServer;
}
注意这里用到了另一个分布式锁,用来控制服务器人数记录
cpp展开代码auto identifier = RedisMgr::GetInstance()->acquireLock(lock_key, LOCK_TIME_OUT, ACQUIRE_TIME_OUT);
ChatServer踢人逻辑
ChatSever中登录逻辑里添加跨服踢人调用
cpp展开代码void LogicSystem::LoginHandler(shared_ptr<CSession> session, const short &msg_id, const string &msg_data) {
Json::Reader reader;
Json::Value root;
reader.parse(msg_data, root);
auto uid = root["uid"].asInt();
auto token = root["token"].asString();
std::cout << "user login uid is " << uid << " user token is "
<< token << endl;
Json::Value rtvalue;
Defer defer([this, &rtvalue, session]() {
std::string return_str = rtvalue.toStyledString();
session->Send(return_str, MSG_CHAT_LOGIN_RSP);
});
//从redis获取用户token是否正确
std::string uid_str = std::to_string(uid);
std::string token_key = USERTOKENPREFIX + uid_str;
std::string token_value = "";
bool success = RedisMgr::GetInstance()->Get(token_key, token_value);
if (!success) {
rtvalue["error"] = ErrorCodes::UidInvalid;
return ;
}
if (token_value != token) {
rtvalue["error"] = ErrorCodes::TokenInvalid;
return ;
}
rtvalue["error"] = ErrorCodes::Success;
std::string base_key = USER_BASE_INFO + uid_str;
auto user_info = std::make_shared<UserInfo>();
bool b_base = GetBaseInfo(base_key, uid, user_info);
if (!b_base) {
rtvalue["error"] = ErrorCodes::UidInvalid;
return;
}
rtvalue["uid"] = uid;
rtvalue["pwd"] = user_info->pwd;
rtvalue["name"] = user_info->name;
rtvalue["email"] = user_info->email;
rtvalue["nick"] = user_info->nick;
rtvalue["desc"] = user_info->desc;
rtvalue["sex"] = user_info->sex;
rtvalue["icon"] = user_info->icon;
//从数据库获取申请列表
std::vector<std::shared_ptr<ApplyInfo>> apply_list;
auto b_apply = GetFriendApplyInfo(uid, apply_list);
if (b_apply) {
for (auto& apply : apply_list) {
Json::Value obj;
obj["name"] = apply->_name;
obj["uid"] = apply->_uid;
obj["icon"] = apply->_icon;
obj["nick"] = apply->_nick;
obj["sex"] = apply->_sex;
obj["desc"] = apply->_desc;
obj["status"] = apply->_status;
rtvalue["apply_list"].append(obj);
}
}
//获取好友列表
std::vector<std::shared_ptr<UserInfo>> friend_list;
bool b_friend_list = GetFriendList(uid, friend_list);
for (auto& friend_ele : friend_list) {
Json::Value obj;
obj["name"] = friend_ele->name;
obj["uid"] = friend_ele->uid;
obj["icon"] = friend_ele->icon;
obj["nick"] = friend_ele->nick;
obj["sex"] = friend_ele->sex;
obj["desc"] = friend_ele->desc;
obj["back"] = friend_ele->back;
rtvalue["friend_list"].append(obj);
}
auto server_name = ConfigMgr::Inst().GetValue("SelfServer", "Name");
{
//此处添加分布式锁,让该线程独占登录
//拼接用户ip对应的key
auto lock_key = LOCK_PREFIX + uid_str;
auto identifier = RedisMgr::GetInstance()->acquireLock(lock_key, LOCK_TIME_OUT, ACQUIRE_TIME_OUT);
//利用defer解锁
Defer defer2([this, identifier, lock_key]() {
RedisMgr::GetInstance()->releaseLock(lock_key, identifier);
});
//此处判断该用户是否在别处或者本服务器登录
std::string uid_ip_value = "";
auto uid_ip_key = USERIPPREFIX + uid_str;
bool b_ip = RedisMgr::GetInstance()->Get(uid_ip_key, uid_ip_value);
//说明用户已经登录了,此处应该踢掉之前的用户登录状态
if (b_ip) {
//获取当前服务器ip信息
auto& cfg = ConfigMgr::Inst();
auto self_name = cfg["SelfServer"]["Name"];
//如果之前登录的服务器和当前相同,则直接在本服务器踢掉
if (uid_ip_value == self_name) {
//查找旧有的连接
auto old_session = UserMgr::GetInstance()->GetSession(uid);
//此处应该发送踢人消息
if (old_session) {
old_session->NotifyOffline(uid);
//清除旧的连接
_p_server->ClearSession(old_session->GetSessionId());
}
}
else {
//如果不是本服务器,则通知grpc通知其他服务器踢掉
//发送通知
KickUserReq kick_req;
kick_req.set_uid(uid);
ChatGrpcClient::GetInstance()->NotifyKickUser(uid_ip_value, kick_req);
}
}
//session绑定用户uid
session->SetUserId(uid);
//为用户设置登录ip server的名字
std::string ipkey = USERIPPREFIX + uid_str;
RedisMgr::GetInstance()->Set(ipkey, server_name);
//uid和session绑定管理,方便以后踢人操作
UserMgr::GetInstance()->SetUserSession(uid, session);
std::string uid_session_key = USER_SESSION_PREFIX + uid_str;
RedisMgr::GetInstance()->Set(uid_session_key, session->GetSessionId());
}
RedisMgr::GetInstance()->IncreaseCount(server_name);
return;
}
注意上面代码,这段代码就是跨服踢人逻辑。
cpp展开代码 else {
//如果不是本服务器,则通知grpc通知其他服务器踢掉
//发送通知
KickUserReq kick_req;
kick_req.set_uid(uid);
ChatGrpcClient::GetInstance()->NotifyKickUser(uid_ip_value, kick_req);
}
关于KickUserReq其实是我们在message.pb.h中生成的。但是我们在自己的文件中使用要用作用域messag::, 所以我们在GrpcClient.h中添加声明
cpp展开代码using message::KickUserReq;
using message::KickUserRsp;
以后我们包含GrpcClient.h就可以使用这些类了。
封装rpc踢人
接下来我们封装rpc接口实现踢人逻辑
rpc客户端接口
cpp展开代码KickUserRsp ChatGrpcClient::NotifyKickUser(std::string server_ip, const KickUserReq& req)
{
KickUserRsp rsp;
Defer defer([&rsp, &req]() {
rsp.set_error(ErrorCodes::Success);
rsp.set_uid(req.uid());
});
auto find_iter = _pools.find(server_ip);
if (find_iter == _pools.end()) {
return rsp;
}
auto& pool = find_iter->second;
ClientContext context;
auto stub = pool->getConnection();
Defer defercon([&stub, this, &pool]() {
pool->returnConnection(std::move(stub));
});
Status status = stub->NotifyKickUser(&context, req, &rsp);
if (!status.ok()) {
rsp.set_error(ErrorCodes::RPCFailed);
return rsp;
}
return rsp;
}
rpc服务端接口实现
cpp展开代码Status ChatServiceImpl::NotifyKickUser(::grpc::ServerContext* context,
const KickUserReq* request, KickUserRsp* reply)
{
//查找用户是否在本服务器
auto uid = request->uid();
auto session = UserMgr::GetInstance()->GetSession(uid);
Defer defer([request, reply]() {
reply->set_error(ErrorCodes::Success);
reply->set_uid(request->uid());
});
//用户不在内存中则直接返回
if (session == nullptr) {
return Status::OK;
}
//在内存中则直接发送通知对方
session->NotifyOffline(uid);
//清除旧的连接
_p_server->ClearSession(session->GetSessionId());
return Status::OK;
}
为了让ChatServiceImpl 获取CServer, 所以我们提供了注册函数
cpp展开代码void ChatServiceImpl::RegisterServer(std::shared_ptr<CServer> pServer)
{
_p_server = pServer;
}
这个函数在main函数中启动grpc服务前注册即可。
登录数量统计
在StatusServer中利用分布式锁获取登录数量,动态分配Server给客户端,这里我们也要用ChatServer启动和退出时清空登录数量
重新调整ChatServer启动逻辑
cpp展开代码using namespace std;
bool bstop = false;
std::condition_variable cond_quit;
std::mutex mutex_quit;
int main()
{
auto& cfg = ConfigMgr::Inst();
auto server_name = cfg["SelfServer"]["Name"];
try {
auto pool = AsioIOServicePool::GetInstance();
//将登录数设置为0
RedisMgr::GetInstance()->InitCount(server_name);
Defer derfer ([server_name]() {
RedisMgr::GetInstance()->HDel(LOGIN_COUNT, server_name);
RedisMgr::GetInstance()->Close();
});
boost::asio::io_context io_context;
auto port_str = cfg["SelfServer"]["Port"];
//创建Cserver智能指针
auto pointer_server = std::make_shared<CServer>(io_context, atoi(port_str.c_str()));
//定义一个GrpcServer
std::string server_address(cfg["SelfServer"]["Host"] + ":" + cfg["SelfServer"]["RPCPort"]);
ChatServiceImpl service;
grpc::ServerBuilder builder;
// 监听端口和添加服务
builder.AddListeningPort(server_address, grpc::InsecureServerCredentials());
builder.RegisterService(&service);
service.RegisterServer(pointer_server);
// 构建并启动gRPC服务器
std::unique_ptr<grpc::Server> server(builder.BuildAndStart());
std::cout << "RPC Server listening on " << server_address << std::endl;
//单独启动一个线程处理grpc服务
std::thread grpc_server_thread([&server]() {
server->Wait();
});
boost::asio::signal_set signals(io_context, SIGINT, SIGTERM);
signals.async_wait([&io_context, pool, &server](auto, auto) {
io_context.stop();
pool->Stop();
server->Shutdown();
});
//将Cserver注册给逻辑类方便以后清除连接
LogicSystem::GetInstance()->SetServer(pointer_server);
io_context.run();
grpc_server_thread.join();
}
catch (std::exception& e) {
std::cerr << "Exception: " << e.what() << endl;
}
}
上面的逻辑有这样一段,要格外注意
cpp展开代码 //将登录数设置为0
RedisMgr::GetInstance()->InitCount(server_name);
Defer derfer ([server_name]() {
RedisMgr::GetInstance()->HDel(LOGIN_COUNT, server_name);
RedisMgr::GetInstance()->Close();
});
这段逻辑是在服务器启动后将对应服务器中连接数清零写入redis,在服务器结束后从redis中删除数量信息,最后关闭Redis连接池
源码
源码地址
https://gitee.com/secondtonone1/llfcchat
day35心跳逻辑
title: 心跳检测实现 date: 2025-05-01 11:57:41 tags: [C++聊天项目] categories: [C++聊天项目]
前情回顾
前文我们实现了跨服踢人逻辑,通过分布式锁锁住不同服务器相同用户登录的操作,保证逻辑的原子性。
今天我们来谈一谈心跳机制,以及为什么要有心跳机制,以及该如何实现心跳机制,而且是分布式情况下心跳配合踢人逻辑该如何实现。
心跳概念
在一个“长连接”(如 TCP 持久连接、WebSocket、gRPC 长流等)中,客户端和服务端之间会保持一个持续打开的通道,以便双方可以随时双向发送数据。与一次性请求/响应模型(短连接)相比,长连接最大的挑战在于如何做到“及时发现网络或对端异常”、并“防止连接在中间节点(如路由器、NAT、防火墙)被静默地回收”。心跳机制正是为了解决这两个核心问题而引入的:
心跳示意图
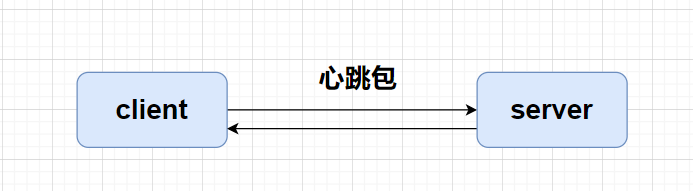
没有心跳
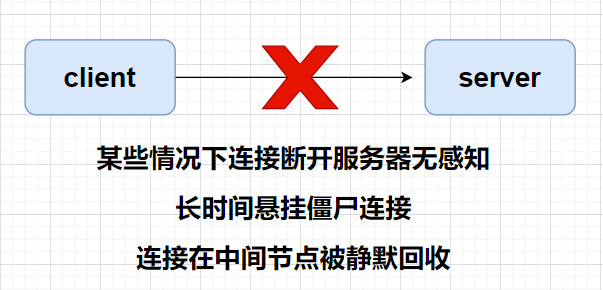
当没有心跳机制的时候,如果设备异常断线(拔掉网线),tcp层面可能无法立即感知,导致僵尸连接挂在服务器上。除非服务器发送数据给客户端才会感知到。或者被中间设备超时回收。
防止中间设备超时回收
许多网络设备(尤其是 NAT、负载均衡、防火墙)会对空闲连接设定一个超时阈值:
- 如果某段时间内连接上没有任何数据包经过,它会自动“回收”这条路由/会话,导致真正的数据到达时被丢弃或重置。
- 心跳包可以视作“活动信号”,让中间设备认为连接仍在活跃,从而维持映射表或会话状态,避免意外断开。
服务器心跳实现
服务器可以启动一个定时器,每隔60s检测一下所有连接,判断连接是否''活着'', 所谓"活着"就是连接没有断开。
怎么设置"活着"呢?就是对每一个Session(会话)设置一个时间戳,这个Session收到消息后,就更新这个时间戳。
服务器定时检测当前时间和这个时间戳的差值,如果大于一个阈值就说明连接断开了。这个阈值看服务器设定,一般60s即可。
cpp展开代码void CServer::on_timer(const boost::system::error_code& ec) {
//此处加锁遍历session
{
lock_guard<mutex> lock(_mutex);
time_t now = std::time(nullptr);
for (auto iter = _sessions.begin(); iter != _sessions.end(); ) {
auto b_expired = iter->second->IsHeartbeatExpired(now);
if (b_expired) {
//关闭socket, 其实这里也会触发async_read的错误处理
iter->second->Close();
iter = _sessions.erase(iter);
//加分布式锁清理redis信息
auto uid_str = std::to_string(_user_uid);
auto lock_key = LOCK_PREFIX + uid_str;
auto identifier = RedisMgr::GetInstance()->acquireLock(lock_key, LOCK_TIME_OUT, ACQUIRE_TIME_OUT);
Defer defer([identifier, lock_key, self, this]() {
RedisMgr::GetInstance()->releaseLock(lock_key, identifier);
});
if (identifier.empty()) {
return;
}
std::string redis_session_id = "";
auto bsuccess = RedisMgr::GetInstance()->Get(USER_SESSION_PREFIX + uid_str, redis_session_id);
if (!bsuccess) {
return;
}
if (redis_session_id != _session_id) {
//说明有客户在其他服务器异地登录了
return;
}
RedisMgr::GetInstance()->Del(USER_SESSION_PREFIX + uid_str);
//清除用户登录信息
RedisMgr::GetInstance()->Del(USERIPPREFIX + uid_str);
continue;
}
session_count++;
}
}
//再次设置,下一个60s检测
_timer.expires_after(std::chrono::seconds(60));
_timer.async_wait([this](boost::system::error_code ec) {
on_timer(ec);
});
}
大家仔细观察这个代码,有没有发现什么问题?
这段代码是先加线程锁_mutex, 然后加分布式锁lock_key
但是我们看下Session读取掉线连接信息时会清空redis信息,流程如下
cpp展开代码void CSession::AsyncReadHead(int total_len)
{
auto self = shared_from_this();
asyncReadFull(HEAD_TOTAL_LEN, [self, this](const boost::system::error_code& ec, std::size_t bytes_transfered) {
try {
if (ec) {
std::cout << "handle read failed, error is " << ec.what() << endl;
Close();
auto self = shared_from_this();
//加锁清除session
auto uid_str = std::to_string(_user_uid);
auto lock_key = LOCK_PREFIX + uid_str;
auto identifier = RedisMgr::GetInstance()->acquireLock(lock_key, LOCK_TIME_OUT, ACQUIRE_TIME_OUT);
Defer defer([identifier, lock_key, self, this]() {
_server->ClearSession(_session_id);
RedisMgr::GetInstance()->releaseLock(lock_key, identifier);
});
if (identifier.empty()) {
return;
}
std::string redis_session_id = "";
auto bsuccess = RedisMgr::GetInstance()->Get(USER_SESSION_PREFIX + uid_str, redis_session_id);
if (!bsuccess) {
return;
}
if (redis_session_id != _session_id) {
//说明有客户在其他服务器异地登录了
return;
}
RedisMgr::GetInstance()->Del(USER_SESSION_PREFIX + uid_str);
//清除用户登录信息
RedisMgr::GetInstance()->Del(USERIPPREFIX + uid_str);
return;
}
//....省略正常逻辑
}catch (std::exception& e) {
std::cout << "Exception code is " << e.what() << endl;
}
});
}
AsyncReadHead错误处理中先加了分布式锁lock_key,再加线程锁_mutex
图示如下
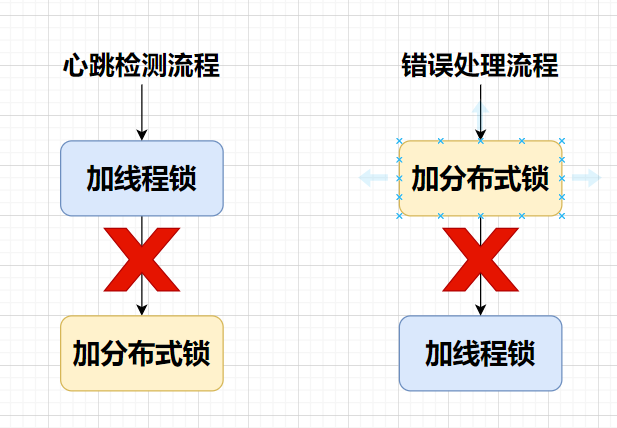
上面图示已经很明显了,有概率造成死锁。
接下来谈谈死锁如何避免
如何避免死锁
线程锁避免死锁
如果是两个线程锁,避免死锁的最简单方式就是同时加锁,或者顺序一致性加锁
在 C++17 里,std::scoped_lock(也有人称它为“scope lock”)提供了对多个互斥量无死锁地一次性加锁的能力。它的核心在于内部调用了函数模板 std::lock(m1, m2, …),该函数会:
- 尝试按某种顺序非阻塞地抓取所有 mutex:
std::lock会循环地对每一个 mutex 做try_lock(),- 如果有任何一个
try_lock()失败,就立刻释放前面已经成功抓到的所有 mutex,退避(backoff),然后重试。
- 保证最终所有 mutex 要么全部抓到了,要么都没抓到:
- 这样就避免了“线程 A 拿了 m1 等待 m2,而线程 B 拿了 m2 等待 m1”这种经典死锁情形。
只要你的所有代码都用同一个调用 std::scoped_lock(m1, m2, …) 的方式去加这几把锁,就不会出现交叉锁导致的死锁。
用法示例
展开代码#include <mutex> #include <thread> #include <iostream> std::mutex mtx1, mtx2; void worker1() { // 同时加 mtx1、mtx2,不会与另一个线程交叉死锁 std::scoped_lock lock(mtx1, mtx2); std::cout << "worker1 got both locks\n"; // … 操作受两把锁保护的资源 … } void worker2() { // 即便另一线程也是先 mtx2、后 mtx1,只要都改成 scoped_lock(mtx1, mtx2), // 底层 std::lock 会保证不会死锁 std::scoped_lock lock(mtx1, mtx2); std::cout << "worker2 got both locks\n"; // … 相同资源操作 … } int main() { std::thread t1(worker1); std::thread t2(worker2); t1.join(); t2.join(); return 0; }
为什么不会死锁?
-
std::scoped_lock(mtx1, mtx2)在构造时等价于:展开代码std::lock(mtx1, mtx2); -
std::lock会:- 先
try_lock()mtx1、再try_lock()mtx2。 - 如果第二步失败,就释放第一把、稍作退避后重试。
- 直到两把都一次性成功为止。
- 先
这样就不会出现“线程 A 拿到 mtx1 → 等 mtx2”同时“线程 B 拿到 mtx2 → 等 mtx1”互相卡死的情况。
分布式锁
要解决“分布式锁 ↔ 线程锁”互相嵌套导致死锁的问题,核心思路就是:
-
统一锁的获取顺序
- 始终按同一个顺序去申请锁。
- 比如:不论是业务 A(先分布式锁后线程锁)还是心跳(先线程锁后分布式锁),都改成 “先拿分布式锁 → 再拿线程锁” 或者 “先拿线程锁 → 再拿分布式锁” 之一即可。
- 只要保证两个场景里锁的申请顺序一致,就不会互相等待导致死锁。
-
使用带超时的尝试锁(tryLock)+ 重试/回退策略
- 对于线程锁(例如
ReentrantLock)和分布式锁(例如Redisson的tryLock(long waitTime, long leaseTime, TimeUnit unit)),都用tryLock而非阻塞式lock()。 - 如果某把锁在指定时间内拿不到,就释放已持有的那把锁,稍微退避(sleep 随机短时长)后重试。
- 这样可以在检测到可能的死锁倾向时主动放弃,避免无限等待。
- 对于线程锁(例如
-
合并锁或升级锁策略
-
如果分布式节点上并发线程只是共享同一把“逻辑锁”,可以考虑把本地线程锁和分布式锁做一次封装:
展开代码class CombinedLock { RLock distLock; std::mutex mtx; public void lock() { distLock.lock(); mtx.lock(); } public void unlock() { mtx.unlock(); distLock.unlock(); } } -
这样业务层只用
combinedLock.lock(),根本不用关心哪把先后,底层永远是固定顺序。
-
-
只用分布式锁或只用线程锁
- 如果心跳更新 Redis 的操作本身就是分布式的,就完全用分布式锁保护它,不再加线程锁。
- 反之,如果这段更新完全在本机线程间协作,也可直接把分布式锁封装进本地锁里,让它表现得像本地锁。
-
利用 Redis Lua 脚本保证原子性
- 将所有对 Redis 的读写操作放到一个 Lua 脚本里一次执行,借助 Redis 的单线程特性保证原子。
- 这样就不需要额外的分布式锁,线程里也不用再加锁。
改造心跳服务
举例:改造心跳服务
cpp展开代码void CServer::on_timer(const boost::system::error_code& ec) {
std::vector<std::shared_ptr<CSession>> _expired_sessions;
int session_count = 0;
//此处加锁遍历session
{
lock_guard<mutex> lock(_mutex);
time_t now = std::time(nullptr);
for (auto iter = _sessions.begin(); iter != _sessions.end(); iter++) {
auto b_expired = iter->second->IsHeartbeatExpired(now);
if (b_expired) {
//关闭socket, 其实这里也会触发async_read的错误处理
iter->second->Close();
//收集过期信息
_expired_sessions.push_back(iter->second);
continue;
}
session_count++;
}
}
//设置session数量
auto& cfg = ConfigMgr::Inst();
auto self_name = cfg["SelfServer"]["Name"];
auto count_str = std::to_string(session_count);
RedisMgr::GetInstance()->HSet(LOGIN_COUNT, self_name, count_str);
//处理过期session, 单独提出,防止死锁
for (auto &session : _expired_sessions) {
session->DealExceptionSession();
}
//再次设置,下一个60s检测
_timer.expires_after(std::chrono::seconds(60));
_timer.async_wait([this](boost::system::error_code ec) {
on_timer(ec);
});
}
将清除逻辑提炼到函数DealExceptionSession
cpp展开代码void CSession::DealExceptionSession()
{
auto self = shared_from_this();
//加锁清除session
auto uid_str = std::to_string(_user_uid);
auto lock_key = LOCK_PREFIX + uid_str;
auto identifier = RedisMgr::GetInstance()->acquireLock(lock_key, LOCK_TIME_OUT, ACQUIRE_TIME_OUT);
Defer defer([identifier, lock_key, self, this]() {
_server->ClearSession(_session_id);
RedisMgr::GetInstance()->releaseLock(lock_key, identifier);
});
if (identifier.empty()) {
return;
}
std::string redis_session_id = "";
auto bsuccess = RedisMgr::GetInstance()->Get(USER_SESSION_PREFIX + uid_str, redis_session_id);
if (!bsuccess) {
return;
}
if (redis_session_id != _session_id) {
//说明有客户在其他服务器异地登录了
return;
}
RedisMgr::GetInstance()->Del(USER_SESSION_PREFIX + uid_str);
//清除用户登录信息
RedisMgr::GetInstance()->Del(USERIPPREFIX + uid_str);
}
-
持有本地线程锁只做遍历、收集过期 UID,不做删除;
-
释放线程锁后,对每个 UID 按 “分布式锁→线程锁” 顺序逐个清理。
这样,所有“同时持有两把锁”的位置,顺序均为:
bash展开代码分布式锁 → 本地线程锁
从而避免死锁
提炼异常处理
比如异步读处理
cpp展开代码void CSession::AsyncReadBody(int total_len)
{
auto self = shared_from_this();
asyncReadFull(total_len, [self, this, total_len](const boost::system::error_code& ec, std::size_t bytes_transfered) {
try {
if (ec) {
std::cout << "handle read failed, error is " << ec.what() << endl;
Close();
DealExceptionSession();
return;
}
if (bytes_transfered < total_len) {
std::cout << "read length not match, read [" << bytes_transfered << "] , total ["
<< total_len<<"]" << endl;
Close();
_server->ClearSession(_session_id);
return;
}
//判断连接无效
if (!_server->CheckValid(_session_id)) {
Close();
return;
}
memcpy(_recv_msg_node->_data , _data , bytes_transfered);
_recv_msg_node->_cur_len += bytes_transfered;
_recv_msg_node->_data[_recv_msg_node->_total_len] = '\0';
cout << "receive data is " << _recv_msg_node->_data << endl;
//更新session心跳时间
UpdateHeartbeat();
//此处将消息投递到逻辑队列中
LogicSystem::GetInstance()->PostMsgToQue(make_shared<LogicNode>(shared_from_this(), _recv_msg_node));
//继续监听头部接受事件
AsyncReadHead(HEAD_TOTAL_LEN);
}
catch (std::exception& e) {
std::cout << "Exception code is " << e.what() << endl;
}
});
}
类似的还有,读头部,写数据等。
过期判断
判断现在时间和上一次心跳时间戳的差值,超过20s就认为连接过期。实际服务器心跳阈值最好60s,这里为了方便演示效果。
cpp展开代码bool CSession::IsHeartbeatExpired(std::time_t& now) {
double diff_sec = std::difftime(now, _last_heartbeat);
if (diff_sec > 20) {
std::cout << "heartbeat expired, session id is " << _session_id << endl;
return true;
}
return false;
}
更新心跳
cpp展开代码void CSession::UpdateHeartbeat()
{
time_t now = std::time(nullptr);
_last_heartbeat = now;
}
在读取消息时做了更新
增加心跳请求处理
服务器增加心跳处理请求
cpp展开代码void LogicSystem::HeartBeatHandler(std::shared_ptr<CSession> session, const short& msg_id, const string& msg_data) {
Json::Reader reader;
Json::Value root;
reader.parse(msg_data, root);
auto uid = root["fromuid"].asInt();
std::cout << "receive heart beat msg, uid is " << uid << std::endl;
Json::Value rtvalue;
rtvalue["error"] = ErrorCodes::Success;
session->Send(rtvalue.toStyledString(), ID_HEARTBEAT_RSP);
}
void LogicSystem::RegisterCallBacks() {
_fun_callbacks[MSG_CHAT_LOGIN] = std::bind(&LogicSystem::LoginHandler, this,
placeholders::_1, placeholders::_2, placeholders::_3);
_fun_callbacks[ID_SEARCH_USER_REQ] = std::bind(&LogicSystem::SearchInfo, this,
placeholders::_1, placeholders::_2, placeholders::_3);
_fun_callbacks[ID_ADD_FRIEND_REQ] = std::bind(&LogicSystem::AddFriendApply, this,
placeholders::_1, placeholders::_2, placeholders::_3);
_fun_callbacks[ID_AUTH_FRIEND_REQ] = std::bind(&LogicSystem::AuthFriendApply, this,
placeholders::_1, placeholders::_2, placeholders::_3);
_fun_callbacks[ID_TEXT_CHAT_MSG_REQ] = std::bind(&LogicSystem::DealChatTextMsg, this,
placeholders::_1, placeholders::_2, placeholders::_3);
_fun_callbacks[ID_HEART_BEAT_REQ] = std::bind(&LogicSystem::HeartBeatHandler, this,
placeholders::_1, placeholders::_2, placeholders::_3);
}
客户端增加心跳处理发包和回复
发包处理
在ChatDialog构造函数中添加
cpp展开代码 _timer = new QTimer(this);
connect(_timer, &QTimer::timeout, this, [this](){
auto user_info = UserMgr::GetInstance()->GetUserInfo();
QJsonObject textObj;
textObj["fromuid"] = user_info->_uid;
QJsonDocument doc(textObj);
QByteArray jsonData = doc.toJson(QJsonDocument::Compact);
emit TcpMgr::GetInstance()->sig_send_data(ReqId::ID_HEART_BEAT_REQ, jsonData);
});
_timer->start(10000);
在析构函数中添加
cpp展开代码ChatDialog::~ChatDialog()
{
_timer->stop();
delete ui;
}
回包处理
cpp展开代码 _handlers.insert(ID_HEARTBEAT_RSP,[this](ReqId id, int len, QByteArray data){
Q_UNUSED(len);
qDebug() << "handle id is " << id << " data is " << data;
// 将QByteArray转换为QJsonDocument
QJsonDocument jsonDoc = QJsonDocument::fromJson(data);
// 检查转换是否成功
if (jsonDoc.isNull()) {
qDebug() << "Failed to create QJsonDocument.";
return;
}
QJsonObject jsonObj = jsonDoc.object();
if (!jsonObj.contains("error")) {
int err = ErrorCodes::ERR_JSON;
qDebug() << "Heart Beat Msg Failed, err is Json Parse Err" << err;
return;
}
int err = jsonObj["error"].toInt();
if (err != ErrorCodes::SUCCESS) {
qDebug() << "Heart Beat Msg Failed, err is " << err;
return;
}
qDebug() << "Receive Heart Beat Msg Success" ;
});
客户端增加断线提示
在TcpMgr构造函数中添加
cpp展开代码 // 处理连接断开
QObject::connect(&_socket, &QTcpSocket::disconnected, [&]() {
qDebug() << "Disconnected from server.";
//并且发送通知到界面
emit sig_connection_closed();
});
MainWindow构造函数中添加信号连接
cpp展开代码 //连接服务器断开心跳超时或异常连接信息
connect(TcpMgr::GetInstance().get(),&TcpMgr::sig_connection_closed, this, &MainWindow::SlotExcepConOffline);
槽函数
cpp展开代码void MainWindow::SlotExcepConOffline()
{
// 使用静态方法直接弹出一个信息框
QMessageBox::information(this, "下线提示", "心跳超时或临界异常,该终端下线!");
TcpMgr::GetInstance()->CloseConnection();
offlineLogin();
}
效果测试
为了方便测试,我们修改StatusServer中GetServer逻辑只返回第一个ChatServer1
cpp展开代码ChatServer StatusServiceImpl::getChatServer() {
std::lock_guard<std::mutex> guard(_server_mtx);
auto minServer = _servers.begin()->second;
auto lock_key = LOCK_COUNT;
//暂时注释
//auto identifier = RedisMgr::GetInstance()->acquireLock(lock_key, LOCK_TIME_OUT, ACQUIRE_TIME_OUT);
////利用defer解锁
//Defer defer2([this, identifier, lock_key]() {
// RedisMgr::GetInstance()->releaseLock(lock_key, identifier);
// });
//auto count_str = RedisMgr::GetInstance()->HGet(LOGIN_COUNT, minServer.name);
//if (count_str.empty()) {
// //不存在则默认设置为最大
// minServer.con_count = INT_MAX;
//}
//else {
// minServer.con_count = std::stoi(count_str);
//}
//// 使用范围基于for循环
//for ( auto& server : _servers) {
//
// if (server.second.name == minServer.name) {
// continue;
// }
// auto count_str = RedisMgr::GetInstance()->HGet(LOGIN_COUNT, server.second.name);
// if (count_str.empty()) {
// server.second.con_count = INT_MAX;
// }
// else {
// server.second.con_count = std::stoi(count_str);
// }
// if (server.second.con_count < minServer.con_count) {
// minServer = server.second;
// }
//}
return minServer;
}
我们启动客户端,以及服务器,先屏蔽客户端发送心跳逻辑,可以看到服务器检测心跳超时后会切断客户端连接
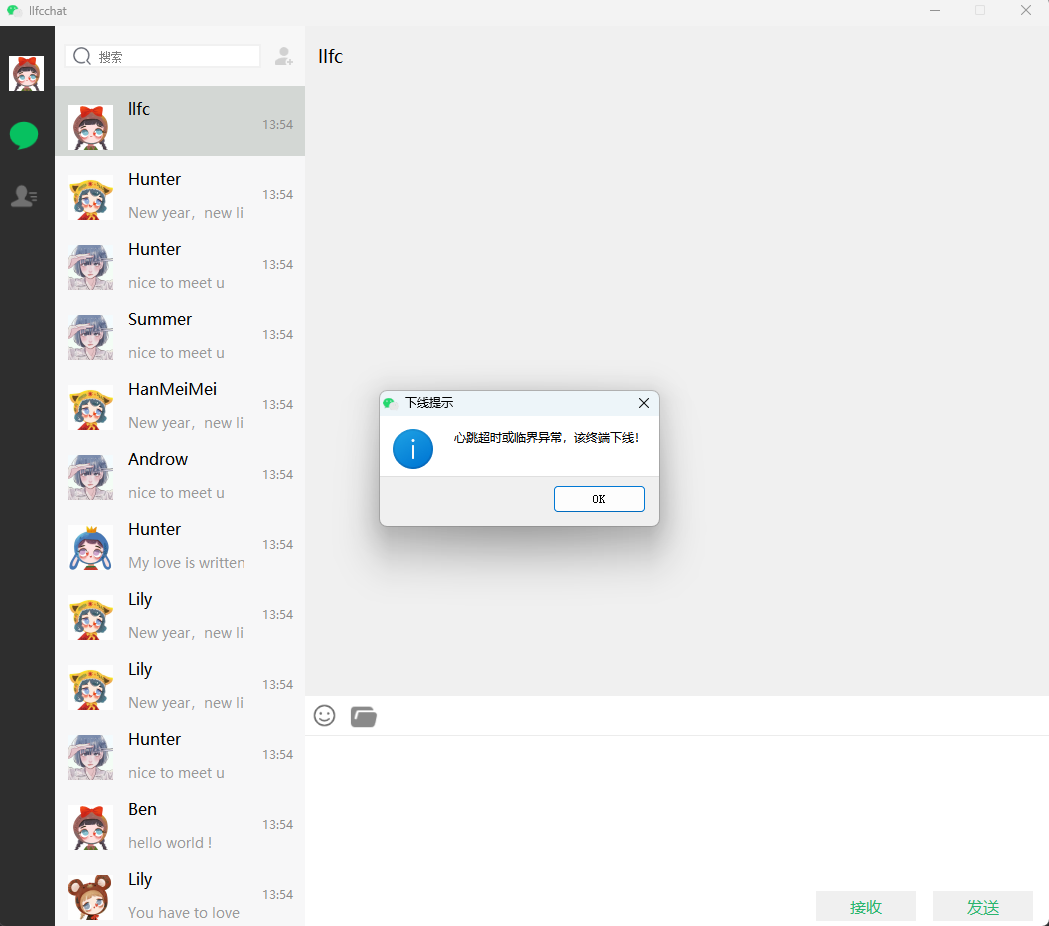
客户端添加心跳包发送
可以看到每隔10s客户端就发送心跳包给服务器,服务器收到后,打印日志,客户端也打印日志
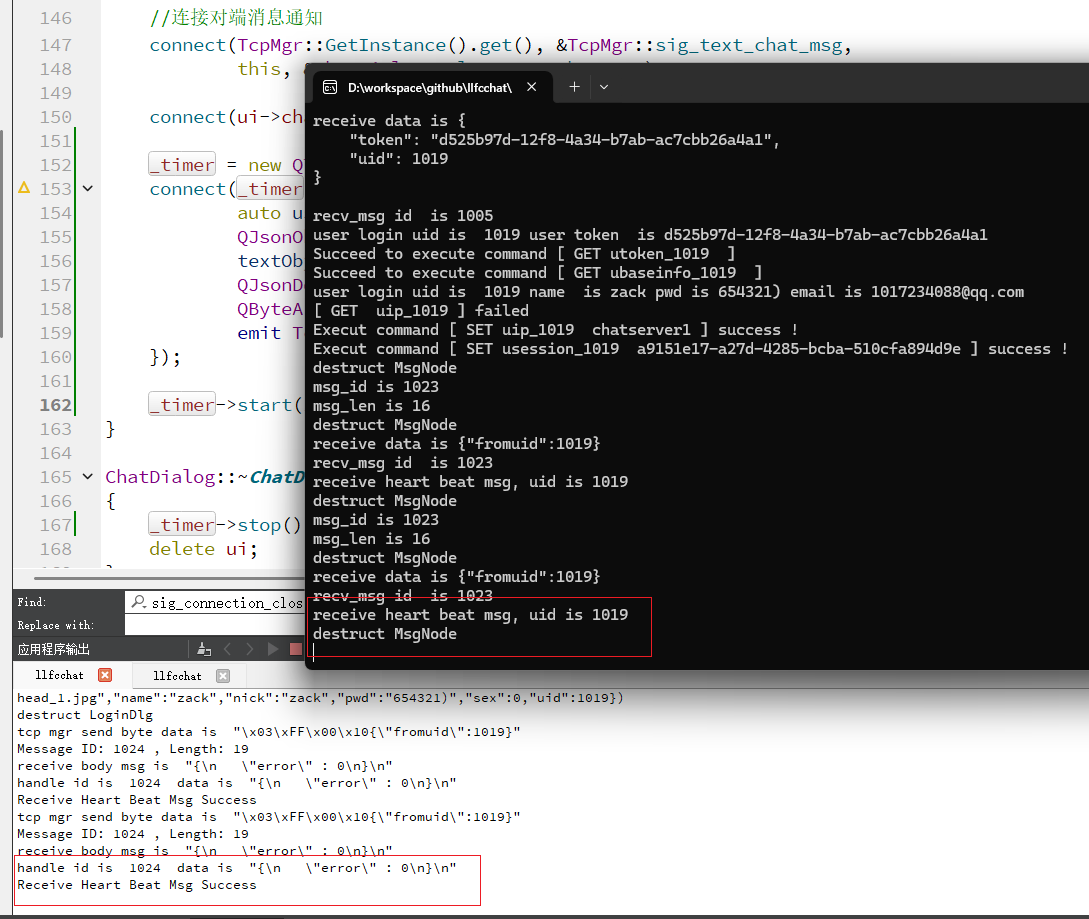
优化连接数统计
之前我们统计一个服务器连接数,都是在服务器检测登录一个用户就增加连接数写入redis,以及CSession析构减少连接数写入redis, 还加了分布式锁,这种做法频繁加锁会影响效率,现在我们有了心跳检测,只需要在心跳检测结束后将统计的连接数写入redis即可
cpp展开代码void CServer::on_timer(const boost::system::error_code& ec) {
std::vector<std::shared_ptr<CSession>> _expired_sessions;
int session_count = 0;
//此处加锁遍历session
{
lock_guard<mutex> lock(_mutex);
time_t now = std::time(nullptr);
for (auto iter = _sessions.begin(); iter != _sessions.end(); iter++) {
auto b_expired = iter->second->IsHeartbeatExpired(now);
if (b_expired) {
//关闭socket, 其实这里也会触发async_read的错误处理
iter->second->Close();
//收集过期信息
_expired_sessions.push_back(iter->second);
continue;
}
session_count++;
}
}
//设置session数量
auto& cfg = ConfigMgr::Inst();
auto self_name = cfg["SelfServer"]["Name"];
auto count_str = std::to_string(session_count);
RedisMgr::GetInstance()->HSet(LOGIN_COUNT, self_name, count_str);
//处理过期session, 单独提出,防止死锁
for (auto &session : _expired_sessions) {
session->DealExceptionSession();
}
//再次设置,下一个60s检测
_timer.expires_after(std::chrono::seconds(60));
_timer.async_wait([this](boost::system::error_code ec) {
on_timer(ec);
});
}
状态服务器中获取连接数返回ChatServer也可以简化了
cpp展开代码ChatServer StatusServiceImpl::getChatServer() {
std::lock_guard<std::mutex> guard(_server_mtx);
auto minServer = _servers.begin()->second;
auto count_str = RedisMgr::GetInstance()->HGet(LOGIN_COUNT, minServer.name);
if (count_str.empty()) {
//不存在则默认设置为最大
minServer.con_count = INT_MAX;
}
else {
minServer.con_count = std::stoi(count_str);
}
// 使用范围基于for循环
for ( auto& server : _servers) {
if (server.second.name == minServer.name) {
continue;
}
auto count_str = RedisMgr::GetInstance()->HGet(LOGIN_COUNT, server.second.name);
if (count_str.empty()) {
server.second.con_count = INT_MAX;
}
else {
server.second.con_count = std::stoi(count_str);
}
if (server.second.con_count < minServer.con_count) {
minServer = server.second;
}
}
return minServer;
}
哪怕我们获取的信息是旧的数据也没关系,负载分配没必要太精确,还有心跳每隔60s会更新依次连接逻辑,所以问题不大。
我们把ChatServer2的逻辑也更新成和ChatServer1,再次测试分布式情况下踢人+心跳逻辑
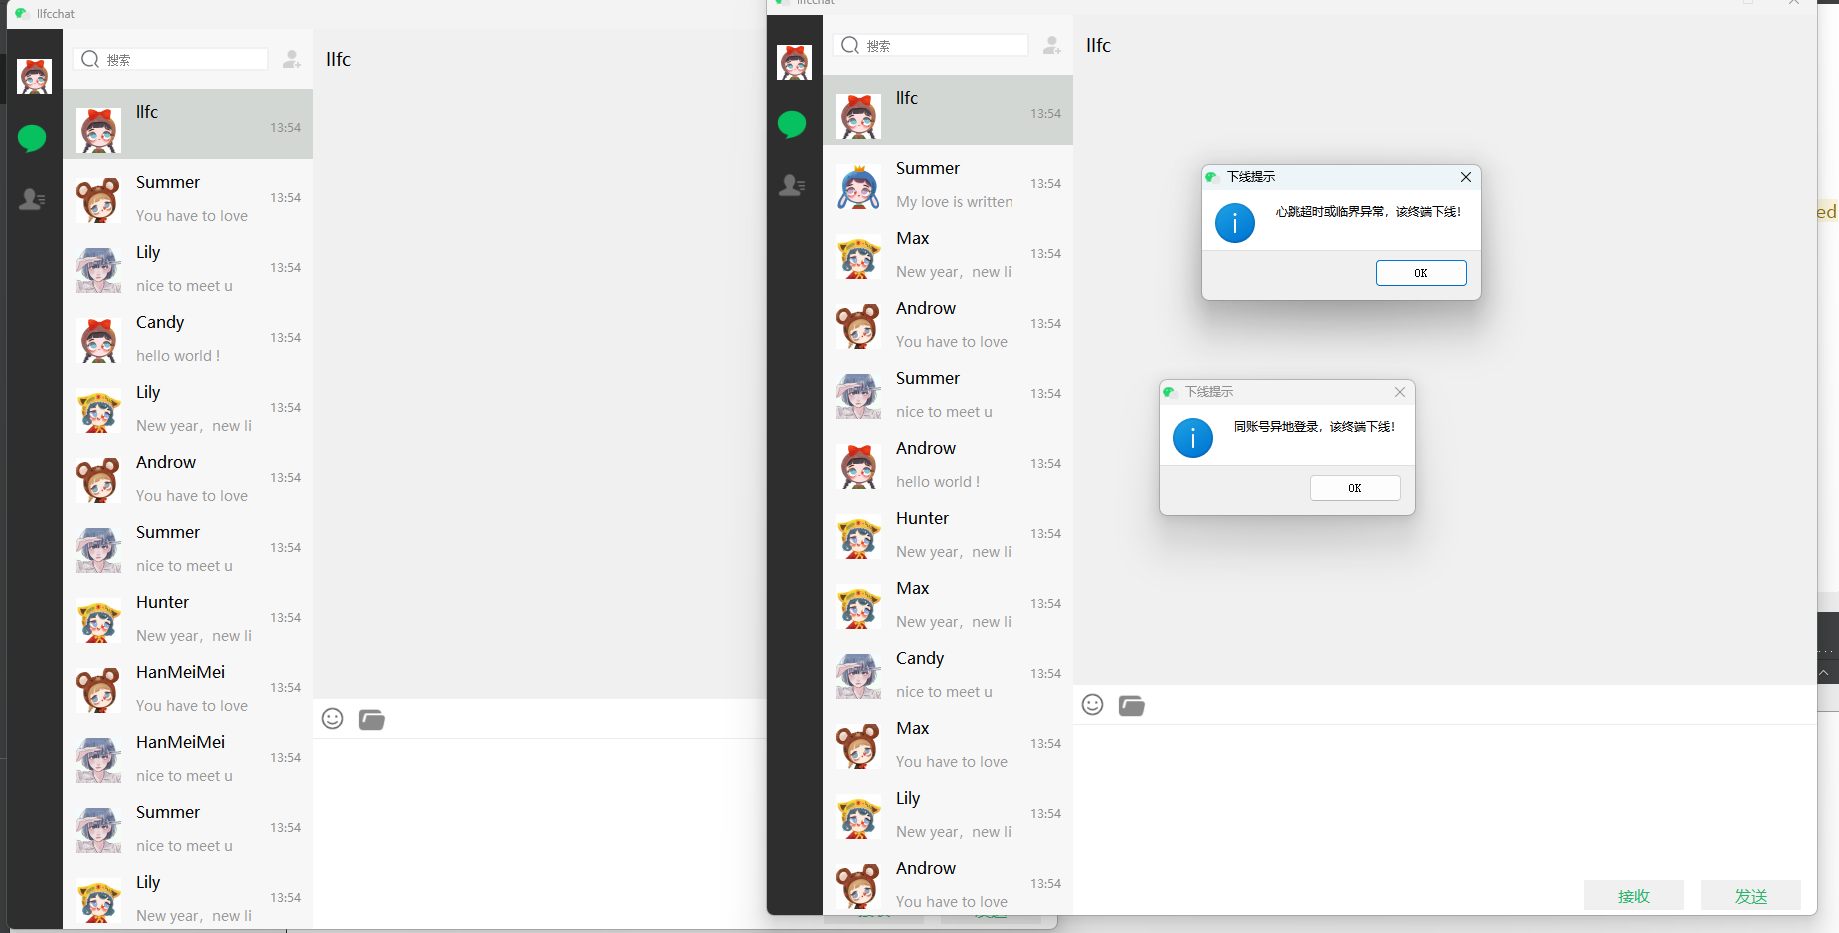
可以看到同账号异地登录,旧客户端收到被踢掉消息,旧的客户端关闭连接,所以弹出心跳超时或异常,该终端下线
所以我们这期踢人+心跳检测就实现了。
源码和视频
源码连接:
https://gitee.com/secondtonone1/llfcchat
视频连接:
https://www.bilibili.com/video/BV1ct5xzcEka/?vd_source=8be9e83424c2ed2c9b2a3ed1d01385e9
day36-实现头像编辑框
title: QT实现头像裁剪功能 date: 2025-05-11 06:39:29 tags: [C++聊天项目] categories: [C++聊天项目]
前情回顾
前文我们实现了心跳,今天来实现头像框裁剪的功能,为以后头像上传和资源服务器做准备。
大体上头像上传框的效果如下
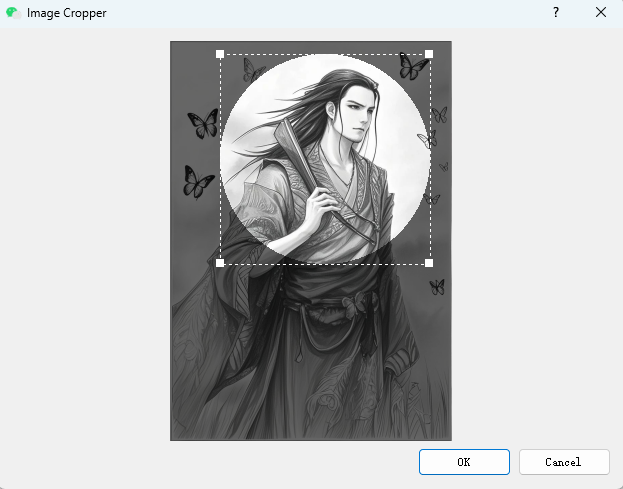
添加设置页面
我们需要在聊天对话框左侧添加设置按钮
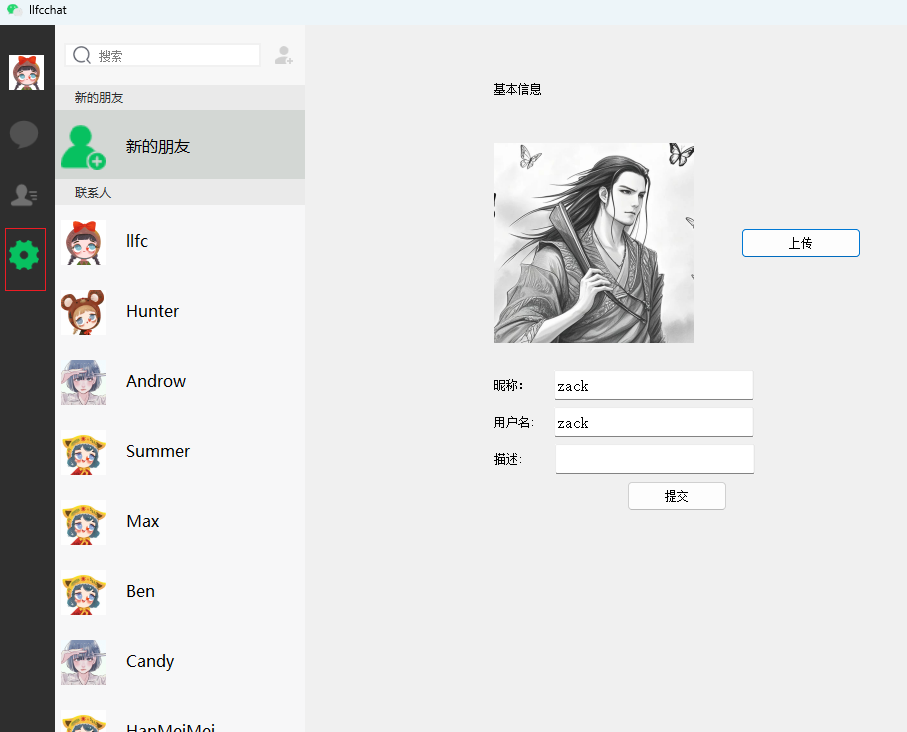
左侧设置按钮是我们封装的类StateWidget
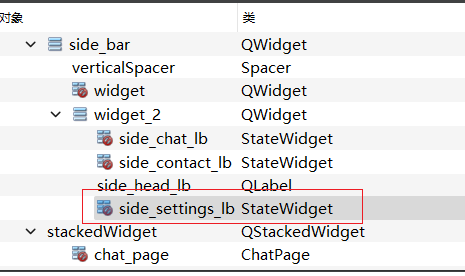
右侧添加UserInfoPage界面
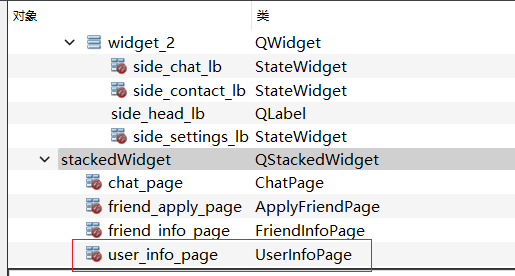
UserInfoPage界面布局
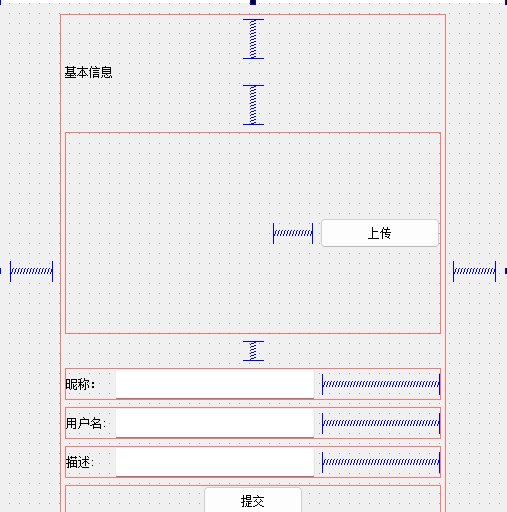
属性表
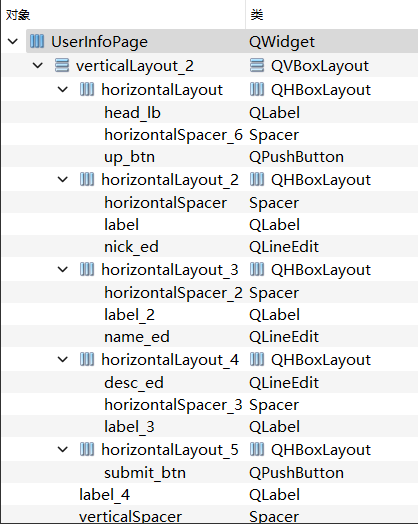
头像裁剪逻辑
点击上传按钮
cpp展开代码//上传头像
void UserInfoPage::on_up_btn_clicked()
{
// 1. 让对话框也能选 *.webp
QString filename = QFileDialog::getOpenFileName(
this,
tr("选择图片"),
QString(),
tr("图片文件 (*.png *.jpg *.jpeg *.bmp *.webp)")
);
if (filename.isEmpty())
return;
// 2. 直接用 QPixmap::load() 加载,无需手动区分格式
QPixmap inputImage;
if (!inputImage.load(filename)) {
QMessageBox::critical(
this,
tr("错误"),
tr("加载图片失败!请确认已部署 WebP 插件。"),
QMessageBox::Ok
);
return;
}
QPixmap image = ImageCropperDialog::getCroppedImage(filename, 600, 400, CropperShape::CIRCLE);
if (image.isNull())
return;
QPixmap scaledPixmap = image.scaled( ui->head_lb->size(), Qt::KeepAspectRatio, Qt::SmoothTransformation); // 将图片缩放到label的大小
ui->head_lb->setPixmap(scaledPixmap); // 将缩放后的图片设置到QLabel上
ui->head_lb->setScaledContents(true); // 设置QLabel自动缩放图片内容以适应大小
QString storageDir = QStandardPaths::writableLocation(
QStandardPaths::AppDataLocation);
// 2. 在其下再建一个 avatars 子目录
QDir dir(storageDir);
if (!dir.exists("avatars")) {
if (!dir.mkpath("avatars")) {
qWarning() << "无法创建 avatars 目录:" << dir.filePath("avatars");
QMessageBox::warning(
this,
tr("错误"),
tr("无法创建存储目录,请检查权限或磁盘空间。")
);
return;
}
}
// 3. 拼接最终的文件名 head.png
QString filePath = dir.filePath("avatars/head.png");
// 4. 保存 scaledPixmap 为 PNG(无损、最高质量)
if (!scaledPixmap.save(filePath, "PNG")) {
QMessageBox::warning(
this,
tr("保存失败"),
tr("头像保存失败,请检查权限或磁盘空间。")
);
} else {
qDebug() << "头像已保存到:" << filePath;
// 以后读取直接用同一路径:storageDir/avatars/head.png
}
}
内部调用了我们的ImageCropperDialog,弹出对话框后会显示裁剪图片的界面。
接下来我们看看ImageCropperDialog实现
cpp展开代码#ifndef IMAGECROPPER_H
#define IMAGECROPPER_H
#include <QWidget>
#include <QDialog>
#include <QPainter>
#include <QLabel>
#include <QPixmap>
#include <QString>
#include <QMessageBox>
#include <QHBoxLayout>
#include <QVBoxLayout>
#include <QPushButton>
#include "imagecropperlabel.h"
/*******************************************************
* Loacl private class, which do image-cropping
* Used in class ImageCropper
*******************************************************/
class ImageCropperDialogPrivate : public QDialog {
Q_OBJECT
public:
ImageCropperDialogPrivate(const QPixmap& imageIn, QPixmap& outputImage,
int windowWidth, int windowHeight,
CropperShape shape, QSize cropperSize = QSize()) :
QDialog(nullptr), outputImage(outputImage)
{
this->setAttribute(Qt::WA_DeleteOnClose, true);
this->setWindowTitle("Image Cropper");
this->setMouseTracking(true);
this->setModal(true);
imageLabel = new ImageCropperLabel(windowWidth, windowHeight, this);
imageLabel->setCropper(shape, cropperSize);
imageLabel->setOutputShape(OutputShape::RECT);
imageLabel->setOriginalImage(imageIn);
imageLabel->enableOpacity(true);
QHBoxLayout* btnLayout = new QHBoxLayout();
btnOk = new QPushButton("OK", this);
btnCancel = new QPushButton("Cancel", this);
btnLayout->addStretch();
btnLayout->addWidget(btnOk);
btnLayout->addWidget(btnCancel);
QVBoxLayout* mainLayout = new QVBoxLayout(this);
mainLayout->addWidget(imageLabel);
mainLayout->addLayout(btnLayout);
connect(btnOk, &QPushButton::clicked, this, [this](){
this->outputImage = this->imageLabel->getCroppedImage();
this->close();
});
connect(btnCancel, &QPushButton::clicked, this, [this](){
this->outputImage = QPixmap();
this->close();
});
}
private:
ImageCropperLabel* imageLabel;
QPushButton* btnOk;
QPushButton* btnCancel;
QPixmap& outputImage;
};
/*******************************************************************
* class ImageCropperDialog
* create a instane of class ImageCropperDialogPrivate
* and get cropped image from the instance(after closing)
********************************************************************/
class ImageCropperDialog : QObject {
public:
static QPixmap getCroppedImage(const QString& filename,int windowWidth, int windowHeight,
CropperShape cropperShape, QSize crooperSize = QSize())
{
QPixmap inputImage;
QPixmap outputImage;
if (!inputImage.load(filename)) {
QMessageBox::critical(nullptr, "Error", "Load image failed!", QMessageBox::Ok);
return outputImage;
}
ImageCropperDialogPrivate* imageCropperDo =
new ImageCropperDialogPrivate(inputImage, outputImage,
windowWidth, windowHeight,
cropperShape, crooperSize);
imageCropperDo->exec();
return outputImage;
}
};
#endif // IMAGECROPPER_H
私有对话框
- 继承自
QDialogQDialog(nullptr):以无父窗口方式创建,独立弹出。Qt::WA_DeleteOnClose:关闭时自动delete对象,防止内存泄漏。setModal(true):对话框模式,阻塞主窗口输入。
- 成员变量
ImageCropperLabel* imageLabel:自定义裁剪视图。QPushButton* btnOk,btnCancel:确认/取消按钮。QPixmap& outputImage:引用外部提供的QPixmap,用来保存裁剪结果。
- 布局管理
- 水平布局 (
QHBoxLayout) 放置按钮并居右。 - 垂直布局 (
QVBoxLayout) 先是大图,再是按钮区。
- 水平布局 (
- Lambda 连接信号与槽
- OK 时,将裁剪后的图像复制给外部引用,然后
close()。 - Cancel 时,将
outputImage置空,表示用户放弃裁剪。
- OK 时,将裁剪后的图像复制给外部引用,然后
静态对话框
- 统一接口:只要一行
ImageCropperDialog::getCroppedImage(…),就能弹出裁剪 UI 并获取结果。 - 输入合法性检查:先用
QPixmap::load()加载文件,失败则弹错并返回空图。 - 阻塞执行:
exec()会进入本地事件循环,直到用户点击 OK/Cancel 关闭对话框。 - 返回结果:通过外部引用
outputImage将裁剪结果“带出”函数作用域。

头像裁剪控件
头文件声明
cpp展开代码/*************************************************************************
* class: ImageCropperLabel
* author: github@Leopard-C
* email: leopard.c@outlook.com
* last change: 2020-03-06
*************************************************************************/
#ifndef IMAGECROPPERLABEL_H
#define IMAGECROPPERLABEL_H
#include <QLabel>
#include <QPixmap>
#include <QPen>
enum class CropperShape {
UNDEFINED = 0,
RECT = 1,
SQUARE = 2,
FIXED_RECT = 3,
ELLIPSE = 4,
CIRCLE = 5,
FIXED_ELLIPSE = 6
};
enum class OutputShape {
RECT = 0,
ELLIPSE = 1
};
enum class SizeType {
fixedSize = 0,
fitToMaxWidth = 1,
fitToMaxHeight = 2,
fitToMaxWidthHeight = 3,
};
class ImageCropperLabel : public QLabel {
Q_OBJECT
public:
ImageCropperLabel(int width, int height, QWidget* parent);
void setOriginalImage(const QPixmap& pixmap);
void setOutputShape(OutputShape shape) { outputShape = shape; }
QPixmap getCroppedImage();
QPixmap getCroppedImage(OutputShape shape);
/*****************************************
* Set cropper's shape
*****************************************/
void setRectCropper();
void setSquareCropper();
void setEllipseCropper();
void setCircleCropper();
void setFixedRectCropper(QSize size);
void setFixedEllipseCropper(QSize size);
void setCropper(CropperShape shape, QSize size); // not recommended
/*****************************************************************************
* Set cropper's fixed size
*****************************************************************************/
void setCropperFixedSize(int fixedWidth, int fixedHeight);
void setCropperFixedWidth(int fixedWidht);
void setCropperFixedHeight(int fixedHeight);
/*****************************************************************************
* Set cropper's minimum size
* default: the twice of minimum of the edge lenght of drag square
*****************************************************************************/
void setCropperMinimumSize(int minWidth, int minHeight)
{ cropperMinimumWidth = minWidth; cropperMinimumHeight = minHeight; }
void setCropperMinimumWidth(int minWidth) { cropperMinimumWidth = minWidth; }
void setCropperMinimumHeight(int minHeight) { cropperMinimumHeight = minHeight; }
/*************************************************
* Set the size, color, visibility of rectangular border
*************************************************/
void setShowRectBorder(bool show) { isShowRectBorder = show; }
QPen getBorderPen() { return borderPen; }
void setBorderPen(const QPen& pen) { borderPen = pen; }
/*************************************************
* Set the size, color of drag square
*************************************************/
void setShowDragSquare(bool show) { isShowDragSquare = show; }
void setDragSquareEdge(int edge) { dragSquareEdge = (edge >= 3 ? edge : 3); }
void setDragSquareColor(const QColor& color) { dragSquareColor = color; }
/*****************************************
* Opacity Effect
*****************************************/
void enableOpacity(bool b = true) { isShowOpacityEffect = b; }
void setOpacity(double newOpacity) { opacity = newOpacity; }
signals:
void croppedImageChanged();
protected:
/*****************************************
* Event
*****************************************/
virtual void paintEvent(QPaintEvent *event) override;
virtual void mousePressEvent(QMouseEvent *e) override;
virtual void mouseMoveEvent(QMouseEvent *e) override;
virtual void mouseReleaseEvent(QMouseEvent *e) override;
private:
/***************************************
* Draw shapes
***************************************/
void drawFillRect(QPoint centralPoint, int edge, QColor color);
void drawRectOpacity();
void drawEllipseOpacity();
void drawOpacity(const QPainterPath& path); // shadow effect
void drawSquareEdge(bool onlyFourCorners);
/***************************************
* Other utility methods
***************************************/
int getPosInCropperRect(const QPoint& pt);
bool isPosNearDragSquare(const QPoint& pt1, const QPoint& pt2);
void resetCropperPos();
void changeCursor();
enum {
RECT_OUTSIZD = 0,
RECT_INSIDE = 1,
RECT_TOP_LEFT, RECT_TOP, RECT_TOP_RIGHT, RECT_RIGHT,
RECT_BOTTOM_RIGHT, RECT_BOTTOM, RECT_BOTTOM_LEFT, RECT_LEFT
};
const bool ONLY_FOUR_CORNERS = true;
private:
QPixmap originalImage;
QPixmap tempImage;
bool isShowRectBorder = true;
QPen borderPen;
CropperShape cropperShape = CropperShape::UNDEFINED;
OutputShape outputShape = OutputShape::RECT;
QRect imageRect; // the whole image area in the label (not real size)
QRect cropperRect; // a rectangle frame to choose image area (not real size)
QRect cropperRect_; // cropper rect (real size)
double scaledRate = 1.0;
bool isLButtonPressed = false;
bool isCursorPosCalculated = false;
int cursorPosInCropperRect = RECT_OUTSIZD;
QPoint lastPos;
QPoint currPos;
bool isShowDragSquare = true;
int dragSquareEdge = 8;
QColor dragSquareColor = Qt::white;
int cropperMinimumWidth = dragSquareEdge * 2;
int cropperMinimumHeight = dragSquareEdge * 2;
bool isShowOpacityEffect = false;
double opacity = 0.6;
};
#endif // IMAGECROPPERLABEL_H
具体实现
cpp展开代码#include "imagecropperlabel.h"
#include <QPainter>
#include <QPainterPath>
#include <QMouseEvent>
#include <QDebug>
#include <QBitmap>
ImageCropperLabel::ImageCropperLabel(int width, int height, QWidget* parent) :
QLabel(parent)
{
this->setFixedSize(width, height);
this->setAlignment(Qt::AlignCenter);
this->setMouseTracking(true);
borderPen.setWidth(1);
borderPen.setColor(Qt::white);
borderPen.setDashPattern(QVector<qreal>() << 3 << 3 << 3 << 3);
}
void ImageCropperLabel::setOriginalImage(const QPixmap &pixmap) {
originalImage = pixmap;
int imgWidth = pixmap.width();
int imgHeight = pixmap.height();
int labelWidth = this->width();
int labelHeight = this->height();
int imgWidthInLabel;
int imgHeightInLabel;
if (imgWidth * labelHeight < imgHeight * labelWidth) {
scaledRate = labelHeight / double(imgHeight);
imgHeightInLabel = labelHeight;
imgWidthInLabel = int(scaledRate * imgWidth);
imageRect.setRect((labelWidth - imgWidthInLabel) / 2, 0,
imgWidthInLabel, imgHeightInLabel);
}
else {
scaledRate = labelWidth / double(imgWidth);
imgWidthInLabel = labelWidth;
imgHeightInLabel = int(scaledRate * imgHeight);
imageRect.setRect(0, (labelHeight - imgHeightInLabel) / 2,
imgWidthInLabel, imgHeightInLabel);
}
tempImage = originalImage.scaled(imgWidthInLabel, imgHeightInLabel,
Qt::KeepAspectRatio, Qt::SmoothTransformation);
this->setPixmap(tempImage);
if (cropperShape >= CropperShape::FIXED_RECT) {
cropperRect.setWidth(int(cropperRect_.width() * scaledRate));
cropperRect.setHeight(int(cropperRect_.height() * scaledRate));
}
resetCropperPos();
}
/*****************************************
* set cropper's shape (and size)
*****************************************/
void ImageCropperLabel::setRectCropper() {
cropperShape = CropperShape::RECT;
resetCropperPos();
}
void ImageCropperLabel::setSquareCropper() {
cropperShape = CropperShape::SQUARE;
resetCropperPos();
}
void ImageCropperLabel::setEllipseCropper() {
cropperShape = CropperShape::ELLIPSE;
resetCropperPos();
}
void ImageCropperLabel::setCircleCropper() {
cropperShape = CropperShape::CIRCLE;
resetCropperPos();
}
void ImageCropperLabel::setFixedRectCropper(QSize size) {
cropperShape = CropperShape::FIXED_RECT;
cropperRect_.setSize(size);
resetCropperPos();
}
void ImageCropperLabel::setFixedEllipseCropper(QSize size) {
cropperShape = CropperShape::FIXED_ELLIPSE;
cropperRect_.setSize(size);
resetCropperPos();
}
// not recommended
void ImageCropperLabel::setCropper(CropperShape shape, QSize size) {
cropperShape = shape;
cropperRect_.setSize(size);
resetCropperPos();
}
/*****************************************************************************
* Set cropper's fixed size
*****************************************************************************/
void ImageCropperLabel::setCropperFixedSize(int fixedWidth, int fixedHeight) {
cropperRect_.setSize(QSize(fixedWidth, fixedHeight));
resetCropperPos();
}
void ImageCropperLabel::setCropperFixedWidth(int fixedWidth) {
cropperRect_.setWidth(fixedWidth);
resetCropperPos();
}
void ImageCropperLabel::setCropperFixedHeight(int fixedHeight) {
cropperRect_.setHeight(fixedHeight);
resetCropperPos();
}
/**********************************************
* Move cropper to the center of the image
* And resize to default
**********************************************/
void ImageCropperLabel::resetCropperPos() {
int labelWidth = this->width();
int labelHeight = this->height();
if (cropperShape == CropperShape::FIXED_RECT || cropperShape == CropperShape::FIXED_ELLIPSE) {
cropperRect.setWidth(int(cropperRect_.width() * scaledRate));
cropperRect.setHeight(int(cropperRect_.height() * scaledRate));
}
switch (cropperShape) {
case CropperShape::UNDEFINED:
break;
case CropperShape::FIXED_RECT:
case CropperShape::FIXED_ELLIPSE: {
cropperRect.setRect((labelWidth - cropperRect.width()) / 2,
(labelHeight - cropperRect.height()) / 2,
cropperRect.width(), cropperRect.height());
break;
}
case CropperShape::RECT:
case CropperShape::SQUARE:
case CropperShape::ELLIPSE:
case CropperShape::CIRCLE: {
int imgWidth = tempImage.width();
int imgHeight = tempImage.height();
int edge = int((imgWidth > imgHeight ? imgHeight : imgWidth) * 3 / 4.0);
cropperRect.setRect((labelWidth - edge) / 2, (labelHeight - edge) / 2, edge, edge);
break;
}
}
}
QPixmap ImageCropperLabel::getCroppedImage() {
return getCroppedImage(this->outputShape);
}
QPixmap ImageCropperLabel::getCroppedImage(OutputShape shape) {
int startX = int((cropperRect.left() - imageRect.left()) / scaledRate);
int startY = int((cropperRect.top() - imageRect.top()) / scaledRate);
int croppedWidth = int(cropperRect.width() / scaledRate);
int croppedHeight = int(cropperRect.height() / scaledRate);
QPixmap resultImage(croppedWidth, croppedHeight);
resultImage = originalImage.copy(startX, startY, croppedWidth, croppedHeight);
// Set ellipse mask (cut to ellipse shape)
if (shape == OutputShape::ELLIPSE) {
QSize size(croppedWidth, croppedHeight);
QBitmap mask(size);
QPainter painter(&mask);
painter.setRenderHint(QPainter::Antialiasing);
painter.setRenderHint(QPainter::SmoothPixmapTransform);
painter.fillRect(0, 0, size.width(), size.height(), Qt::white);
painter.setBrush(QColor(0, 0, 0));
painter.drawRoundRect(0, 0, size.width(), size.height(), 99, 99);
resultImage.setMask(mask);
}
return resultImage;
}
void ImageCropperLabel::paintEvent(QPaintEvent *event) {
// Draw original image
QLabel::paintEvent(event);
// Draw cropper and set some effects
switch (cropperShape) {
case CropperShape::UNDEFINED:
break;
case CropperShape::FIXED_RECT:
drawRectOpacity();
break;
case CropperShape::FIXED_ELLIPSE:
drawEllipseOpacity();
break;
case CropperShape::RECT:
drawRectOpacity();
drawSquareEdge(!ONLY_FOUR_CORNERS);
break;
case CropperShape::SQUARE:
drawRectOpacity();
drawSquareEdge(ONLY_FOUR_CORNERS);
break;
case CropperShape::ELLIPSE:
drawEllipseOpacity();
drawSquareEdge(!ONLY_FOUR_CORNERS);
break;
case CropperShape::CIRCLE:
drawEllipseOpacity();
drawSquareEdge(ONLY_FOUR_CORNERS);
break;
}
// Draw cropper rect
if (isShowRectBorder) {
QPainter painter(this);
painter.setPen(borderPen);
painter.drawRect(cropperRect);
}
}
void ImageCropperLabel::drawSquareEdge(bool onlyFourCorners) {
if (!isShowDragSquare)
return;
// Four corners
drawFillRect(cropperRect.topLeft(), dragSquareEdge, dragSquareColor);
drawFillRect(cropperRect.topRight(), dragSquareEdge, dragSquareColor);
drawFillRect(cropperRect.bottomLeft(), dragSquareEdge, dragSquareColor);
drawFillRect(cropperRect.bottomRight(), dragSquareEdge, dragSquareColor);
// Four edges
if (!onlyFourCorners) {
int centralX = cropperRect.left() + cropperRect.width() / 2;
int centralY = cropperRect.top() + cropperRect.height() / 2;
drawFillRect(QPoint(cropperRect.left(), centralY), dragSquareEdge, dragSquareColor);
drawFillRect(QPoint(centralX, cropperRect.top()), dragSquareEdge, dragSquareColor);
drawFillRect(QPoint(cropperRect.right(), centralY), dragSquareEdge, dragSquareColor);
drawFillRect(QPoint(centralX, cropperRect.bottom()), dragSquareEdge, dragSquareColor);
}
}
void ImageCropperLabel::drawFillRect(QPoint centralPoint, int edge, QColor color) {
QRect rect(centralPoint.x() - edge / 2, centralPoint.y() - edge / 2, edge, edge);
QPainter painter(this);
painter.fillRect(rect, color);
}
// Opacity effect
void ImageCropperLabel::drawOpacity(const QPainterPath& path) {
QPainter painterOpac(this);
painterOpac.setOpacity(opacity);
painterOpac.fillPath(path, QBrush(Qt::black));
}
void ImageCropperLabel::drawRectOpacity() {
if (isShowOpacityEffect) {
QPainterPath p1, p2, p;
p1.addRect(imageRect);
p2.addRect(cropperRect);
p = p1.subtracted(p2);
drawOpacity(p);
}
}
void ImageCropperLabel::drawEllipseOpacity() {
if (isShowOpacityEffect) {
QPainterPath p1, p2, p;
p1.addRect(imageRect);
p2.addEllipse(cropperRect);
p = p1.subtracted(p2);
drawOpacity(p);
}
}
bool ImageCropperLabel::isPosNearDragSquare(const QPoint& pt1, const QPoint& pt2) {
return abs(pt1.x() - pt2.x()) * 2 <= dragSquareEdge
&& abs(pt1.y() - pt2.y()) * 2 <= dragSquareEdge;
}
int ImageCropperLabel::getPosInCropperRect(const QPoint &pt) {
if (isPosNearDragSquare(pt, QPoint(cropperRect.right(), cropperRect.center().y())))
return RECT_RIGHT;
if (isPosNearDragSquare(pt, cropperRect.bottomRight()))
return RECT_BOTTOM_RIGHT;
if (isPosNearDragSquare(pt, QPoint(cropperRect.center().x(), cropperRect.bottom())))
return RECT_BOTTOM;
if (isPosNearDragSquare(pt, cropperRect.bottomLeft()))
return RECT_BOTTOM_LEFT;
if (isPosNearDragSquare(pt, QPoint(cropperRect.left(), cropperRect.center().y())))
return RECT_LEFT;
if (isPosNearDragSquare(pt, cropperRect.topLeft()))
return RECT_TOP_LEFT;
if (isPosNearDragSquare(pt, QPoint(cropperRect.center().x(), cropperRect.top())))
return RECT_TOP;
if (isPosNearDragSquare(pt, cropperRect.topRight()))
return RECT_TOP_RIGHT;
if (cropperRect.contains(pt, true))
return RECT_INSIDE;
return RECT_OUTSIZD;
}
/*************************************************
*
* Change mouse cursor type
* Arrow, SizeHor, SizeVer, etc...
*
*************************************************/
void ImageCropperLabel::changeCursor() {
switch (cursorPosInCropperRect) {
case RECT_OUTSIZD:
setCursor(Qt::ArrowCursor);
break;
case RECT_BOTTOM_RIGHT: {
switch (cropperShape) {
case CropperShape::SQUARE:
case CropperShape::CIRCLE:
case CropperShape::RECT:
case CropperShape::ELLIPSE:
setCursor(Qt::SizeFDiagCursor);
break;
default:
break;
}
break;
}
case RECT_RIGHT: {
switch (cropperShape) {
case CropperShape::RECT:
case CropperShape::ELLIPSE:
setCursor(Qt::SizeHorCursor);
break;
default:
break;
}
break;
}
case RECT_BOTTOM: {
switch (cropperShape) {
case CropperShape::RECT:
case CropperShape::ELLIPSE:
setCursor(Qt::SizeVerCursor);
break;
default:
break;
}
break;
}
case RECT_BOTTOM_LEFT: {
switch (cropperShape) {
case CropperShape::RECT:
case CropperShape::ELLIPSE:
case CropperShape::SQUARE:
case CropperShape::CIRCLE:
setCursor(Qt::SizeBDiagCursor);
break;
default:
break;
}
break;
}
case RECT_LEFT: {
switch (cropperShape) {
case CropperShape::RECT:
case CropperShape::ELLIPSE:
setCursor(Qt::SizeHorCursor);
break;
default:
break;
}
break;
}
case RECT_TOP_LEFT: {
switch (cropperShape) {
case CropperShape::RECT:
case CropperShape::ELLIPSE:
case CropperShape::SQUARE:
case CropperShape::CIRCLE:
setCursor(Qt::SizeFDiagCursor);
break;
default:
break;
}
break;
}
case RECT_TOP: {
switch (cropperShape) {
case CropperShape::RECT:
case CropperShape::ELLIPSE:
setCursor(Qt::SizeVerCursor);
break;
default:
break;
}
break;
}
case RECT_TOP_RIGHT: {
switch (cropperShape) {
case CropperShape::SQUARE:
case CropperShape::CIRCLE:
case CropperShape::RECT:
case CropperShape::ELLIPSE:
setCursor(Qt::SizeBDiagCursor);
break;
default:
break;
}
break;
}
case RECT_INSIDE: {
setCursor(Qt::SizeAllCursor);
break;
}
}
}
/*****************************************************
*
* Mouse Events
*
*****************************************************/
void ImageCropperLabel::mousePressEvent(QMouseEvent *e) {
currPos = lastPos = e->pos();
isLButtonPressed = true;
}
void ImageCropperLabel::mouseMoveEvent(QMouseEvent *e) {
currPos = e->pos();
if (!isCursorPosCalculated) {
cursorPosInCropperRect = getPosInCropperRect(currPos);
changeCursor();
}
if (!isLButtonPressed)
return;
if (!imageRect.contains(currPos))
return;
isCursorPosCalculated = true;
int xOffset = currPos.x() - lastPos.x();
int yOffset = currPos.y() - lastPos.y();
lastPos = currPos;
int disX = 0;
int disY = 0;
// Move cropper
switch (cursorPosInCropperRect) {
case RECT_OUTSIZD:
break;
case RECT_BOTTOM_RIGHT: {
disX = currPos.x() - cropperRect.left();
disY = currPos.y() - cropperRect.top();
switch (cropperShape) {
case CropperShape::UNDEFINED:
case CropperShape::FIXED_RECT:
case CropperShape::FIXED_ELLIPSE:
break;
case CropperShape::SQUARE:
case CropperShape::CIRCLE:
setCursor(Qt::SizeFDiagCursor);
if (disX >= cropperMinimumWidth && disY >= cropperMinimumHeight) {
if (disX > disY && cropperRect.top() + disX <= imageRect.bottom()) {
cropperRect.setRight(currPos.x());
cropperRect.setBottom(cropperRect.top() + disX);
emit croppedImageChanged();
}
else if (disX <= disY && cropperRect.left() + disY <= imageRect.right()) {
cropperRect.setBottom(currPos.y());
cropperRect.setRight(cropperRect.left() + disY);
emit croppedImageChanged();
}
}
break;
case CropperShape::RECT:
case CropperShape::ELLIPSE:
setCursor(Qt::SizeFDiagCursor);
if (disX >= cropperMinimumWidth) {
cropperRect.setRight(currPos.x());
emit croppedImageChanged();
}
if (disY >= cropperMinimumHeight) {
cropperRect.setBottom(currPos.y());
emit croppedImageChanged();
}
break;
}
break;
}
case RECT_RIGHT: {
disX = currPos.x() - cropperRect.left();
switch (cropperShape) {
case CropperShape::UNDEFINED:
case CropperShape::FIXED_RECT:
case CropperShape::FIXED_ELLIPSE:
case CropperShape::SQUARE:
case CropperShape::CIRCLE:
break;
case CropperShape::RECT:
case CropperShape::ELLIPSE:
if (disX >= cropperMinimumWidth) {
cropperRect.setRight(currPos.x());
emit croppedImageChanged();
}
break;
}
break;
}
case RECT_BOTTOM: {
disY = currPos.y() - cropperRect.top();
switch (cropperShape) {
case CropperShape::UNDEFINED:
case CropperShape::FIXED_RECT:
case CropperShape::FIXED_ELLIPSE:
case CropperShape::SQUARE:
case CropperShape::CIRCLE:
break;
case CropperShape::RECT:
case CropperShape::ELLIPSE:
if (disY >= cropperMinimumHeight) {
cropperRect.setBottom(cropperRect.bottom() + yOffset);
emit croppedImageChanged();
}
break;
}
break;
}
case RECT_BOTTOM_LEFT: {
disX = cropperRect.right() - currPos.x();
disY = currPos.y() - cropperRect.top();
switch (cropperShape) {
case CropperShape::UNDEFINED:
break;
case CropperShape::FIXED_RECT:
case CropperShape::FIXED_ELLIPSE:
case CropperShape::RECT:
case CropperShape::ELLIPSE:
if (disX >= cropperMinimumWidth) {
cropperRect.setLeft(currPos.x());
emit croppedImageChanged();
}
if (disY >= cropperMinimumHeight) {
cropperRect.setBottom(currPos.y());
emit croppedImageChanged();
}
break;
case CropperShape::SQUARE:
case CropperShape::CIRCLE:
if (disX >= cropperMinimumWidth && disY >= cropperMinimumHeight) {
if (disX > disY && cropperRect.top() + disX <= imageRect.bottom()) {
cropperRect.setLeft(currPos.x());
cropperRect.setBottom(cropperRect.top() + disX);
emit croppedImageChanged();
}
else if (disX <= disY && cropperRect.right() - disY >= imageRect.left()) {
cropperRect.setBottom(currPos.y());
cropperRect.setLeft(cropperRect.right() - disY);
emit croppedImageChanged();
}
}
break;
}
break;
}
case RECT_LEFT: {
disX = cropperRect.right() - currPos.x();
switch (cropperShape) {
case CropperShape::UNDEFINED:
case CropperShape::FIXED_RECT:
case CropperShape::FIXED_ELLIPSE:
case CropperShape::SQUARE:
case CropperShape::CIRCLE:
break;
case CropperShape::RECT:
case CropperShape::ELLIPSE:
if (disX >= cropperMinimumHeight) {
cropperRect.setLeft(cropperRect.left() + xOffset);
emit croppedImageChanged();
}
break;
}
break;
}
case RECT_TOP_LEFT: {
disX = cropperRect.right() - currPos.x();
disY = cropperRect.bottom() - currPos.y();
switch (cropperShape) {
case CropperShape::UNDEFINED:
case CropperShape::FIXED_RECT:
case CropperShape::FIXED_ELLIPSE:
break;
case CropperShape::RECT:
case CropperShape::ELLIPSE:
if (disX >= cropperMinimumWidth) {
cropperRect.setLeft(currPos.x());
emit croppedImageChanged();
}
if (disY >= cropperMinimumHeight) {
cropperRect.setTop(currPos.y());
emit croppedImageChanged();
}
break;
case CropperShape::SQUARE:
case CropperShape::CIRCLE:
if (disX >= cropperMinimumWidth && disY >= cropperMinimumHeight) {
if (disX > disY && cropperRect.bottom() - disX >= imageRect.top()) {
cropperRect.setLeft(currPos.x());
cropperRect.setTop(cropperRect.bottom() - disX);
emit croppedImageChanged();
}
else if (disX <= disY && cropperRect.right() - disY >= imageRect.left()) {
cropperRect.setTop(currPos.y());
cropperRect.setLeft(cropperRect.right() - disY);
emit croppedImageChanged();
}
}
break;
}
break;
}
case RECT_TOP: {
disY = cropperRect.bottom() - currPos.y();
switch (cropperShape) {
case CropperShape::UNDEFINED:
case CropperShape::FIXED_RECT:
case CropperShape::FIXED_ELLIPSE:
case CropperShape::SQUARE:
case CropperShape::CIRCLE:
break;
case CropperShape::RECT:
case CropperShape::ELLIPSE:
if (disY >= cropperMinimumHeight) {
cropperRect.setTop(cropperRect.top() + yOffset);
emit croppedImageChanged();
}
break;
}
break;
}
case RECT_TOP_RIGHT: {
disX = currPos.x() - cropperRect.left();
disY = cropperRect.bottom() - currPos.y();
switch (cropperShape) {
case CropperShape::UNDEFINED:
case CropperShape::FIXED_RECT:
case CropperShape::FIXED_ELLIPSE:
break;
case CropperShape::RECT:
case CropperShape::ELLIPSE:
if (disX >= cropperMinimumWidth) {
cropperRect.setRight(currPos.x());
emit croppedImageChanged();
}
if (disY >= cropperMinimumHeight) {
cropperRect.setTop(currPos.y());
emit croppedImageChanged();
}
break;
case CropperShape::SQUARE:
case CropperShape::CIRCLE:
if (disX >= cropperMinimumWidth && disY >= cropperMinimumHeight) {
if (disX < disY && cropperRect.left() + disY <= imageRect.right()) {
cropperRect.setTop(currPos.y());
cropperRect.setRight(cropperRect.left() + disY);
emit croppedImageChanged();
}
else if (disX >= disY && cropperRect.bottom() - disX >= imageRect.top()) {
cropperRect.setRight(currPos.x());
cropperRect.setTop(cropperRect.bottom() - disX);
emit croppedImageChanged();
}
}
break;
}
break;
}
case RECT_INSIDE: {
// Make sure the cropperRect is entirely inside the imageRecct
if (xOffset > 0) {
if (cropperRect.right() + xOffset > imageRect.right())
xOffset = 0;
}
else if (xOffset < 0) {
if (cropperRect.left() + xOffset < imageRect.left())
xOffset = 0;
}
if (yOffset > 0) {
if (cropperRect.bottom() + yOffset > imageRect.bottom())
yOffset = 0;
}
else if (yOffset < 0) {
if (cropperRect.top() + yOffset < imageRect.top())
yOffset = 0;
}
cropperRect.moveTo(cropperRect.left() + xOffset, cropperRect.top() + yOffset);
emit croppedImageChanged();
}
break;
}
repaint();
}
void ImageCropperLabel::mouseReleaseEvent(QMouseEvent *) {
isLButtonPressed = false;
isCursorPosCalculated = false;
setCursor(Qt::ArrowCursor);
}
下面逐步讲解代码实现
枚举类型定义
cpp展开代码enum class CropperShape { … };
enum class OutputShape { … };
enum class SizeType { … };
- CropperShape:裁剪框的形状(矩形、正方形、椭圆、圆、以及固定尺寸的变种)。
- OutputShape:导出时输出的形状,仅矩形或椭圆两种。
- SizeType:内部用来控制当图片过大/过小时如何缩放至 Label 尺寸。
这些枚举让 API 更语义化、调用更直观。
类声明与成员变量
cpp展开代码class ImageCropperLabel : public QLabel {
Q_OBJECT
public:
ImageCropperLabel(int width, int height, QWidget* parent);
// … 设置图片、设置裁剪形状、获取结果等方法 …
signals:
void croppedImageChanged();
protected:
// 重载绘制与鼠标事件函数
private:
// 绘制辅助:drawFillRect、drawOpacity、drawRectOpacity 等
// 工具方法:getPosInCropperRect、resetCropperPos、changeCursor 等
// 状态变量
QPixmap originalImage; // 原始图片
QPixmap tempImage; // 缩放至 Label 尺寸后的临时位图
bool isShowRectBorder = true; // 是否画裁剪框边框
QPen borderPen; // 边框样式
CropperShape cropperShape = CropperShape::UNDEFINED;
OutputShape outputShape = OutputShape::RECT;
QRect imageRect; // 在 Label 中显示图片的区域(可能有留白)
QRect cropperRect; // 裁剪框在 Label 坐标系下的位置与大小
QRect cropperRect_; // “真实”像素尺寸下的参考矩形(仅固定尺寸时有效)
double scaledRate = 1.0;
// 拖拽、缩放交互相关
bool isLButtonPressed = false;
bool isCursorPosCalculated = false;
int cursorPosInCropperRect = 0; // 用上述匿名 enum 表示鼠标在裁剪框哪个位置
QPoint lastPos, currPos;
// 拖拽控制点样式
bool isShowDragSquare = true;
int dragSquareEdge = 8;
QColor dragSquareColor = Qt::white;
int cropperMinimumWidth = dragSquareEdge * 2;
int cropperMinimumHeight = dragSquareEdge * 2;
// 半透明遮罩
bool isShowOpacityEffect = false;
double opacity = 0.6;
};
- 核心状态:存了原图、临时图、裁剪框位置、缩放比例等。
- 交互状态:鼠标按下/移动、在哪个拖拽点、是否在拖拽中。
- 可配置属性:边框、拖拽手柄、最小尺寸、遮罩效果等,通过 public 方法暴露给外部。
构造函数(Label 初始化)
cpp展开代码ImageCropperLabel::ImageCropperLabel(int width, int height, QWidget* parent)
: QLabel(parent)
{
setFixedSize(width, height);
setAlignment(Qt::AlignCenter);
setMouseTracking(true); // 即使不按按钮也能收到 mouseMove 事件
borderPen.setWidth(1);
borderPen.setColor(Qt::white);
borderPen.setDashPattern(QVector<qreal>() << 3 << 3); // 虚线
}
- 固定尺寸:确保裁剪界面大小一致,不随容器拉伸。
- 居中显示:图片展示时居中。
- 边框样式:白色虚线。
加载并缩放原图
cpp展开代码void ImageCropperLabel::setOriginalImage(const QPixmap &pixmap) {
originalImage = pixmap;
// 计算在 label 里显示时的缩放比例和目标尺寸
if (imgWidth * labelHeight < imgHeight * labelWidth) {
scaledRate = labelHeight / double(imgHeight);
… compute imgWidthInLabel, imageRect …
} else {
… 另一种缩放方式 …
}
tempImage = originalImage.scaled(imgWidthInLabel, imgHeightInLabel,
Qt::KeepAspectRatio, Qt::SmoothTransformation);
setPixmap(tempImage);
// 如果是固定尺寸裁剪框,需要按同样比例缩放
if (cropperShape >= CropperShape::FIXED_RECT) {
cropperRect.setWidth(int(cropperRect_.width() * scaledRate));
…
}
resetCropperPos();
}
- 按保持长宽比的方式,把原图缩放到 Label 区域内(letterbox 模式)。
imageRect:记录图像在 Label 坐标系下的实际绘制区域。tempImage:在 Label 上展示的图,用于用户交互。
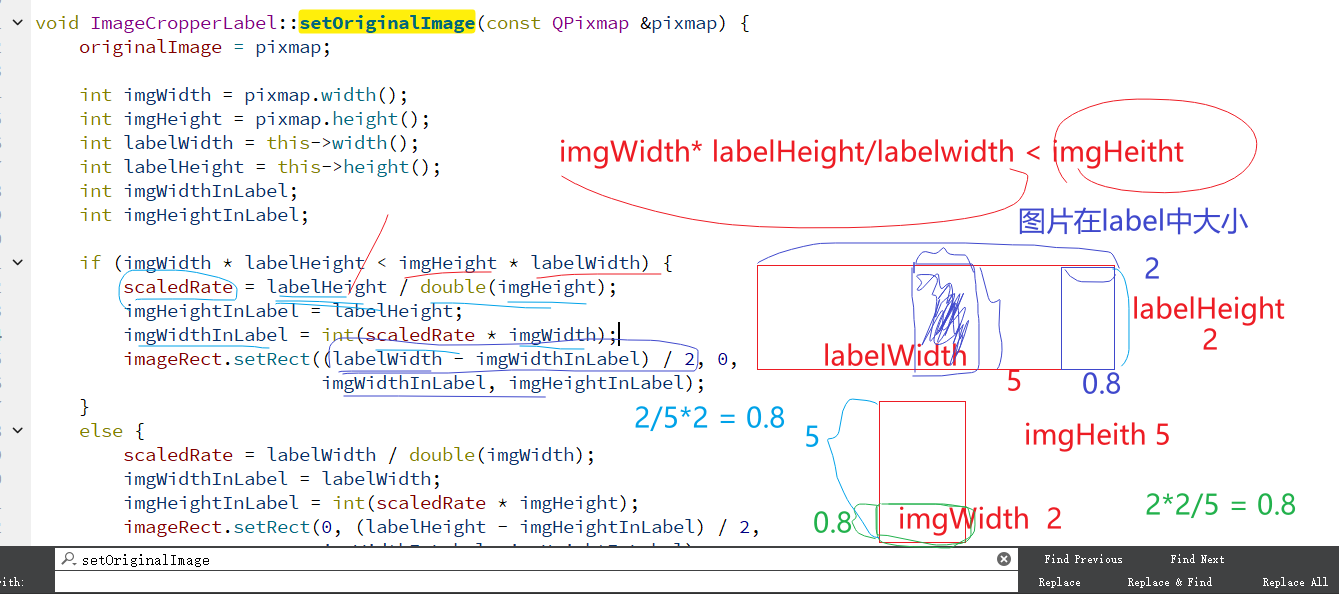
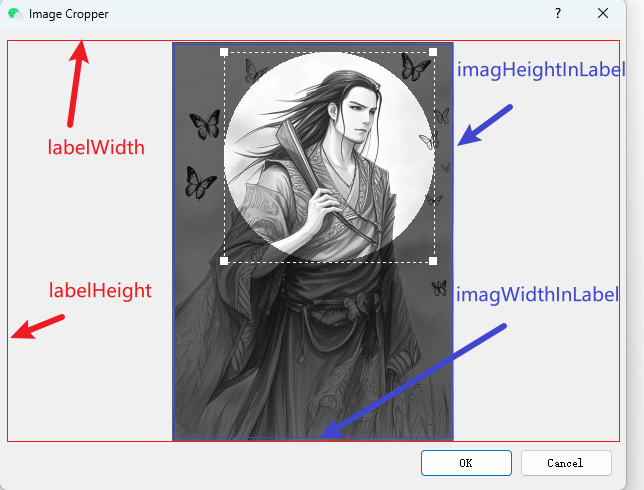
裁剪形状设置与重置
cpp展开代码void ImageCropperLabel::setRectCropper() { cropperShape = RECT; resetCropperPos(); }
… // 各种 setXXXCropper()
void ImageCropperLabel::resetCropperPos() {
// 根据 cropperShape,计算初始的 cropperRect:
// - 固定尺寸时居中铺满
// - 可变尺寸时取图片较短边的 3/4,居中
}
- 统一调用:每次改变 shape 或大小,都调用
resetCropperPos()让裁剪框回到可见区域中央。


获取裁剪结果
cpp展开代码QPixmap ImageCropperLabel::getCroppedImage(OutputShape shape) {
// 1. 根据缩放比例,把 cropperRect 从 Label 坐标系映射到原图坐标系:
int startX = (cropperRect.left() - imageRect.left()) / scaledRate;
… compute croppedWidth, croppedHeight …
// 2. 从 originalImage 上 copy 出子图
QPixmap resultImage = originalImage.copy(startX, startY, cw, ch);
// 3. 如果输出椭圆,则用 QBitmap+setMask 做裁切
if (shape == OutputShape::ELLIPSE) {
QBitmap mask(size);
QPainter p(&mask);
p.fillRect(…, Qt::white);
p.setBrush(Qt::black);
p.drawRoundRect(0,0,w,h,99,99);
resultImage.setMask(mask);
}
return resultImage;
}

- 核心思路:先把用户框映射回原图,再按需求做矩形或椭圆裁剪。
为什么要除以 scaledRate?
-
背景:裁剪区域的坐标 (
cropperRect) 和尺寸 (cropperRect.width(),cropperRect.height()) 都是相对于图像在显示中的位置和大小,而不是原始图像的大小。这意味着显示上的裁剪框可能已经被缩放过。因此,scaledRate是一个缩放比例,用来将裁剪区域从显示坐标系统(可能已经缩放)转换回原始图像的坐标系统。 -
代码解释:
cropperRect.left() - imageRect.left()表示裁剪框左边缘与原始图像左边缘的偏移量(即裁剪框相对于图像的起始位置)。scaledRate是图像在显示时的缩放比例(例如,显示的图像比原图小或大,scaledRate可以是 1、0.5、2 等)。- 除以
scaledRate就是将显示的坐标转换为原始图像的坐标。这样得到的是裁剪框在原始图像中的位置和大小。
例如:假设
scaledRate = 0.5(显示图像是原图的 50%),则cropperRect表示的区域实际在原图中要乘以 2 才能得到正确的大小和位置。
为什么椭圆要单独处理?
裁剪区域的形状是矩形的,而图像本身可能要根据需求切割成不同的形状。如果要求裁剪区域是椭圆形状,那么矩形的裁剪区域必须通过遮罩(mask)来实现。
- 遮罩的作用:
- 默认情况下,裁剪区域是矩形的。为了让裁剪后的图像呈现椭圆形状,我们需要用一个遮罩来过滤掉矩形区域之外的部分。
- 通过绘制一个椭圆(在矩形区域内),并设置遮罩(
mask),使得图像在该遮罩的范围内显示,超出范围的部分将变为透明。
- 椭圆处理的步骤:
- 通过
QBitmap mask(size)创建一个与裁剪区域大小相同的二值遮罩(黑白图像)。 - 然后使用
QPainter绘制一个椭圆形状。drawRoundRect方法画的其实是一个圆角矩形,但由于宽度和高度一样,且角的弯曲度非常高(99, 99),所以它的效果看起来是一个椭圆。 - 最后,通过
resultImage.setMask(mask)将这个椭圆形状应用到裁剪后的图像上,从而实现椭圆形的裁剪效果。
- 通过
painter.setBrush(QColor(0, 0, 0)); 在这里的唯一目的是往那个 QBitmap 遮罩(mask) 上「画」一个黑色的圆角矩形,用来告诉 Qt 哪一块区域要保留、哪一块区域要透明——它并不是在往你的 resultImage 上画黑色。
- 在
mask上:- 黑色 → 可见
- 白色 → 透明
如果你不 setBrush(QColor(0, 0, 0)) 去把圆角矩形「涂黑」,那么整张 mask 就只有白色(或只有透明),结果就是 整张图片都被裁成透明了,你看不见任何内容。
所以,setBrush(QColor(0, 0, 0)) 的作用只是:
- 在
mask上,填充一个黑色的圆角矩形; - 当你调用
resultImage.setMask(mask);时,Qt 会把这部分“黑色”区域映射为 保留原图像素,而把剩下的(白色)区域变成透明。
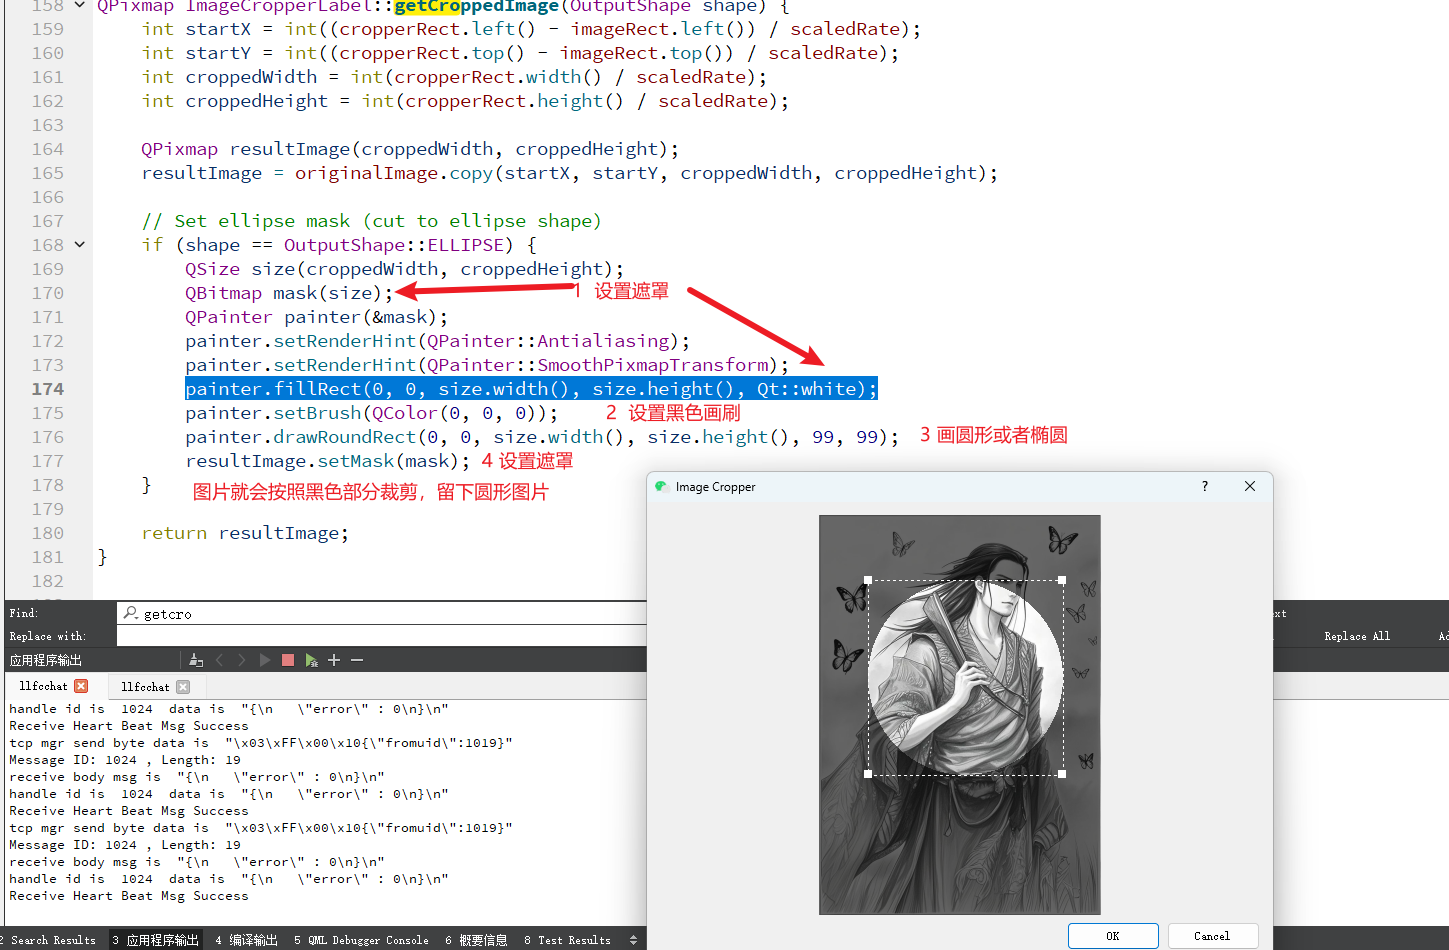
绘制与遮罩效果
cpp展开代码void ImageCropperLabel::paintEvent(QPaintEvent *event) {
// 1. 先调用父类,实现原始图像的绘制
QLabel::paintEvent(event);
// 2. 根据当前裁剪形状,绘制不同的“半透明遮罩”或“高光边”
switch (cropperShape) {
case CropperShape::UNDEFINED:
break;
case CropperShape::FIXED_RECT:
drawRectOpacity();
break;
case CropperShape::FIXED_ELLIPSE:
drawEllipseOpacity();
break;
case CropperShape::RECT:
drawRectOpacity();
drawSquareEdge(!ONLY_FOUR_CORNERS);
break;
case CropperShape::SQUARE:
drawRectOpacity();
drawSquareEdge(ONLY_FOUR_CORNERS);
break;
case CropperShape::ELLIPSE:
drawEllipseOpacity();
drawSquareEdge(!ONLY_FOUR_CORNERS);
break;
case CropperShape::CIRCLE:
drawEllipseOpacity();
drawSquareEdge(ONLY_FOUR_CORNERS);
break;
}
// 3. 如果需要,给裁剪框本身画一条边框
if (isShowRectBorder) {
QPainter painter(this);
painter.setPen(borderPen);
painter.drawRect(cropperRect);
}
}
-
绘制原图
QLabel::paintEvent(event)会根据当前设置的 pixmap 或者绘图内容,把“完整的”图像画到控件上。我们不做任何改动,保留原始像素。叠加遮罩或高光边 根据
cropperShape(枚举当前选中的裁剪形状),有两类主要操作:drawRectOpacity()/drawEllipseOpacity():在裁剪框以外的区域绘制半透明黑色遮罩,突出裁剪区域本身。drawSquareEdge(...):在裁剪框的四条边或者四个角上绘制高对比度的“小方块”或“手柄”,以便用户拖动调整大小。
绘制裁剪框边线 如果
isShowRectBorder==true,再用borderPen(一般是明亮的颜色或宽度可见的线条)精确地把cropperRect描边一次,让裁剪范围更清晰。
半透明遮罩
cpp展开代码void ImageCropperLabel::drawOpacity(const QPainterPath& path) {
QPainter painterOpac(this);
painterOpac.setOpacity(opacity); // 设定当前 painter 的透明度
painterOpac.fillPath(path, QBrush(Qt::black)); // 用黑色填充整个 path 区域
}
opacity:这是一个[0.0 … 1.0]之间的浮点值,控制遮罩的“浓度”。越接近 1.0,黑得越不透明;越接近 0.0,则越接近“无色”。fillPath(path, QBrush(Qt::black)):把传入的QPainterPath区域,用半透明的黑色一次性“盖”上去。
drawRectOpacity()
cpp展开代码void ImageCropperLabel::drawRectOpacity() {
if (!isShowOpacityEffect) return;
// 1. p1:整个图像区域
QPainterPath p1;
p1.addRect(imageRect);
// 2. p2:裁剪框区域
QPainterPath p2;
p2.addRect(cropperRect);
// 3. 求差集:p = p1 - p2
QPainterPath p = p1.subtracted(p2);
// 4. 对 p 区域绘制半透明黑色遮罩
drawOpacity(p);
}
imageRect:通常是整个图片在控件上的显示区域。cropperRect:用户定义的“裁剪框”矩形。p1.subtracted(p2):把裁剪框内部切掉,结果p就是“图片区域减去裁剪框”的外部部分。- 遮罩效果:只有外部部分被半透明黑色盖住,裁剪框内——也就是用户关心的区域——保持原样未被遮盖。
椭圆遮罩 —— drawEllipseOpacity()(原理同上)
虽然你没贴出函数体,但它与 drawRectOpacity() 唯一区别就是把 p2.addRect(cropperRect) 换成:
cpp展开代码QPainterPath p2;
p2.addEllipse(cropperRect);
这样 p1.subtracted(p2) 就是“整张图片减去椭圆区域”,半透明遮罩会围着椭圆“环绕”绘制。

“方块手柄”高光 —— drawSquareEdge(bool onlyCorners)
cpp展开代码void ImageCropperLabel::drawSquareEdge(bool onlyFourCorners) {
if (!isShowDragSquare)
return;
// Four corners
drawFillRect(cropperRect.topLeft(), dragSquareEdge, dragSquareColor);
drawFillRect(cropperRect.topRight(), dragSquareEdge, dragSquareColor);
drawFillRect(cropperRect.bottomLeft(), dragSquareEdge, dragSquareColor);
drawFillRect(cropperRect.bottomRight(), dragSquareEdge, dragSquareColor);
// Four edges
if (!onlyFourCorners) {
int centralX = cropperRect.left() + cropperRect.width() / 2;
int centralY = cropperRect.top() + cropperRect.height() / 2;
drawFillRect(QPoint(cropperRect.left(), centralY), dragSquareEdge, dragSquareColor);
drawFillRect(QPoint(centralX, cropperRect.top()), dragSquareEdge, dragSquareColor);
drawFillRect(QPoint(cropperRect.right(), centralY), dragSquareEdge, dragSquareColor);
drawFillRect(QPoint(centralX, cropperRect.bottom()), dragSquareEdge, dragSquareColor);
}
}
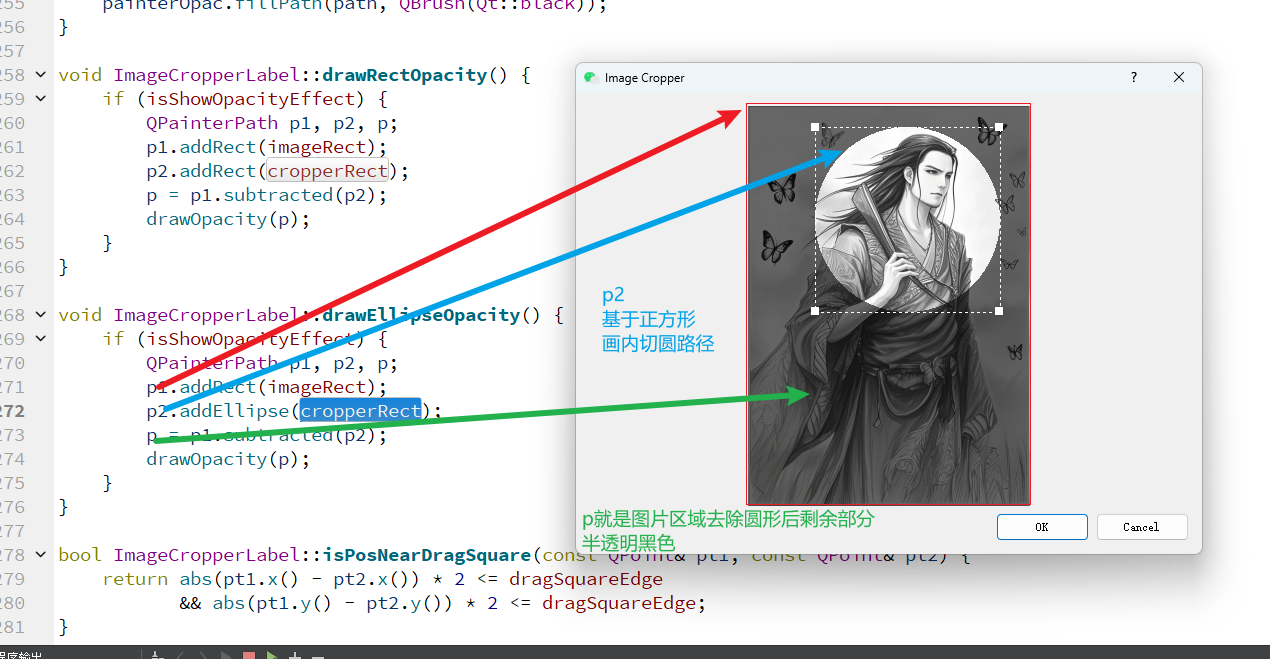
此函数通常会:
- 在
cropperRect的四条边(或四个角)各计算几个固定大小的小矩形位置。 - 用不透明画刷(如白色或蓝色)绘制这些 “拖拽手柄”,让用户知道可以从这些点出发拖动调整大小。
onlyCorners 参数决定是只在四个角显示手柄,还是在四条边中央也显示。
手柄检测
isPosNearDragSquare(pt1, pt2):手柄附近检测
cpp展开代码bool ImageCropperLabel::isPosNearDragSquare(const QPoint& pt1, const QPoint& pt2) {
return abs(pt1.x() - pt2.x()) * 2 <= dragSquareEdge
&& abs(pt1.y() - pt2.y()) * 2 <= dragSquareEdge;
}
pt1:当前鼠标点(或触点)坐标。pt2:某个拖拽手柄中心点坐标。dragSquareEdge:定义手柄大小(宽或高)的常量。
逻辑:如果鼠标点到手柄中心的水平距离和垂直距离都不超过 dragSquareEdge/2,就认为“在手柄区域内”。乘以 2 只是把“不超过半边”转成”两倍距离不超过边长“的判断。
getPosInCropperRect(pt):整体位置分类
cpp展开代码int ImageCropperLabel::getPosInCropperRect(const QPoint &pt) {
if (isPosNearDragSquare(pt, QPoint(cropperRect.right(), cropperRect.center().y())))
return RECT_RIGHT;
if (isPosNearDragSquare(pt, cropperRect.bottomRight()))
return RECT_BOTTOM_RIGHT;
if (isPosNearDragSquare(pt, QPoint(cropperRect.center().x(), cropperRect.bottom())))
return RECT_BOTTOM;
if (isPosNearDragSquare(pt, cropperRect.bottomLeft()))
return RECT_BOTTOM_LEFT;
if (isPosNearDragSquare(pt, QPoint(cropperRect.left(), cropperRect.center().y())))
return RECT_LEFT;
if (isPosNearDragSquare(pt, cropperRect.topLeft()))
return RECT_TOP_LEFT;
if (isPosNearDragSquare(pt, QPoint(cropperRect.center().x(), cropperRect.top())))
return RECT_TOP;
if (isPosNearDragSquare(pt, cropperRect.topRight()))
return RECT_TOP_RIGHT;
if (cropperRect.contains(pt, true))
return RECT_INSIDE;
return RECT_OUTSIZD;
}
按照顺序,它分别检测:
- 右边中点
RECT_RIGHT以(cropperRect.right(), cropperRect.center().y())为中心,看鼠标是否落在右侧手柄区域。 - 右下角
RECT_BOTTOM_RIGHT以cropperRect.bottomRight()为中心,看鼠标是否落在这个角的手柄。 - 下边中点
RECT_BOTTOM中点为(center.x(), bottom)。 - 左下角
RECT_BOTTOM_LEFT - 左边中点
RECT_LEFT - 左上角
RECT_TOP_LEFT - 上边中点
RECT_TOP - 右上角
RECT_TOP_RIGHT
如果以上八个拖拽手柄区域都没有命中,接着:
RECT_INSIDE:如果点严格落在cropperRect内部(第二个参数true表示内边缘也算),就返回“内部”标志。RECT_OUTSIZD:都不符合,则认为在裁剪框外。
综合效果
- 在 鼠标按下 或 移动 时,调用
getPosInCropperRect(pt),能够快速定位出当前点相对于裁剪框的位置类型。 - 上层逻辑(如鼠标事件处理)根据这个返回值,决定要进行哪种操作:
- 如果是某个角或边的手柄,就进入“调整大小”模式,且拖拽方向锁定;
- 如果是
RECT_INSIDE,则进入“移动整个裁剪框”模式; - 如果是
RECT_OUTSIZD,则不做任何裁剪框相关的拖拽操作。
这样,就实现了一个用户友好的「拖拽四角/边来调整裁剪框大小,或者拖拽内部来移动框」的交互体验。
鼠标按下移动释放
mousePressEvent
cpp展开代码void ImageCropperLabel::mousePressEvent(QMouseEvent *e) {
currPos = lastPos = e->pos();
isLButtonPressed = true;
}
功能:当鼠标左键按下时调用。
做了什么:
- 用
e->pos()(相对于控件左上角的坐标)初始化currPos、lastPos,为后续移动计算做准备。 - 将
isLButtonPressed置为true,开启拖动或缩放模式。
mouseMoveEvent
这是核心函数,处理移动和缩放。
cpp展开代码void ImageCropperLabel::mouseMoveEvent(QMouseEvent *e) {
currPos = e->pos();
// 首次进入时,确定鼠标在哪个区域:边角、边缘、框内或框外
if (!isCursorPosCalculated) {
cursorPosInCropperRect = getPosInCropperRect(currPos);
changeCursor(); // 根据区域切换不同形状的鼠标指针
}
// 如果左键没有按下或鼠标移出了图片范围,就不做任何处理
if (!isLButtonPressed || !imageRect.contains(currPos))
return;
isCursorPosCalculated = true; // 保证只计算一次区域
// 计算本次移动增量
int xOffset = currPos.x() - lastPos.x();
int yOffset = currPos.y() - lastPos.y();
lastPos = currPos;
int disX = 0, disY = 0; // 用于后续缩放计算
// 根据鼠标所在区域,选择对应的移动/缩放逻辑
switch (cursorPosInCropperRect) {
case RECT_OUTSIZD:
break; // 在框外:不处理
// —— 右下角 缩放 ——
case RECT_BOTTOM_RIGHT: {
disX = currPos.x() - cropperRect.left();
disY = currPos.y() - cropperRect.top();
switch (cropperShape) {
// 固定模式:不允许缩放
case CropperShape::UNDEFINED:
case CropperShape::FIXED_RECT:
case CropperShape::FIXED_ELLIPSE:
break;
// 正方形/圆形:强制保持宽高一致
case CropperShape::SQUARE:
case CropperShape::CIRCLE:
setCursor(Qt::SizeFDiagCursor);
// 保证没有小于最小尺寸且不超出图片下/right 边
if (disX >= cropperMinimumWidth && disY >= cropperMinimumHeight) {
if (disX > disY && cropperRect.top() + disX <= imageRect.bottom()) {
// 宽度主导,伸长底边
cropperRect.setRight(currPos.x());
cropperRect.setBottom(cropperRect.top() + disX);
}
else if (disY >= disX && cropperRect.left() + disY <= imageRect.right()) {
// 高度主导,伸长右边
cropperRect.setBottom(currPos.y());
cropperRect.setRight(cropperRect.left() + disY);
}
emit croppedImageChanged();
}
break;
// 普通矩形/椭圆:独立伸缩宽或高
case CropperShape::RECT:
case CropperShape::ELLIPSE:
setCursor(Qt::SizeFDiagCursor);
if (disX >= cropperMinimumWidth) {
cropperRect.setRight(currPos.x());
emit croppedImageChanged();
}
if (disY >= cropperMinimumHeight) {
cropperRect.setBottom(currPos.y());
emit croppedImageChanged();
}
break;
}
break;
}
// —— 右侧边 缩放 ——
case RECT_RIGHT: {
disX = currPos.x() - cropperRect.left();
if (cropperShape==CropperShape::RECT||cropperShape==CropperShape::ELLIPSE) {
if (disX >= cropperMinimumWidth) {
cropperRect.setRight(currPos.x());
emit croppedImageChanged();
}
}
break;
}
// —— 底部边 缩放 ——
case RECT_BOTTOM: {
disY = currPos.y() - cropperRect.top();
if (cropperShape==CropperShape::RECT||cropperShape==CropperShape::ELLIPSE) {
if (disY >= cropperMinimumHeight) {
cropperRect.setBottom(cropperRect.bottom() + yOffset);
emit croppedImageChanged();
}
}
break;
}
// —— 左下角、左侧、上边…… 各角/边 缩放逻辑同上 ——
// (代码中分别处理了 RECT_BOTTOM_LEFT、RECT_LEFT、RECT_TOP_LEFT、
// RECT_TOP、RECT_TOP_RIGHT,核心思想与右下相似:计算 disX/disY,
// 判断形状、最小尺寸、边界,再更新对应边或角的坐标并 emit。)
// —— 框内拖动 ——
case RECT_INSIDE: {
// 先检测移动后是否会超出图片范围,将偏移量 xOffset/yOffset 裁剪到合法区间
if (cropperRect.left() + xOffset < imageRect.left()) xOffset = imageRect.left() - cropperRect.left();
if (cropperRect.right()+ xOffset > imageRect.right()) xOffset = imageRect.right() - cropperRect.right();
if (cropperRect.top() + yOffset < imageRect.top()) yOffset = imageRect.top() - cropperRect.top();
if (cropperRect.bottom()+ yOffset > imageRect.bottom()) yOffset = imageRect.bottom() - cropperRect.bottom();
// 移动整个裁剪框
cropperRect.translate(xOffset, yOffset);
emit croppedImageChanged();
break;
}
}
repaint(); // 触发重绘,及时在界面上更新新的裁剪框
}
关键点总结
-
首次定位 当鼠标首次进入
mouseMoveEvent,用getPosInCropperRect(currPos)判断鼠标在裁剪框的哪个“热区”——外部、框内、四边、四角中的哪一个,并调用changeCursor()切换对应的鼠标指针样式(如移动箭头、水平/垂直/对角调整形状等),以提示用户下一步操作。 -
左右、上下、四角缩放
- 对于矩形/椭圆,宽高可独立调整;
- 对于正方形/圆,则保证
width == height,并根据位移量较大的一边来驱动另一边; - 对于“固定”模式,则完全不允许用户改变大小。
-
边界与最小尺寸约束
- 缩放时先判断新的宽度/高度是否 ≥
cropperMinimumWidth/Height; - 再判断新坐标是否会跑出
imageRect(图片区域)之外; - 最后才更新
cropperRect并发信号croppedImageChanged()以便上层 UI 或逻辑更新裁剪后的图像。
- 缩放时先判断新的宽度/高度是否 ≥
-
拖动整个裁剪框
-
鼠标在框内部拖动(
RECT_INSIDE),计算每次的偏移xOffset,yOffset, -
并先“裁剪”偏移量,使整个框保持在图片范围内,
-
最后调用
translate()平移cropperRect。
-
mouseReleaseEvent(QMouseEvent *)
cpp展开代码void ImageCropperLabel::mouseReleaseEvent(QMouseEvent *) {
isLButtonPressed = false;
isCursorPosCalculated = false;
setCursor(Qt::ArrowCursor);
}
- 功能:当鼠标左键松开时调用。
- 做了什么:
- 将
isLButtonPressed置为false,停止后续的拖动/缩放处理。 - 重置
isCursorPosCalculated = false,下次再移动时会重新计算在哪个区域。 - 恢复默认箭头指针。
- 将
保存逻辑
cpp展开代码//上传头像
void UserInfoPage::on_up_btn_clicked()
{
// 1. 让对话框也能选 *.webp
QString filename = QFileDialog::getOpenFileName(
this,
tr("选择图片"),
QString(),
tr("图片文件 (*.png *.jpg *.jpeg *.bmp *.webp)")
);
if (filename.isEmpty())
return;
// 2. 直接用 QPixmap::load() 加载,无需手动区分格式
QPixmap inputImage;
if (!inputImage.load(filename)) {
QMessageBox::critical(
this,
tr("错误"),
tr("加载图片失败!请确认已部署 WebP 插件。"),
QMessageBox::Ok
);
return;
}
QPixmap image = ImageCropperDialog::getCroppedImage(filename, 600, 400, CropperShape::CIRCLE);
if (image.isNull())
return;
QPixmap scaledPixmap = image.scaled( ui->head_lb->size(), Qt::KeepAspectRatio, Qt::SmoothTransformation); // 将图片缩放到label的大小
ui->head_lb->setPixmap(scaledPixmap); // 将缩放后的图片设置到QLabel上
ui->head_lb->setScaledContents(true); // 设置QLabel自动缩放图片内容以适应大小
QString storageDir = QStandardPaths::writableLocation(
QStandardPaths::AppDataLocation);
// 2. 在其下再建一个 avatars 子目录
QDir dir(storageDir);
if (!dir.exists("avatars")) {
if (!dir.mkpath("avatars")) {
qWarning() << "无法创建 avatars 目录:" << dir.filePath("avatars");
QMessageBox::warning(
this,
tr("错误"),
tr("无法创建存储目录,请检查权限或磁盘空间。")
);
return;
}
}
// 3. 拼接最终的文件名 head.png
QString filePath = dir.filePath("avatars/head.png");
// 4. 保存 scaledPixmap 为 PNG(无损、最高质量)
if (!scaledPixmap.save(filePath, "PNG")) {
QMessageBox::warning(
this,
tr("保存失败"),
tr("头像保存失败,请检查权限或磁盘空间。")
);
} else {
qDebug() << "头像已保存到:" << filePath;
// 以后读取直接用同一路径:storageDir/avatars/head.png
}
}
- 选择图片文件(支持多种格式)
cpp展开代码QString filename = QFileDialog::getOpenFileName(
this,
tr("选择图片"),
QString(),
tr("图片文件 (*.png *.jpg *.jpeg *.bmp *.webp)")
);
if (filename.isEmpty())
return;
- 功能:当用户点击上传头像按钮时,弹出文件选择对话框(
QFileDialog),允许用户选择图片文件。此对话框支持的文件格式包括.png、.jpg、.jpeg、.bmp和.webp。如果用户没有选择文件(即点击了取消),则返回并不执行后续操作。
- 加载图片文件
cpp展开代码QPixmap inputImage;
if (!inputImage.load(filename)) {
QMessageBox::critical(
this,
tr("错误"),
tr("加载图片失败!请确认已部署 WebP 插件。"),
QMessageBox::Ok
);
return;
}
- 功能:通过
QPixmap类加载用户选定的图片文件。如果加载失败(如文件损坏、格式不支持等),则弹出错误对话框提示用户,并退出当前函数。
- 裁剪图片
cpp展开代码QPixmap image = ImageCropperDialog::getCroppedImage(filename, 600, 400, CropperShape::CIRCLE);
if (image.isNull())
return;
- 功能:调用
ImageCropperDialog::getCroppedImage函数裁剪图片。这个函数会根据传入的文件路径(filename)、目标大小(600x400)和裁剪形状(此处是圆形CropperShape::CIRCLE)返回一个裁剪后的图片QPixmap。如果裁剪过程失败(即返回空QPixmap),则函数直接退出。
- 缩放图片到指定的
QLabel大小
cpp展开代码QPixmap scaledPixmap = image.scaled( ui->head_lb->size(), Qt::KeepAspectRatio, Qt::SmoothTransformation);
ui->head_lb->setPixmap(scaledPixmap);
ui->head_lb->setScaledContents(true);
- 功能:将裁剪后的图片缩放到与界面上显示头像的
QLabel(head_lb)大小相匹配。使用scaled()方法,保持图片的宽高比 (Qt::KeepAspectRatio),并且应用平滑的图像转换(Qt::SmoothTransformation),保证缩放后的图片质量尽可能高。最后,将缩放后的图片设置到QLabel上,并开启setScaledContents(true),使得QLabel自动调整内容大小以适应其尺寸。
- 获取应用程序的存储目录
cpp展开代码QString storageDir = QStandardPaths::writableLocation(QStandardPaths::AppDataLocation);
- 功能:通过
QStandardPaths::writableLocation(QStandardPaths::AppDataLocation)获取应用程序的可写数据存储目录。这个目录是操作系统为应用程序提供的一个常规存储路径,通常用于存储配置文件、数据文件等。
- 创建头像存储目录
cpp展开代码QDir dir(storageDir);
if (!dir.exists("avatars")) {
if (!dir.mkpath("avatars")) {
qWarning() << "无法创建 avatars 目录:" << dir.filePath("avatars");
QMessageBox::warning(
this,
tr("错误"),
tr("无法创建存储目录,请检查权限或磁盘空间。")
);
return;
}
}
- 功能:检查存储目录下是否已经存在一个名为
avatars的子目录。如果不存在,则通过mkpath()创建该子目录。若创建失败,弹出警告对话框提示用户检查权限或磁盘空间。
- 拼接最终的保存路径
cpp展开代码QString filePath = dir.filePath("avatars/head.png");
- 功能:拼接最终的文件路径,存储头像的文件名为
head.png,并位于avatars目录下。filePath即为头像图片的完整存储路径。
- 保存裁剪后的图片
cpp展开代码if (!scaledPixmap.save(filePath, "PNG")) {
QMessageBox::warning(
this,
tr("保存失败"),
tr("头像保存失败,请检查权限或磁盘空间。")
);
} else {
qDebug() << "头像已保存到:" << filePath;
}
- 功能:使用
QPixmap::save()方法将裁剪并缩放后的图片保存到指定路径filePath。保存格式为PNG。如果保存失败,则弹出警告对话框提示用户;否则,输出日志,显示头像已成功保存的路径。
源码连接
本文作者:冬月
本文链接:
版权声明:本博客所有文章除特别声明外,均采用 BY-NC-SA 许可协议。转载请注明出处!